
Battery problem on 2009 hatch sti
 26 January 2017, 09:03 AM
#31
Scooby Regular

Join Date: Apr 2015
Location: UK
Posts: 163
Likes: 0
Received 0 Likes
on
0 Posts
Well i did the test with the multimetre and get between 0.09 and 0.11 so its not using any abnotmal power i charged the battery i cant use a maintainance charger as i have to run a lead from the house out to the front of the house il see how long its lasts now maybe time for a new battery
I went for the 2.4w solar charger
 26 January 2017, 02:18 PM
#32
Scooby Senior
How does that work if my car is in the garage??

26 January 2017, 02:20 PM
#33
Scooby Senior
 26 January 2017, 05:31 PM
#36
Scooby Regular
Join Date: Apr 2015
Location: UK
Posts: 163
Likes: 0
Received 0 Likes
on
0 Posts
It is nice and convenient, just plug it in and pop the panel on the dash
http://www.halfords.com/workshop-too...ainer-12v-2-4w
http://www.halfords.com/workshop-too...ry-maintainers
http://www.halfords.com/workshop-too...ainer-12v-2-4w
http://www.halfords.com/workshop-too...ry-maintainers
27 January 2017, 10:02 PM
#40
 20140717_152519 by Rob Ostle, on Flickr
 Robs STI En-Route by Rob Ostle, on Flickr
27 January 2017, 10:47 PM
Robs STI En-Route by Rob Ostle, on Flickr
27 January 2017, 10:47 PM
#41
Scooby Regular
Yep but not wired into the sidelights, Wired through an Audi style DRL Controller
20140717_152519 by Rob Ostle, on Flickr
Robs STI En-Route by Rob Ostle, on Flickr
20140717_152519 by Rob Ostle, on FlickrRobs STI En-Route by Rob Ostle, on FlickrDone back in 2012...........


used as DRL's
10 February 2017, 09:35 PM
#42
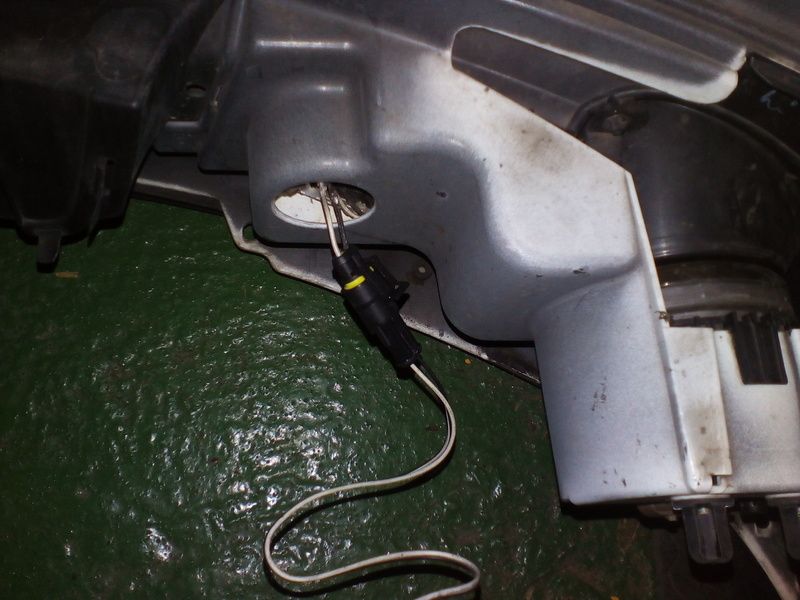
male connection goes in the female plug and vice versa,
I found snipe nose / radio nose pliers fine,
don`t leave loads of conductor exposed, just enough to reach the small crimp part, fold those two tabs over with the pliers, this is when I solder the wire to the connection, I do not tin the wires,
try to limit the amount of solder going into the area above the small crimp/tabs, the plug locks into this area, so if you have too much conductor or solder there you will struggle to lock it all together,
then use the pliers to fold the larger crimps over, if possible inc the yellow dust/water seal, this depends on size of cable you are using.
This shows how they are put together.
11 February 2017, 08:22 AM
#43
Scooby Senior
wish I'd of seen that YOUTUBE video lol
The female connector was the problem, pushing the pins in far enought. I used a fine small scrediver to push them up in place,
I couldn't get the solder to stick, so didn't bother.. think it was too cold in the garage and my solder gun isn't that good at getting hot quick.
The yellow bungs I slid in place last. Then once all in place I just smeared some clear silicone over the ends.
They work fine
11 February 2017, 09:59 AM
#44
wish I'd of seen that YOUTUBE video lol
The female connector was the problem, pushing the pins in far enought. I used a fine small scrediver to push them up in place,
I couldn't get the solder to stick, so didn't bother.. think it was too cold in the garage and my solder gun isn't that good at getting hot quick.
The yellow bungs I slid in place last. Then once all in place I just smeared some clear silicone over the ends.
They work fine