DIY Mudflaps (Classic UK Turbo) a work in progress

 01 April 2005, 01:54 PM
#32
Scooby Regular
Thread Starter

Join Date: Jun 2004
Location: 310Nm oil burner....
Posts: 2,619
Likes: 0
Received 0 Likes
on
0 Posts
Originally Posted by SirFozzalot
Those flaps will look great....especially accompanied by your new CAMERA CAR stickers! 

It would be the first camera car without the owner actually owning a Digial Video Camera!
Off to the workshop now!
See you at Santapod!!!
01 April 2005, 01:56 PM
#33
Originally Posted by VTEC to Turbo
It would be the first camera car without the owner actually owning a Digital Video Camera!
How about "Official ESC Video Editor"
01 April 2005, 02:57 PM
#34
Scooby Regular

Join Date: Jan 2002
Posts: 7,161
Likes: 0
Received 0 Likes
on
0 Posts
Originally Posted by VTEC to Turbo
I vital component missing!
It would be the first camera car without the owner actually owning a Digial Video Camera!
Off to the workshop now!
See you at Santapod!!!
It would be the first camera car without the owner actually owning a Digial Video Camera!
Off to the workshop now!
See you at Santapod!!!
Im at the Pod sunday and will be parking on the SIDC stand. you know my car and I'll be the short little chinese guy. come and say hello.
 Nearly tho
02 April 2005, 09:01 PM
Nearly tho
02 April 2005, 09:01 PM
#37
Scooby Regular
Thread Starter
Join Date: Jun 2004
Location: 310Nm oil burner....
Posts: 2,619
Likes: 0
Received 0 Likes
on
0 Posts
Originally Posted by Ray_li
you could CAD drawing and get loads of them laser cut and sell them here. I was thinking of doing that but give up cuz I wanted them on my car ASAP.
Im at the Pod sunday and will be parking on the SIDC stand. you know my car and I'll be the short little chinese guy. come and say hello.
Im at the Pod sunday and will be parking on the SIDC stand. you know my car and I'll be the short little chinese guy. come and say hello.
Will post an update with pitures when I'm at work with broadband.
04 April 2005, 09:59 AM
#38
Scooby Regular
Thread Starter
Join Date: Jun 2004
Location: 310Nm oil burner....
Posts: 2,619
Likes: 0
Received 0 Likes
on
0 Posts
Originally Posted by VTEC to Turbo
Will do mate, I'm the one with the new black mudflaps AND VTEC to Turbo on my ESC Show numberplate.
Will post an update with pitures when I'm at work with broadband.
Will post an update with pitures when I'm at work with broadband.
04 April 2005, 10:20 AM
#40
Scooby Regular
Thread Starter
Join Date: Jun 2004
Location: 310Nm oil burner....
Posts: 2,619
Likes: 0
Received 0 Likes
on
0 Posts
Originally Posted by Spec'c'57
so wots wrong with today????  tired like me???? might have a sleep as im in the office alone for an hour.....
tired like me???? might have a sleep as im in the office alone for an hour..... I feel an unproductive day coming up!

 they LOOK FANTASIC to me mate!!!
04 April 2005, 11:48 AM
they LOOK FANTASIC to me mate!!!
04 April 2005, 11:48 AM
#43
Scooby Regular
Thread Starter
Join Date: Jun 2004
Location: 310Nm oil burner....
Posts: 2,619
Likes: 0
Received 0 Likes
on
0 Posts
Originally Posted by SirFozzalot
Nice number plate!
Foz you good mate? you missed a cracker yesterday mate, really good fun.
04 April 2005, 11:52 AM
#44
Originally Posted by VTEC to Turbo
Foz you good mate? you missed a cracker yesterday mate, really good fun.
I know, missed The Poser's Cruise on Saturday too.

Had friends staying over this weekend so couldn't escape!
") 05 April 2005, 10:04 AM
05 April 2005, 10:04 AM
#45
Scooby Regular
Thread Starter
Join Date: Jun 2004
Location: 310Nm oil burner....
Posts: 2,619
Likes: 0
Received 0 Likes
on
0 Posts
Right here are the last pics I'll post up.
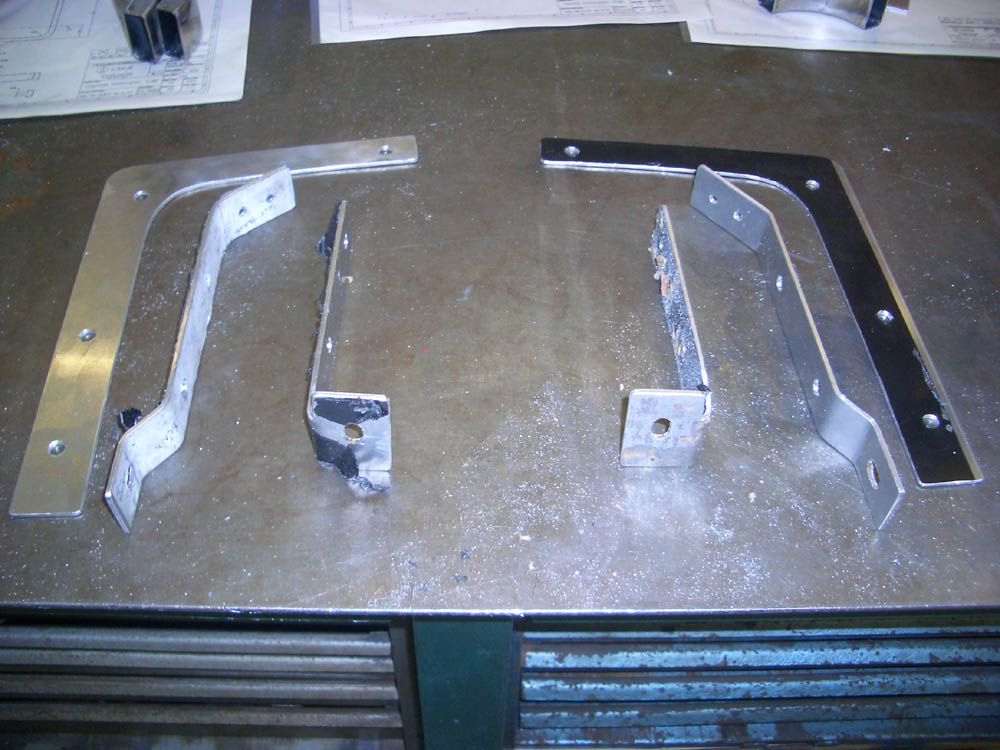
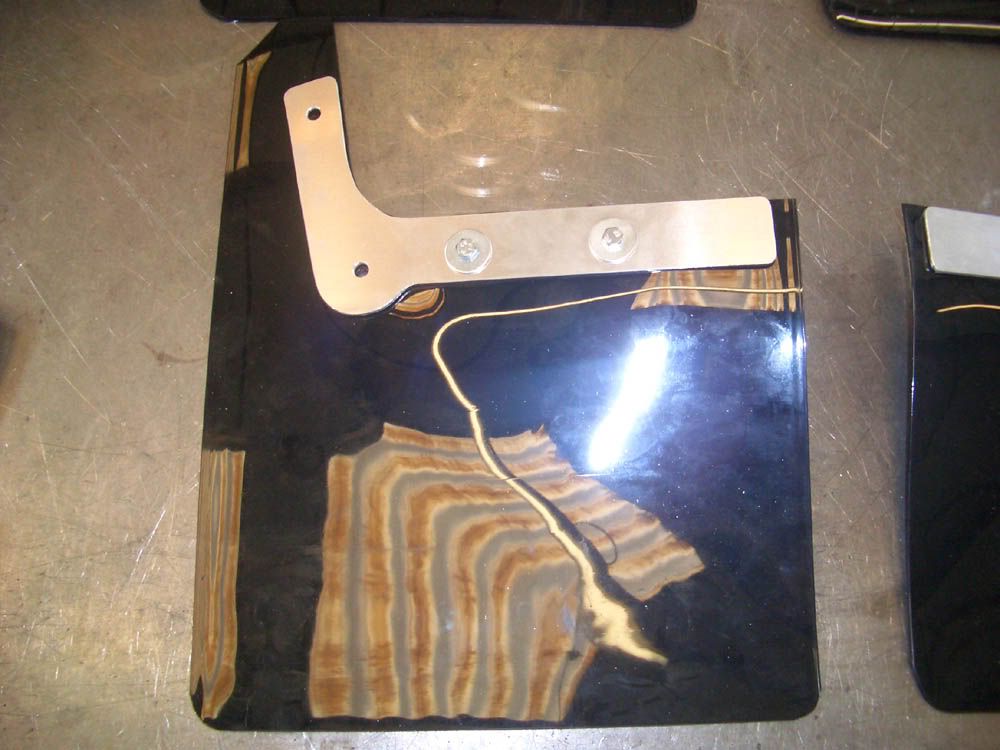
The brackets after day one
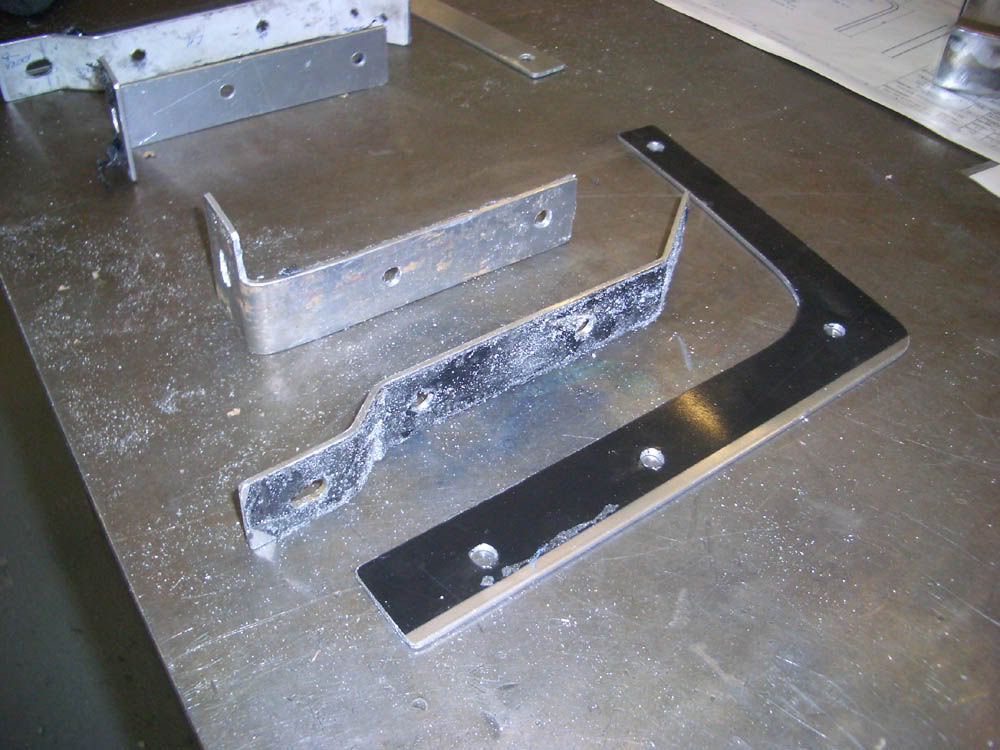
Finished making the bracket Saturday morning and assembled them
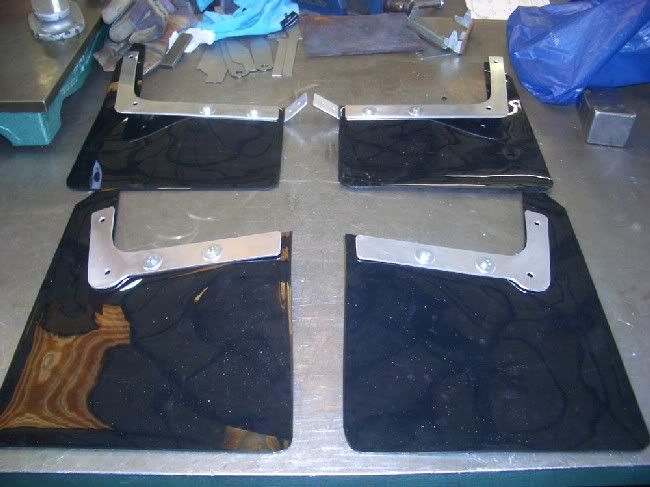
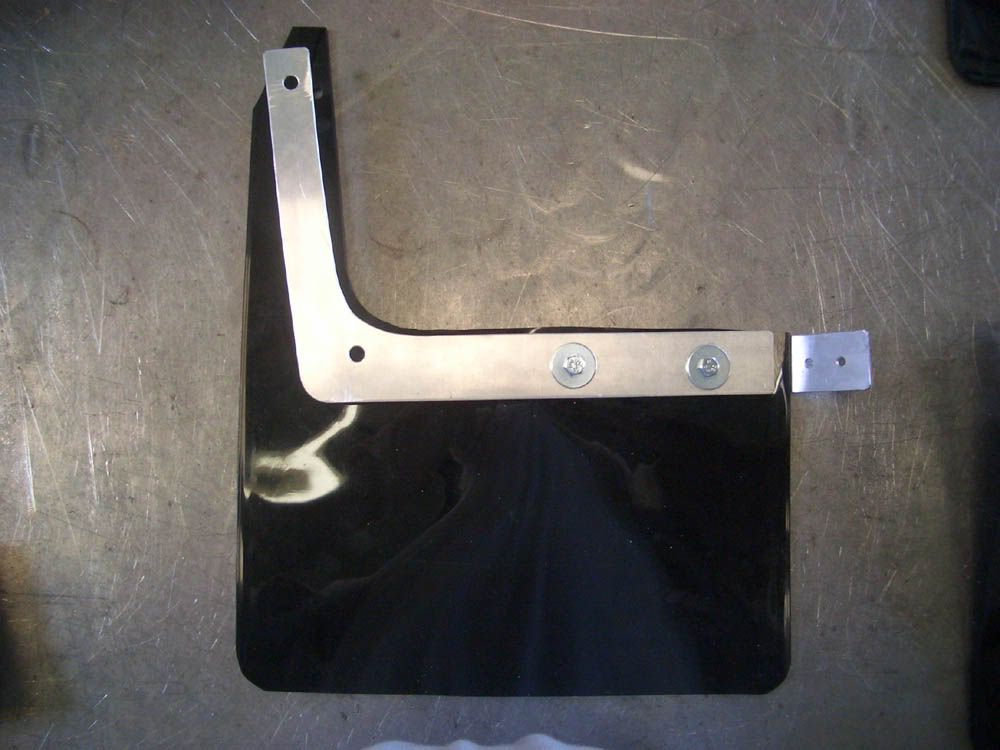
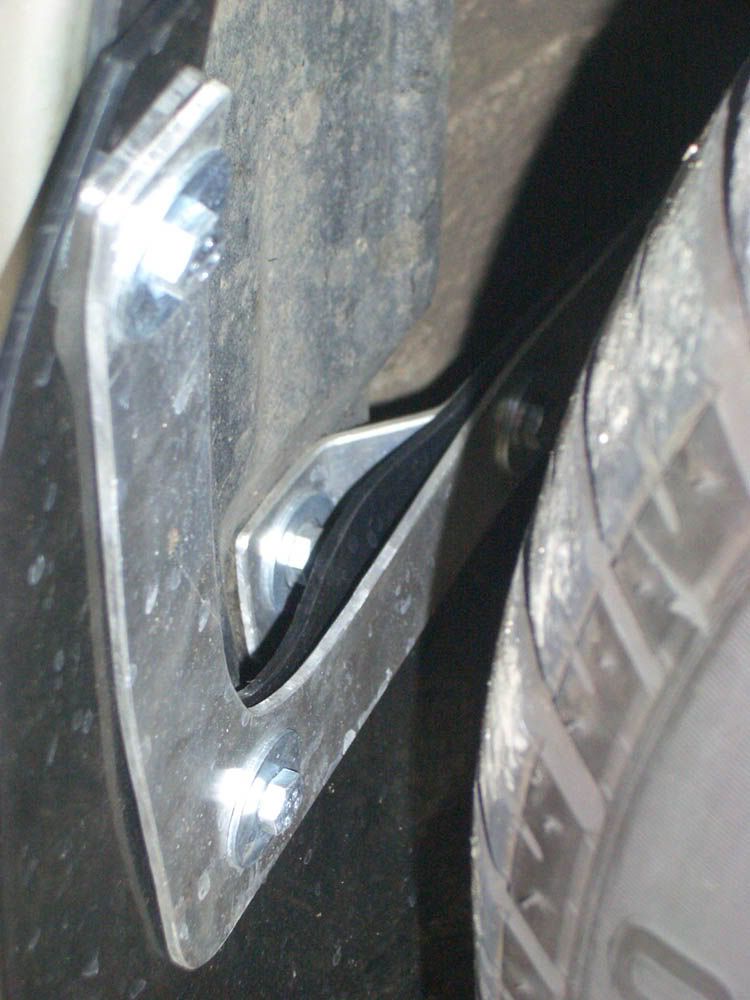
Pics of the Front Right (drivers side) assembled mudflap
Mounted on car
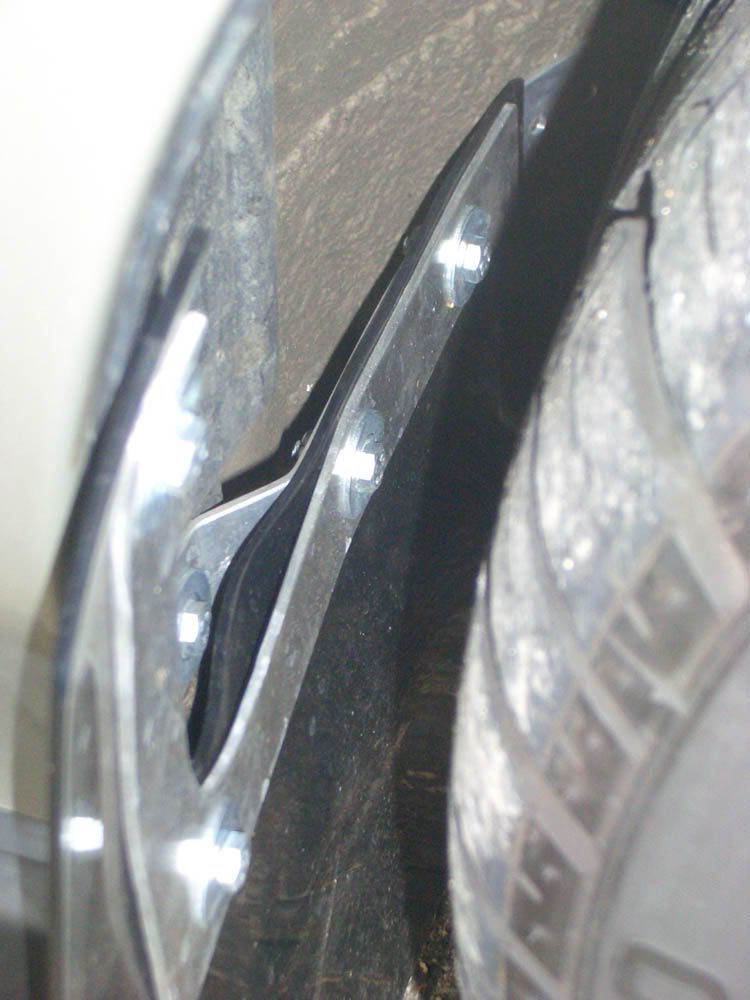
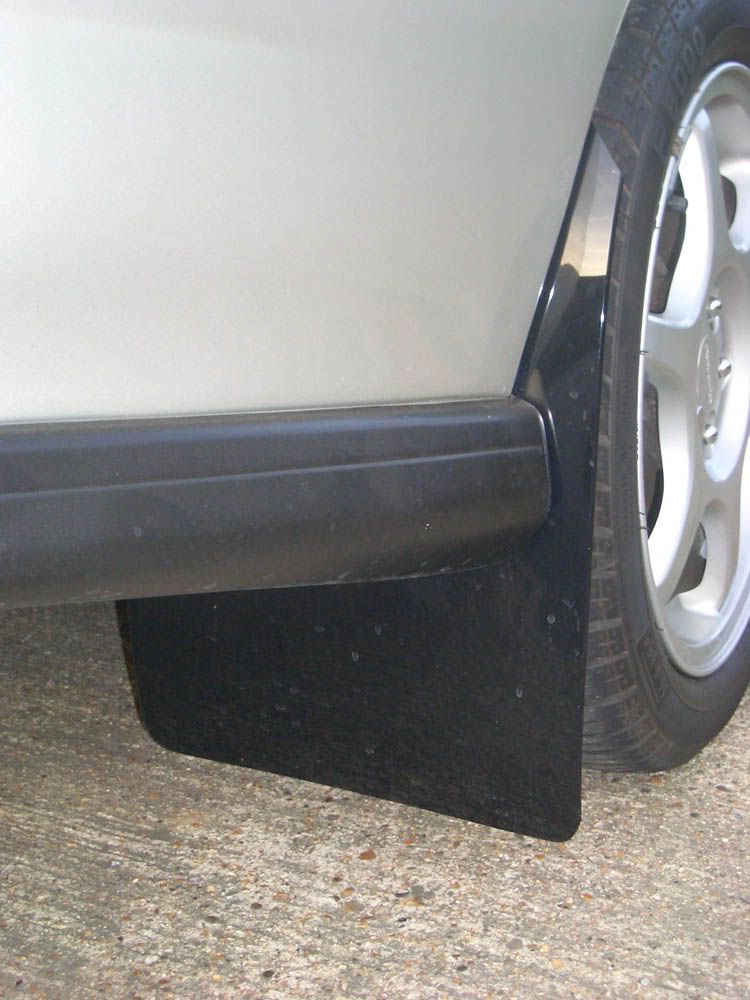
Pics of the Rear Right (drivers side) assembled mudflap
Mounted on car

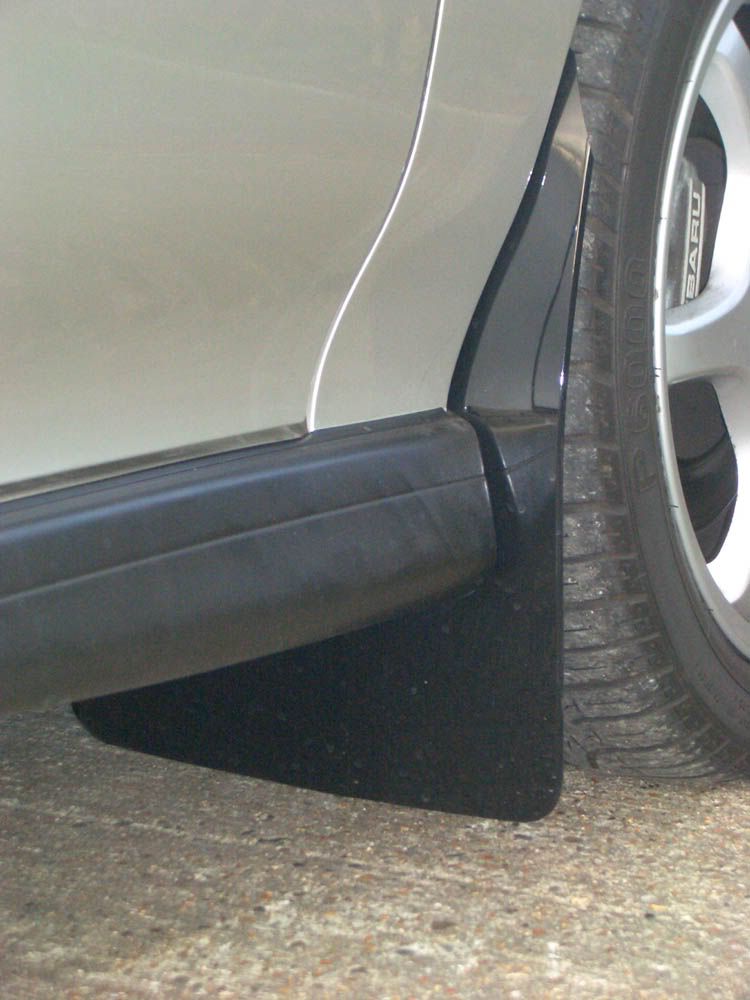
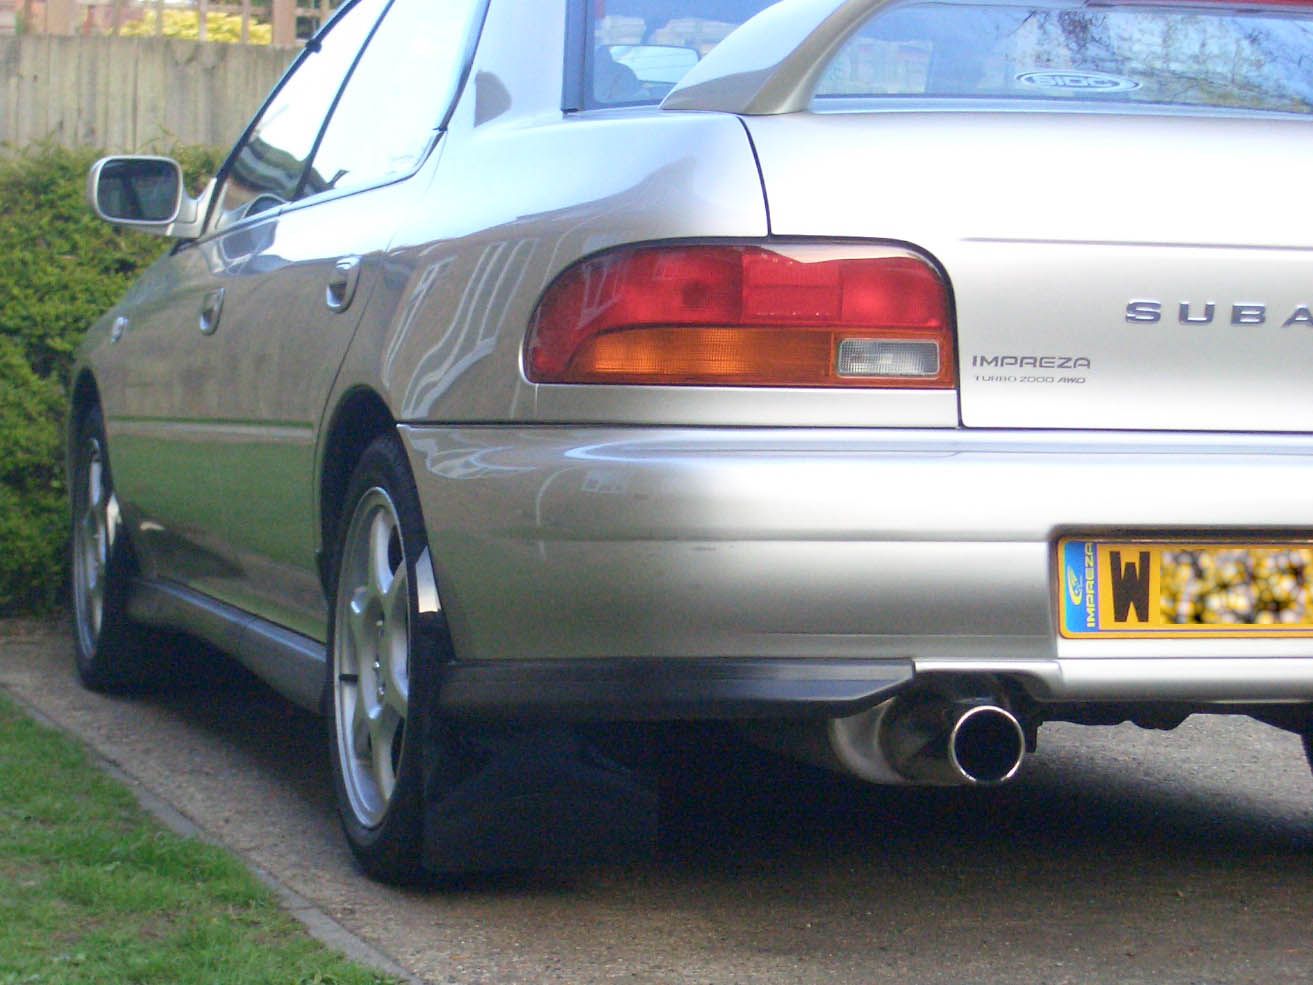
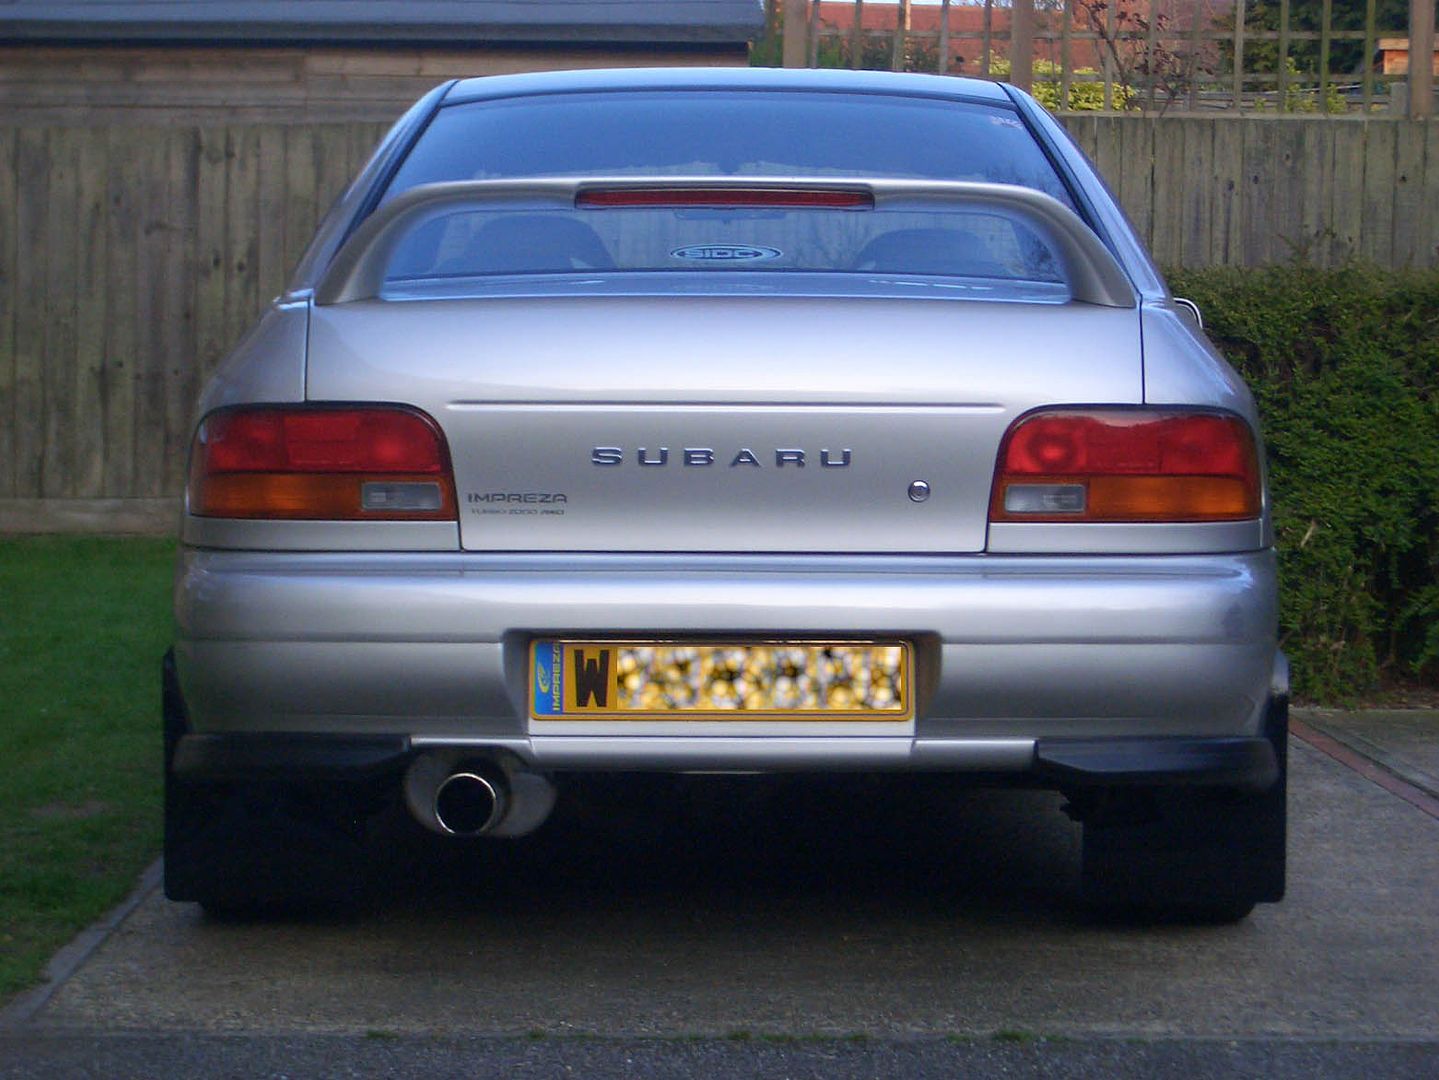
The overall effect......
The brackets after day one
Finished making the bracket Saturday morning and assembled them
Pics of the Front Right (drivers side) assembled mudflap
Mounted on car
Pics of the Rear Right (drivers side) assembled mudflap
Mounted on car
The overall effect......

 05 April 2005, 10:17 AM
#48
Scooby Regular
Thread Starter
Join Date: Jun 2004
Location: 310Nm oil burner....
Posts: 2,619
Likes: 0
Received 0 Likes
on
0 Posts
Right here are the last pics I'll post up.
The brackets after day one.....
I used a piece of paper on the car to mark out the hole centers, I then sketched out on a piece of paper the shape I wanted for the brackets and spray mounted onto the sheet of 2mm Aluminium. (I used double sided tape and doubled up the Aluminium so that I could get 2 brackets exactly the same).
I used a band saw to roughly cut the brackets to the template then I hand filled them to get a smooth flat finish.
The bends I did by hand in a vice.
I finished making the bracket Saturday morning and assembled them (2 brackets for each Mudflap (1 infront and 1 behind the material)
Pics of the Front Right (drivers side) assembled mudflap
Mounted on car
Pics of the Rear Right (drivers side) assembled mudflap
Mounted on car
The overall effect......
To be honest, if I didn't have use of my mates workshop I would have been stuffed!!!!!
Overall I am really happy with the look and for a total cost to me of about �35 I am chuffed to bits.

Thread
Thread Starter
Forum
Replies
Last Post
Scott@ScoobySpares
Full Cars Breaking For Spares
61
11 January 2021 03:08 PM
Scott@ScoobySpares
Full Cars Breaking For Spares
7
14 December 2015 08:16 AM