
Prodrive Grp.N. chassis street build
 28 December 2007, 10:42 PM
#31
Scooby Regular
Thread Starter

Join Date: Dec 2002
Posts: 458
Likes: 0
Received 0 Likes
on
0 Posts
Got me some new saws today, much better. 
I have to cut a few holes in the firewall, one for the airco, one for the heater itself and 2 more for engine looms.
The new-age models have different connection terminals for the airco and heater so I have to adjust everything.
I knew this was going to come because I had the same problems with the build-up of my other project, that's why I started with the dash on this project, good to have it out of my way.
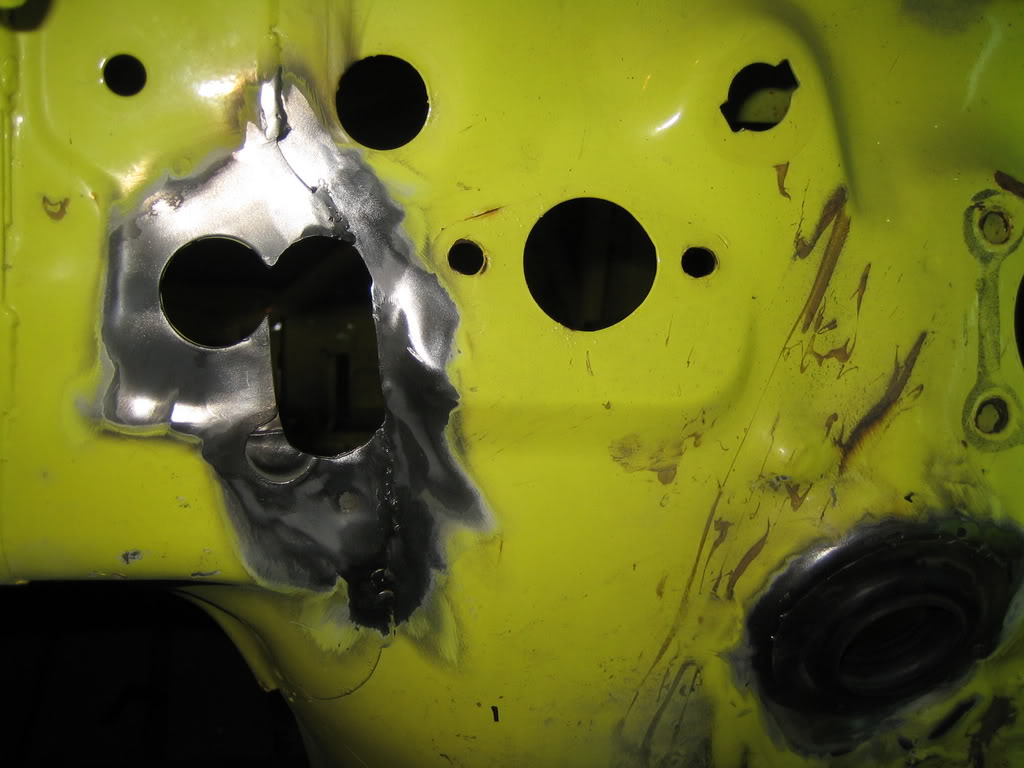
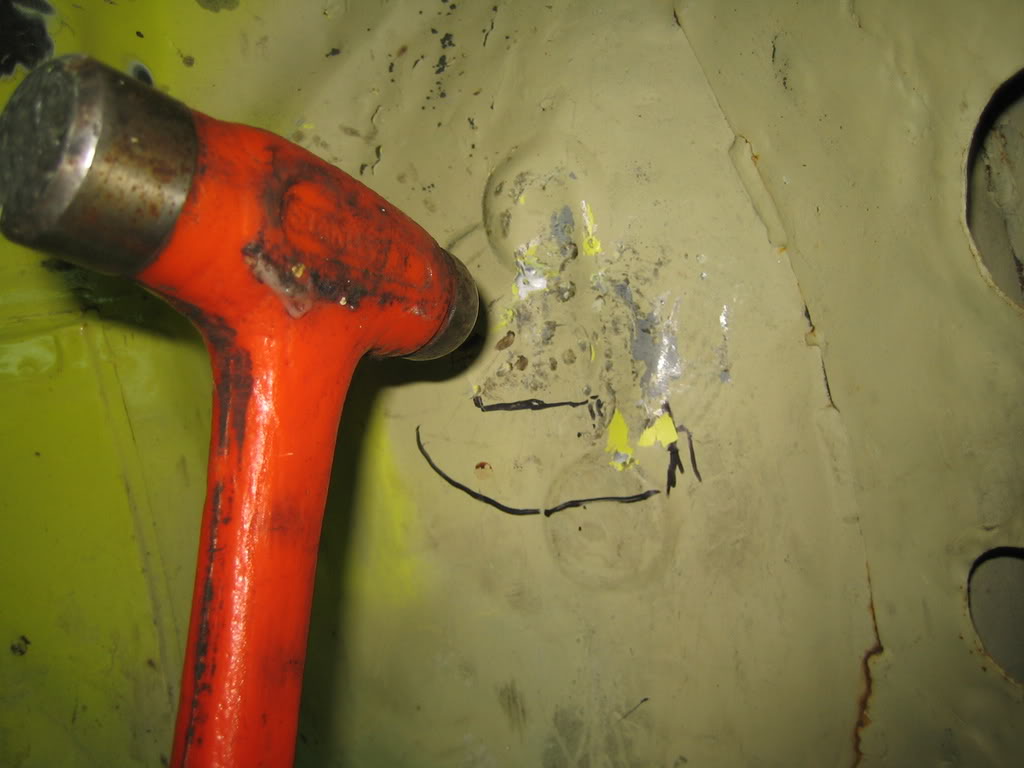
It might look simple to cut a few holes in the firewall and it is, but there are other problems.
There have been made all kinds of foldings (not sure if this is the correct word for it) pressed into the metal of the firewall, this is for strength and against resonation.
The airco terminal has to be tight to the firewall to prevent leakages so I have to make it flat.
But when they press the folds into the metal it stretches it a litlle also, so when you try hammer it flat there is some material left, which has to go somewhere.
So when you hit the firewall in one place it bounces back somewhere else.
To cure this I have made cuts into all the stressed places, this relaxes the metal.
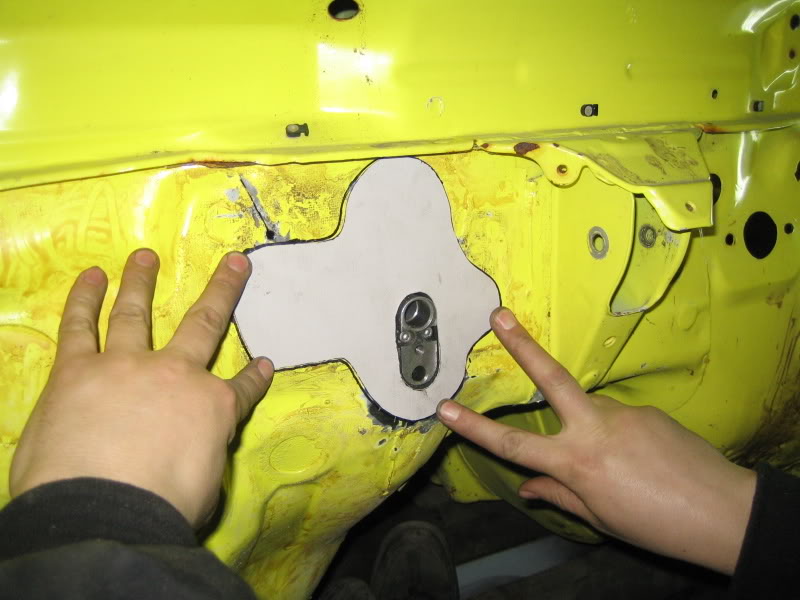
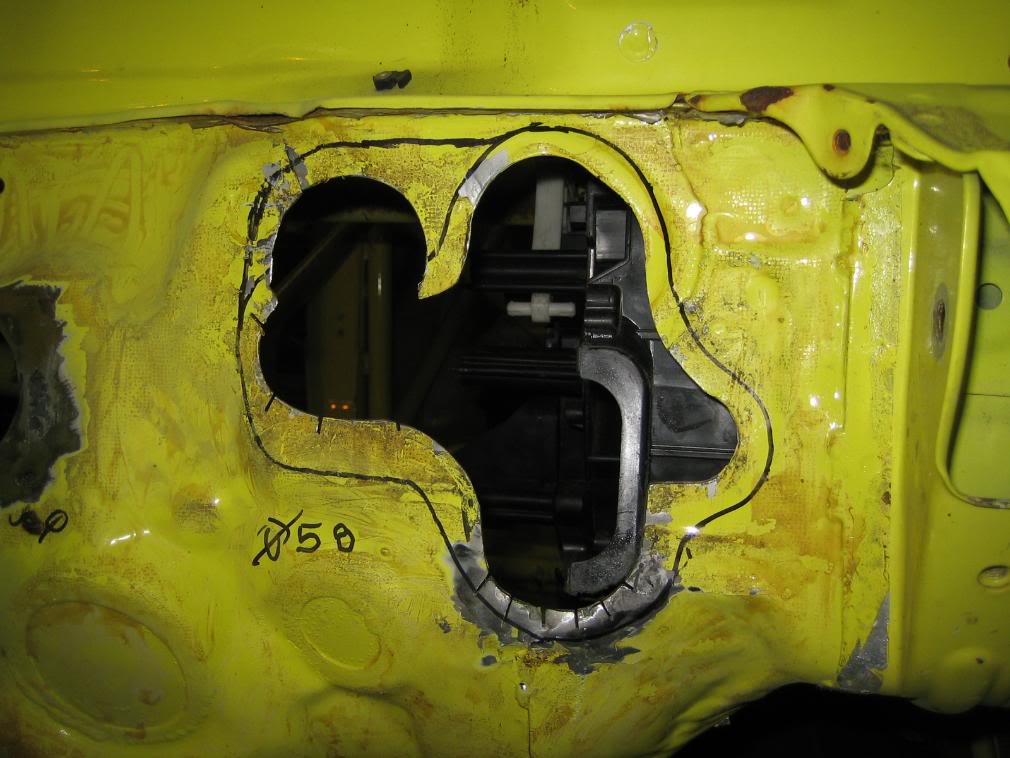
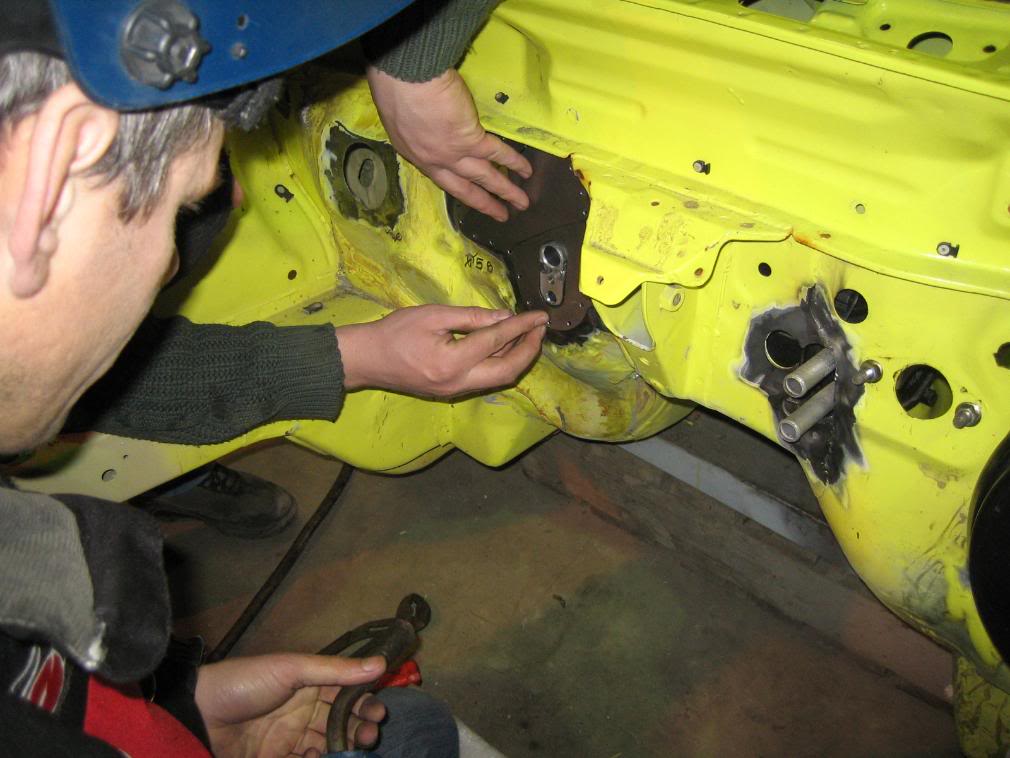
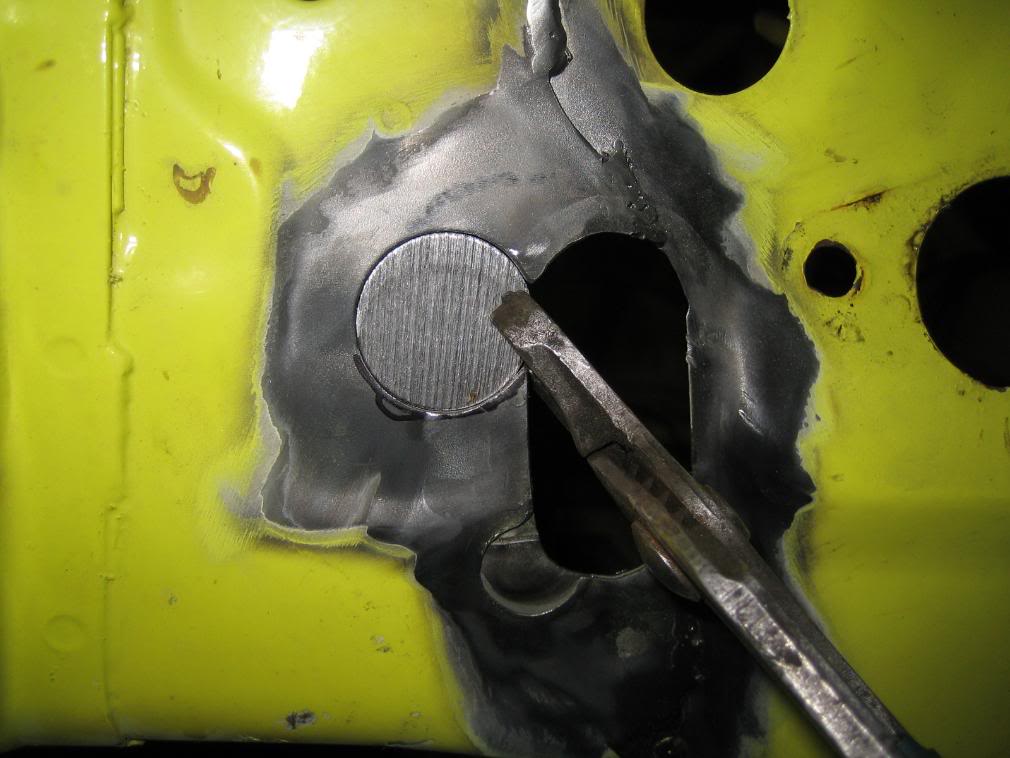
So I had made a nice fitting hole:
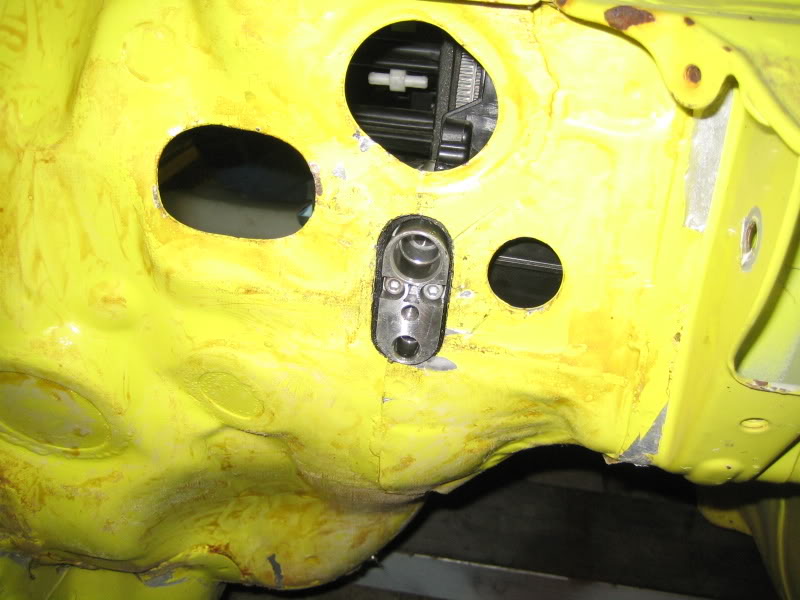
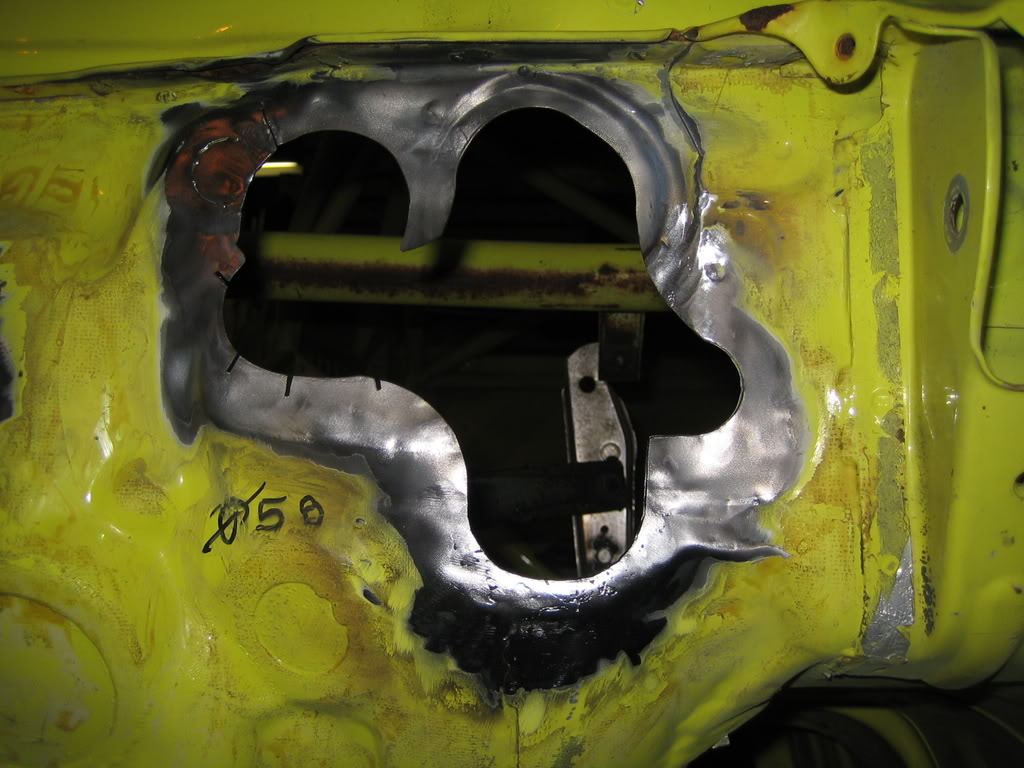
I had already fixed the heaterunit, into which the airco unit is built, so the position of the connection terminal was final, I had to make the firewall fit around it.
The firewall had to be repositioned back and forth a bit to get it to fit the connection terminal, but due to the stresses the hole I first cut didn't come out right.
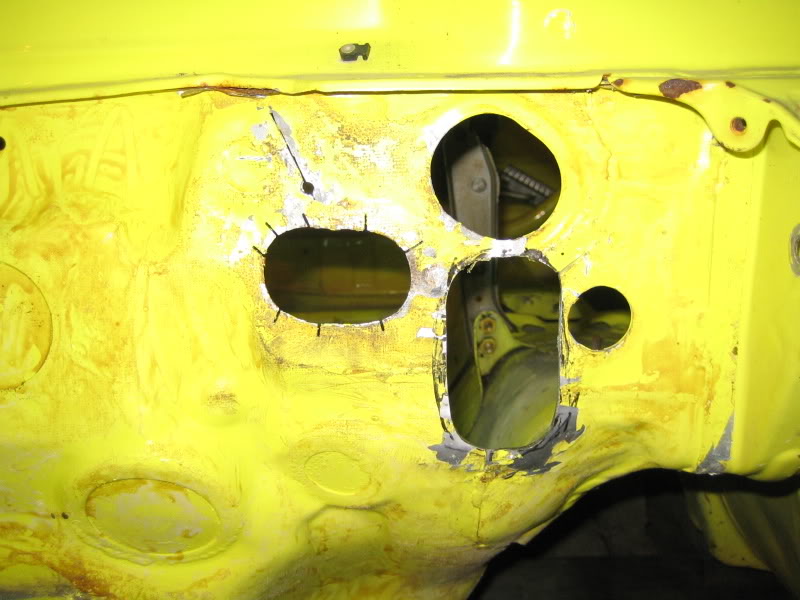
So I had to make it bigger:
I have to cut a few holes in the firewall, one for the airco, one for the heater itself and 2 more for engine looms.
The new-age models have different connection terminals for the airco and heater so I have to adjust everything.
I knew this was going to come because I had the same problems with the build-up of my other project, that's why I started with the dash on this project, good to have it out of my way.
It might look simple to cut a few holes in the firewall and it is, but there are other problems.
There have been made all kinds of foldings (not sure if this is the correct word for it) pressed into the metal of the firewall, this is for strength and against resonation.
The airco terminal has to be tight to the firewall to prevent leakages so I have to make it flat.
But when they press the folds into the metal it stretches it a litlle also, so when you try hammer it flat there is some material left, which has to go somewhere.
So when you hit the firewall in one place it bounces back somewhere else.
To cure this I have made cuts into all the stressed places, this relaxes the metal.
So I had made a nice fitting hole:
I had already fixed the heaterunit, into which the airco unit is built, so the position of the connection terminal was final, I had to make the firewall fit around it.
The firewall had to be repositioned back and forth a bit to get it to fit the connection terminal, but due to the stresses the hole I first cut didn't come out right.
So I had to make it bigger:
 28 December 2007, 10:43 PM
#32
Scooby Regular
Thread Starter
Join Date: Dec 2002
Posts: 458
Likes: 0
Received 0 Likes
on
0 Posts
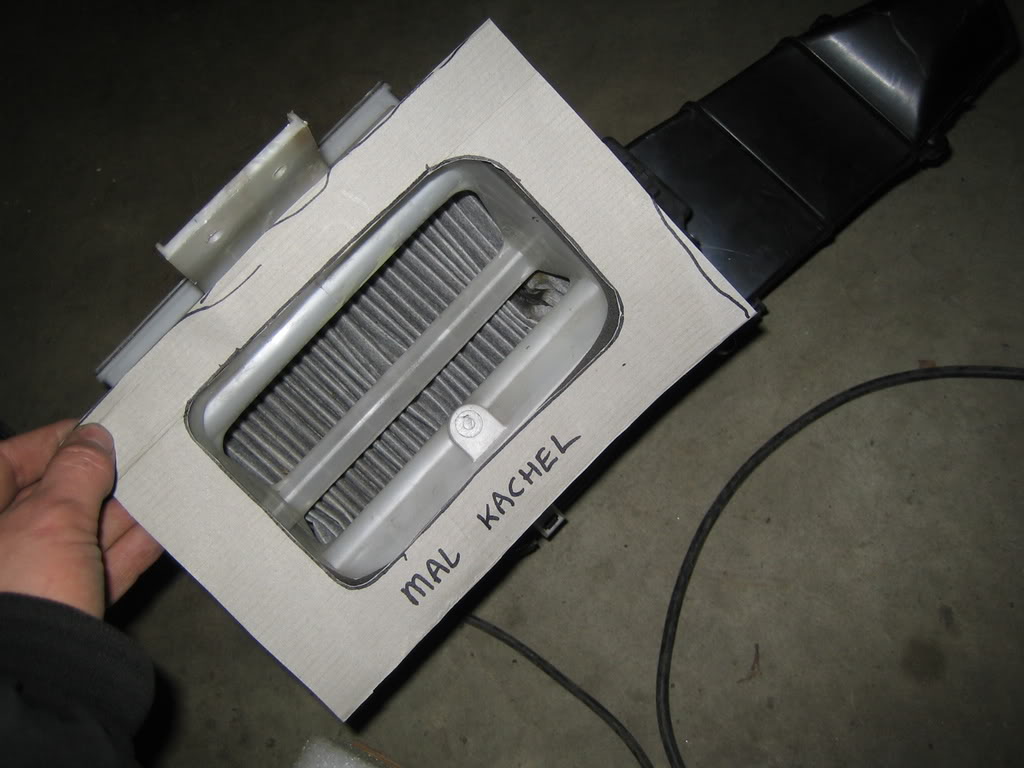
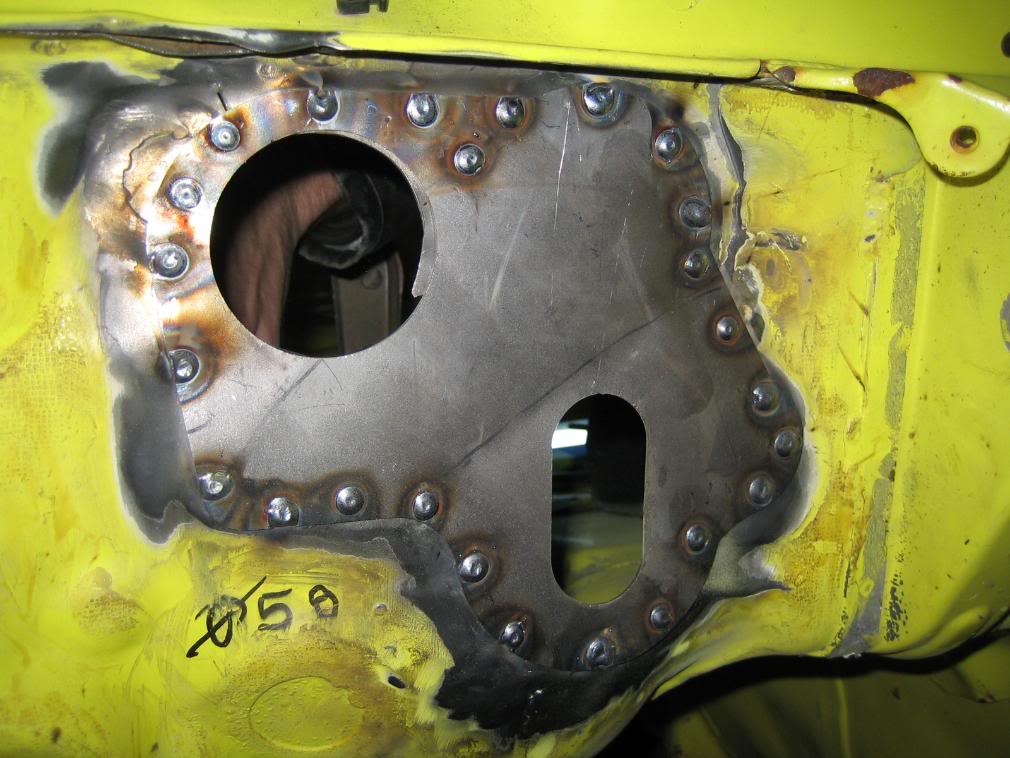
I increased the hole a bit more because I decided that the coverplate was going to be bigger and incorperate one of the engineloom holes too:

I used some packing foil as blueprint:
Which I used for cutting it out in cardboard:
Et viola:
After that I started cutting holes for the heater connections:
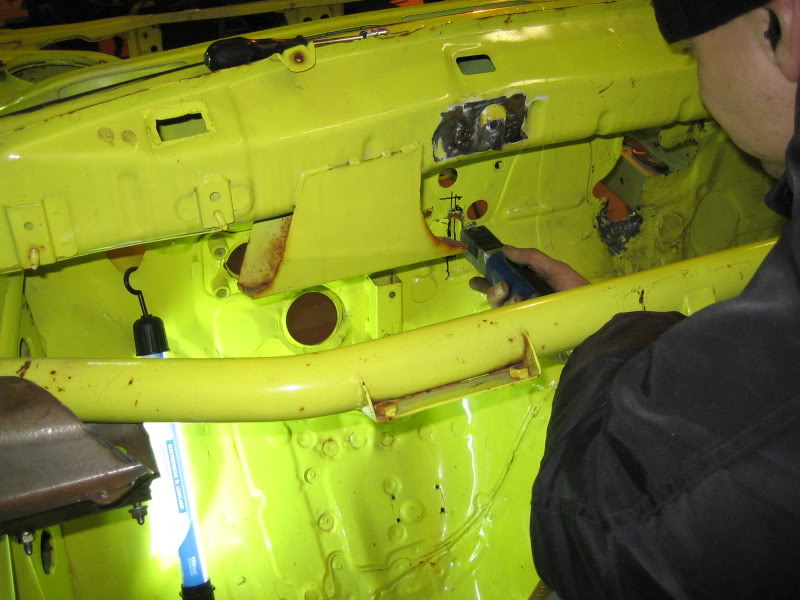
Then the day was over.
I used some packing foil as blueprint:
Which I used for cutting it out in cardboard:
Et viola:
After that I started cutting holes for the heater connections:
Then the day was over.
29 December 2007, 09:01 PM
#33
Scooby Regular
Thread Starter
Join Date: Dec 2002
Posts: 458
Likes: 0
Received 0 Likes
on
0 Posts
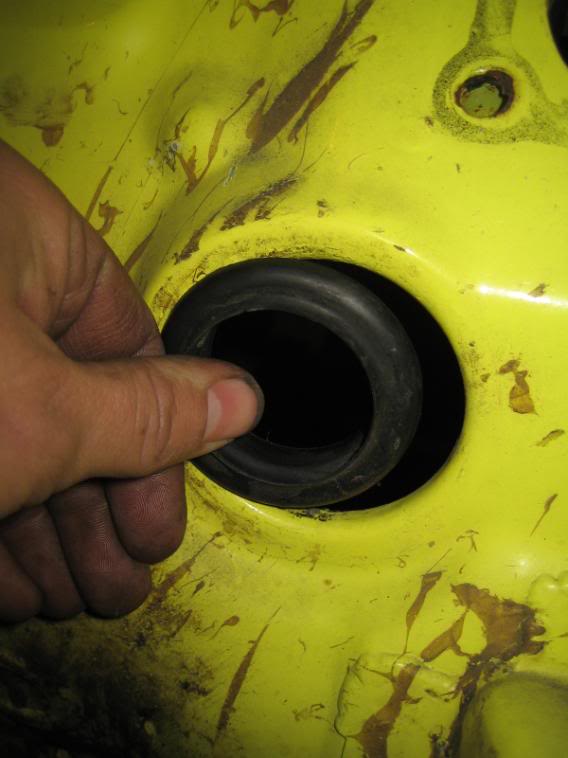
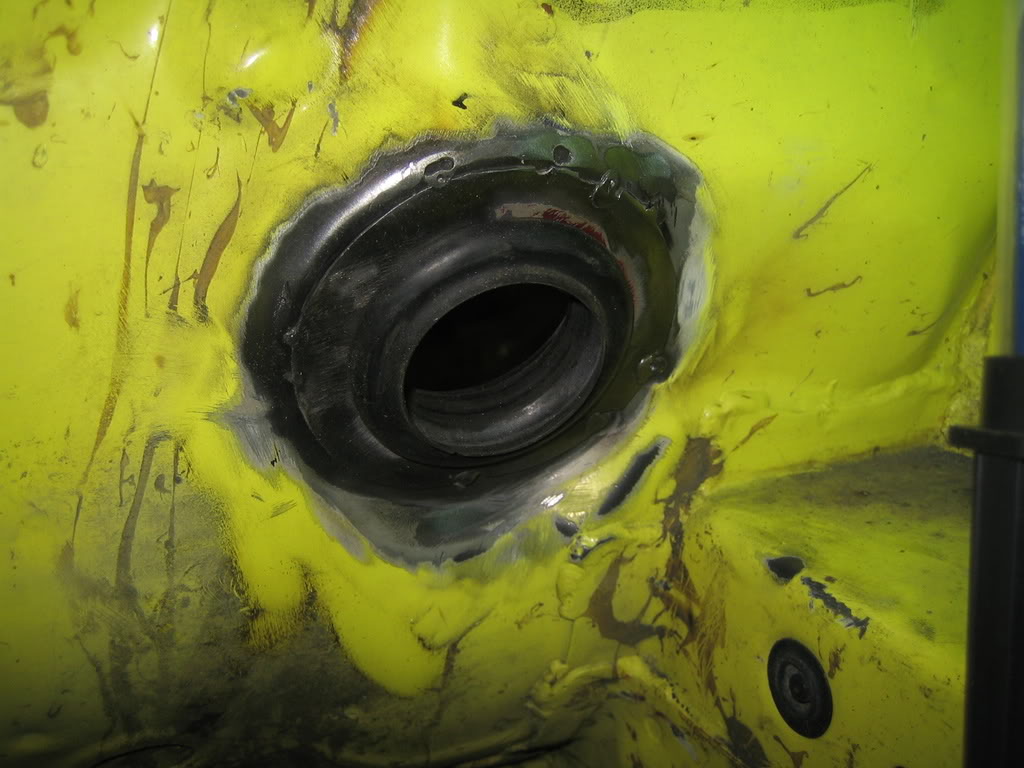
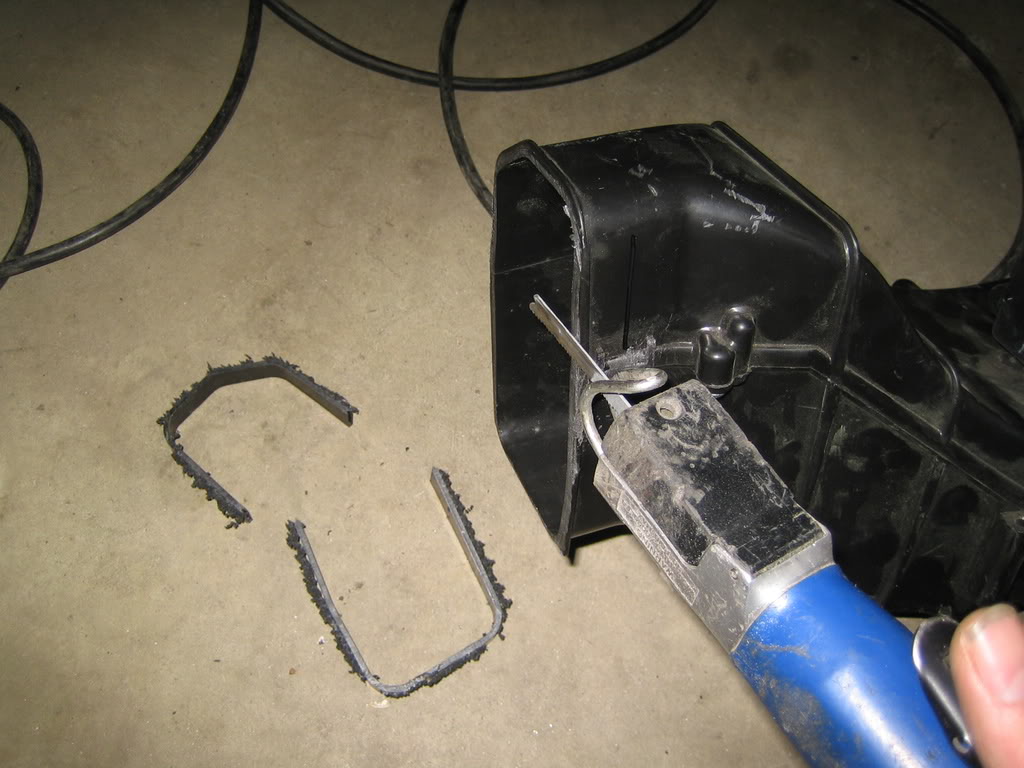
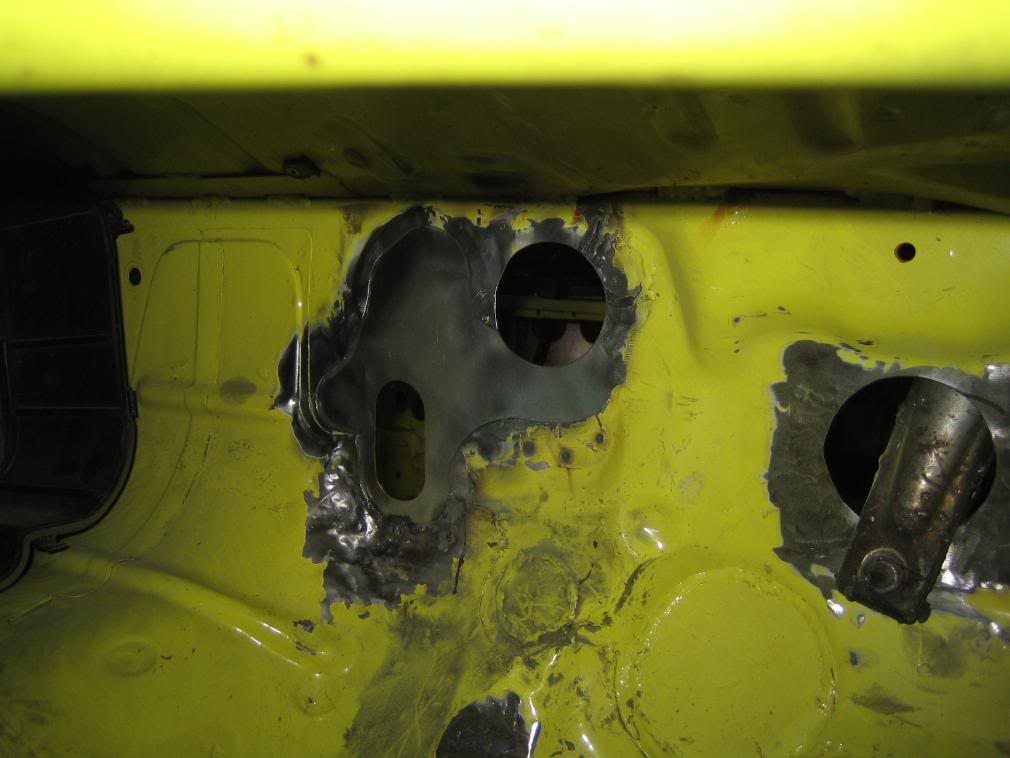
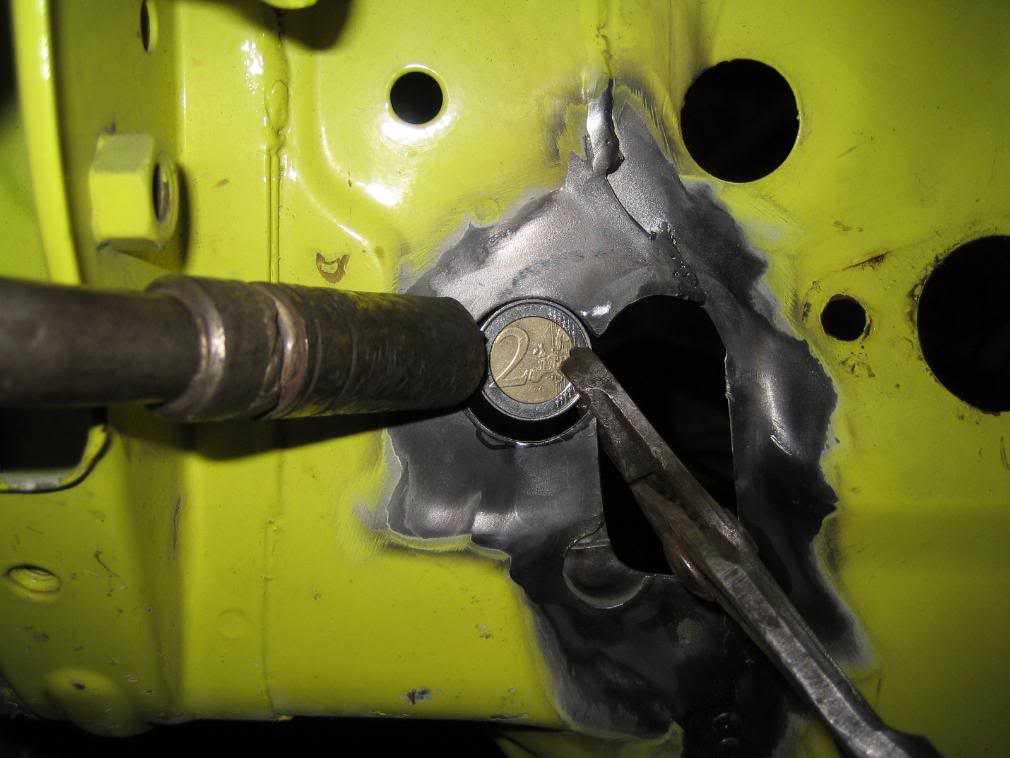
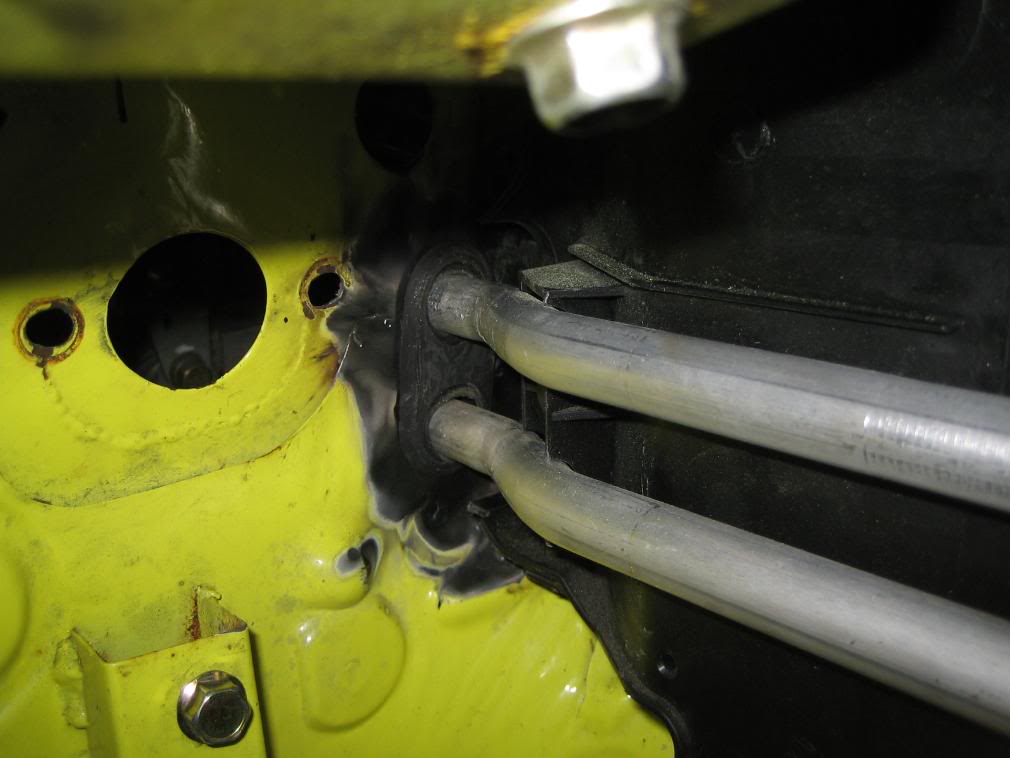
Today I went further on the heater connections.
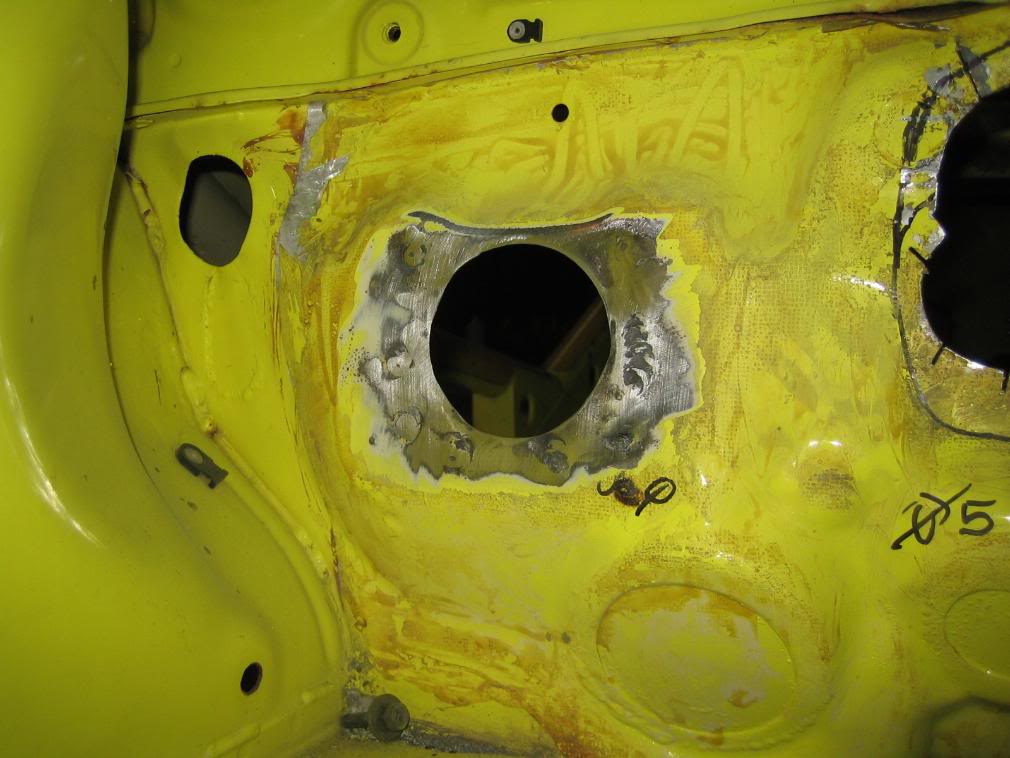
After making a start yesterday I increased the hole a bit further for positioning and finished it off to fit the rubber:

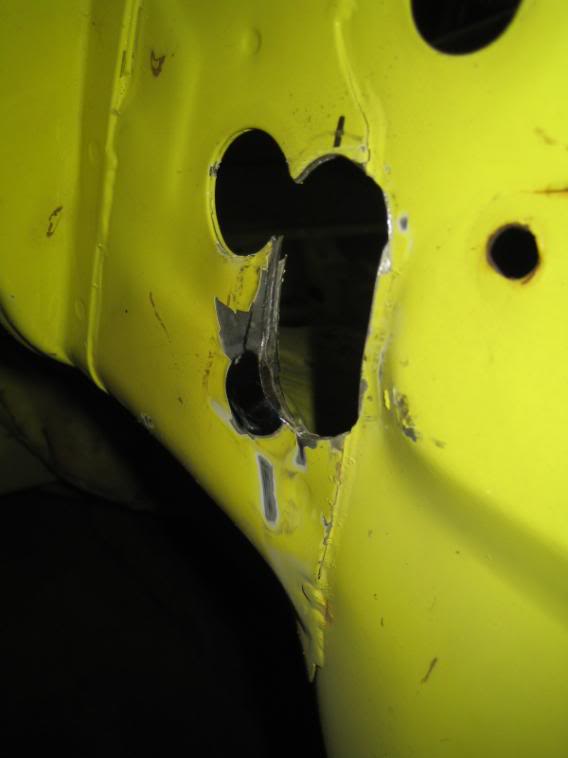

The finishing touch:
The loom holes were up next:
After making a start yesterday I increased the hole a bit further for positioning and finished it off to fit the rubber:
The finishing touch:
The loom holes were up next:
29 December 2007, 09:02 PM
#34
Scooby Regular
Thread Starter
Join Date: Dec 2002
Posts: 458
Likes: 0
Received 0 Likes
on
0 Posts
To give some background info, we had to do this predure about 30 times.
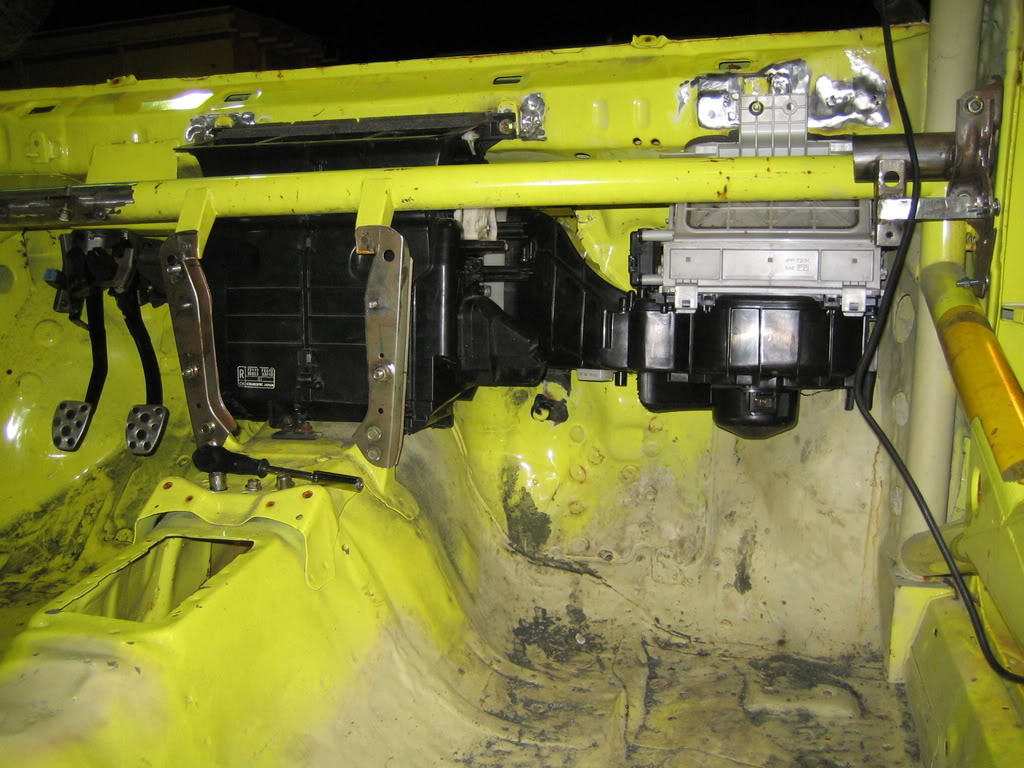
Building in the heater unit:
Empty!
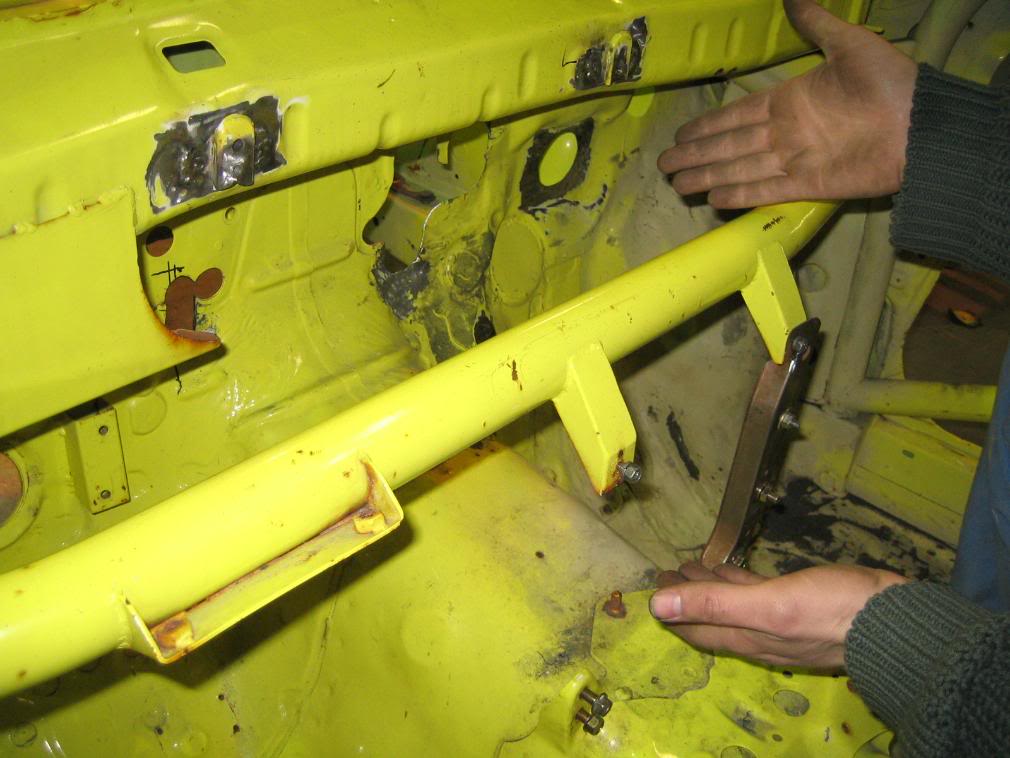
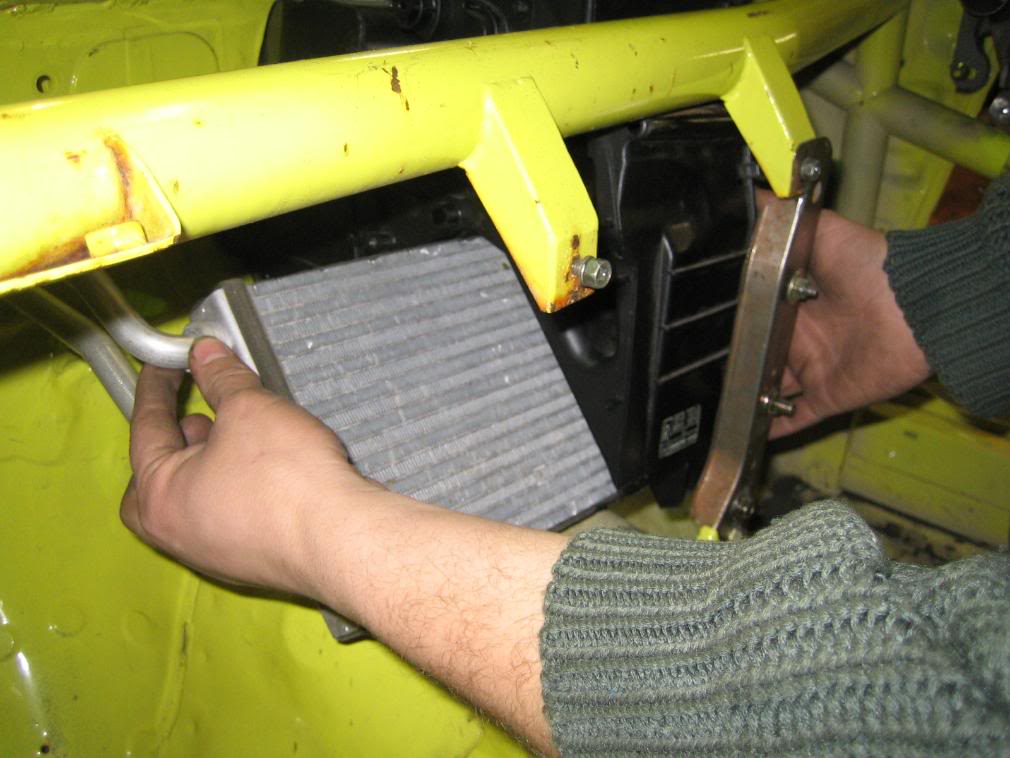
Left side, this has to be wiggled between the cage and firewall and then be moved to the right for the heater element to fit:
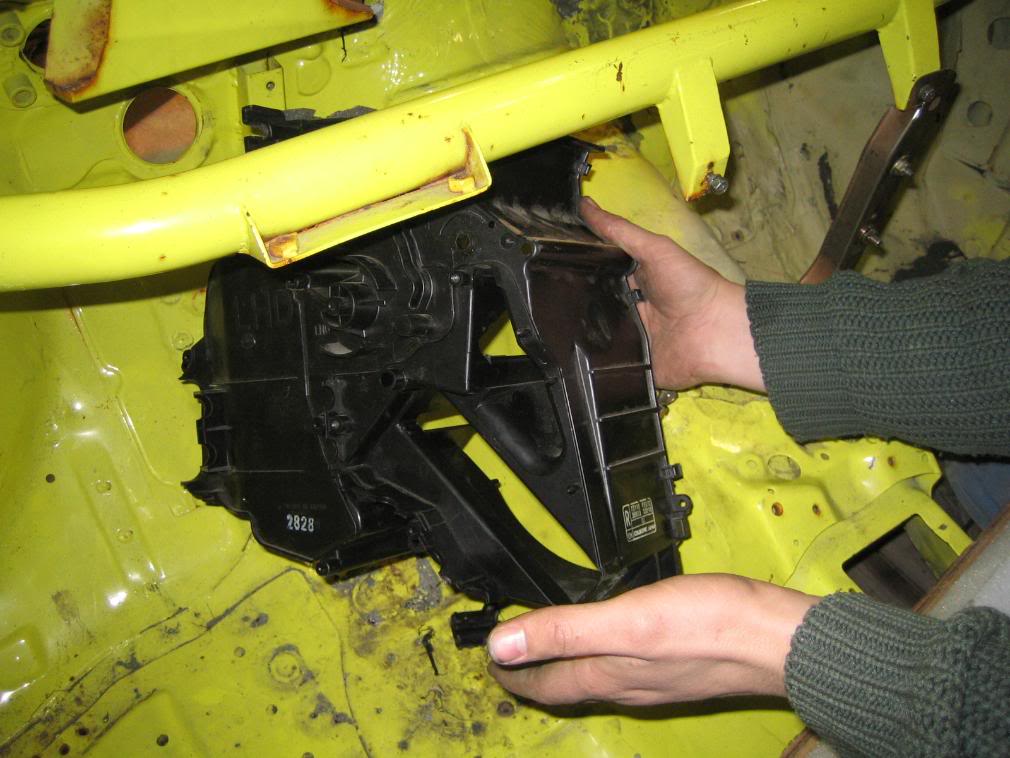

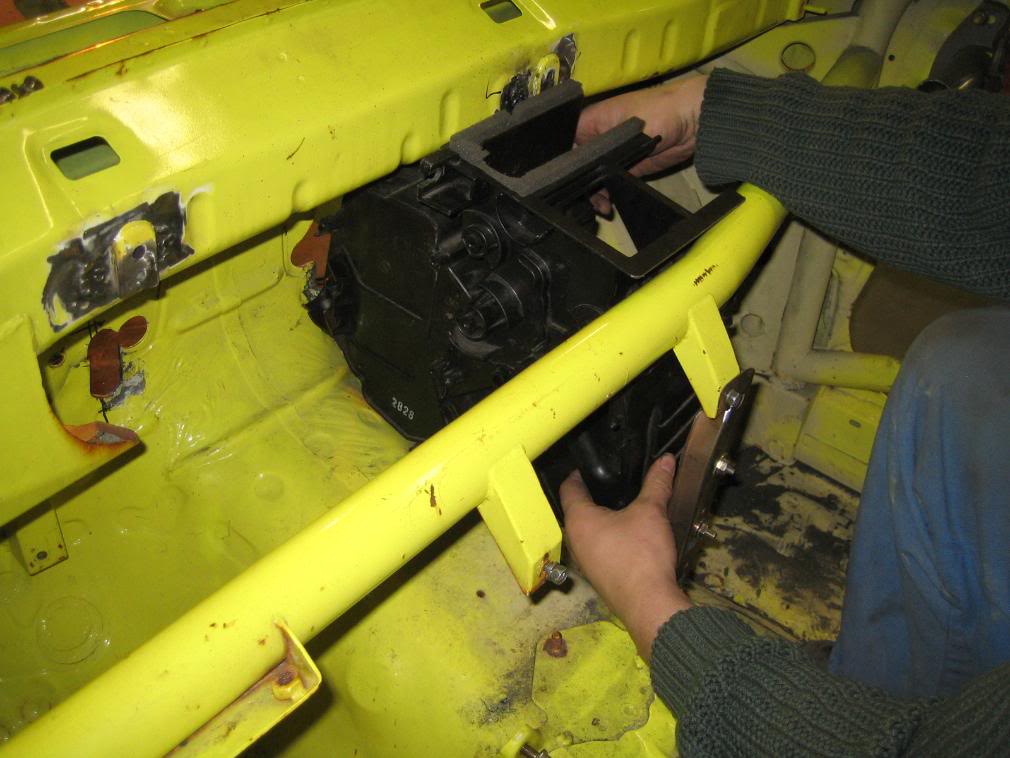
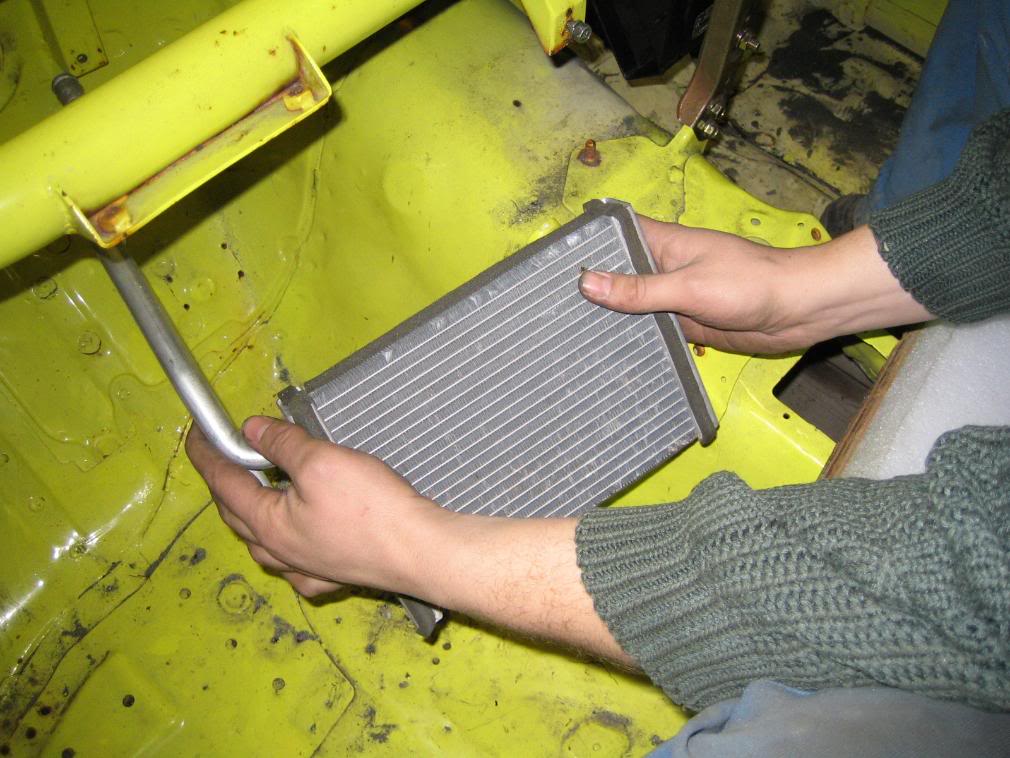
Heater element, the pipes have to go through the hole first, then the left half can be pushed over it:
Building in the heater unit:
Empty!
Left side, this has to be wiggled between the cage and firewall and then be moved to the right for the heater element to fit:
Heater element, the pipes have to go through the hole first, then the left half can be pushed over it:
29 December 2007, 09:03 PM
#36
Scooby Regular
Thread Starter
Join Date: Dec 2002
Posts: 458
Likes: 0
Received 0 Likes
on
0 Posts
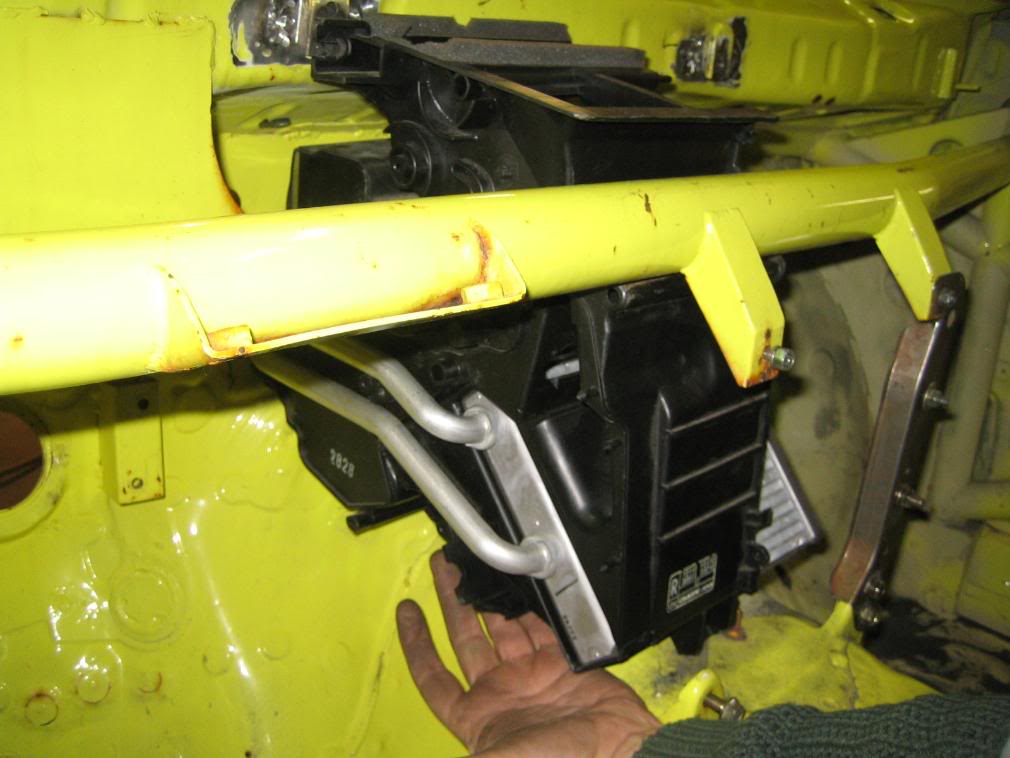
Et viola!!
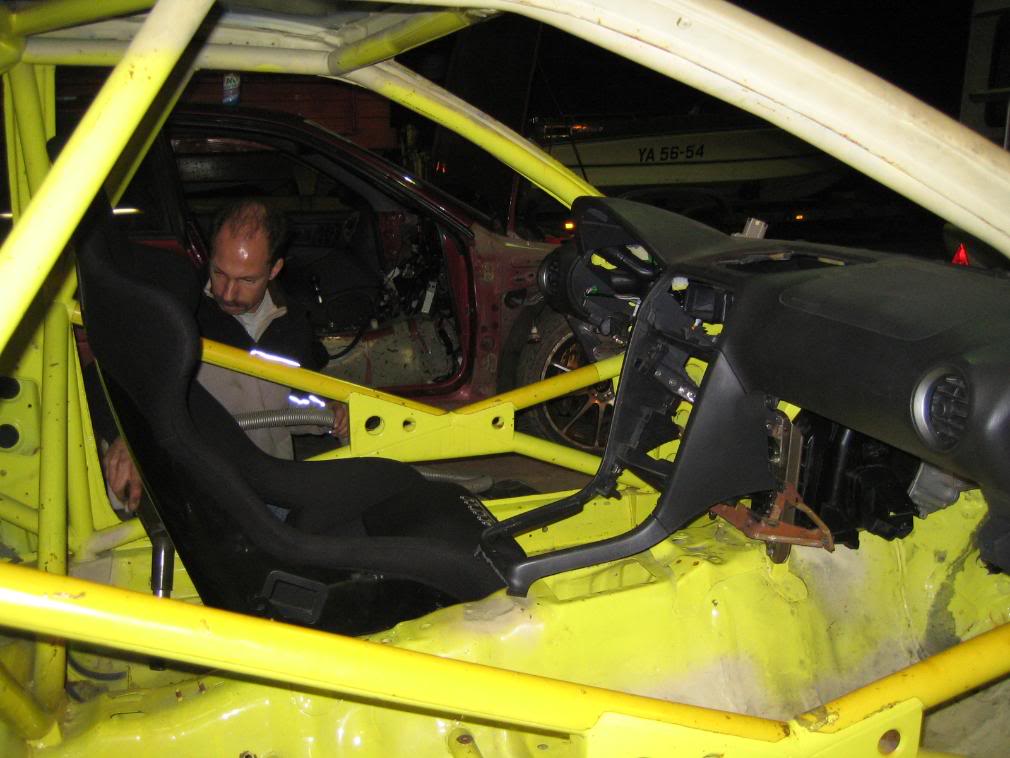
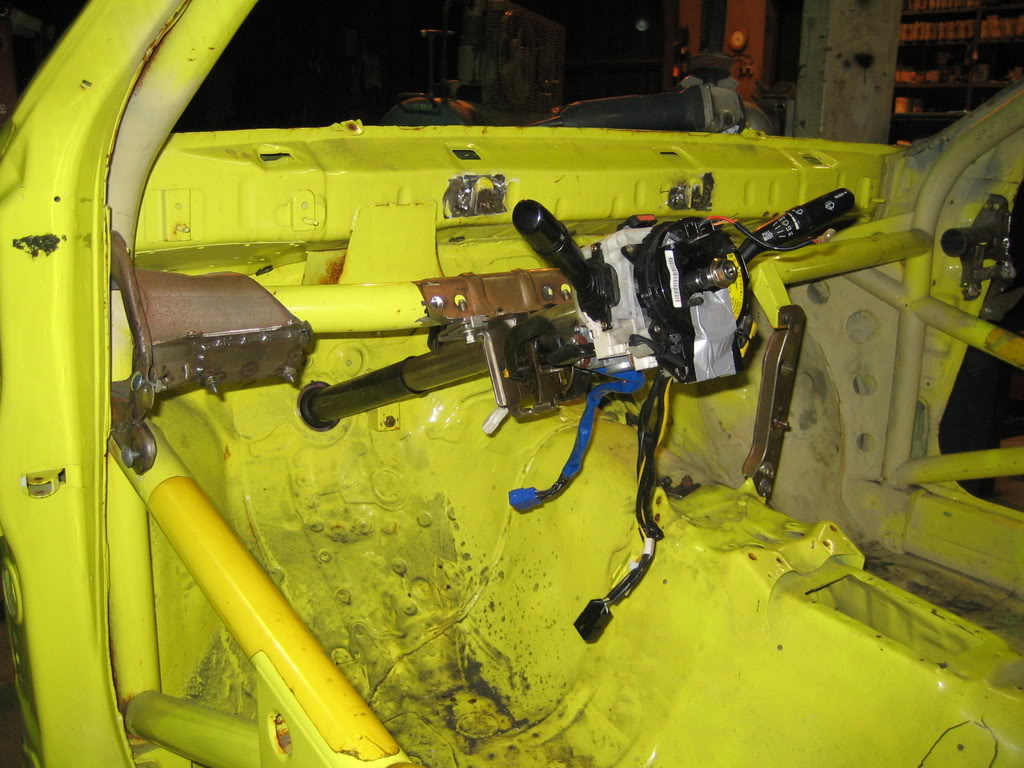
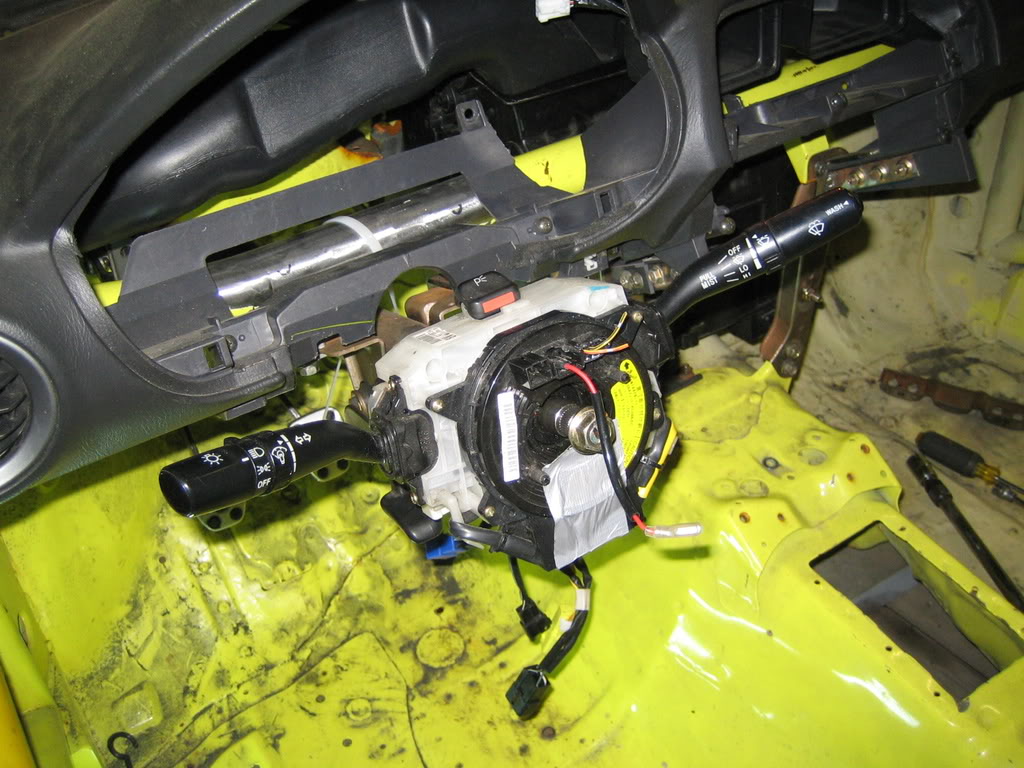
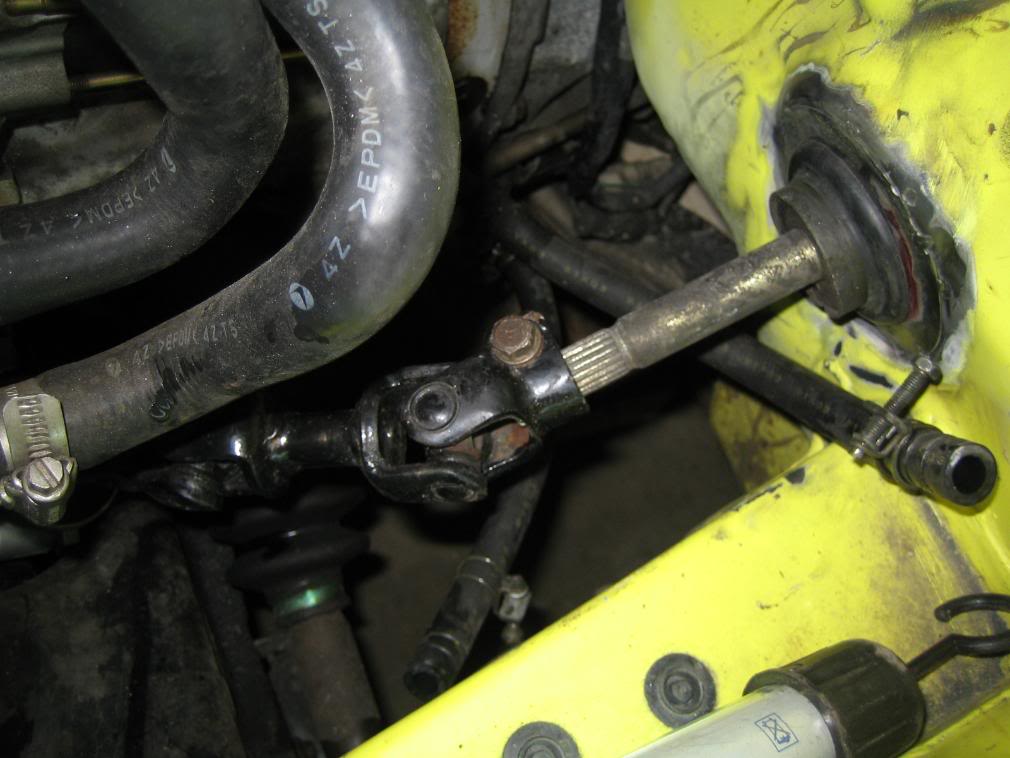
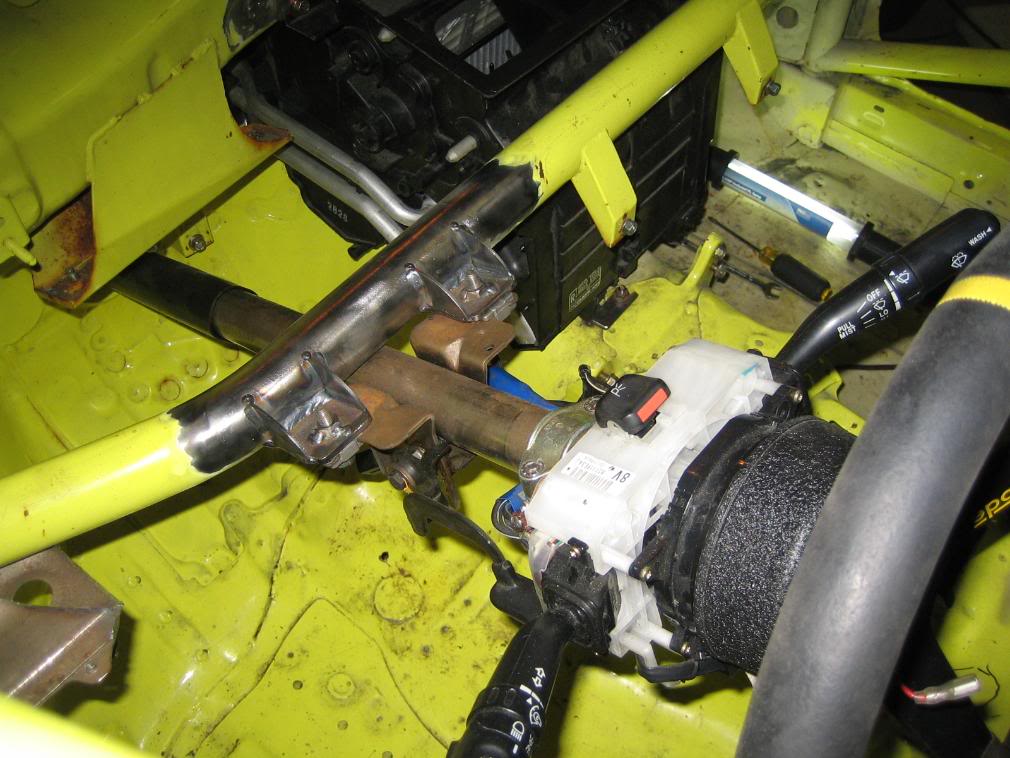
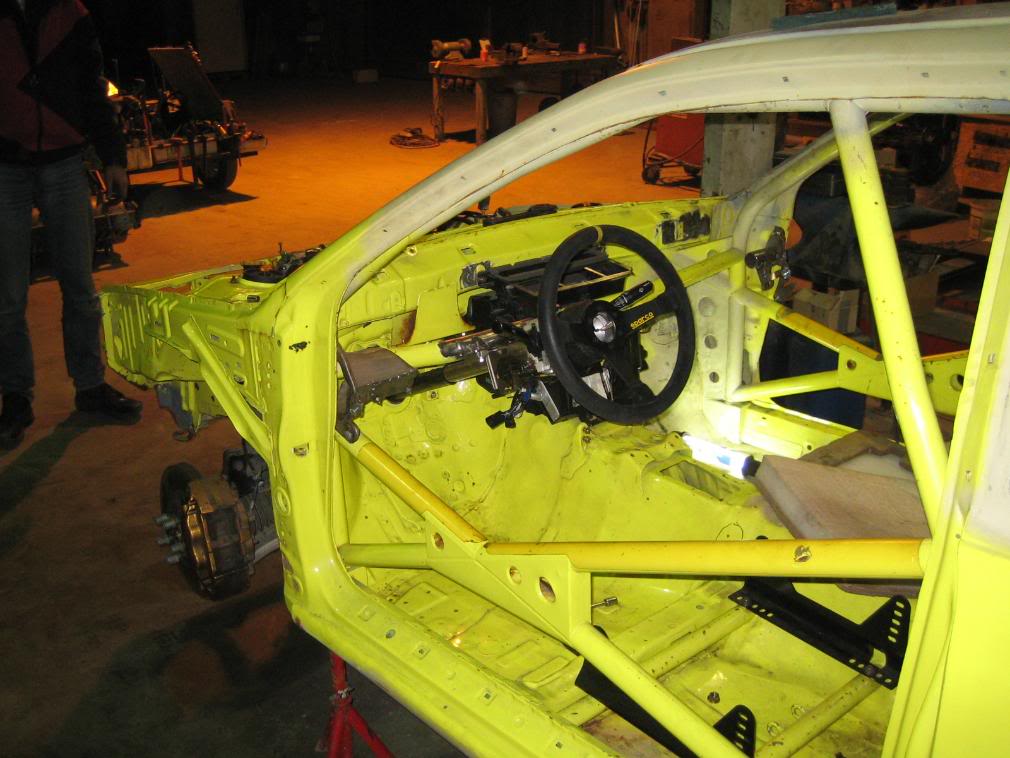
The next step is the steering column, it's fixation points do not match the ones in the chassis.
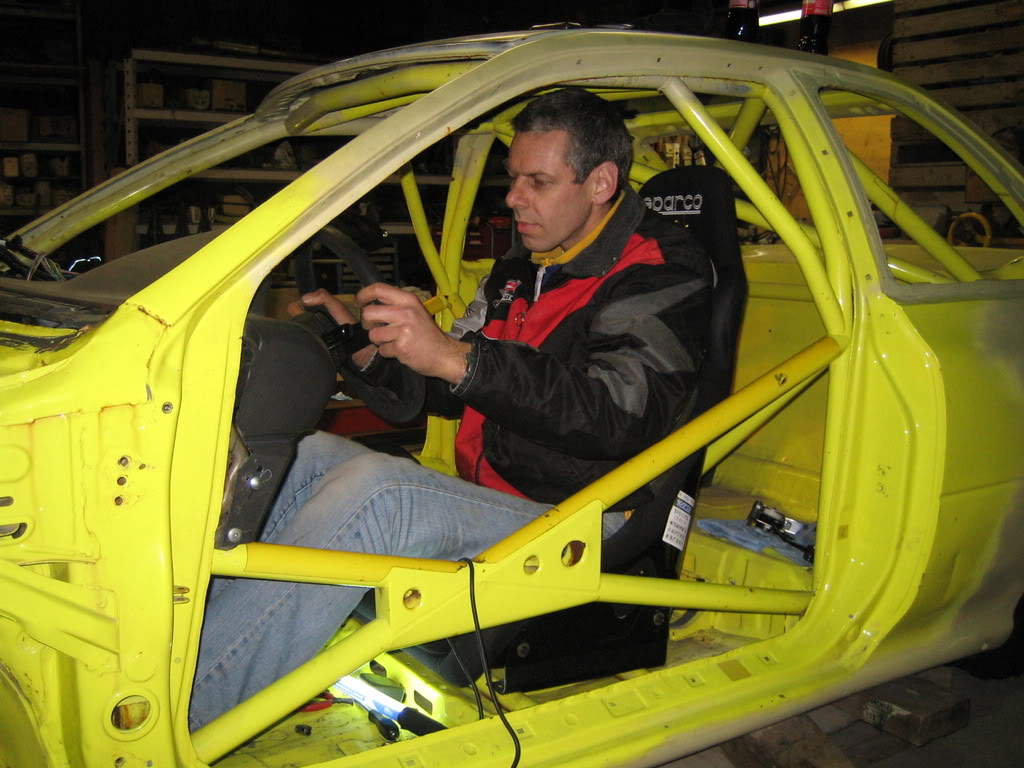
So we had to put in the chair and dashboard for alignment fitting.
With the GL we needed a day to make the chairframe fitting.
In this chassis the guys atProdrive have welded in some tubes for fixation.
I could fit the chair in just sitting on his side supports,so no frames were needed!!
29 December 2007, 09:04 PM
#37
Scooby Regular
Thread Starter
Join Date: Dec 2002
Posts: 458
Likes: 0
Received 0 Likes
on
0 Posts
Dasboard:
Chair had to be test fitted of course:

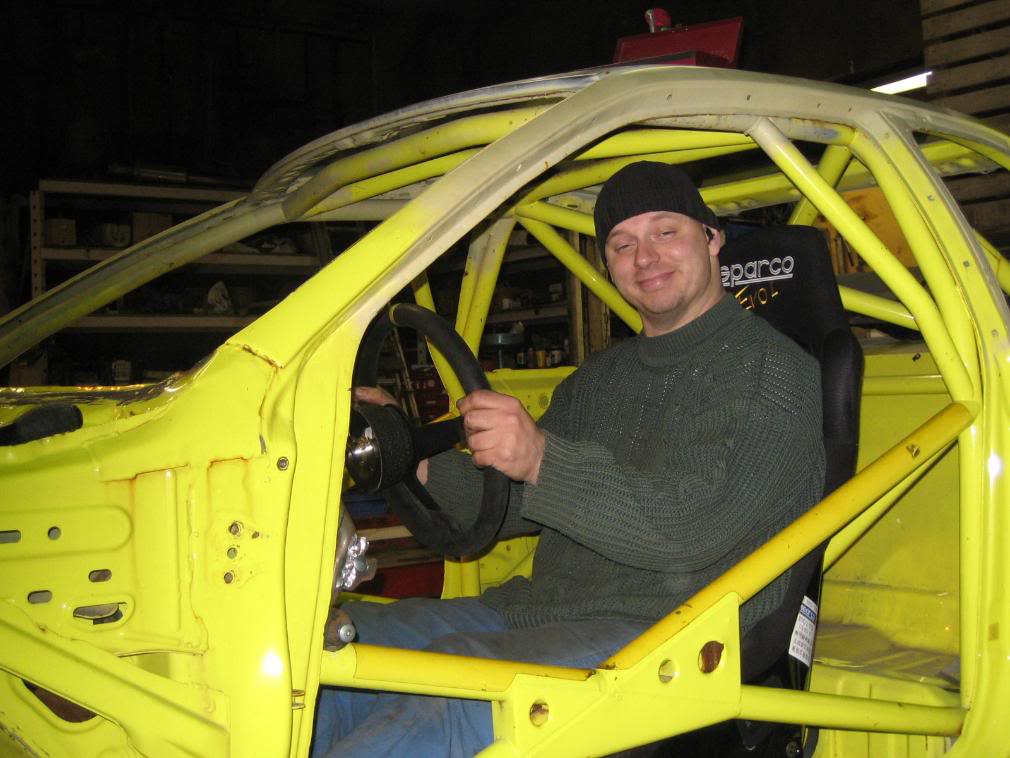
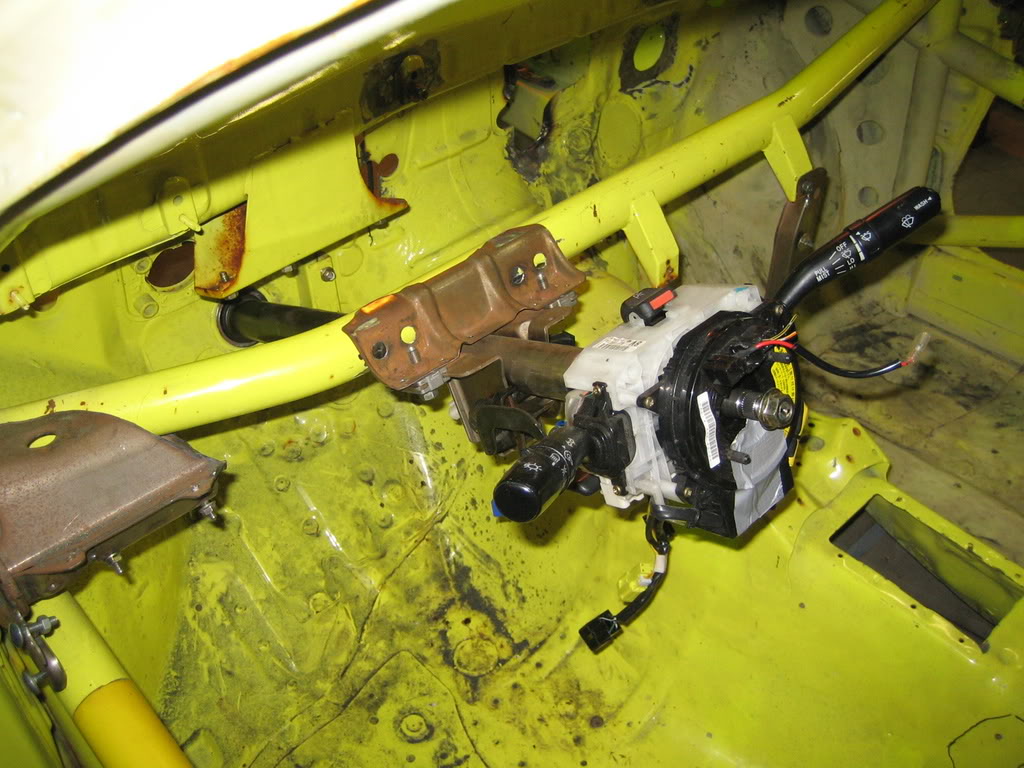
The steer sits perfect in line!:
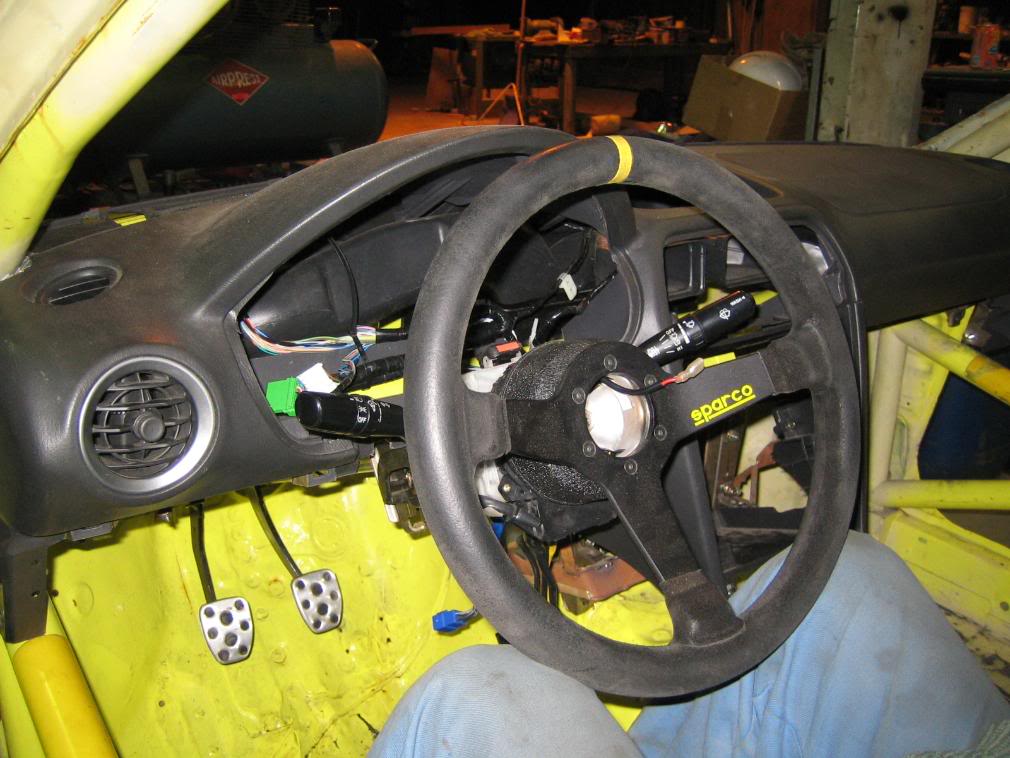
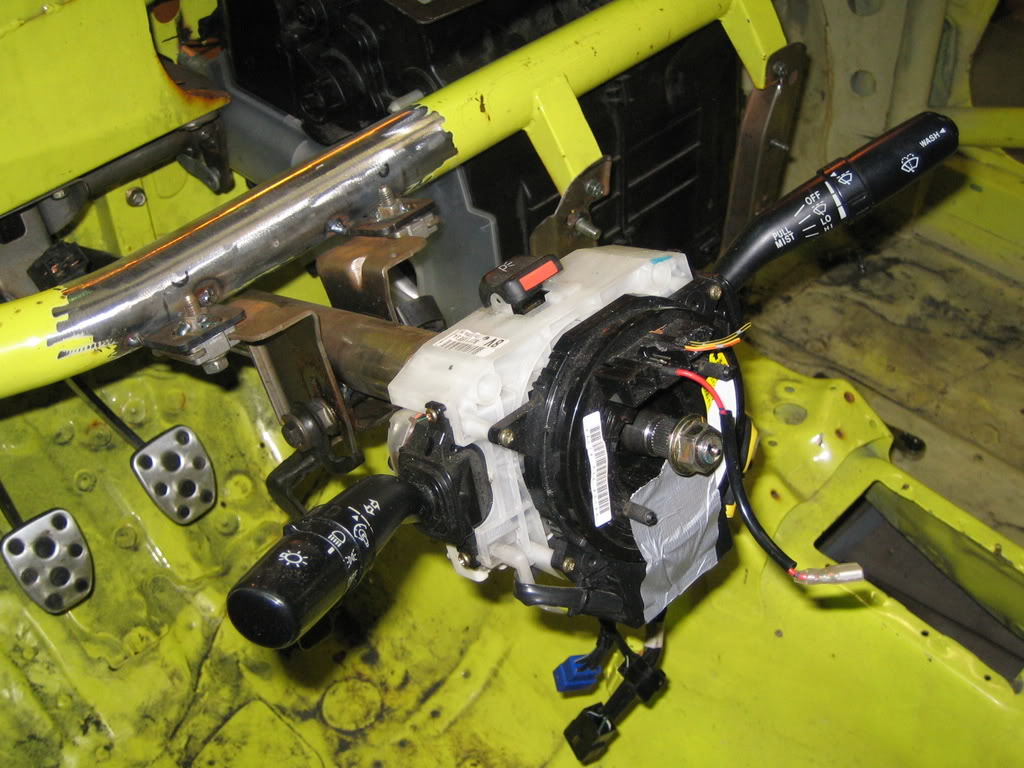
Unfortunatly the hole in the firewall is to big for this collumn,this has to be adressed too:
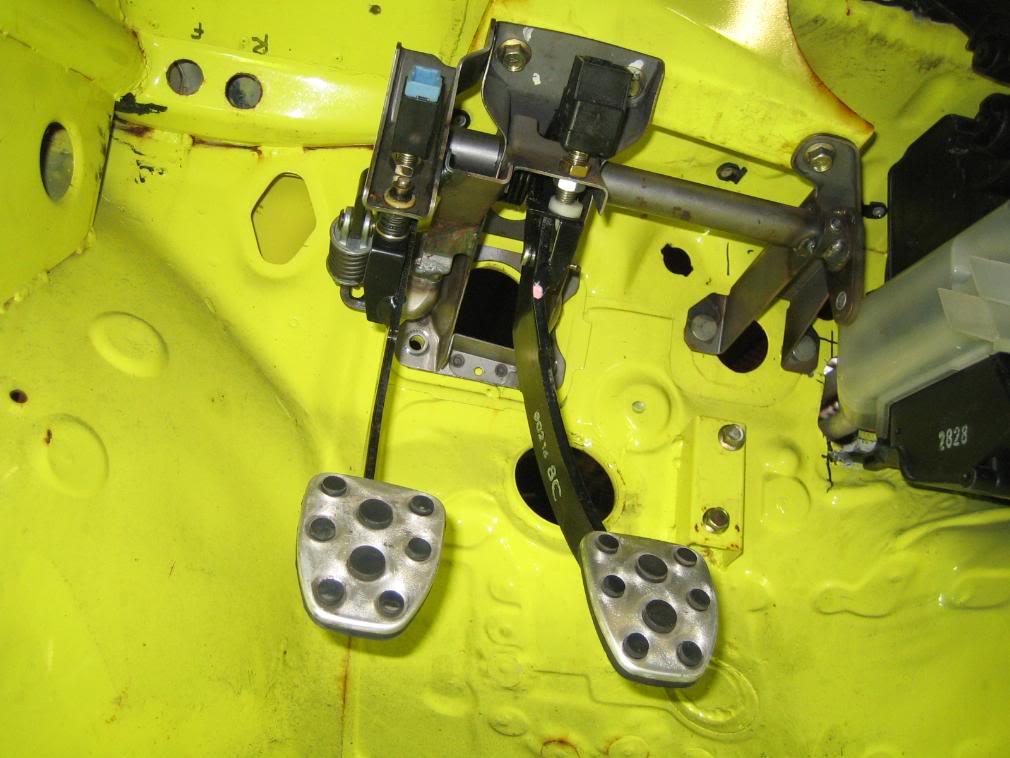
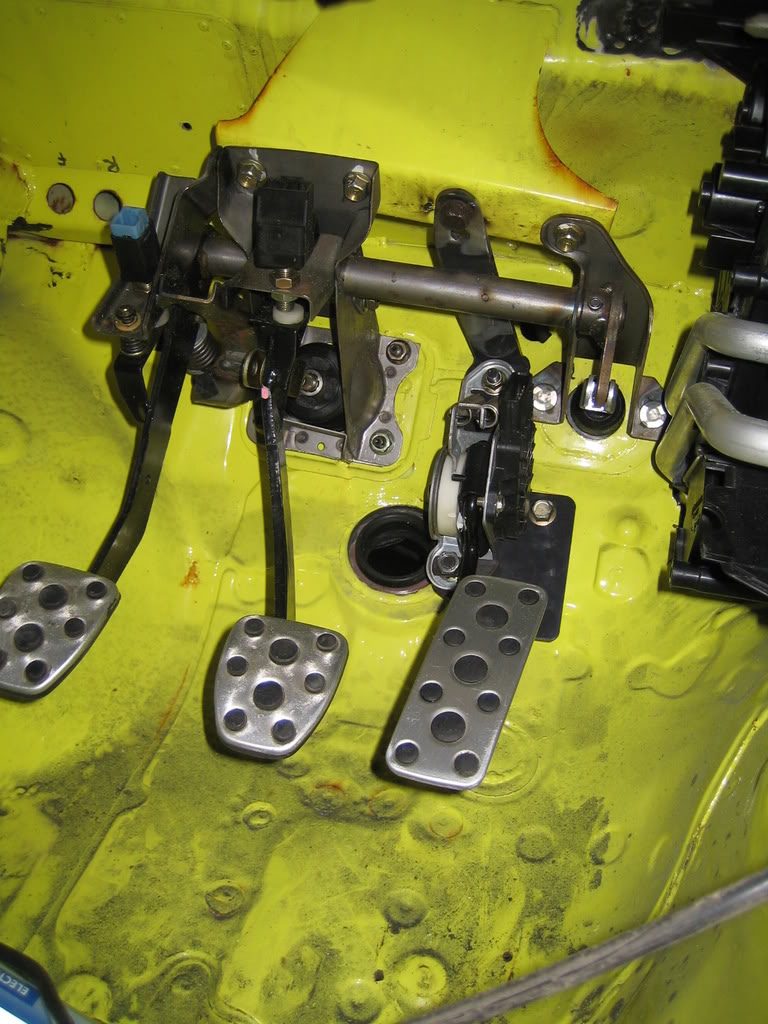
We also removed some pedals from the old car and put them in the new chassis:
This was it for this year, more next year!
Chair had to be test fitted of course:
The steer sits perfect in line!:
Unfortunatly the hole in the firewall is to big for this collumn,this has to be adressed too:
We also removed some pedals from the old car and put them in the new chassis:
This was it for this year, more next year!


 05 January 2008, 11:55 PM
#42
Scooby Regular
Thread Starter
Join Date: Dec 2002
Posts: 458
Likes: 0
Received 0 Likes
on
0 Posts
Yip.
Today and Thursday I did a bit of work on the car.
Thursday:
I did a little bit more on the steering column, it didn't fit on either side, it needed attention.
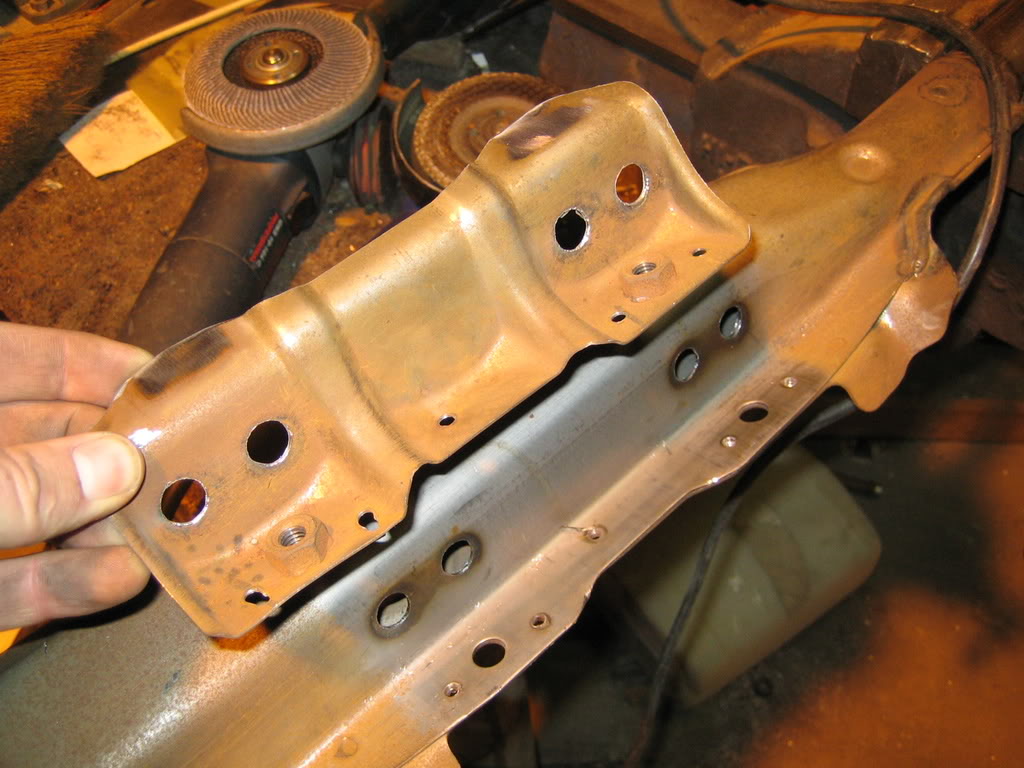
First I cut of the fixation plate from the bar that runs underneath the dashbord, so it can be welded to the new chassis:
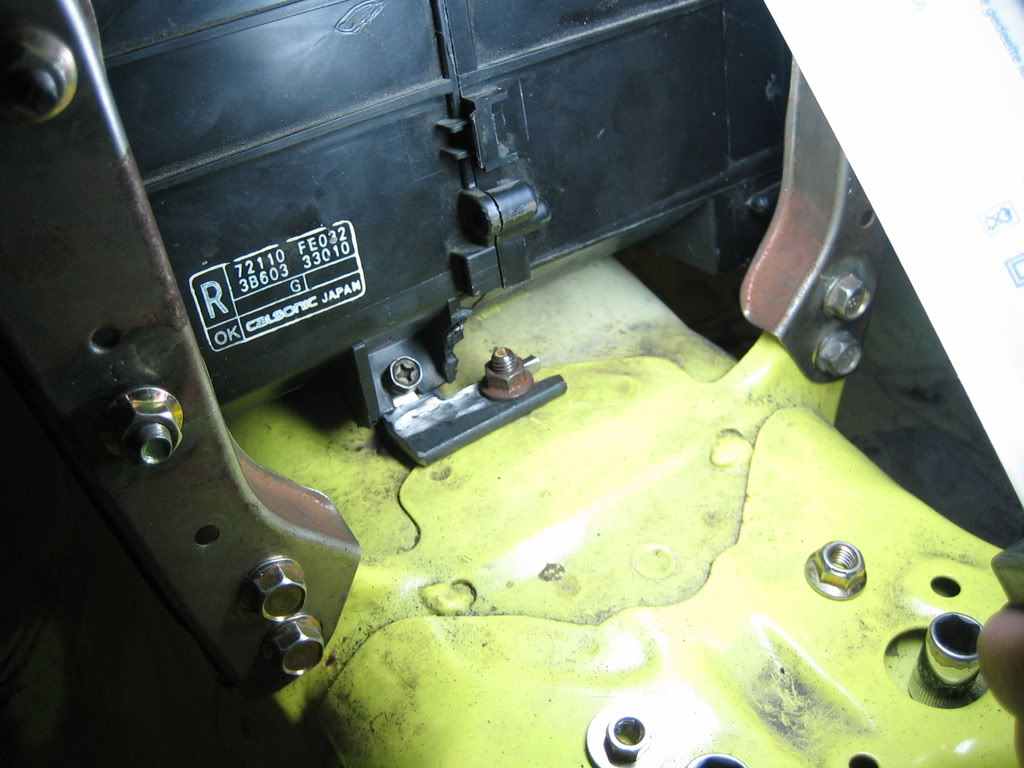
And we fixed the last bracket on the heater, now it is locked down really well:
Today:
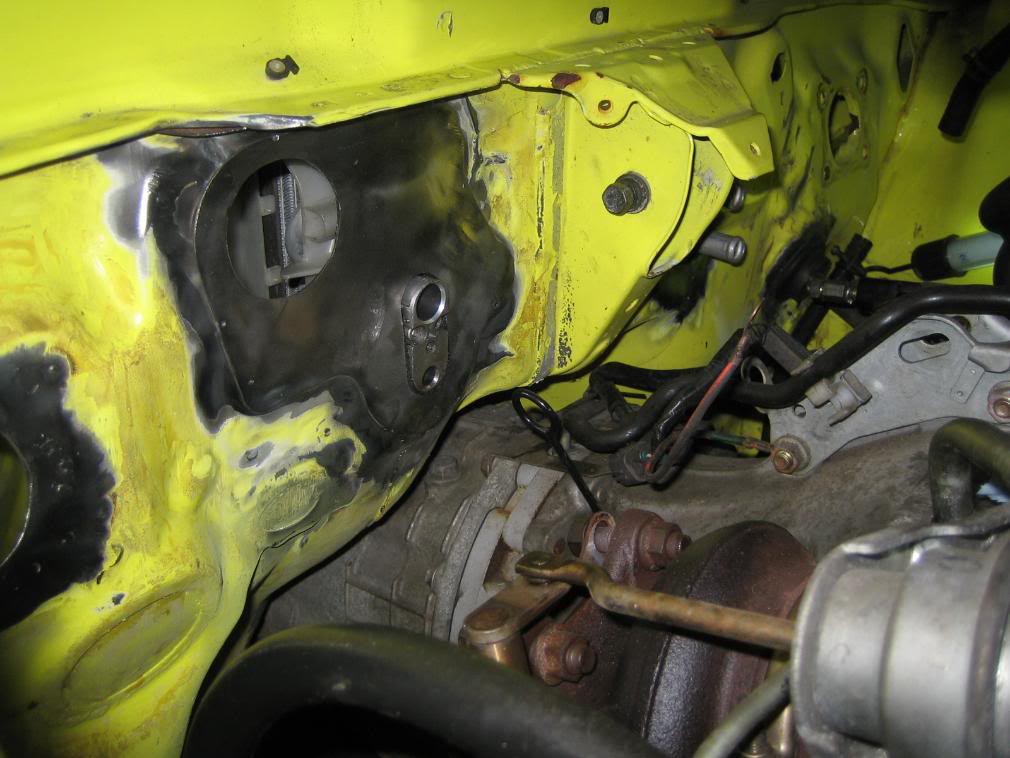
I had to cut out a piece of firewall from my old car to fit into the hole in the new chassis.
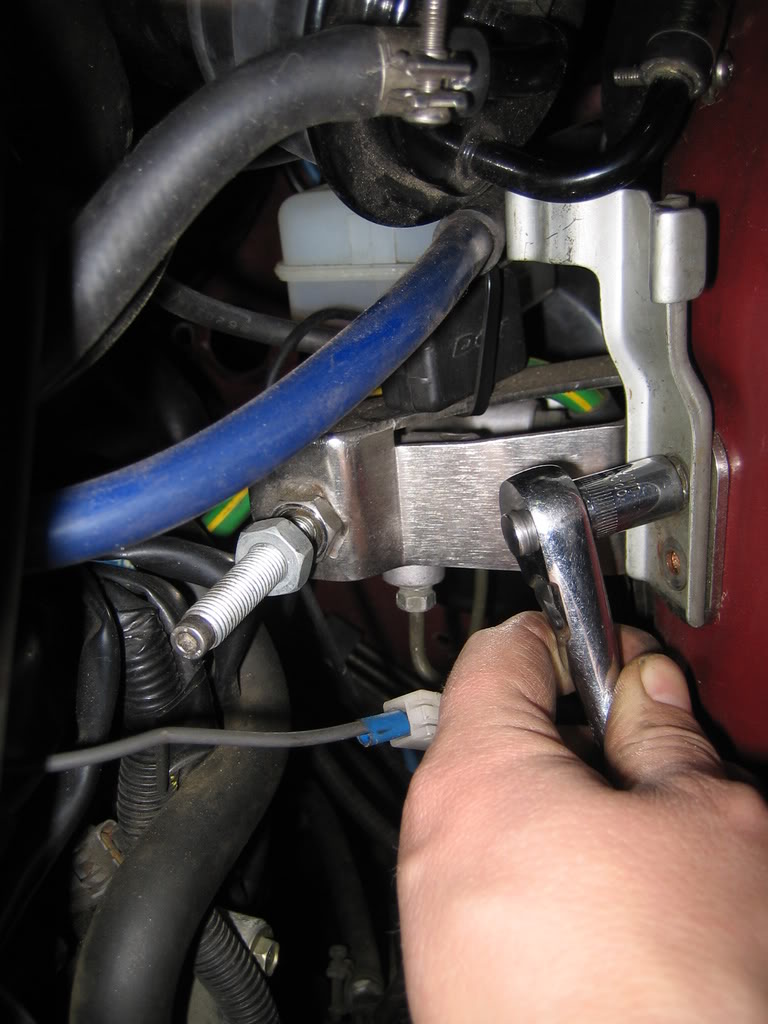
But I had to remove the master brake cilinder first:
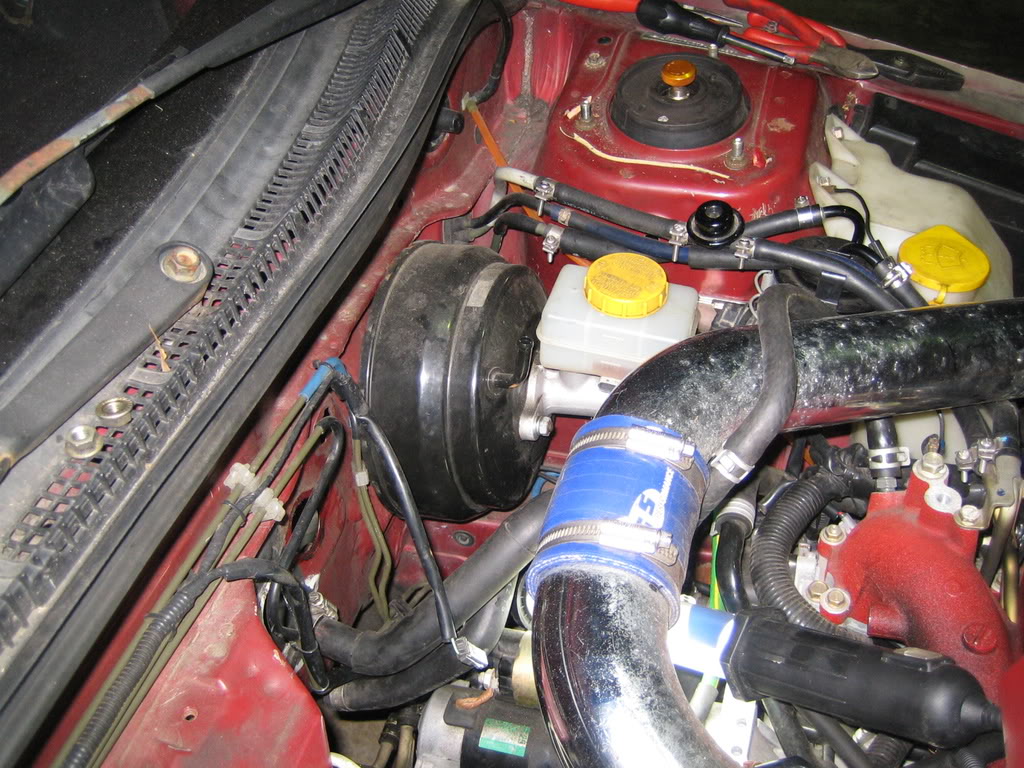
So the fuel filter has to be removed and my home made brake bracket:
Today and Thursday I did a bit of work on the car.
Thursday:
I did a little bit more on the steering column, it didn't fit on either side, it needed attention.
First I cut of the fixation plate from the bar that runs underneath the dashbord, so it can be welded to the new chassis:
And we fixed the last bracket on the heater, now it is locked down really well:
Today:
I had to cut out a piece of firewall from my old car to fit into the hole in the new chassis.
But I had to remove the master brake cilinder first:
So the fuel filter has to be removed and my home made brake bracket:
05 January 2008, 11:57 PM
#44
Scooby Regular
Thread Starter
Join Date: Dec 2002
Posts: 458
Likes: 0
Received 0 Likes
on
0 Posts
Then a sorry attempt to weld.
I only spot welded the plate for the steering column because I need to check if it is in the correct place later when then steeringhouse and subframe are attached:
It's in!!
Well almost, I still need to weld the fixation points on the dashbar, that will happen soon:
I only spot welded the plate for the steering column because I need to check if it is in the correct place later when then steeringhouse and subframe are attached:
It's in!!
Well almost, I still need to weld the fixation points on the dashbar, that will happen soon:

 06 January 2008, 08:03 PM
#48
Scooby Regular

Join Date: May 2004
Location: Ascended to the next level
Posts: 7,498
Likes: 0
Received 0 Likes
on
0 Posts
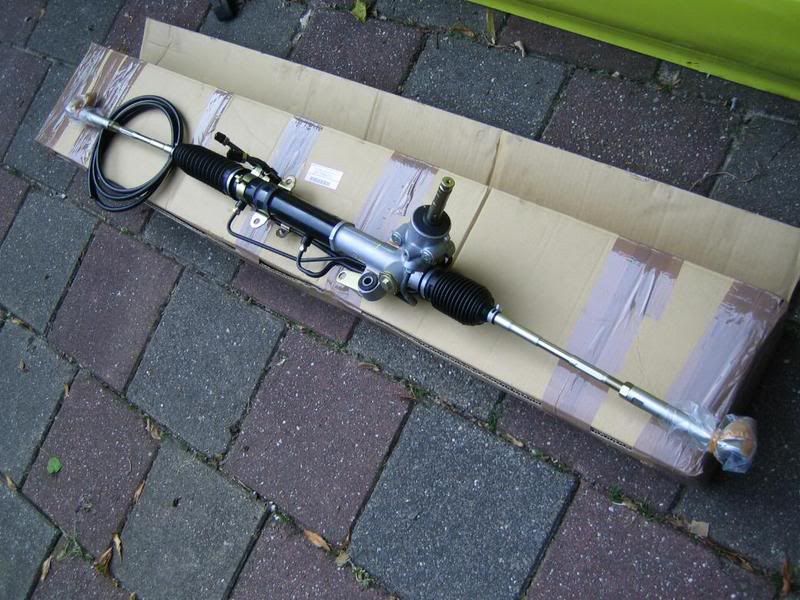
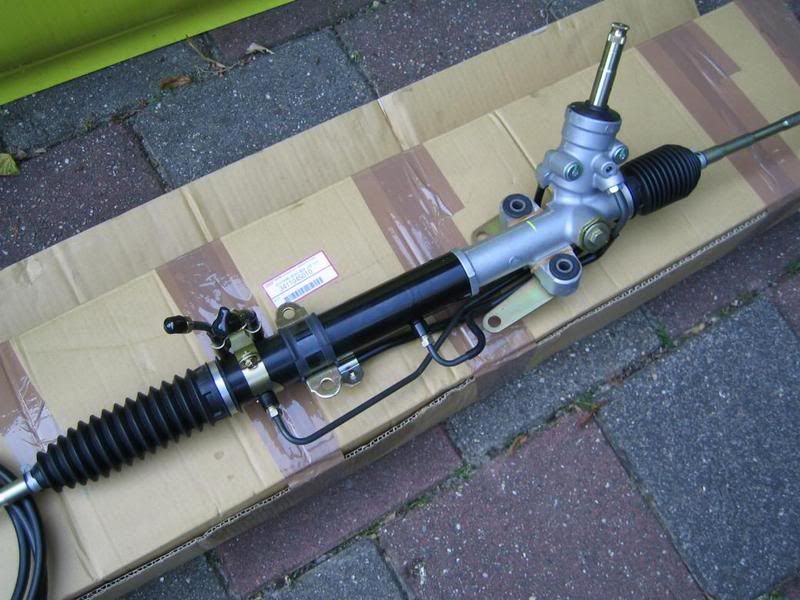
What every scoob should have fitted as standard (except for the very few RAs with manual racks
 )
)Something I struggled to get hold of for sensible money when I still had my scoob, but so desperately needed.
 08 January 2008, 10:50 PM
#49
Scooby Regular
Thread Starter
Join Date: Dec 2002
Posts: 458
Likes: 0
Received 0 Likes
on
0 Posts
Thanks guys!!
And Shark Man, I know your pain, I had it for a long long time, this was just a stroke of luck to be honest!
--------------------
Was a busy night but for some reason it doesn't look like much was done.
Probably because most of the time was spent building the components in and out of the car.
Anyway,
I wanted to fix the other side of the steering column, for which I removed the original fixation plate.
Unfortunatly it didn't fit very well so something new had to be found.
We had a strip of metal lying about with just the right thickness and width plus on top 2 holes that the bolts fit through.
So we cut it in half and used both parts.
As said it doesn't sound like much but it was pretty much work anyhow.
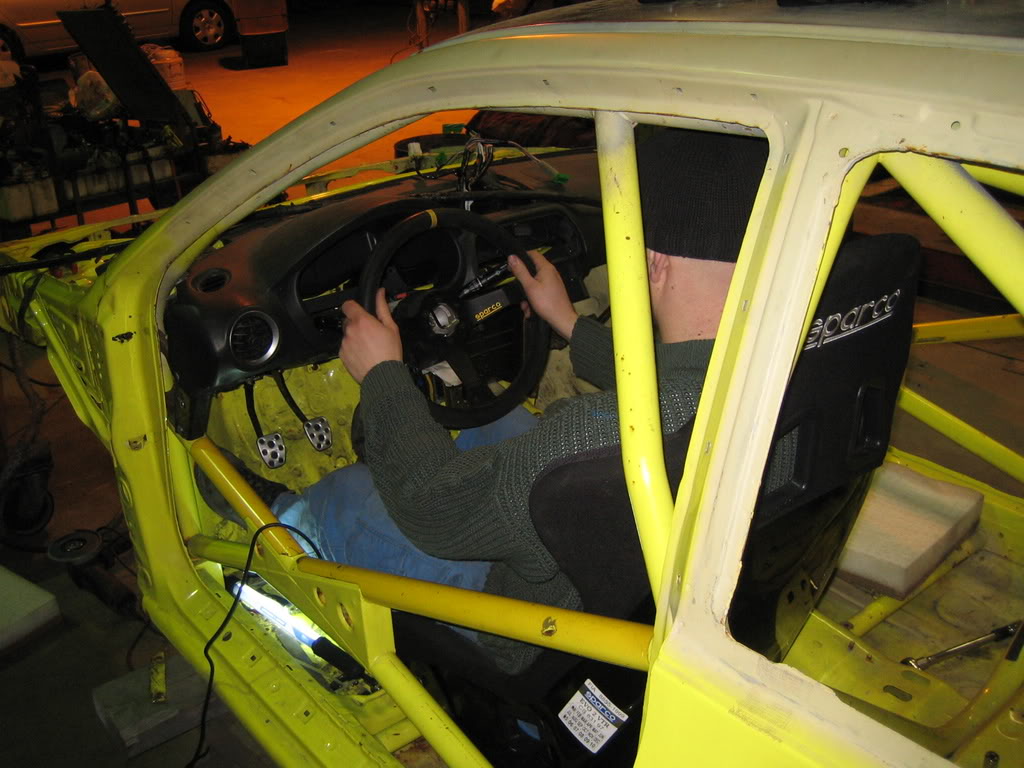
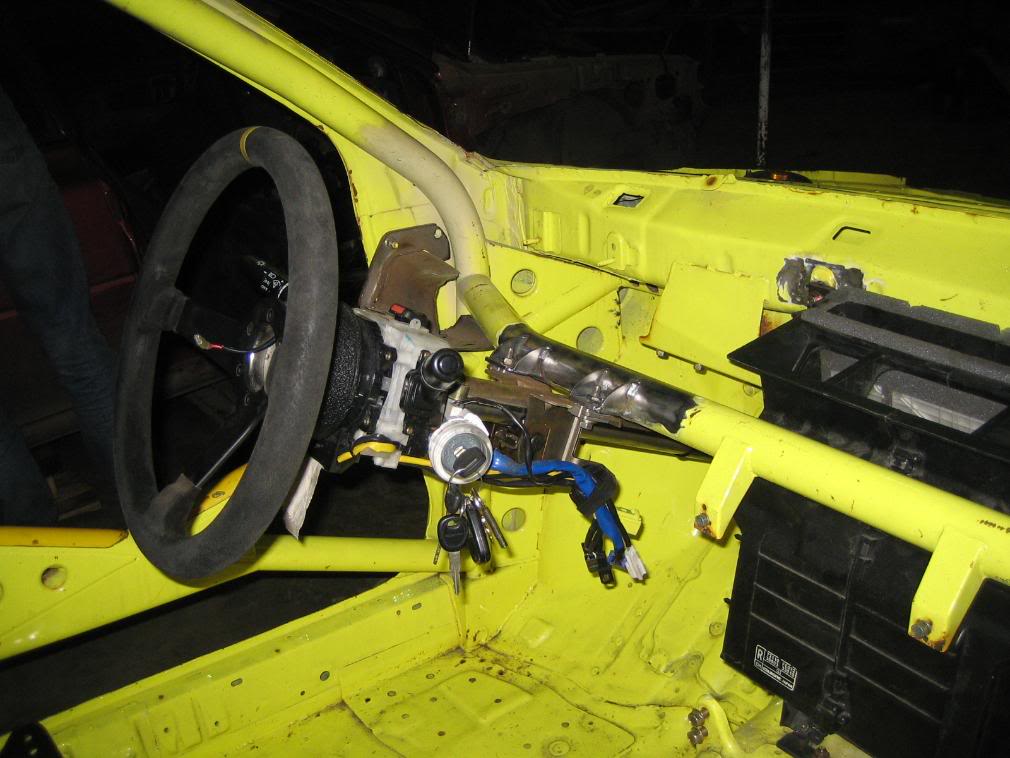
Testing:
Test positioning from the driver view:
Finaly on it's final resting place:
Cardboard design, this will be lasered from metal sheet:

More to come.
And Shark Man, I know your pain, I had it for a long long time, this was just a stroke of luck to be honest!
--------------------
Was a busy night but for some reason it doesn't look like much was done.
Probably because most of the time was spent building the components in and out of the car.
Anyway,
I wanted to fix the other side of the steering column, for which I removed the original fixation plate.
Unfortunatly it didn't fit very well so something new had to be found.
We had a strip of metal lying about with just the right thickness and width plus on top 2 holes that the bolts fit through.
So we cut it in half and used both parts.
As said it doesn't sound like much but it was pretty much work anyhow.
Testing:
Test positioning from the driver view:
Finaly on it's final resting place
:Cardboard design, this will be lasered from metal sheet:
More to come.
 12 January 2008, 07:59 PM
#51
Scooby Regular
Thread Starter
Join Date: Dec 2002
Posts: 458
Likes: 0
Received 0 Likes
on
0 Posts
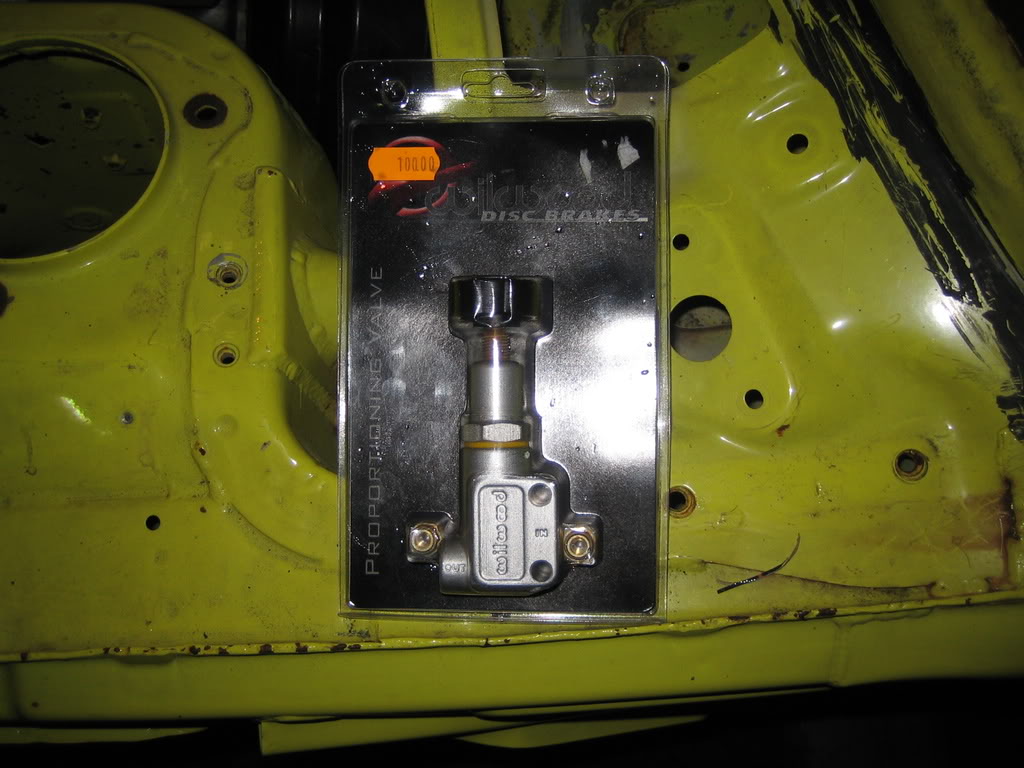
Got me a brakebalance devider:
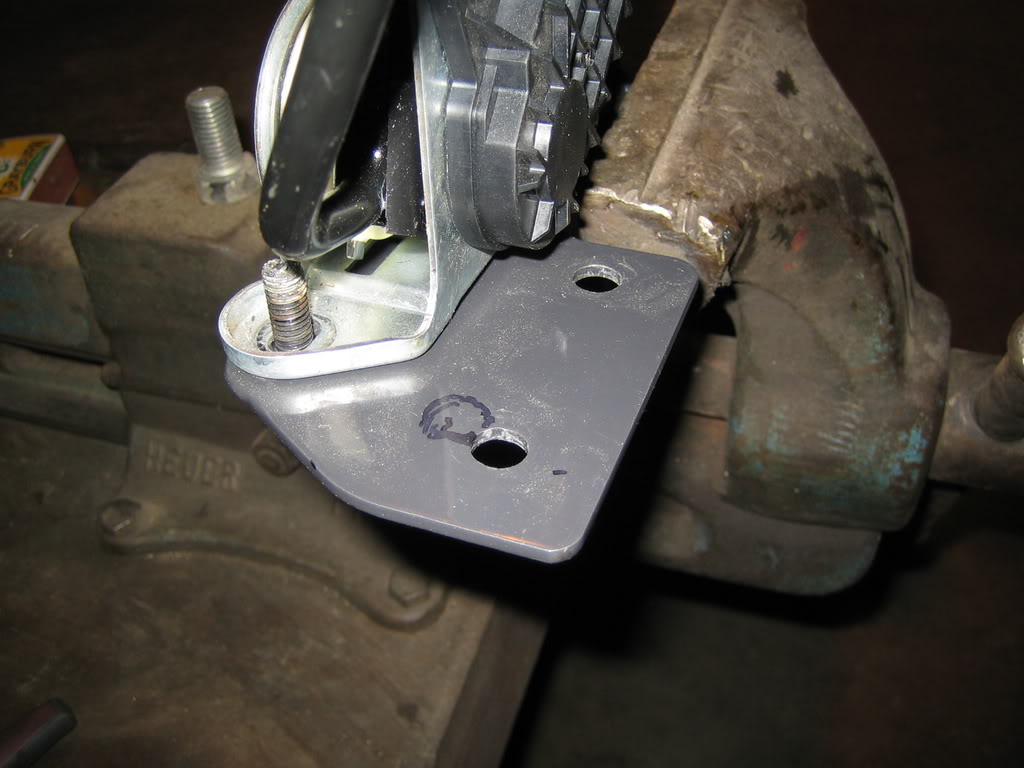
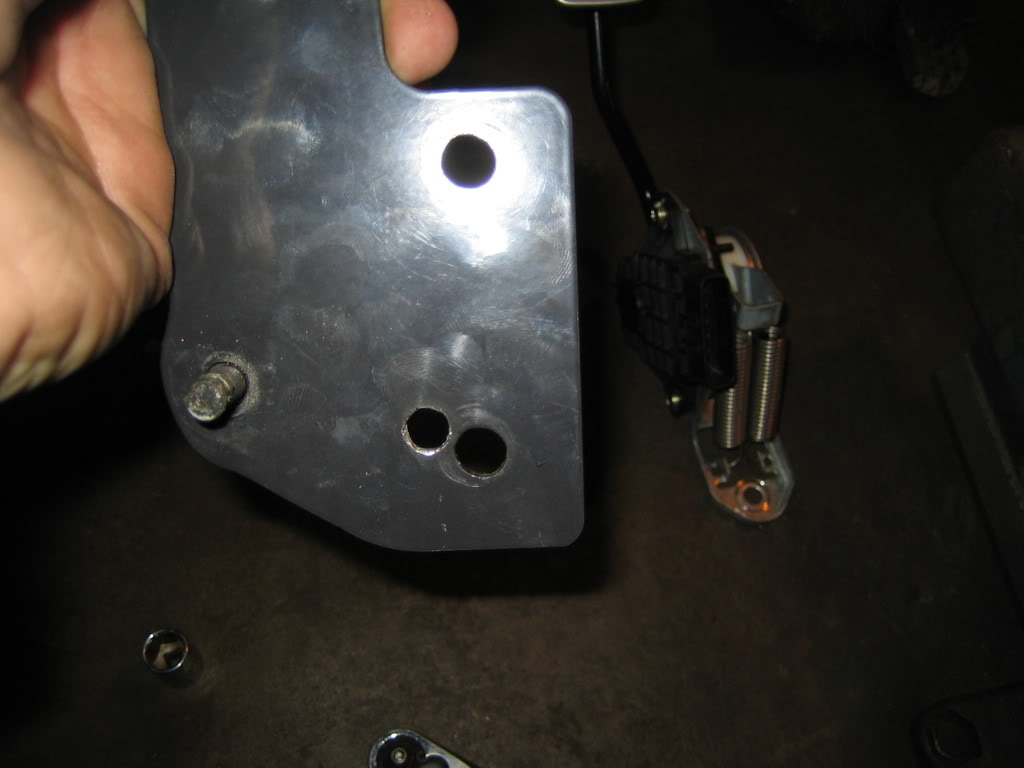
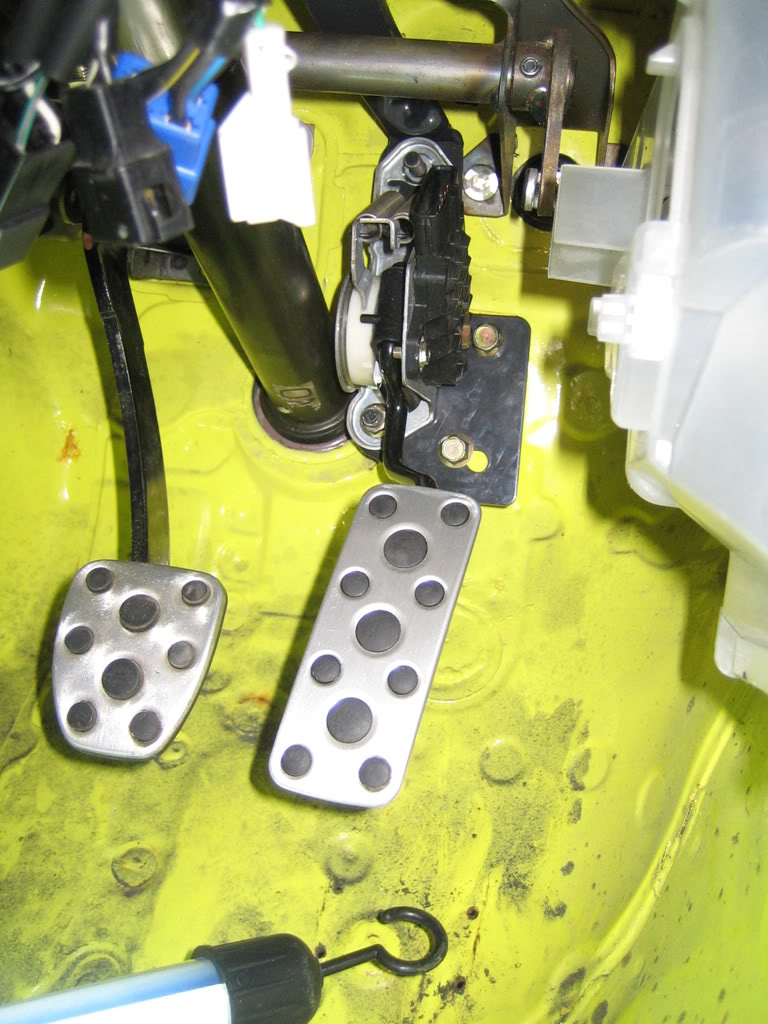
Friday I started on the throttle, the fixation points on the chassis were slightly different to the GL.
So a hole needed to be drilled and a piece of metal needed to be welded:
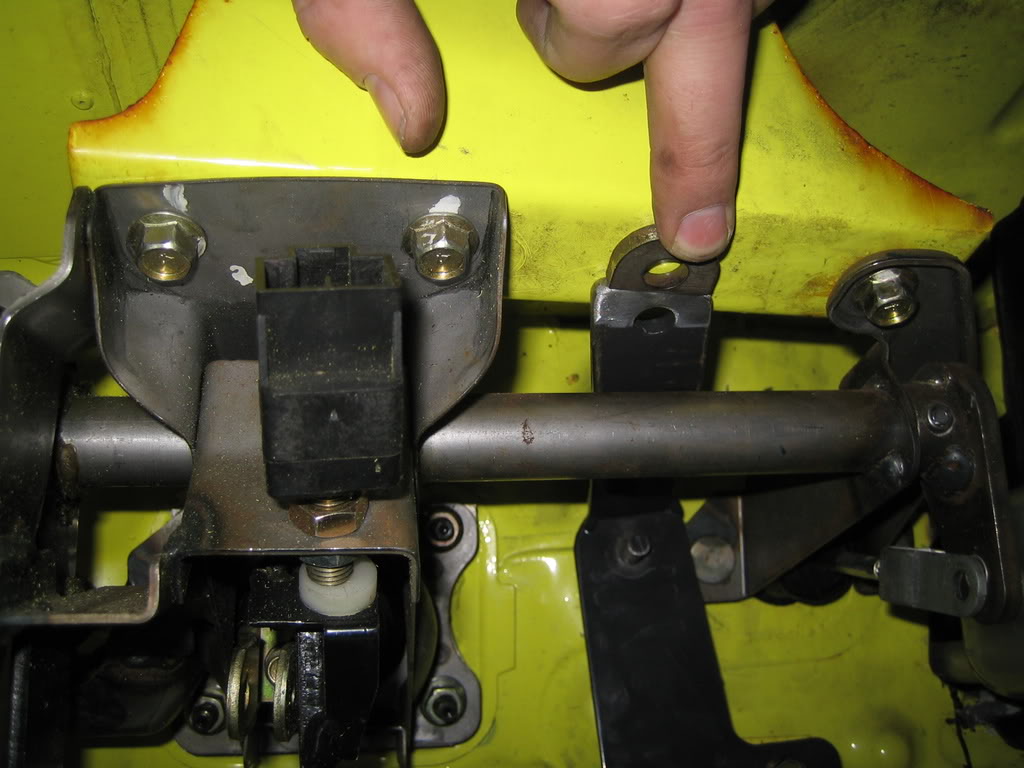
Friday I started on the throttle, the fixation points on the chassis were slightly different to the GL.
So a hole needed to be drilled and a piece of metal needed to be welded:
12 January 2008, 07:59 PM
#52
Scooby Regular
Thread Starter
Join Date: Dec 2002
Posts: 458
Likes: 0
Received 0 Likes
on
0 Posts
Then the final part of the heater, this ould fit easily I already noticed:
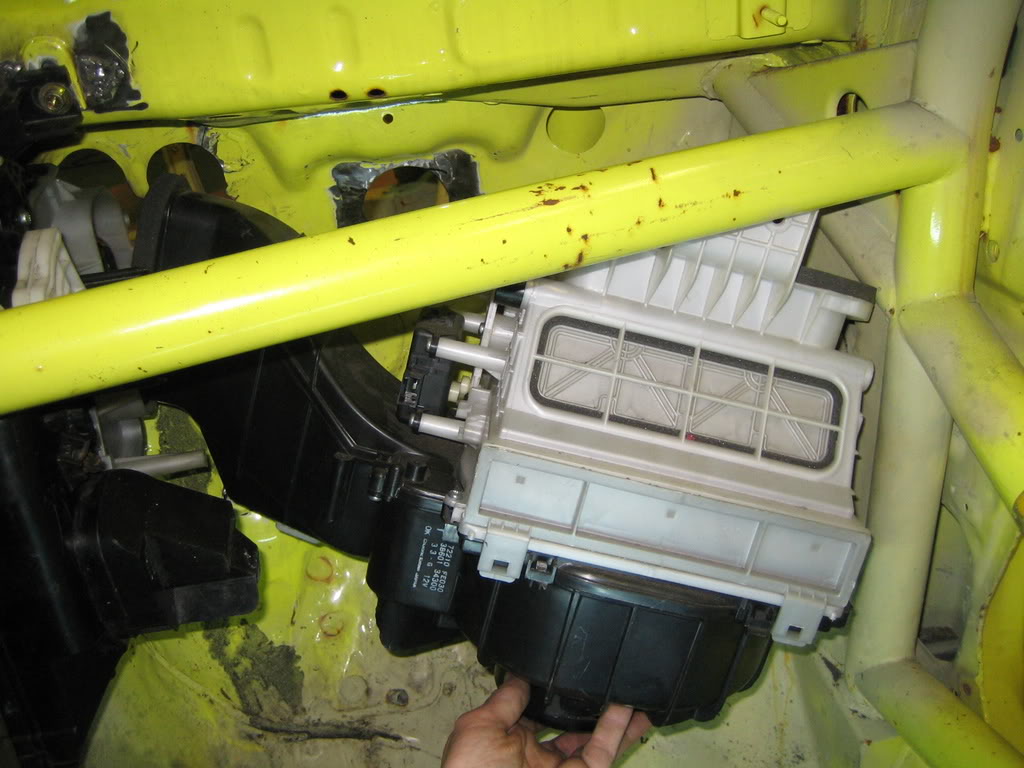
Because the cage sits in the corner the heater cannot go into it's original position so it has to move to centre of the car a bit, making it to small to fit between the cage and the other heater part.
So I cut a small part of and it fits immediatly!
Meanwhile I cut the fixationpoint and welded it into the correct place:
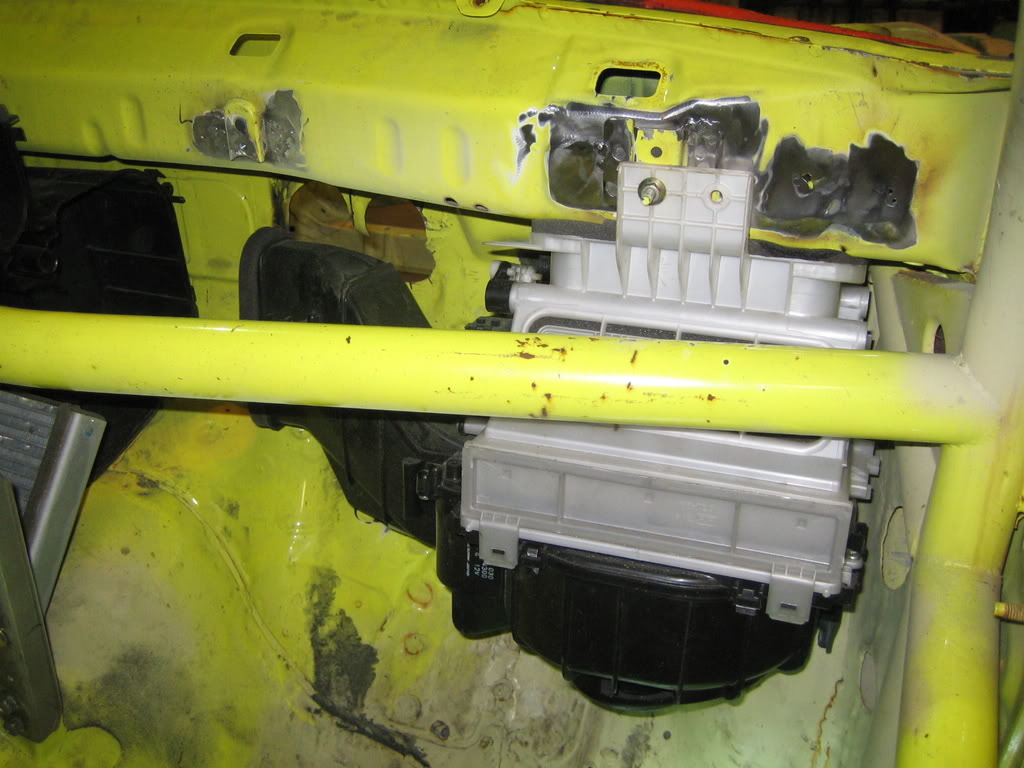
Finaly I had tap a bulge in the fender for a better fit:
It fits, Aram happy!:
Because it has moved a bit to the centre of the car I have to adjust the opening in the chassis too, that's why I made a cardboard version that can be lasered from metal later:
Because the cage sits in the corner the heater cannot go into it's original position so it has to move to centre of the car a bit, making it to small to fit between the cage and the other heater part.
So I cut a small part of and it fits immediatly!
Meanwhile I cut the fixationpoint and welded it into the correct place:
Finaly I had tap a bulge in the fender for a better fit:
It fits, Aram happy!:
Because it has moved a bit to the centre of the car I have to adjust the opening in the chassis too, that's why I made a cardboard version that can be lasered from metal later:
12 January 2008, 08:00 PM
#53
Scooby Regular
Thread Starter
Join Date: Dec 2002
Posts: 458
Likes: 0
Received 0 Likes
on
0 Posts
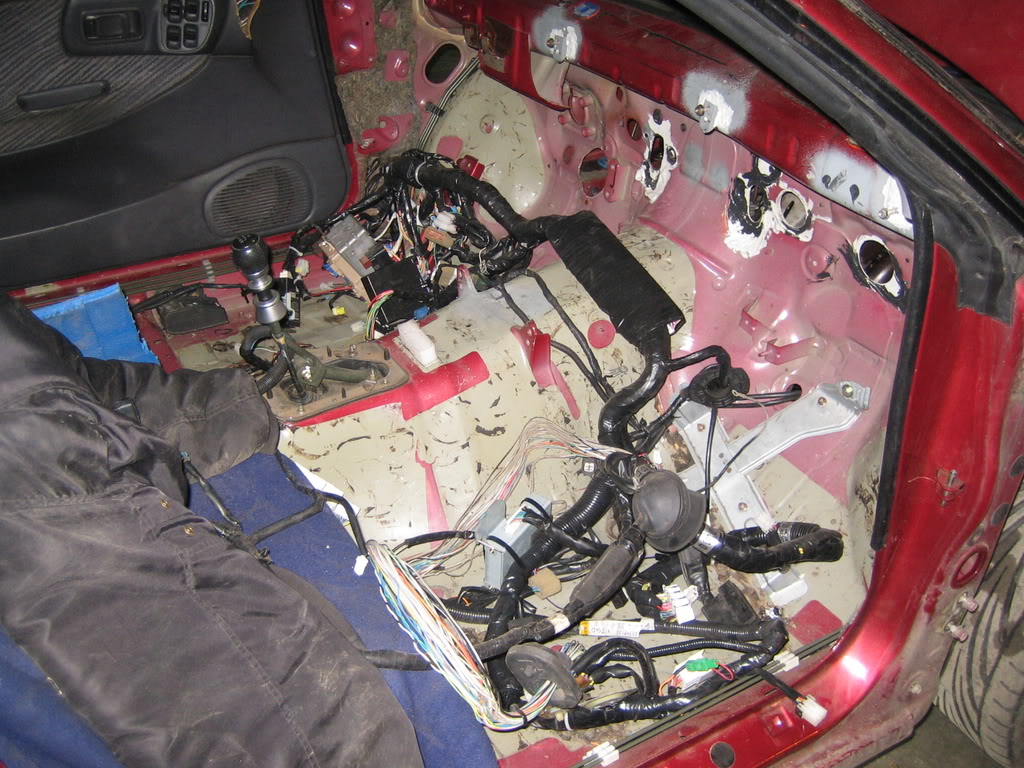
Now that most work on the dash is done, I can concentrate on the final part, the loom, after that the interior is almost done!
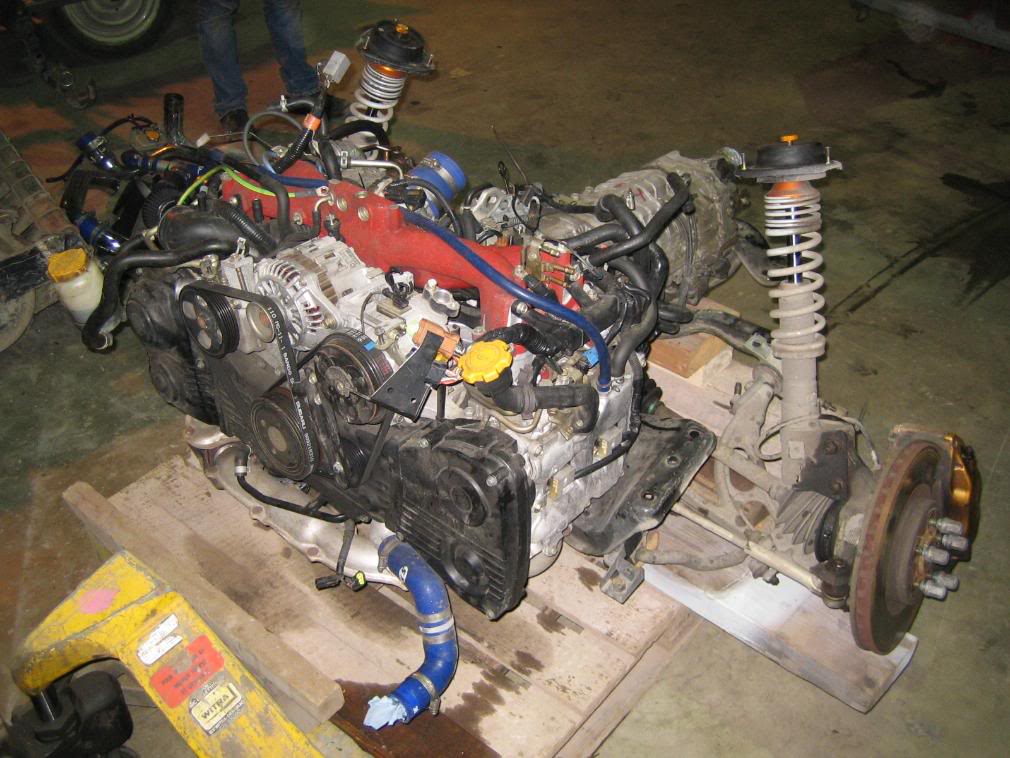
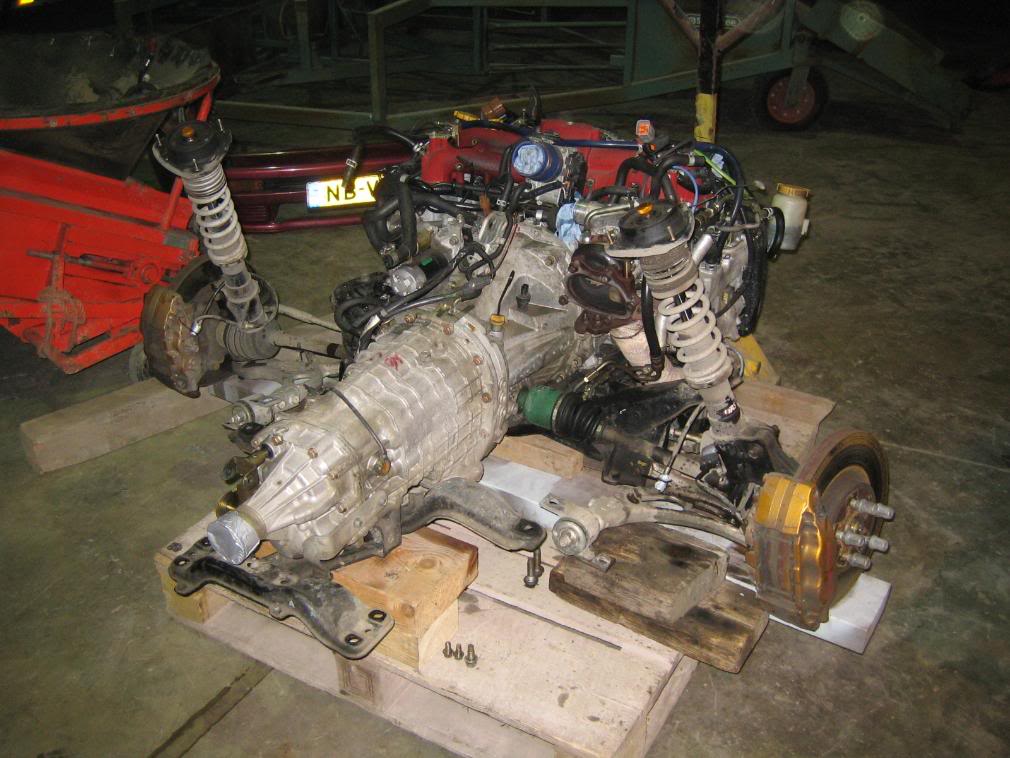
Today I started tearing the GL down a bit more, starting with the most important now, the looms:

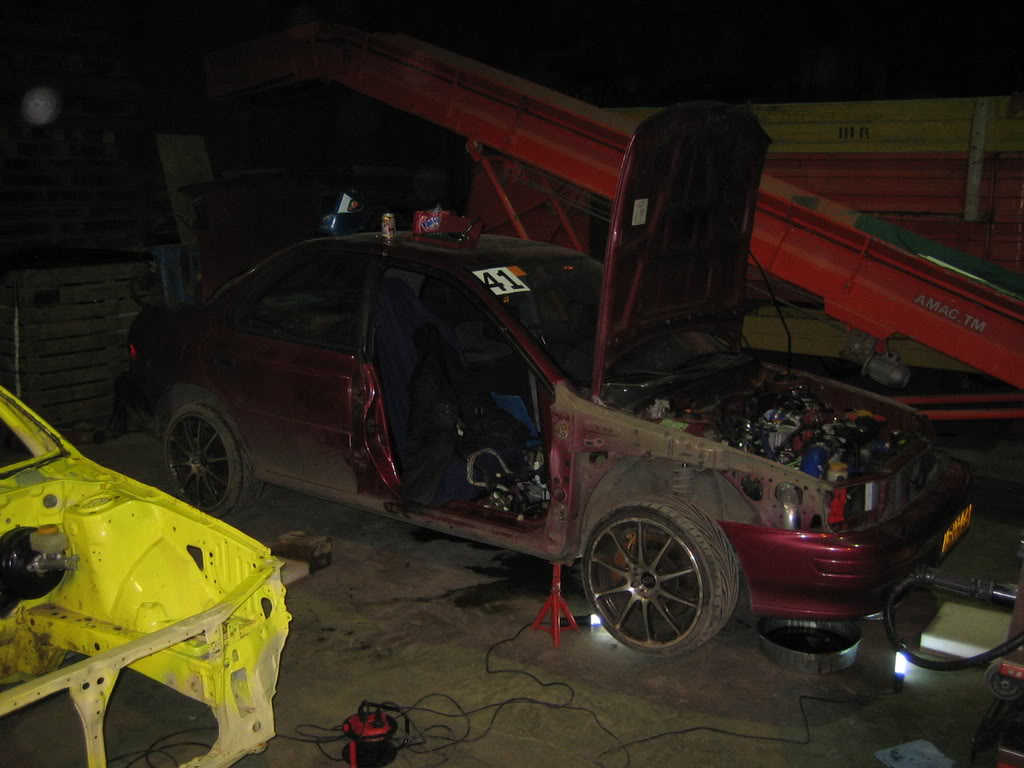
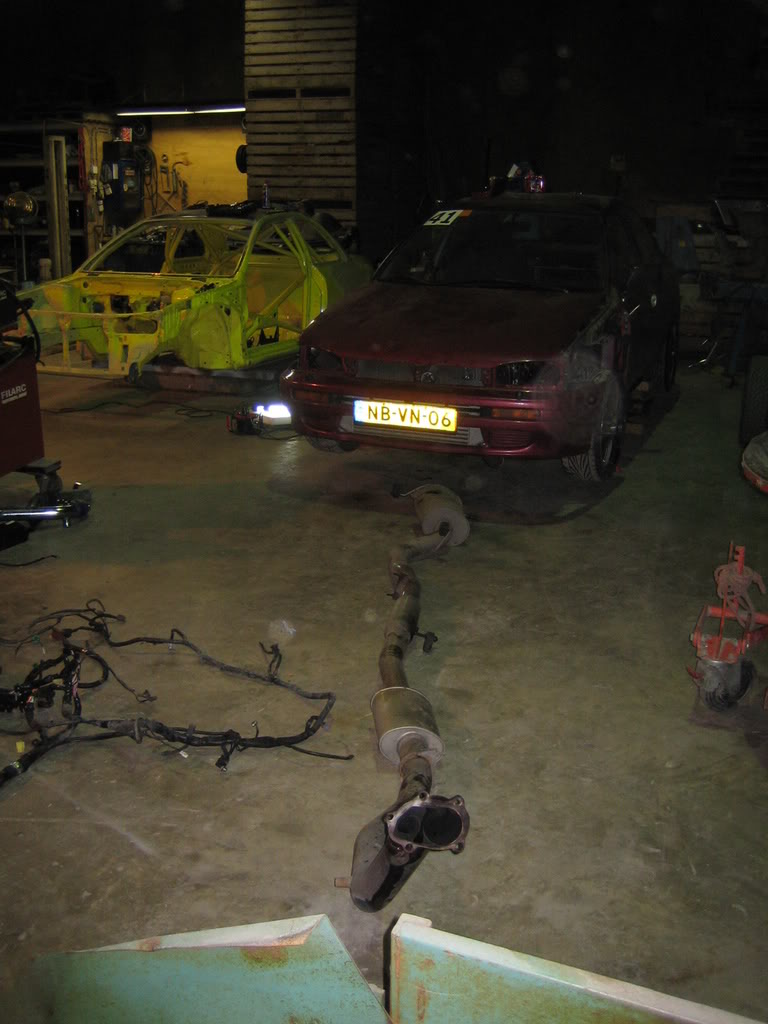
After putting the GL on a steeck, I drained the iols and removed the exhaust, next is the engine/drivetrain:
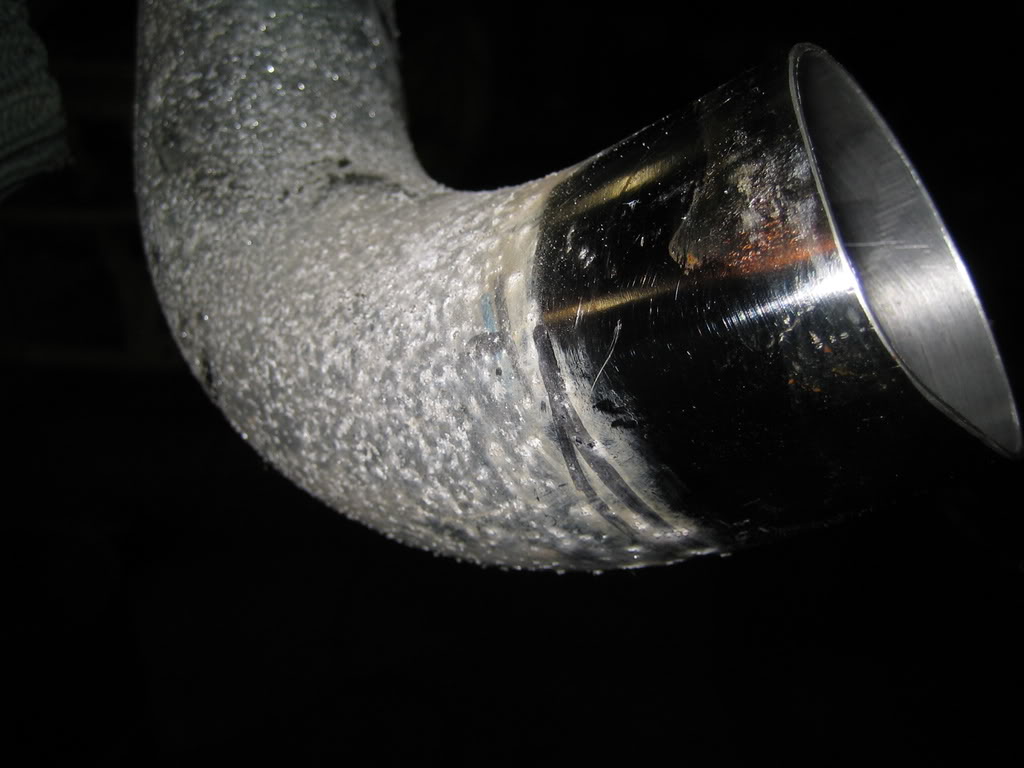
This aluminium after 2 years on a car, the smooth piece is original:
Tommorow we continue!
Today I started tearing the GL down a bit more, starting with the most important now, the looms:
After putting the GL on a steeck, I drained the iols and removed the exhaust, next is the engine/drivetrain:
This aluminium after 2 years on a car, the smooth piece is original:
Tommorow we continue!
13 January 2008, 10:21 PM
#54
Scooby Regular
Thread Starter
Join Date: Dec 2002
Posts: 458
Likes: 0
Received 0 Likes
on
0 Posts
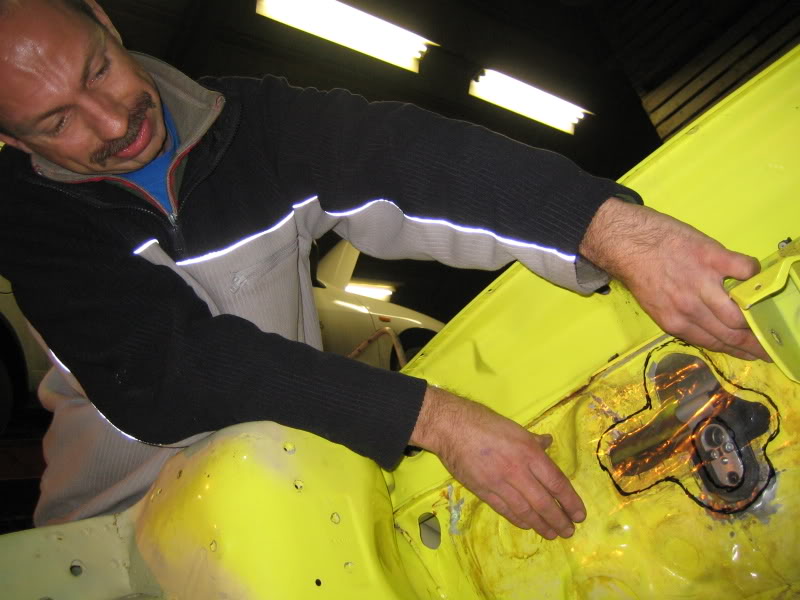
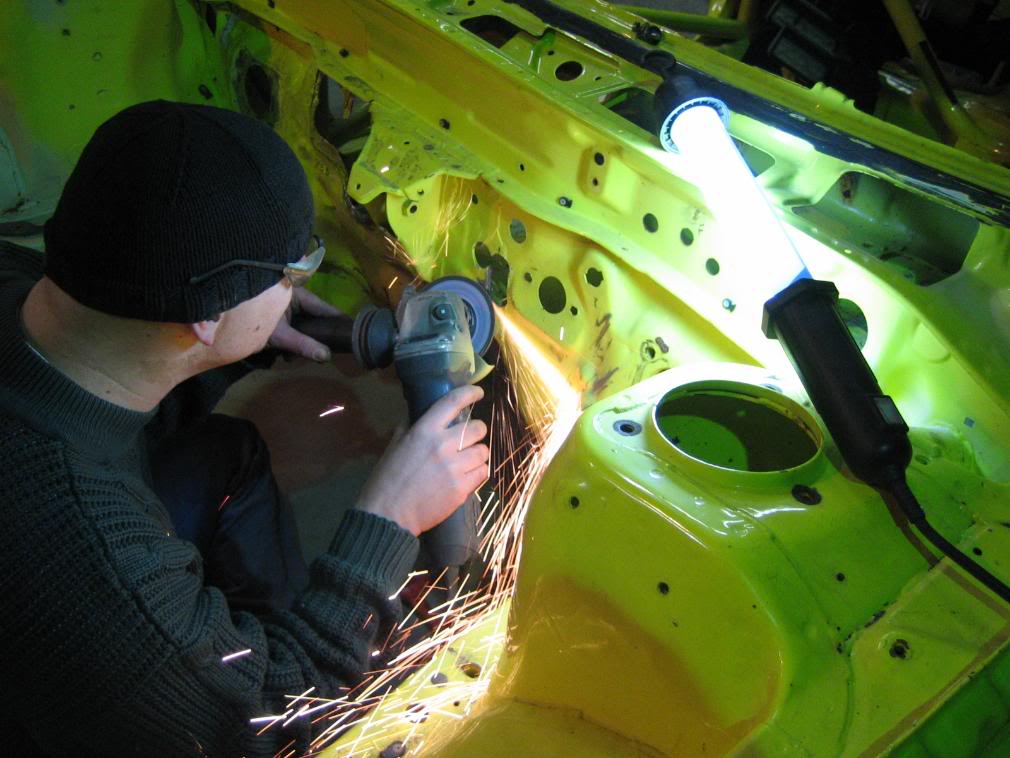
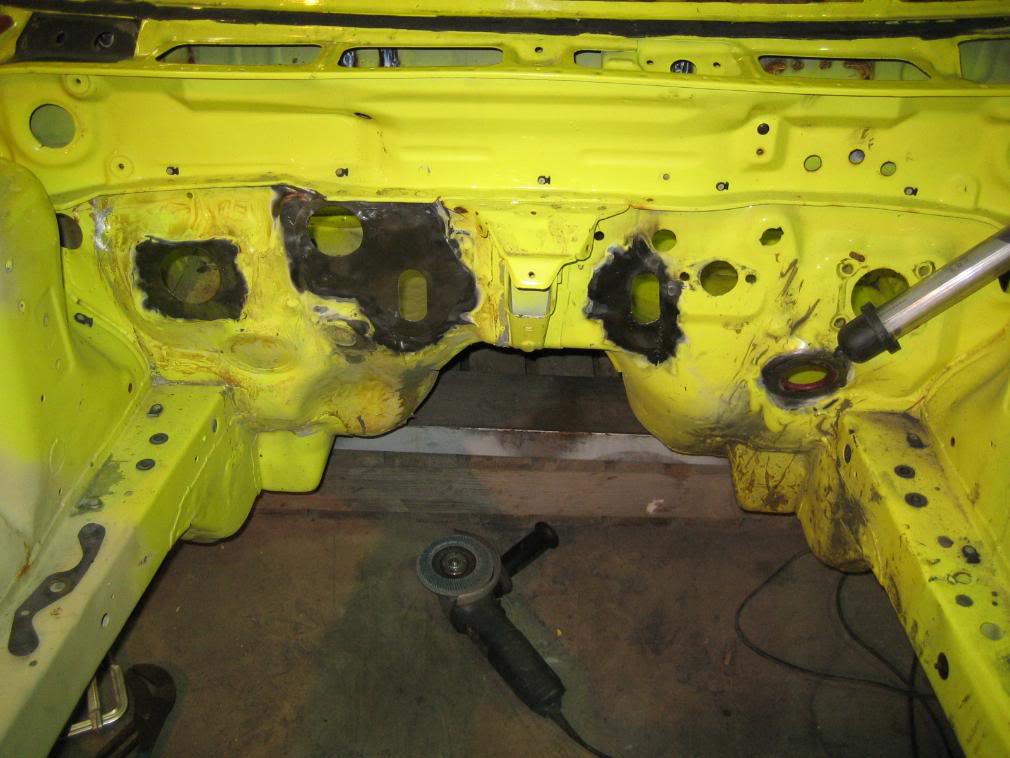
Today I started with the welding of the lasered plates on the firewall:
So that's where my money disappears....:
I could just save it and replace it by something cheaper:
So that's where my money disappears....:
I could just save it and replace it by something cheaper:
13 January 2008, 10:22 PM
#55
Scooby Regular
Thread Starter
Join Date: Dec 2002
Posts: 458
Likes: 0
Received 0 Likes
on
0 Posts
My friend Alex lasered the sharkfins I made the cardboard copy for, so we welded them in also:
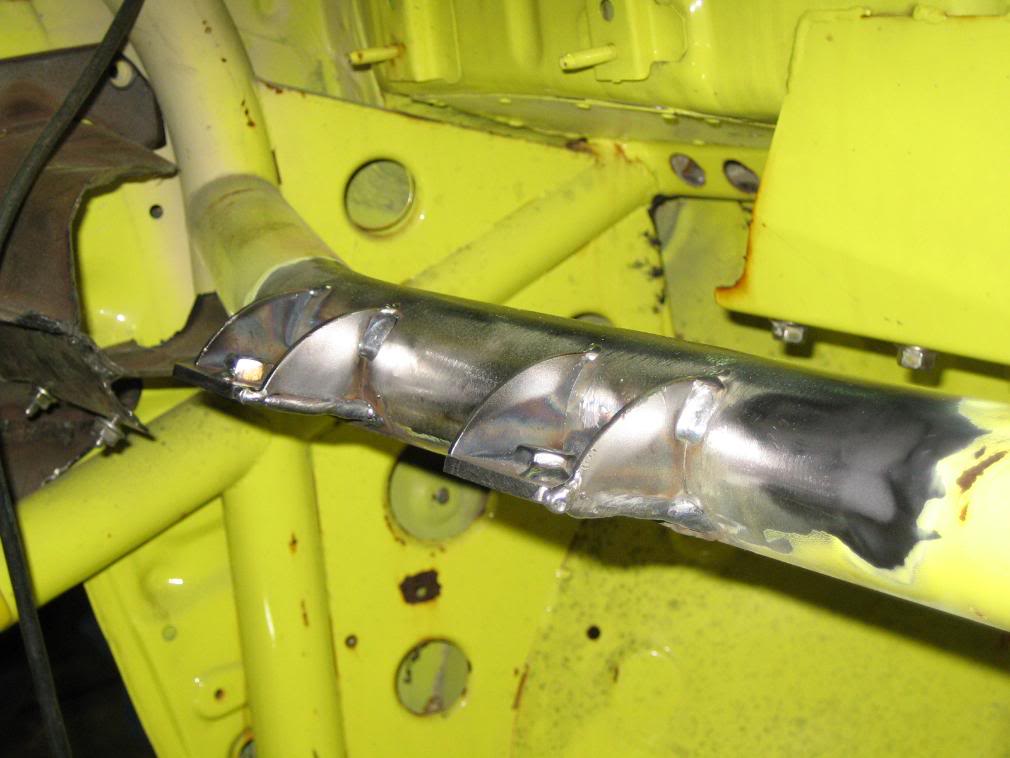
So now almost everything is colmplete concerning the firewall, just a few small things left to do.
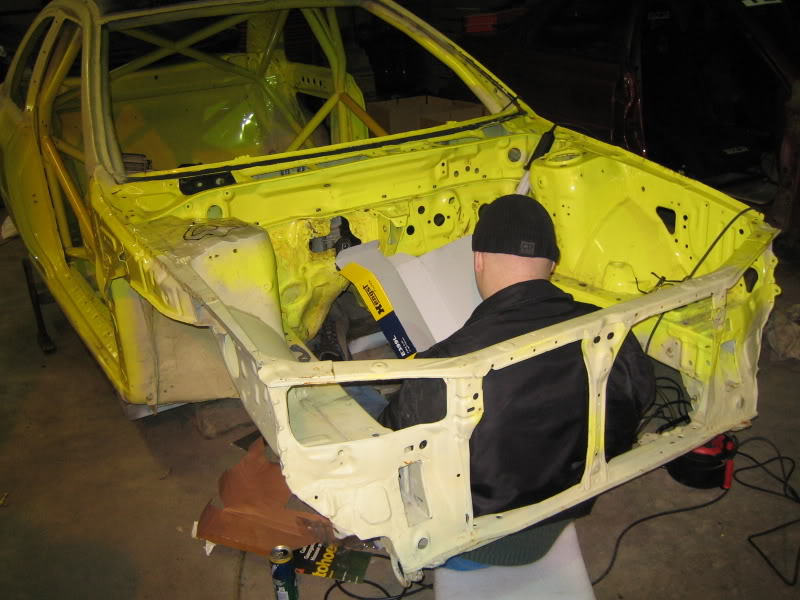
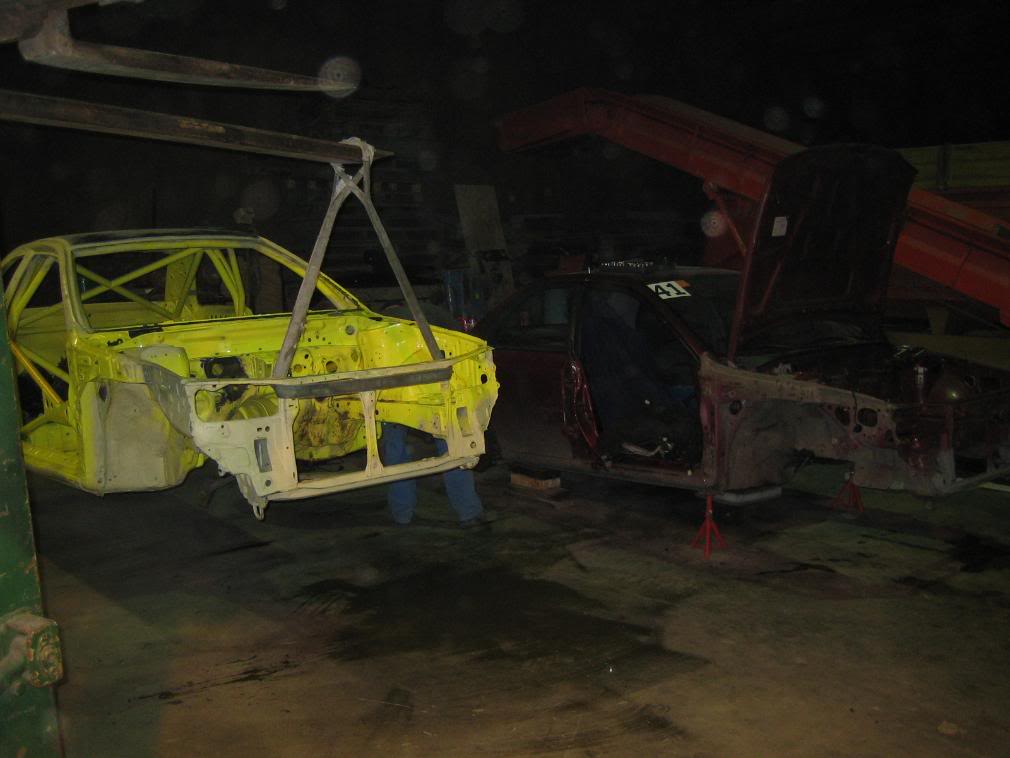
After that we started on the old car, removing the internals.
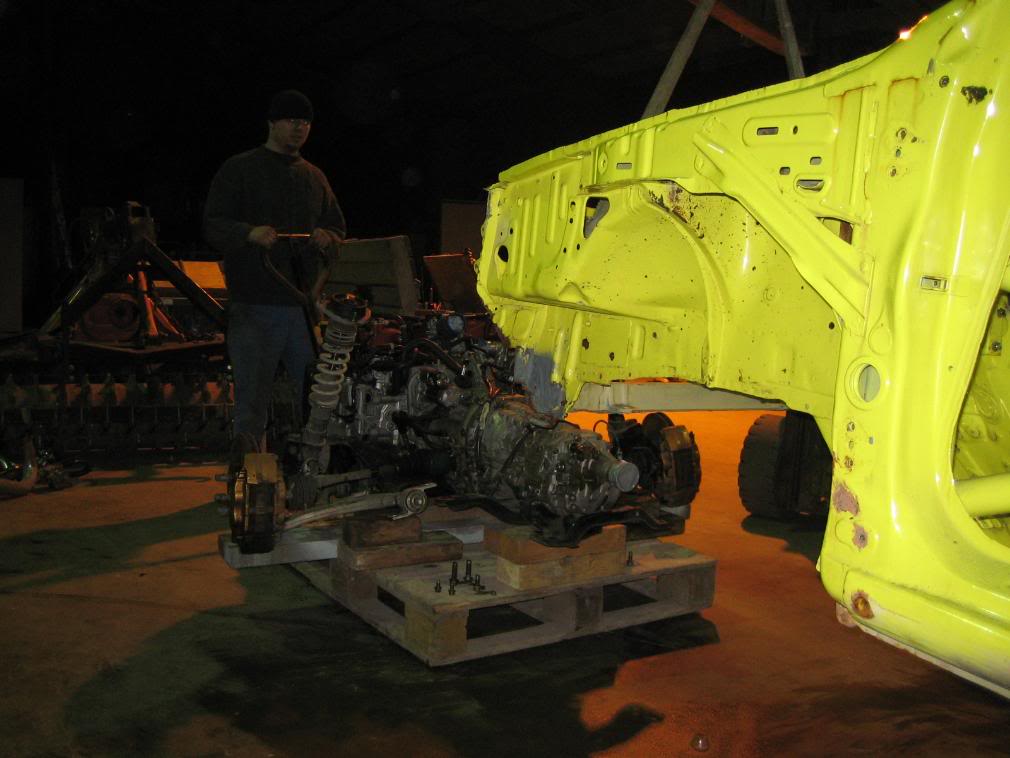
I wanted the subframe to fit into the the chassis, to see if the steering column is in the correct place.
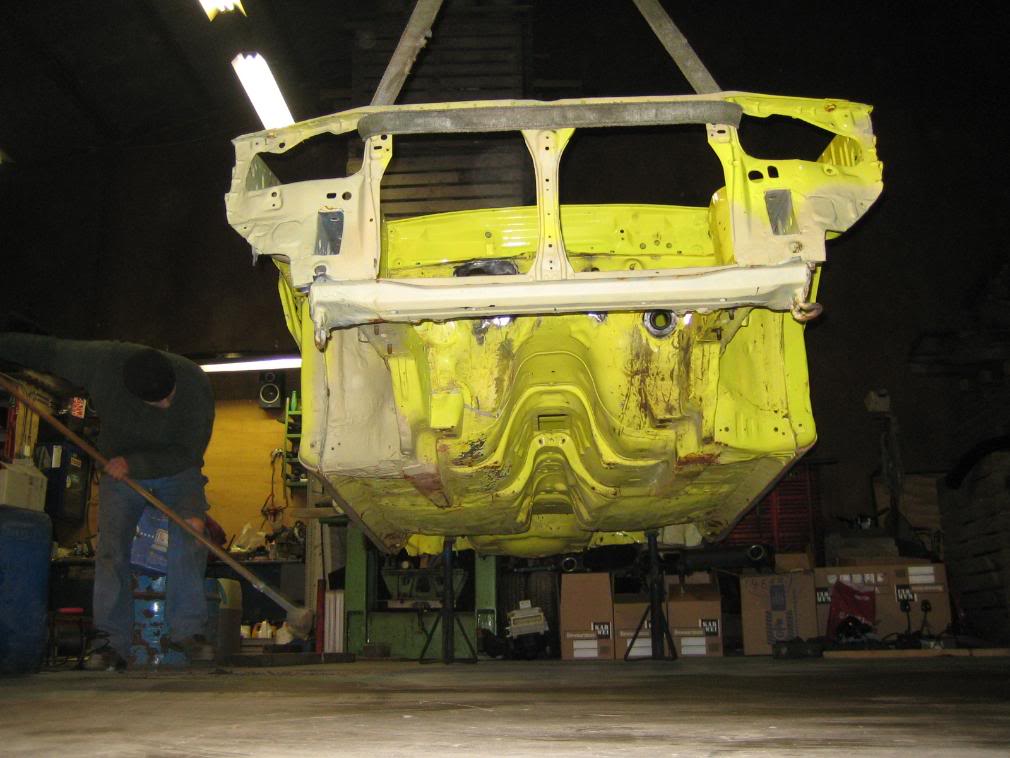
I didn't like the idea of removing all parts one by one, so I put a pallet under the engine etc. and lowered eveything on there.
After that we just lifted the body up.
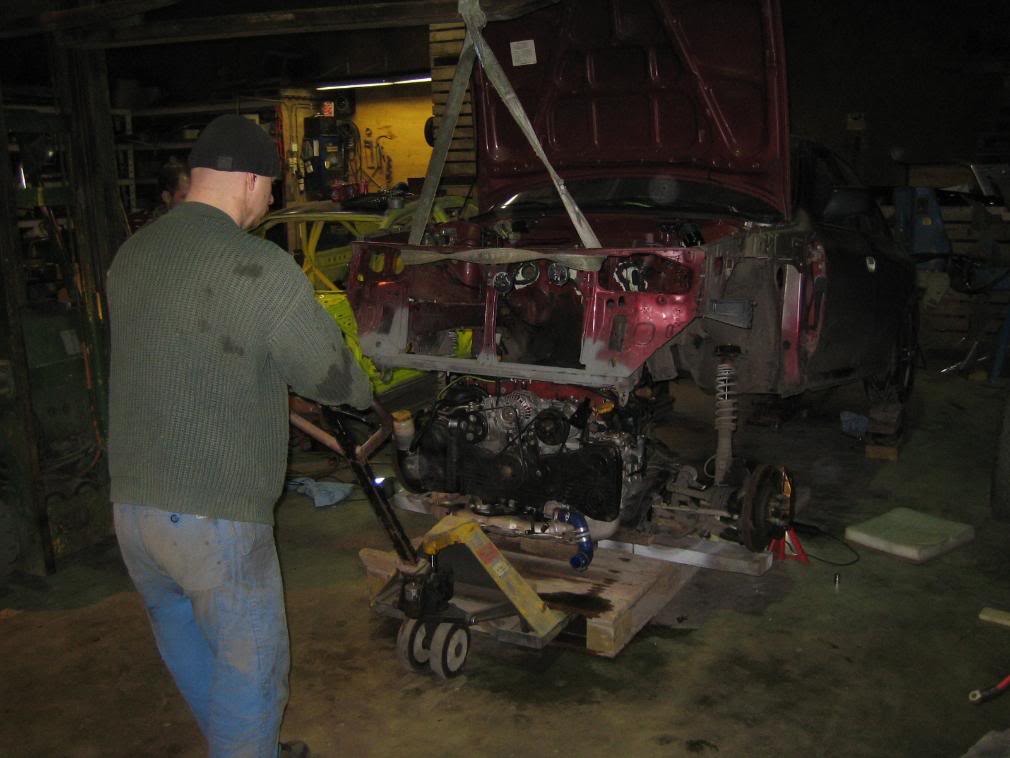

So now almost everything is colmplete concerning the firewall, just a few small things left to do.
After that we started on the old car, removing the internals.
I wanted the subframe to fit into the the chassis, to see if the steering column is in the correct place.
I didn't like the idea of removing all parts one by one, so I put a pallet under the engine etc. and lowered eveything on there.
After that we just lifted the body up.
13 January 2008, 10:23 PM
#56
Scooby Regular
Thread Starter
Join Date: Dec 2002
Posts: 458
Likes: 0
Received 0 Likes
on
0 Posts
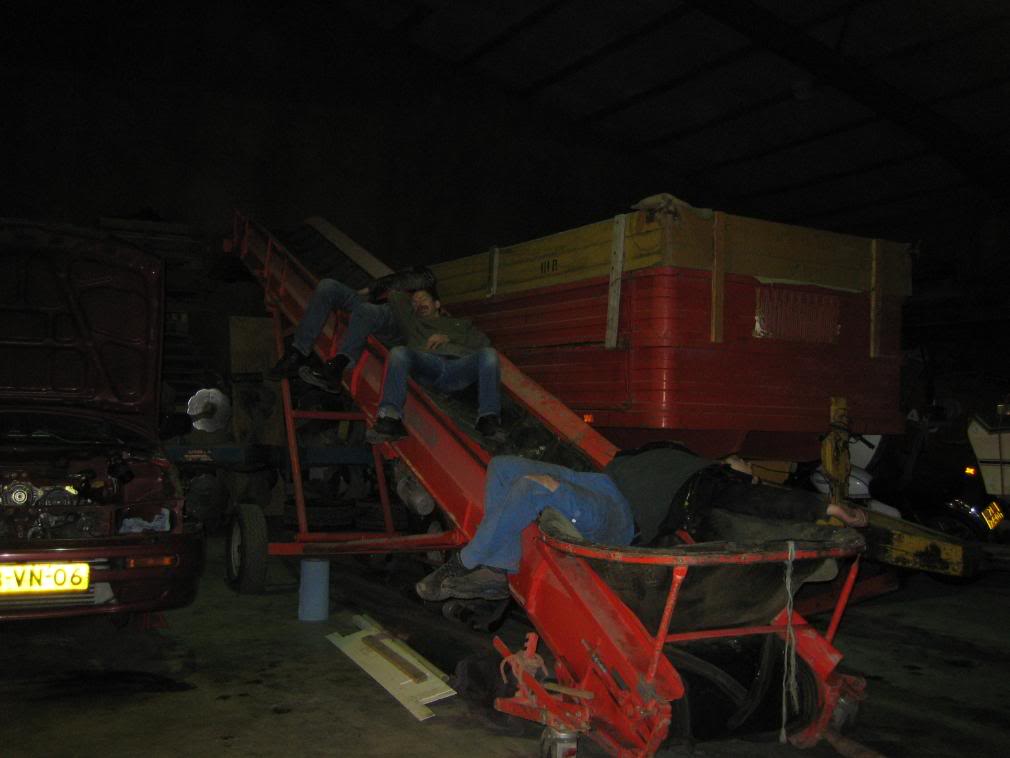
But after that much work sometimes you kinda had it:
And you start to make mistakes:
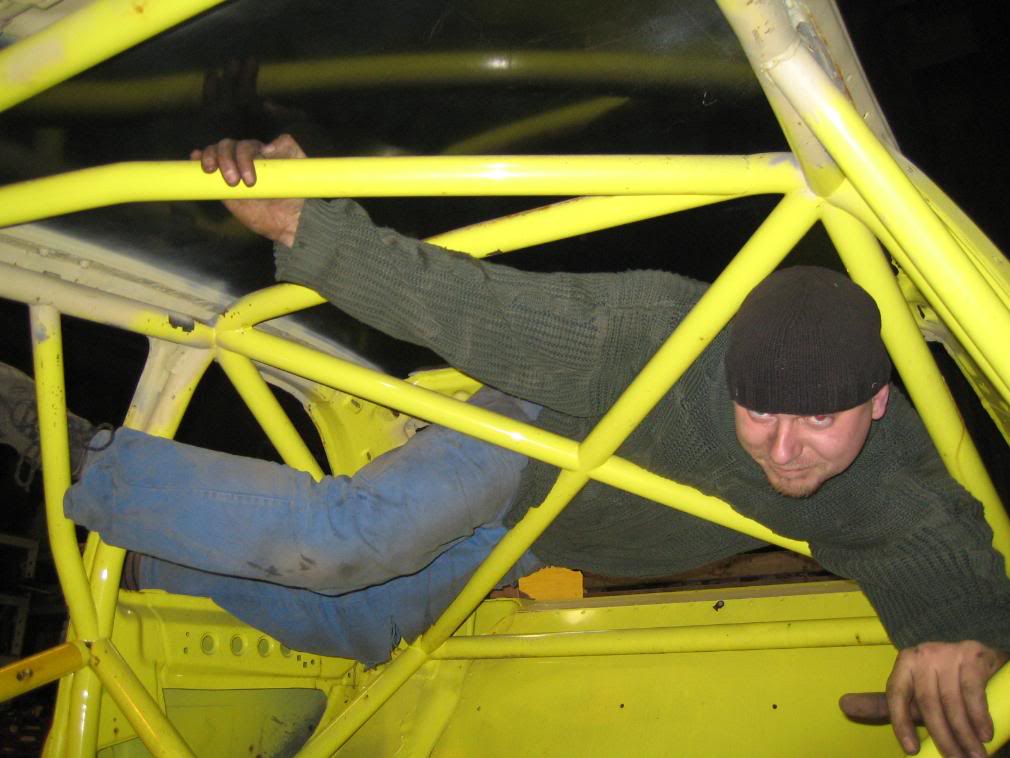
If that happens you know you gotta rest, so we did :
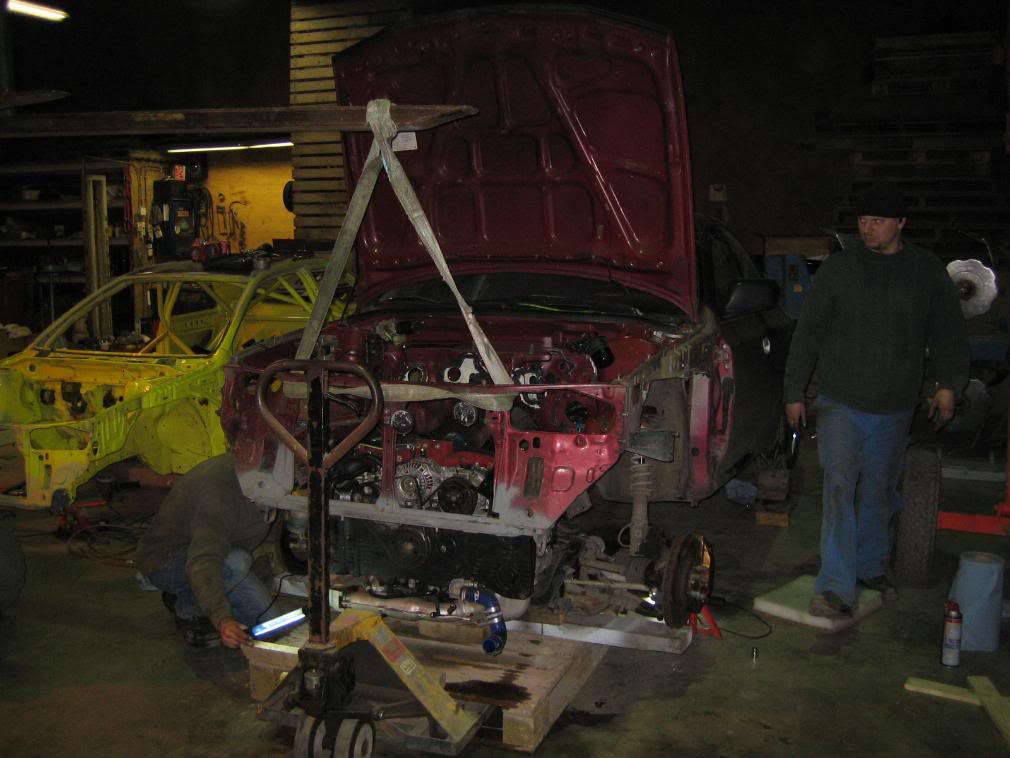
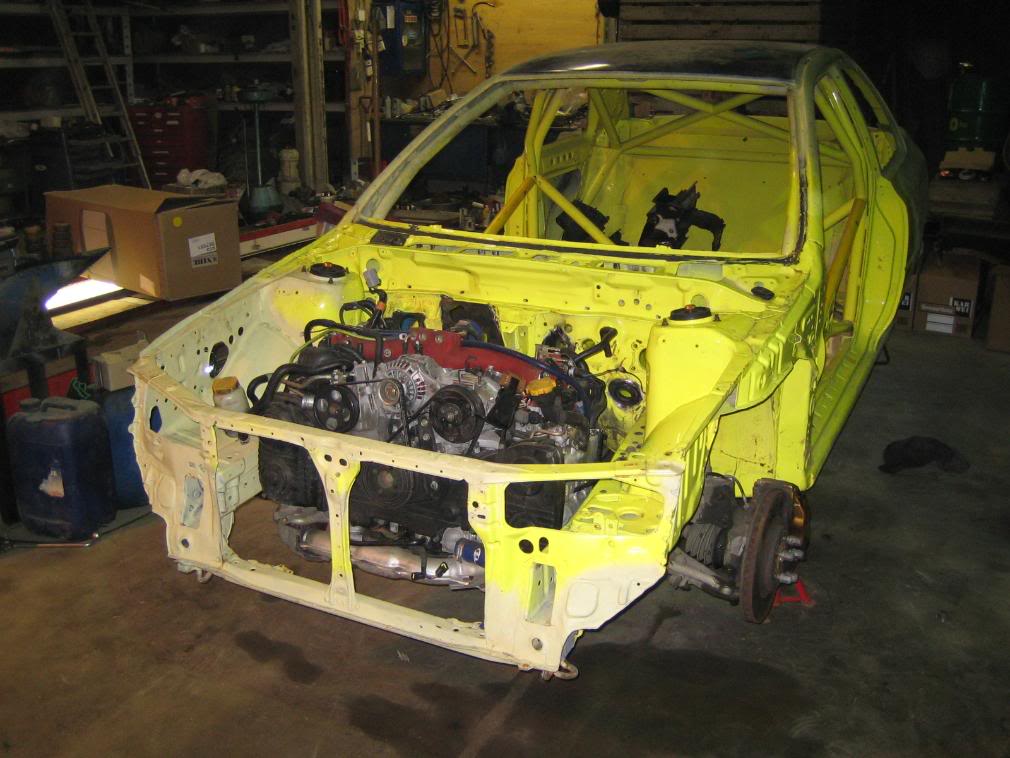
After a good nap I had decided to mount the whole thing into the new chassis, instead of just the subframe:
And you start to make mistakes:
If that happens you know you gotta rest, so we did
:After a good nap I had decided to mount the whole thing into the new chassis, instead of just the subframe:
13 January 2008, 10:23 PM
#57
Scooby Regular
Thread Starter
Join Date: Dec 2002
Posts: 458
Likes: 0
Received 0 Likes
on
0 Posts
After that I checked if the steering column was ok and put the heater back in for trial fitting:

There's a lot left to do but I'm very happy with the progress sofar, I hope we can keep up this speed.
There's a lot left to do but I'm very happy with the progress sofar, I hope we can keep up this speed.
 Impressive, what's the plan re. painting of the car? Are you going to strip it down again so u can re-paint the inside of the shell?

 i'm watching this thread with interest