
Prodrive Grp.N. chassis street build
 24 March 2008, 04:45 PM
#121
Scooby Regular
Thread Starter

Join Date: Dec 2002
Posts: 458
Likes: 0
Received 0 Likes
on
0 Posts
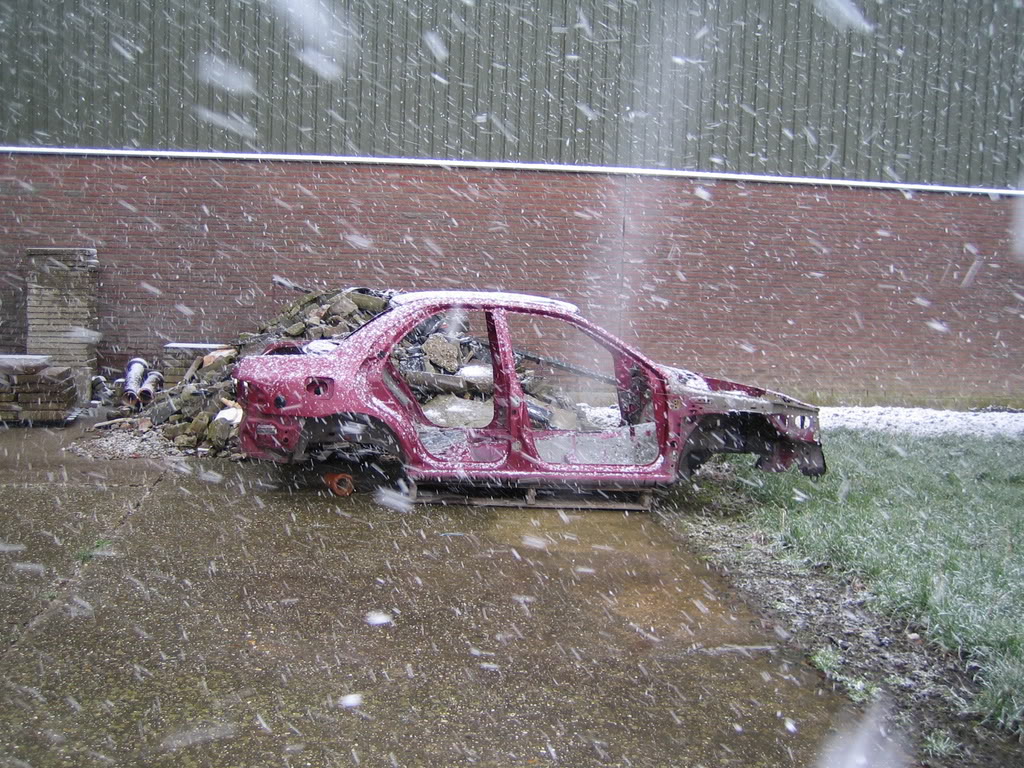
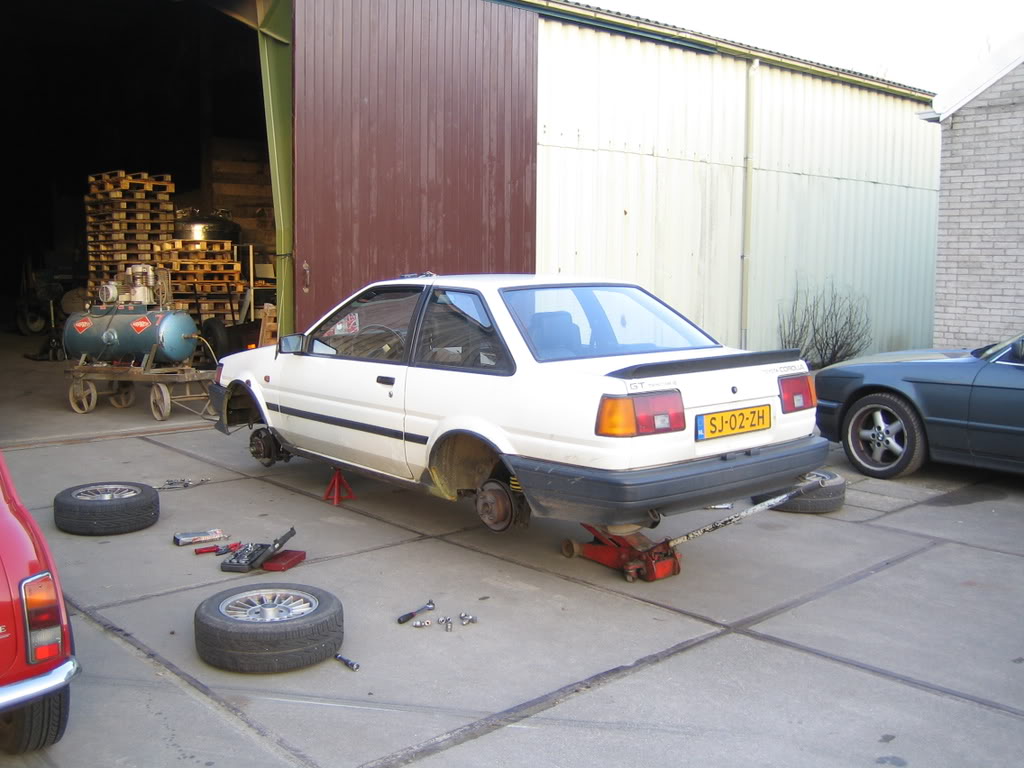
Tried to do a bit again today but with this cold it's no fun, it is easter but it's snowing here!
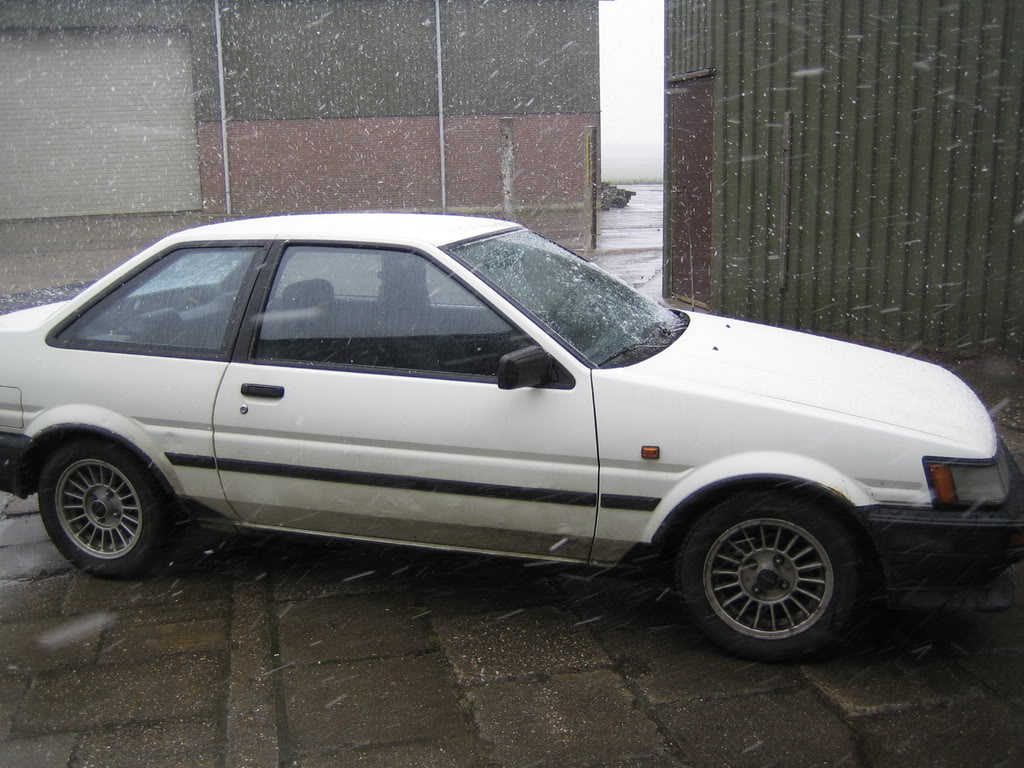
This is what it looked like, and there is no heating in the workshop.
My old red faithfull:
My current white faithfull:
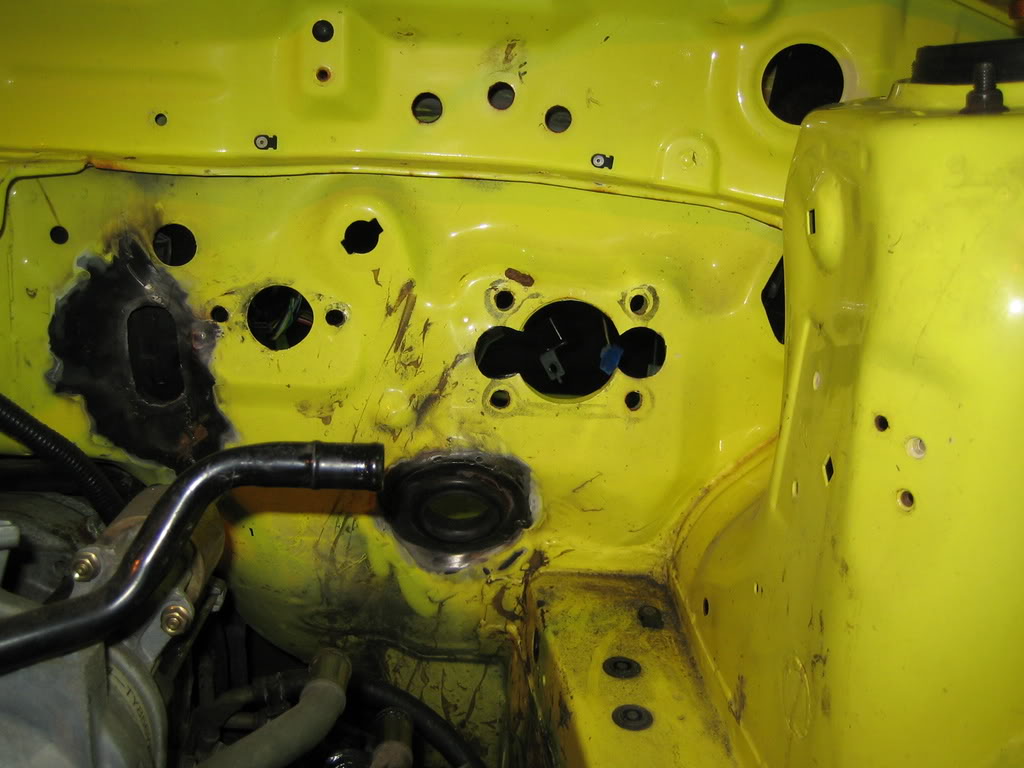
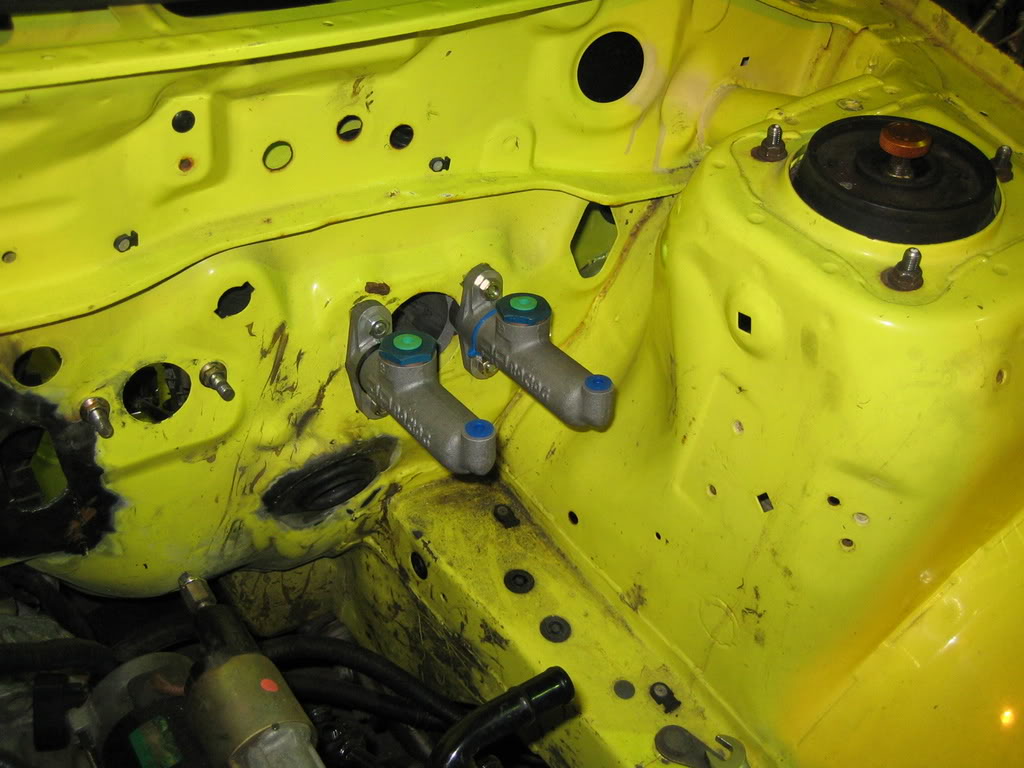
Anyway, I wanted to fix up the pedalbox and the 2 brake cilinders but it turns out the guys at Prodrive welded the attachmentplate on the firewall crooked!
Argh..., I'm not gonna accept that so I will be doing some more welding and grinding, thank god I didn't have much to do anyway....
But I can still work out the brakelines when they are a bit out of line, so no prob there.
Crooked:
Put them in anyhow:
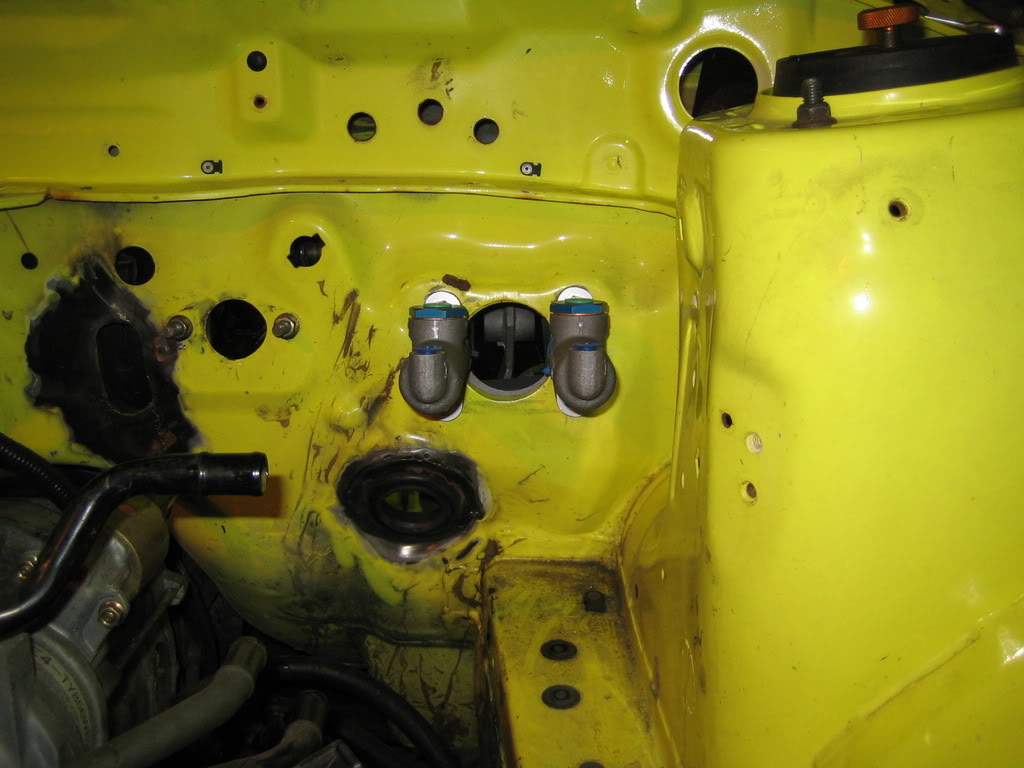
Then I let the parking brake get used to it's new habitat:

This is what it looked like, and there is no heating in the workshop.
My old red faithfull:
My current white faithfull:
Anyway, I wanted to fix up the pedalbox and the 2 brake cilinders but it turns out the guys at Prodrive welded the attachmentplate on the firewall crooked!
Argh..., I'm not gonna accept that so I will be doing some more welding and grinding, thank god I didn't have much to do anyway....
But I can still work out the brakelines when they are a bit out of line, so no prob there.
Crooked:
Put them in anyhow:
Then I let the parking brake get used to it's new habitat:
 24 March 2008, 07:59 PM
#122
Scooby Regular

Join Date: Aug 2000
Posts: 2,830
Likes: 0
Received 0 Likes
on
0 Posts
Just read through the full thread - good luck to you with the mammoth conversion - it's something not many would attempt 
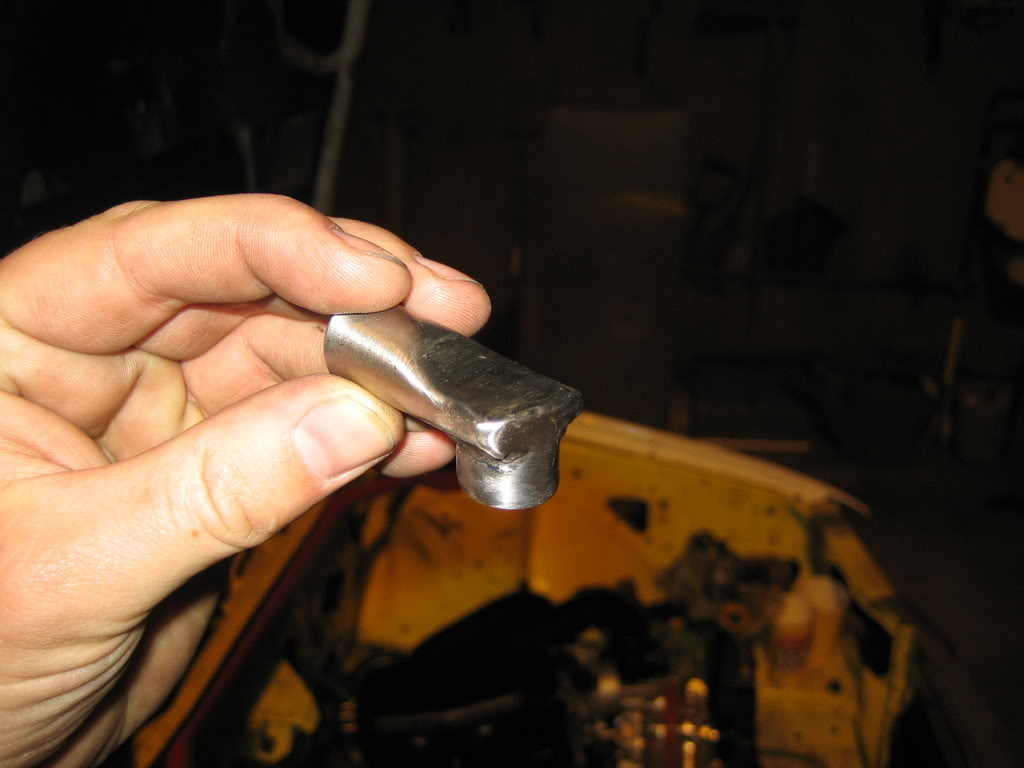
Anyway, the bit you used to fasten the two wires together a couple of pages back is called a "bootlace ferrule" and you use crimping pliers to crush them.
All the best,
Andy
Anyway, the bit you used to fasten the two wires together a couple of pages back is called a "bootlace ferrule" and you use crimping pliers to crush them.
All the best,
Andy
28 March 2008, 06:43 PM
#123
Scooby Regular
Thread Starter
Join Date: Dec 2002
Posts: 458
Likes: 0
Received 0 Likes
on
0 Posts
A bootlace ferrule, hmmmm, I'll try and remember that, thanks! 
Well, it has been a while with the updates for the hachi, I am to busy with my Impreza for now.
The things done are quite the standard upgrades I think.
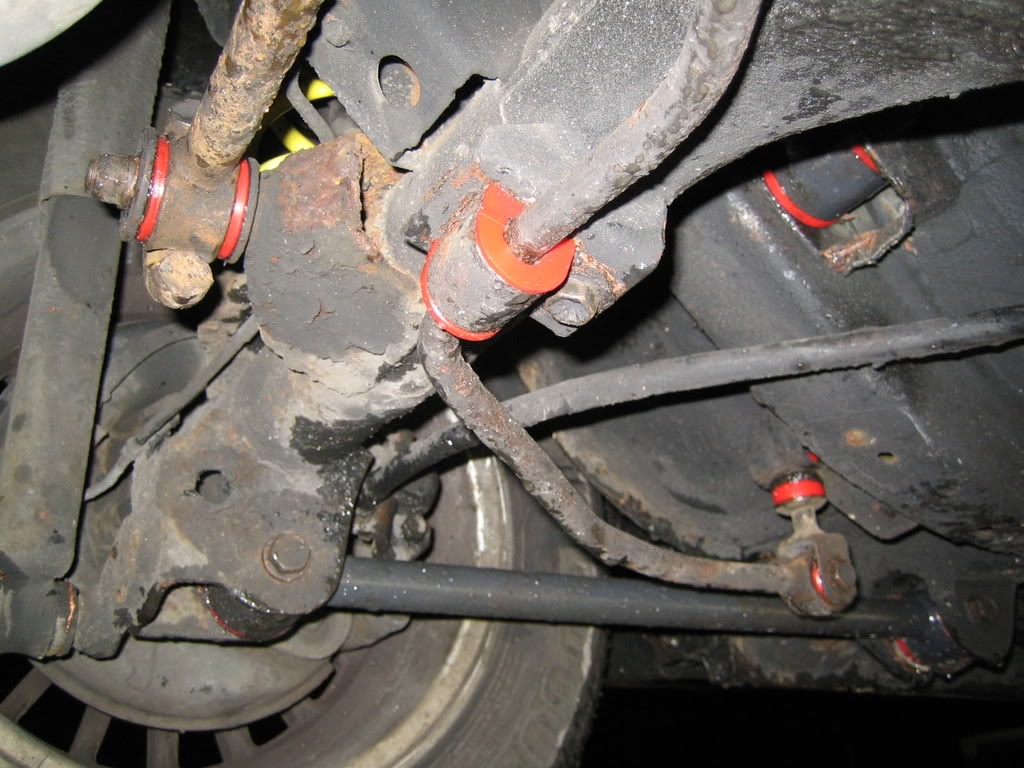
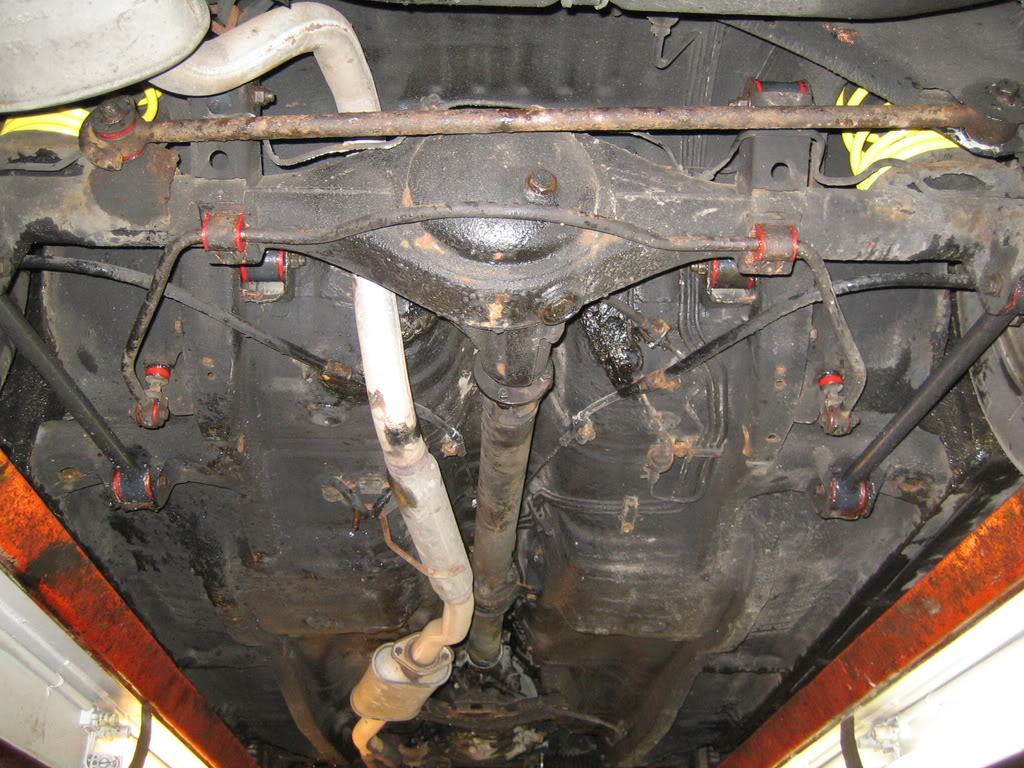
First up the bushings, this brings a big improvement for handling!
Then I did some maintenance on the engine and a change of oils everywhere.
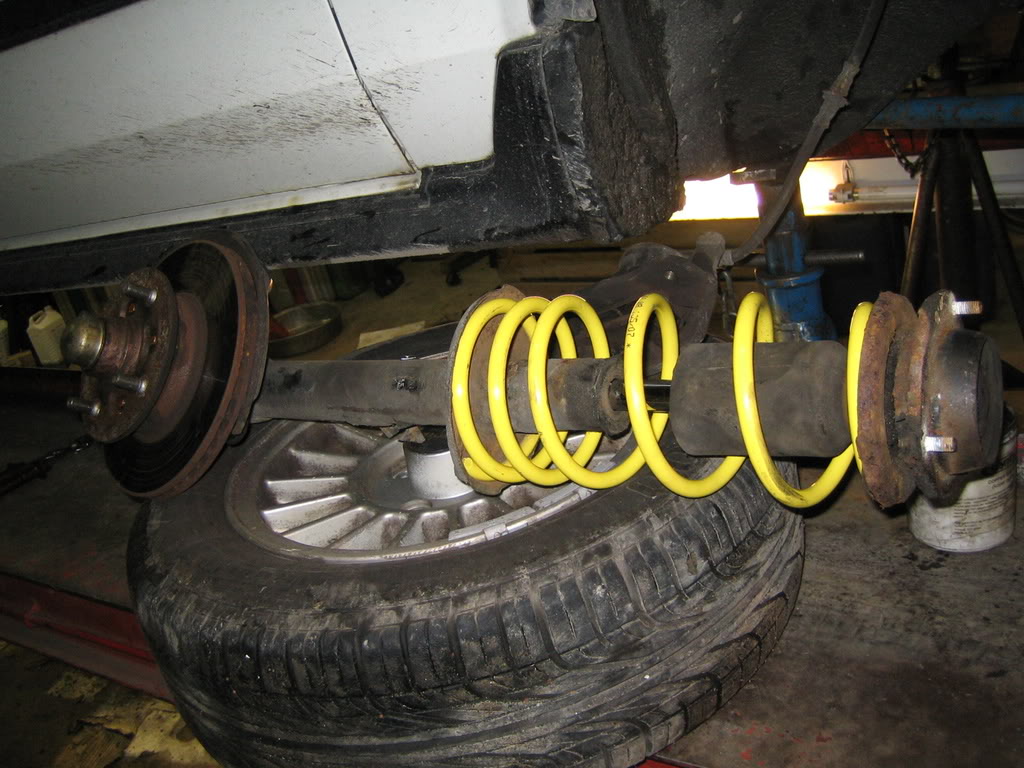
I changed the springs, but the dampers need to be changed for a better quality ride, I am not satified with the handling yet.
The brakelines were changed for stainless steel ones.
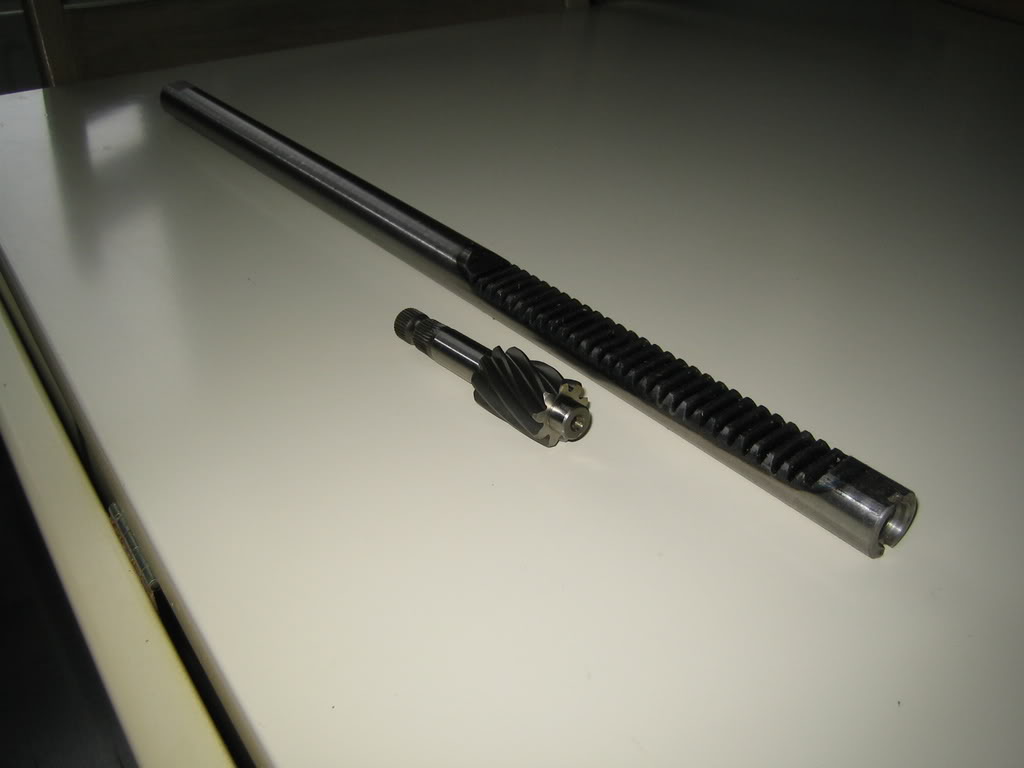
And I bought a Quaife quick rack steering upgrade through a groupbuy on club4ag, this arrived today.
Well, it has been a while with the updates for the hachi, I am to busy with my Impreza for now.
The things done are quite the standard upgrades I think.
First up the bushings, this brings a big improvement for handling!
Then I did some maintenance on the engine and a change of oils everywhere.
I changed the springs, but the dampers need to be changed for a better quality ride, I am not satified with the handling yet.
The brakelines were changed for stainless steel ones.
And I bought a Quaife quick rack steering upgrade through a groupbuy on club4ag, this arrived today.
30 March 2008, 02:01 AM
#124
Scooby Regular
Join Date: Aug 2000
Posts: 2,830
Likes: 0
Received 0 Likes
on
0 Posts
The ferrules are normally used at our place to put on the end of wires so they can be put into screwed terminals on equipment e.g. on electrical panels - it keeps all the wire strands together without having to 'tin' the ends with solder which is time consuming and probably against workplace Health & Safety guidelines if you're breathing in solder fumes a lot... ")
31 March 2008, 10:20 PM
#125
Scooby Regular
Thread Starter
Join Date: Dec 2002
Posts: 458
Likes: 0
Received 0 Likes
on
0 Posts
Yeah, that's where we use them for here also, I use them in a different way for my car though, I think they will do just fine like this.
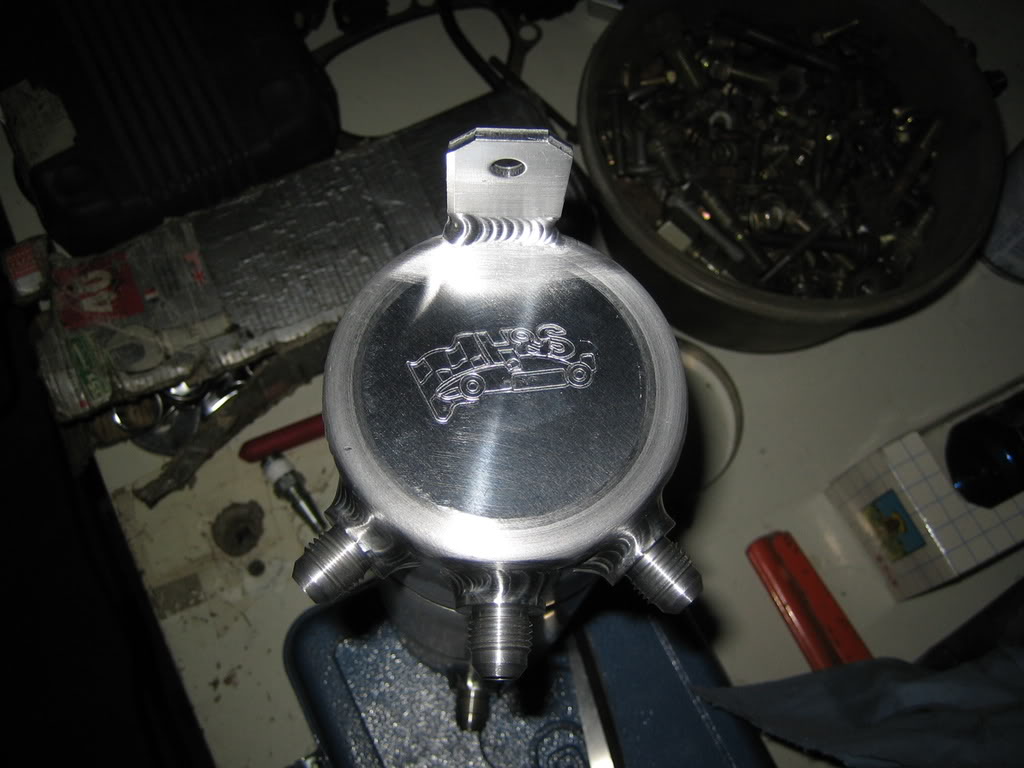
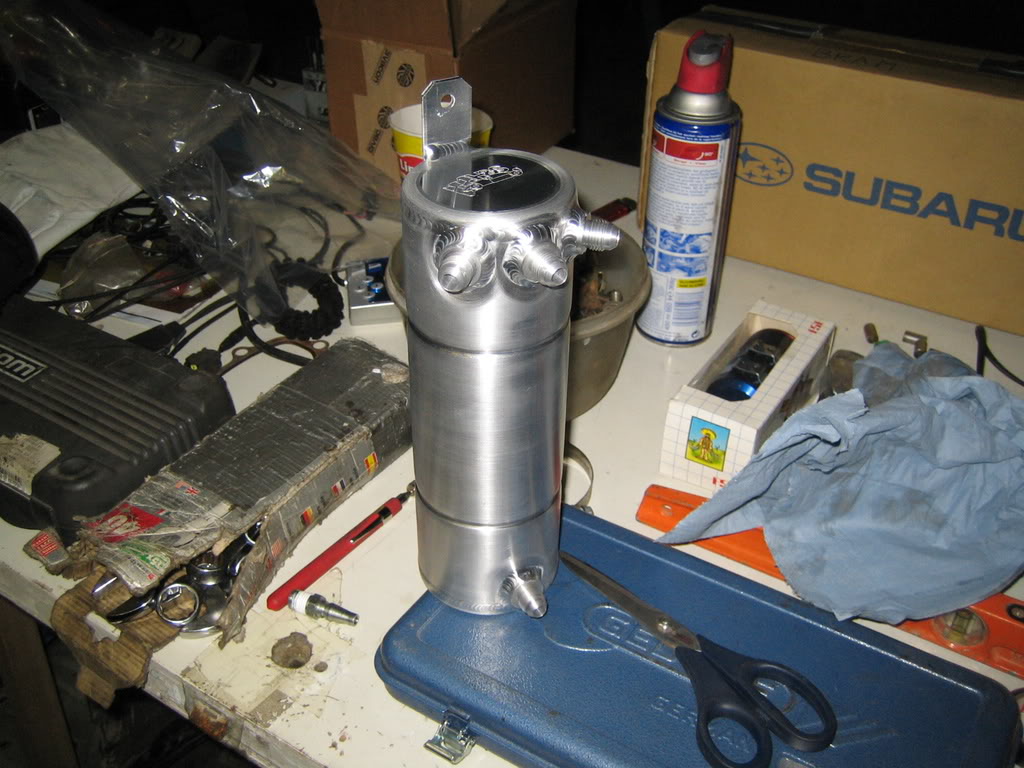
Got a whirlpot today.
It's not the one I thought it would be, I expected a ATL in somewhat bigger size.
Ohh well, if it works it works.
Got a whirlpot today.
It's not the one I thought it would be, I expected a ATL in somewhat bigger size.
Ohh well, if it works it works.
03 April 2008, 09:38 PM
#126
Scooby Regular
Thread Starter
Join Date: Dec 2002
Posts: 458
Likes: 0
Received 0 Likes
on
0 Posts
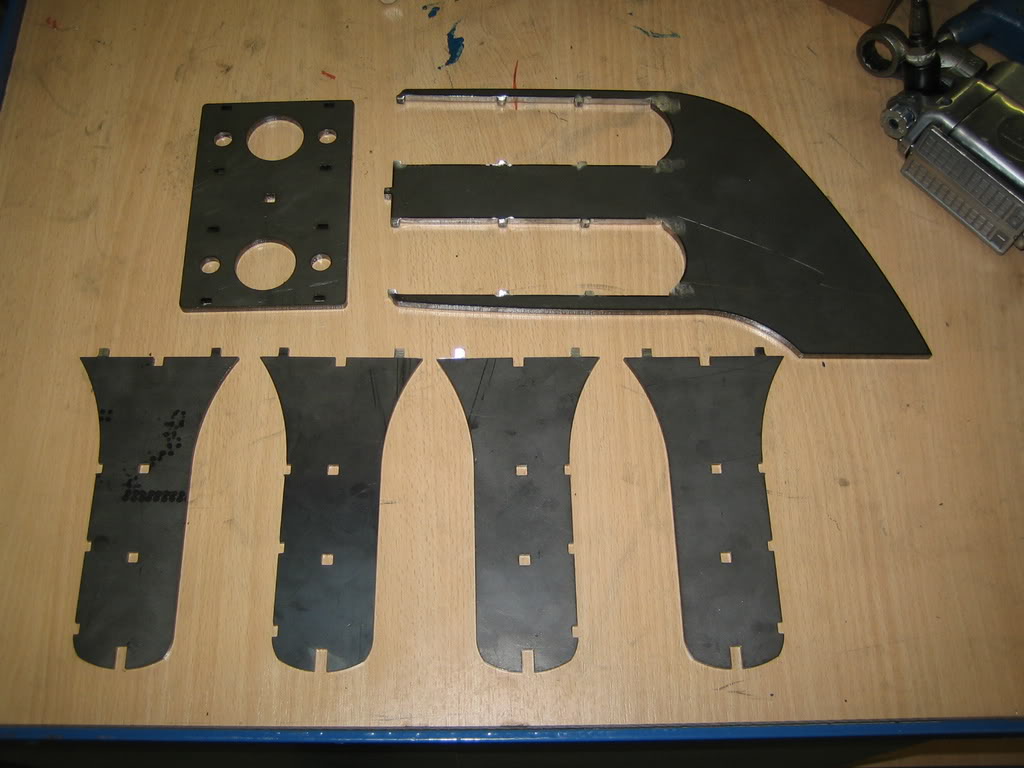
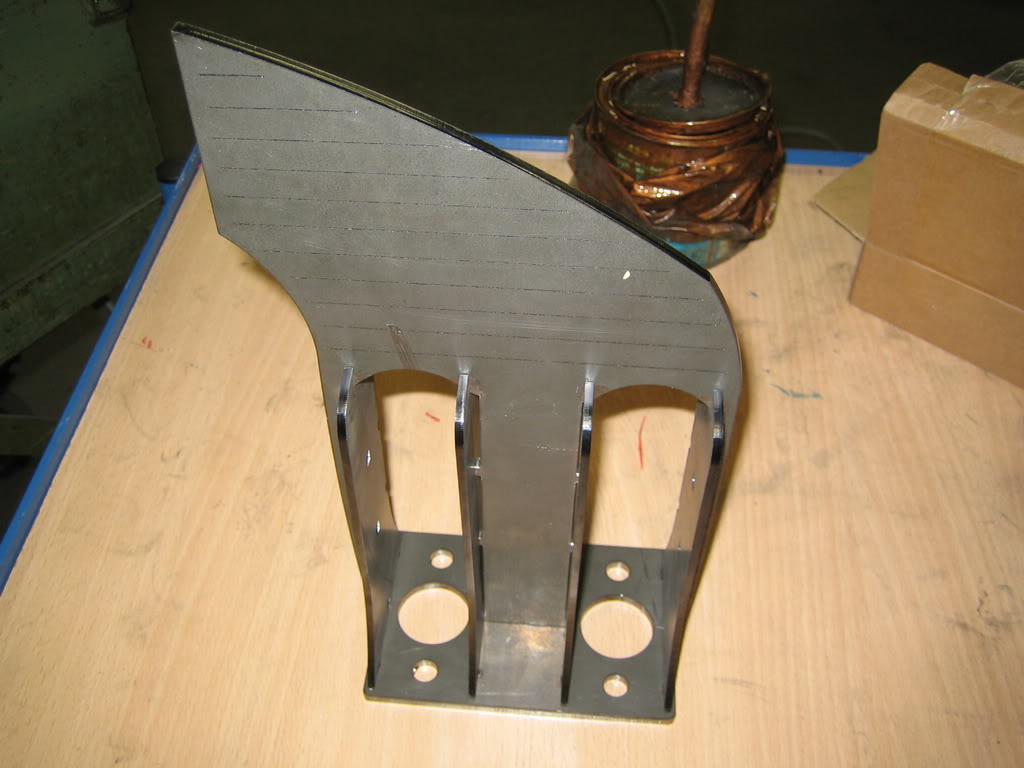
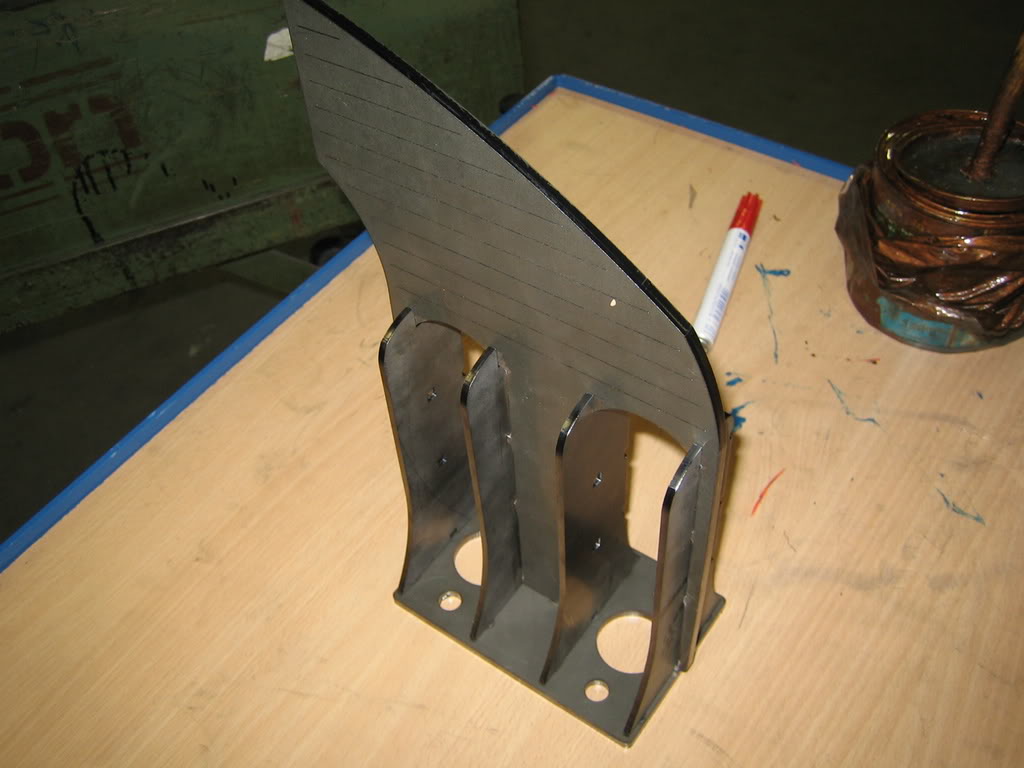
Because the mastercilinder mounting on the firewall is crooked I had to adress this.
So I decided to incorperate this on a brake bracklet aswell.
I designed a experimental version on autocad from which I will develop the final version.
I will keep it steel for now, but the final version will be aluminium.
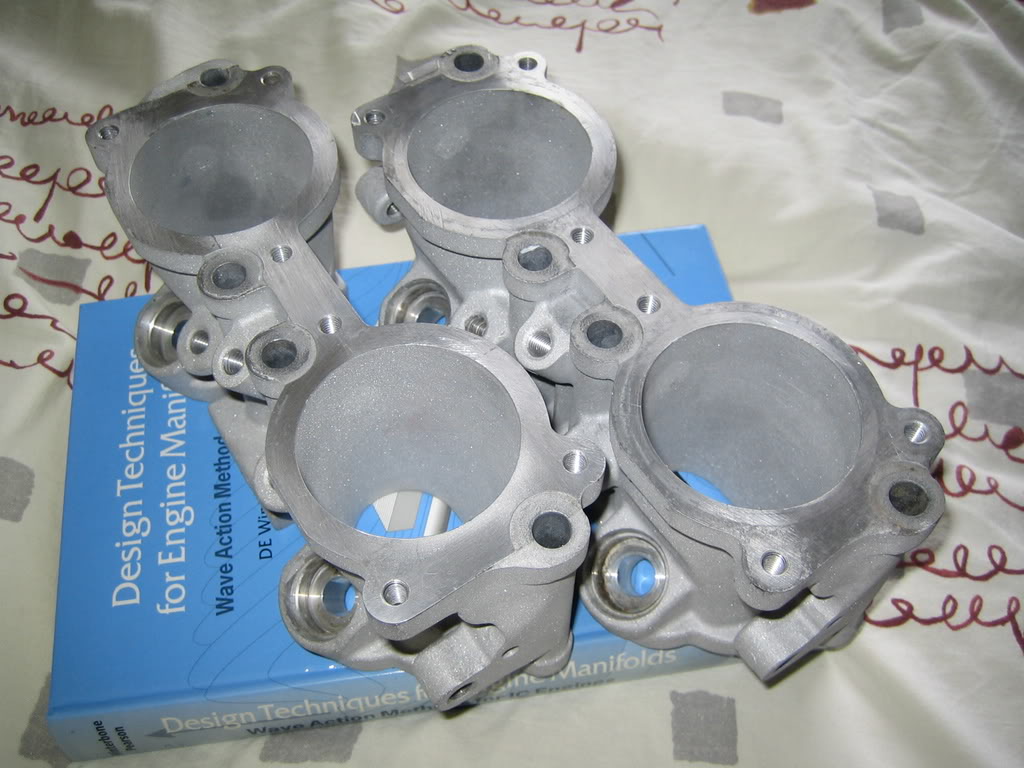
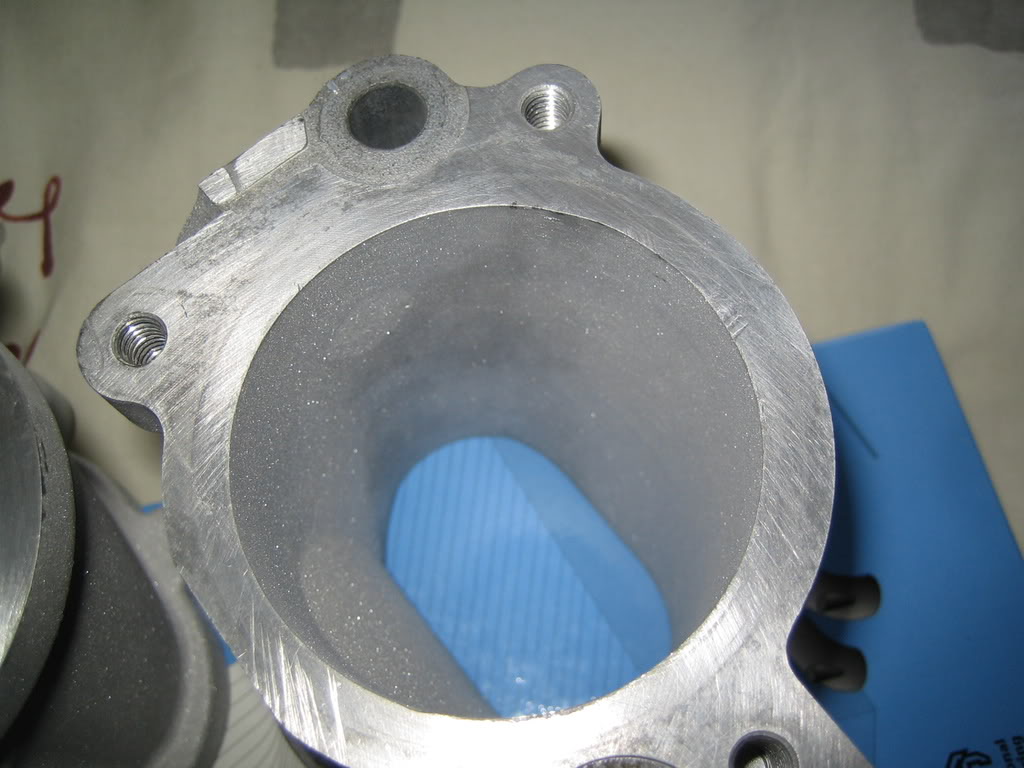
I began cleaning up the throttle bodies.
They are full of environmental valves etc. that seriously restrict the flow.
Today I started milling a bit on them.

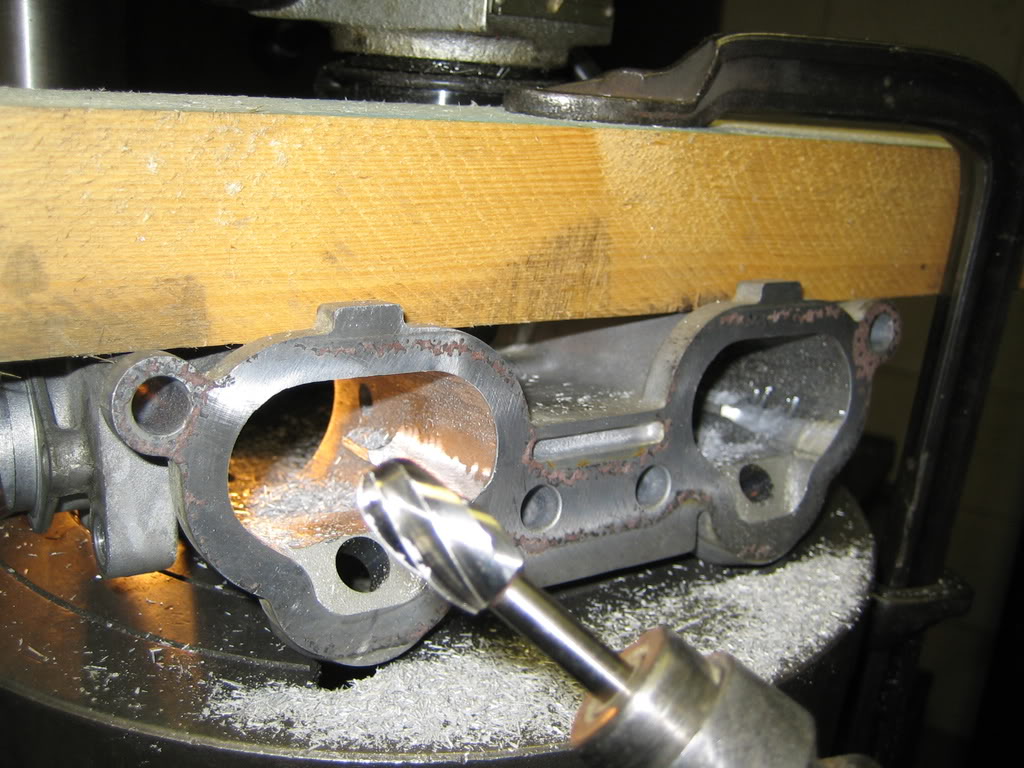
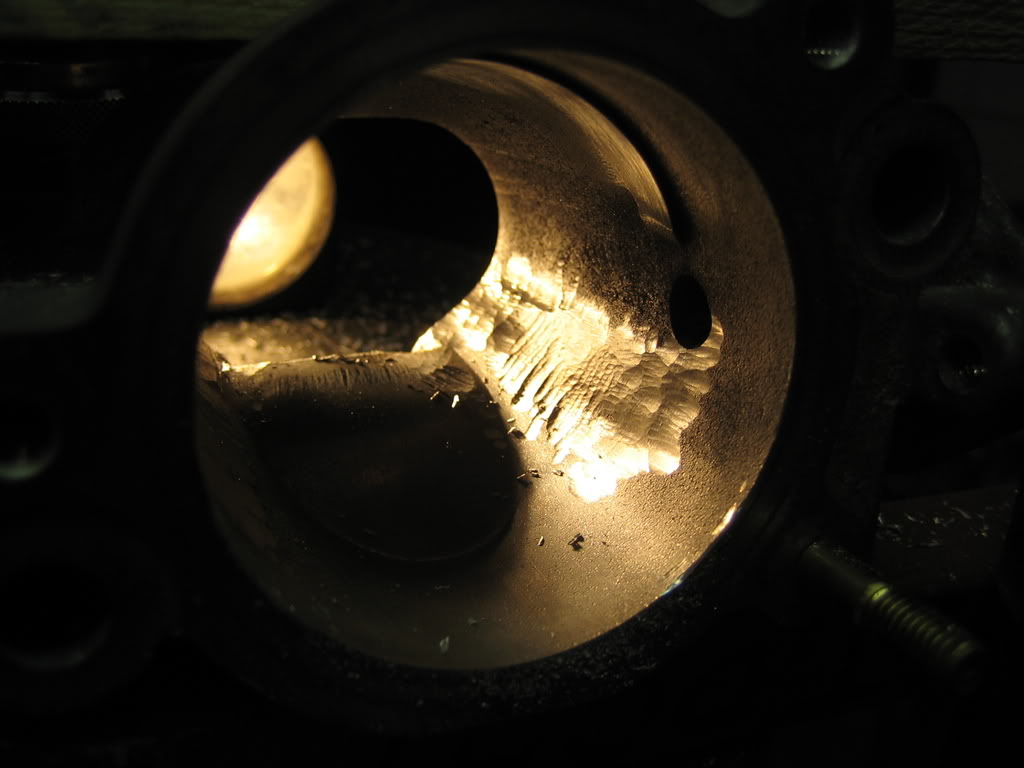
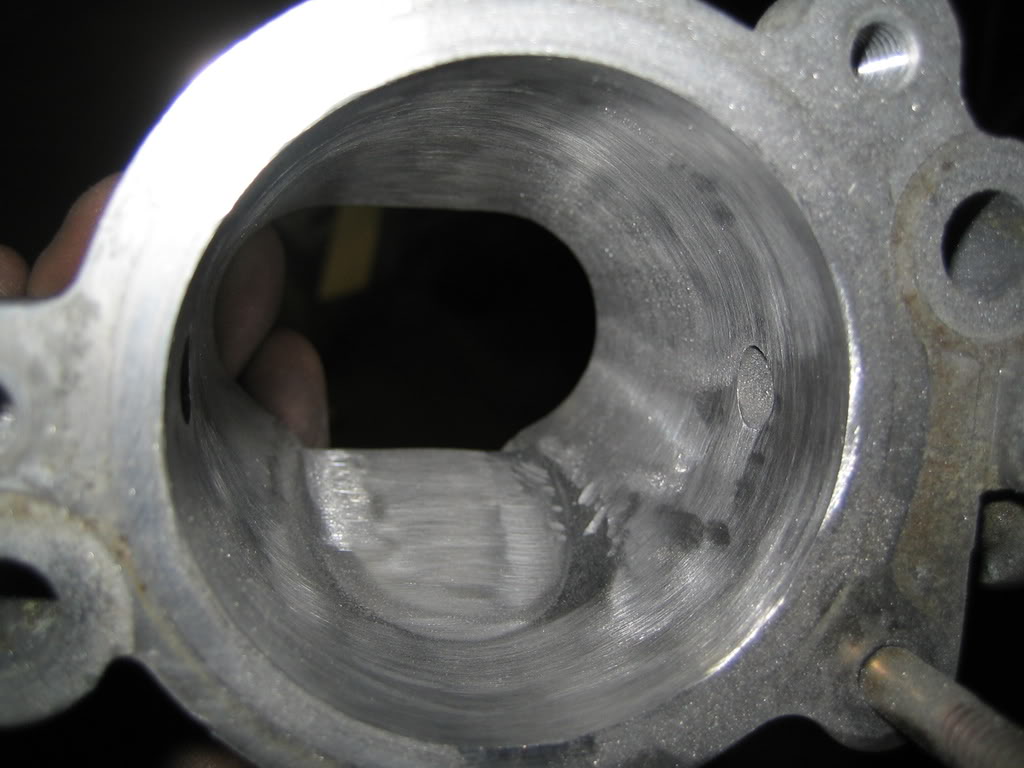
More later.
So I decided to incorperate this on a brake bracklet aswell.
I designed a experimental version on autocad from which I will develop the final version.
I will keep it steel for now, but the final version will be aluminium.
I began cleaning up the throttle bodies.
They are full of environmental valves etc. that seriously restrict the flow.
Today I started milling a bit on them.
More later.
07 April 2008, 04:16 PM
#128
Scooby Regular
Thread Starter
Join Date: Dec 2002
Posts: 458
Likes: 0
Received 0 Likes
on
0 Posts
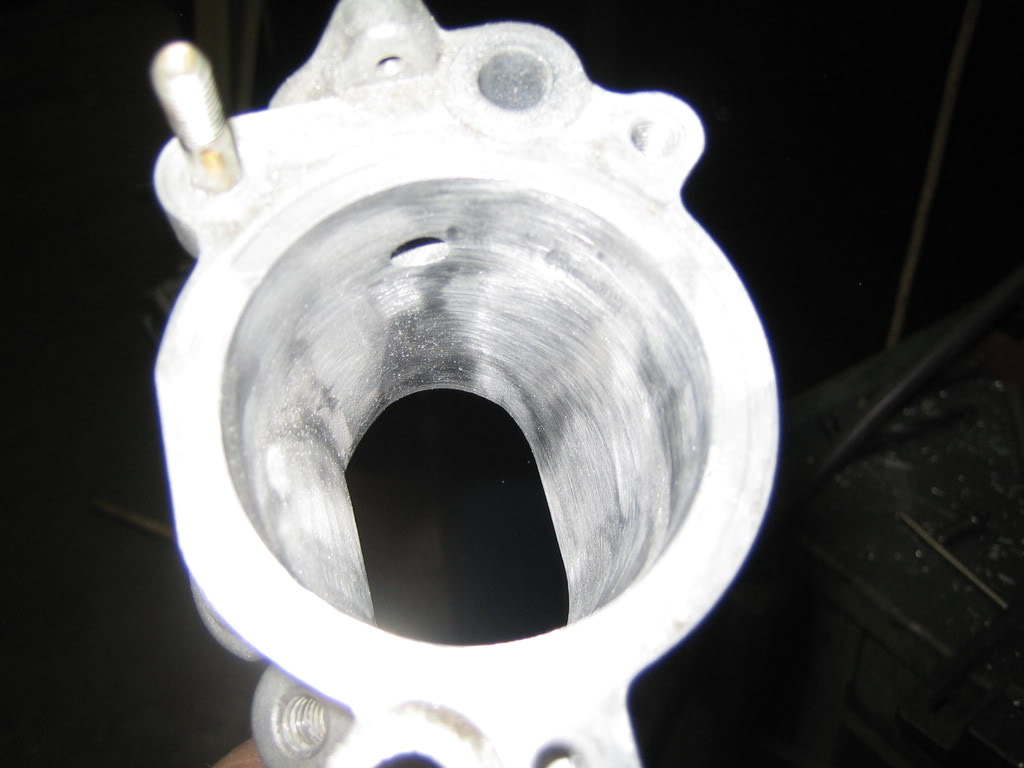
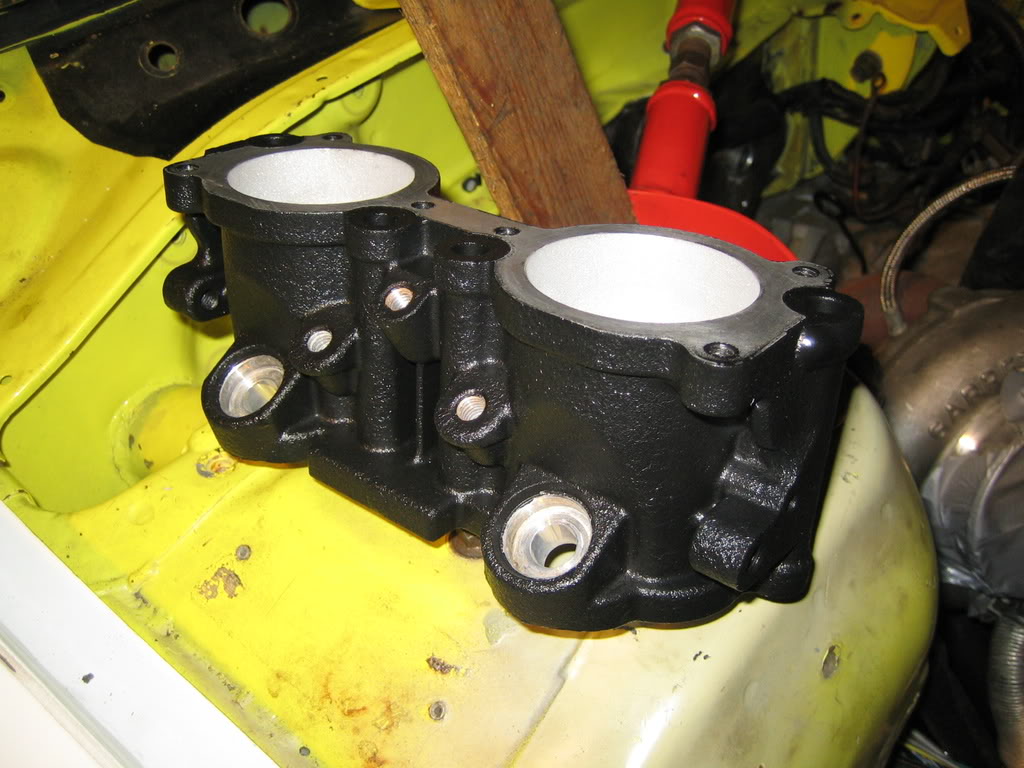
Today I kinda finished my body's, sandblasted them a bit etc.
Maybe I'll have the outside shotpeened, because the surface is "open" after sandblasting it, so dirt sticks to it very easily.
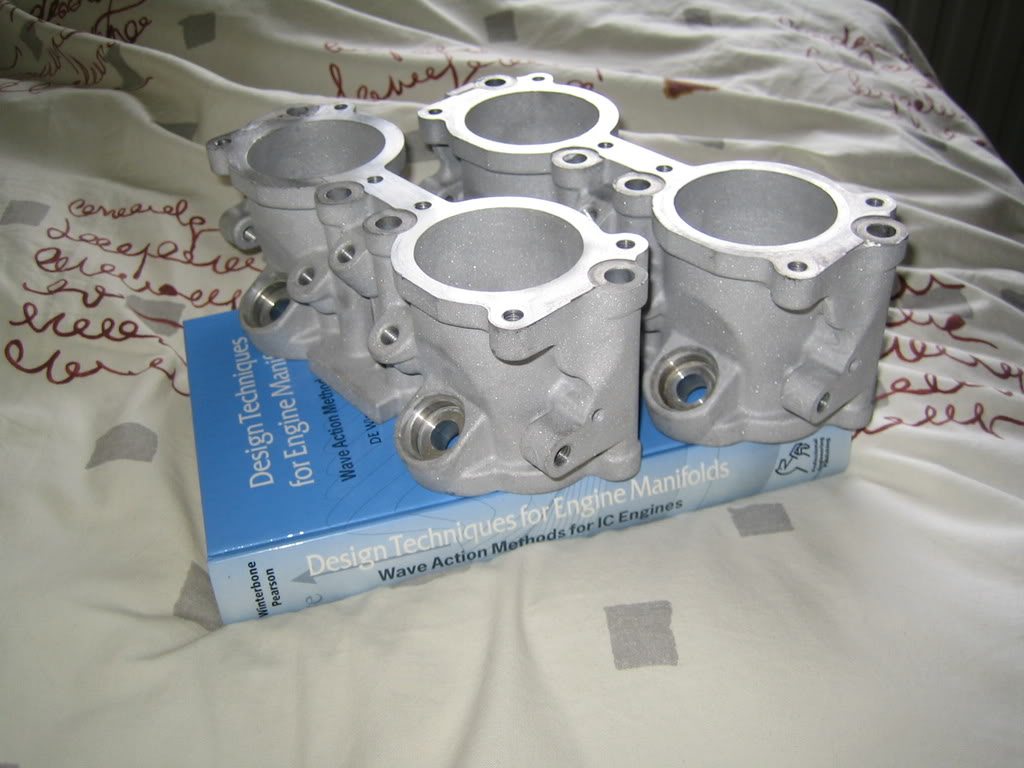
Maybe I'll have the outside shotpeened, because the surface is "open" after sandblasting it, so dirt sticks to it very easily.
28 April 2008, 07:34 PM
#131
Scooby Regular
Thread Starter
Join Date: Dec 2002
Posts: 458
Likes: 0
Received 0 Likes
on
0 Posts
Not much of an update but I am trying to get my car registered on the road which has a few glitches.
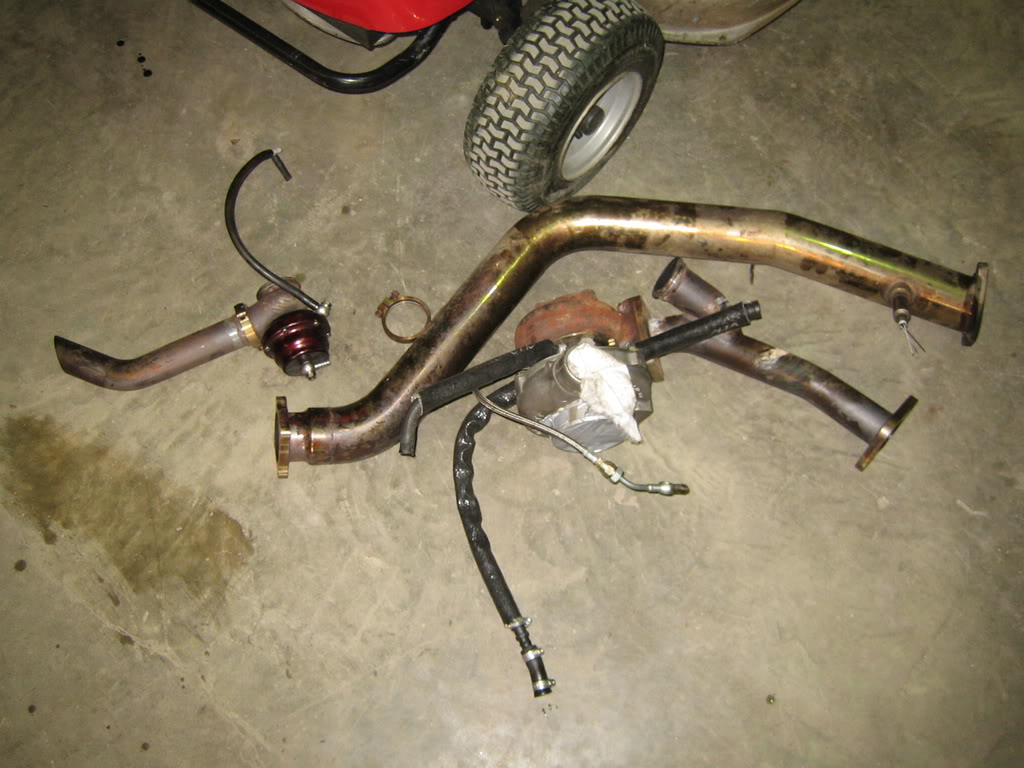
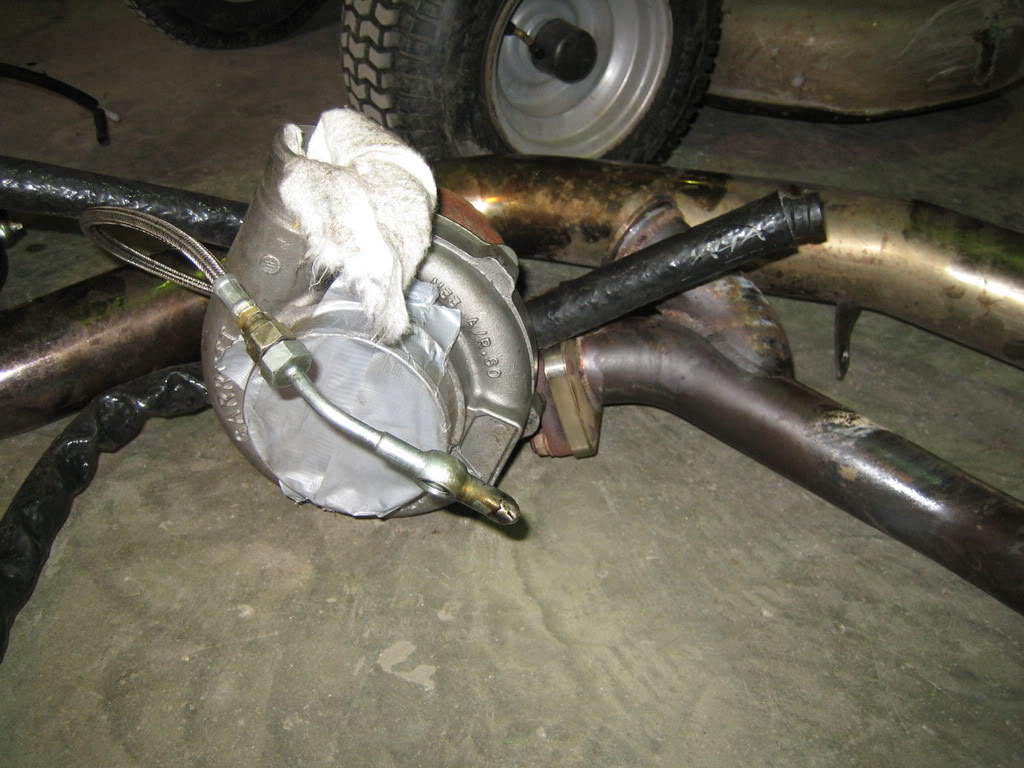
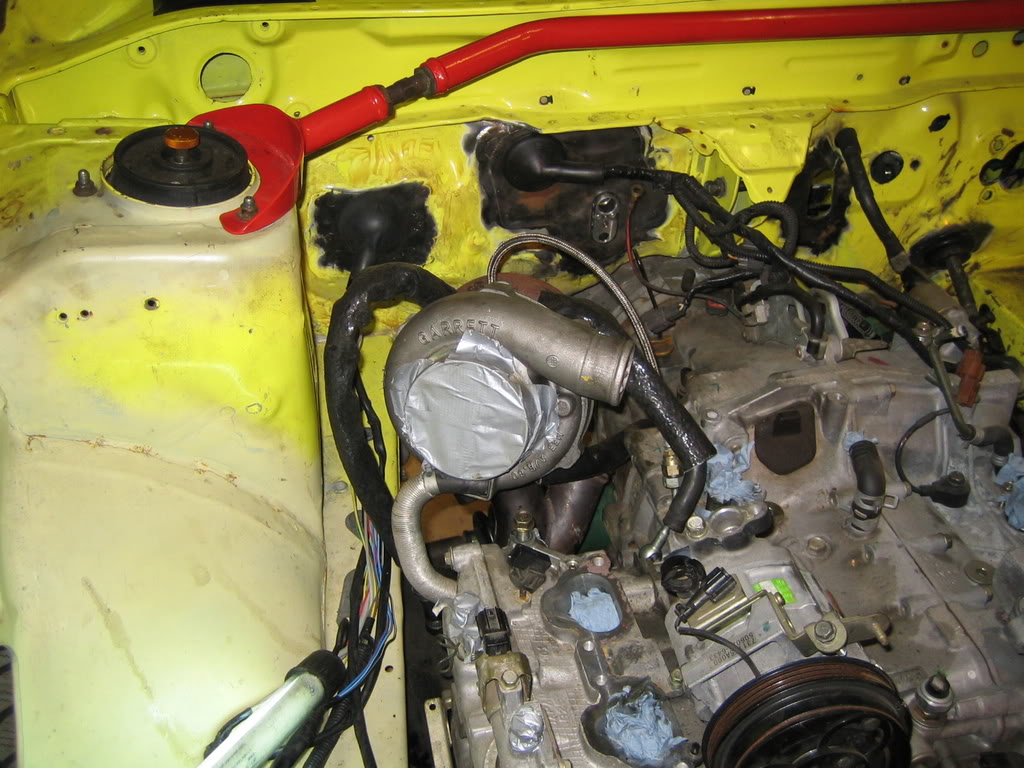
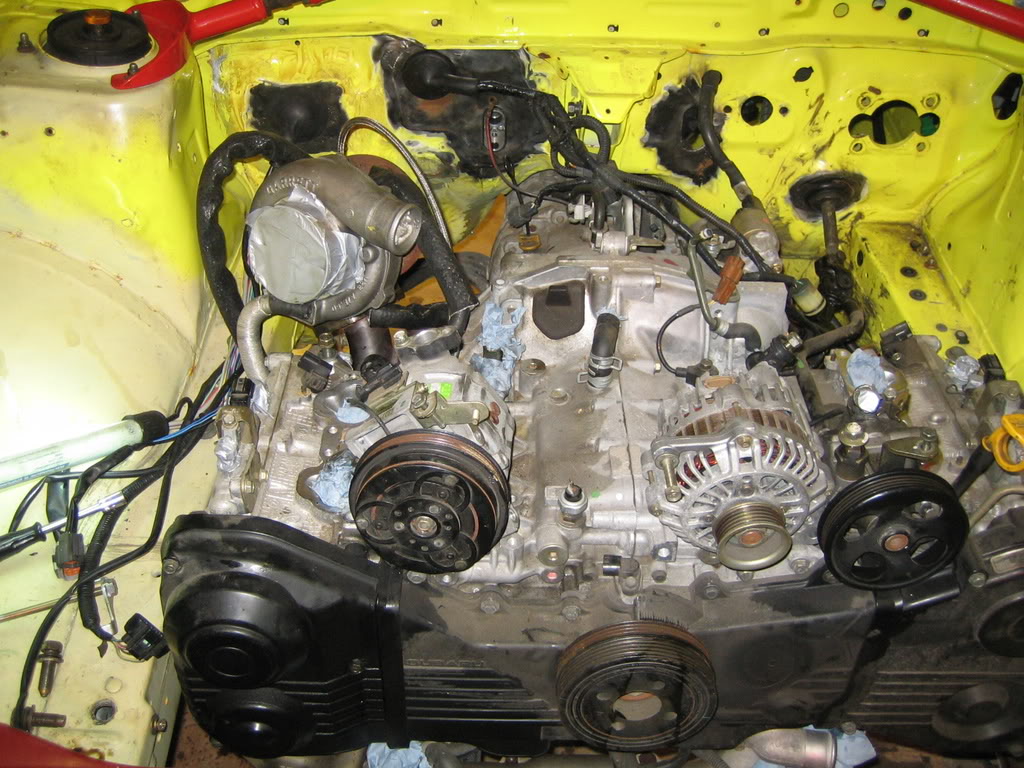
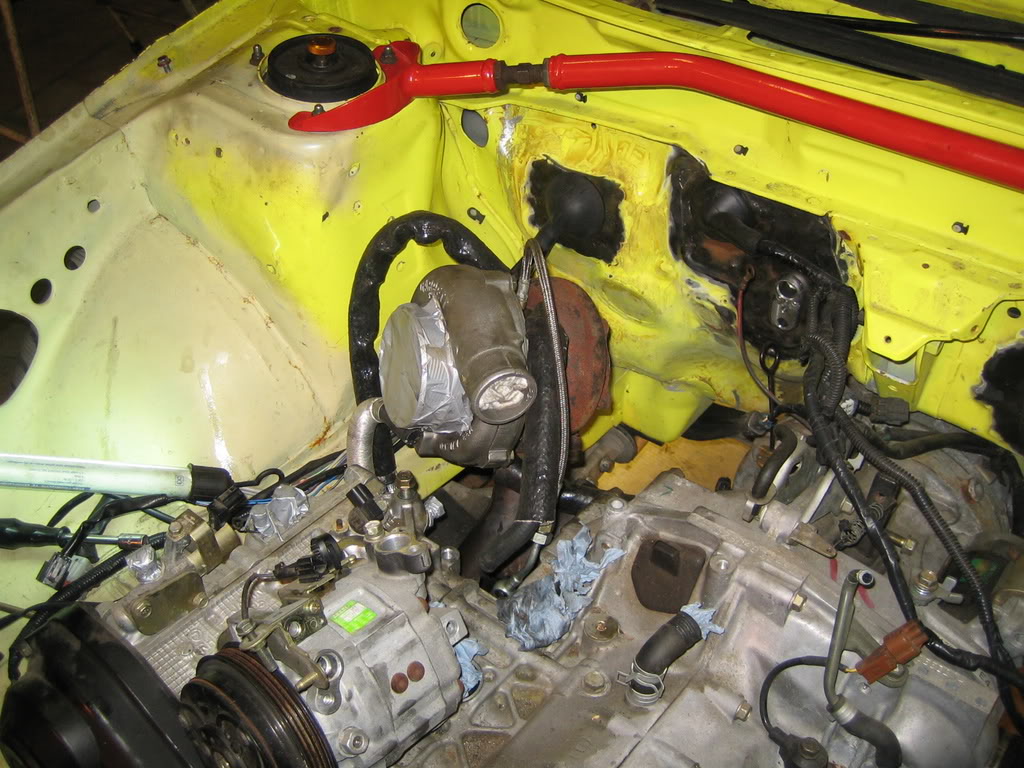
Anyway, I got my turbo set-up this weekend, it is a Garrett GT30 kit by Perrin.
Here some shots of the set on the floor and in the car:
I prolly have to register the car here in the UK first, if anyone has some info on this please let me know!
Anyway, I got my turbo set-up this weekend, it is a Garrett GT30 kit by Perrin.
Here some shots of the set on the floor and in the car:
I prolly have to register the car here in the UK first, if anyone has some info on this please let me know!
 01 May 2008, 11:38 PM
#134
Scooby Regular
Thread Starter
Join Date: Dec 2002
Posts: 458
Likes: 0
Received 0 Likes
on
0 Posts
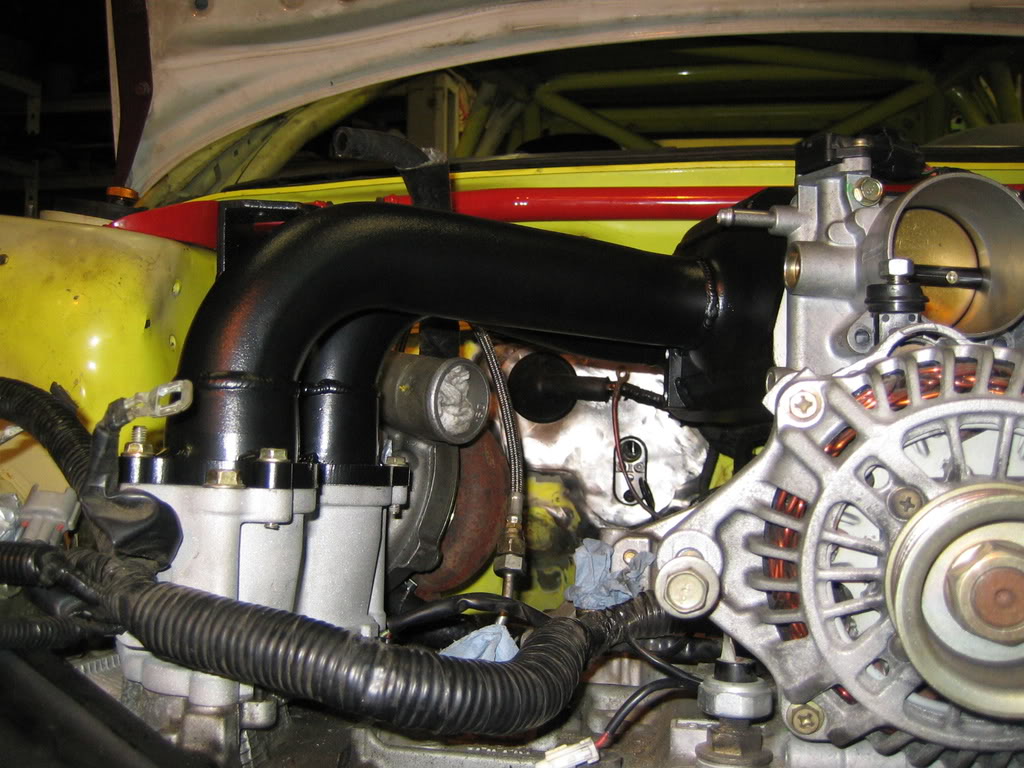
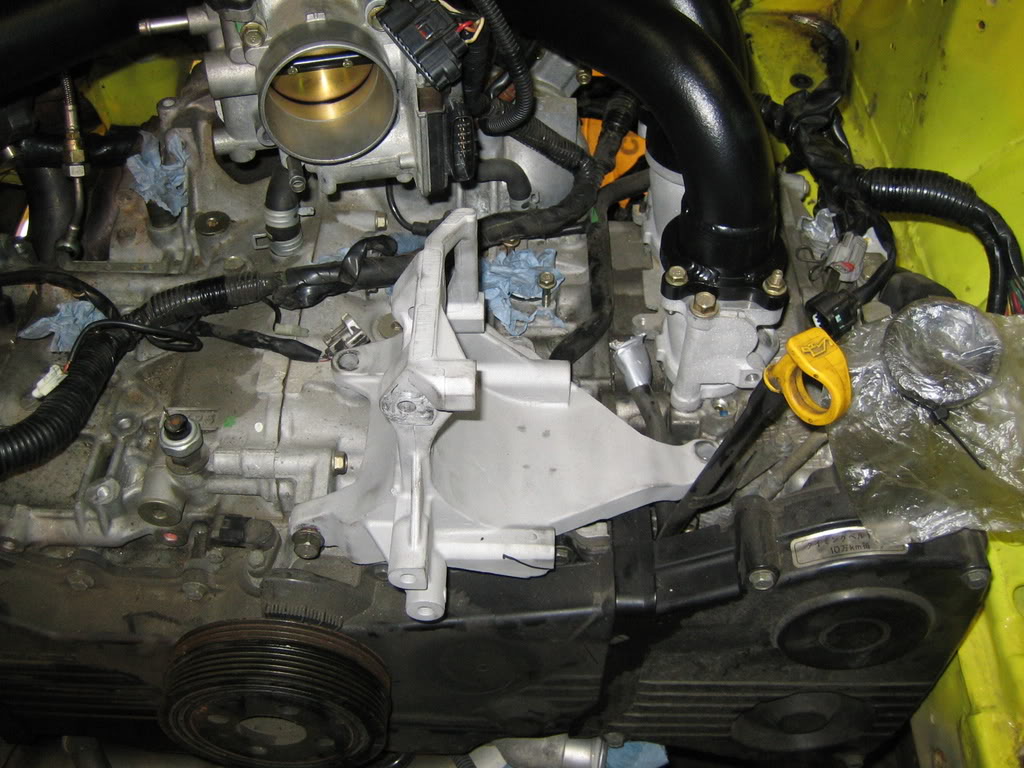
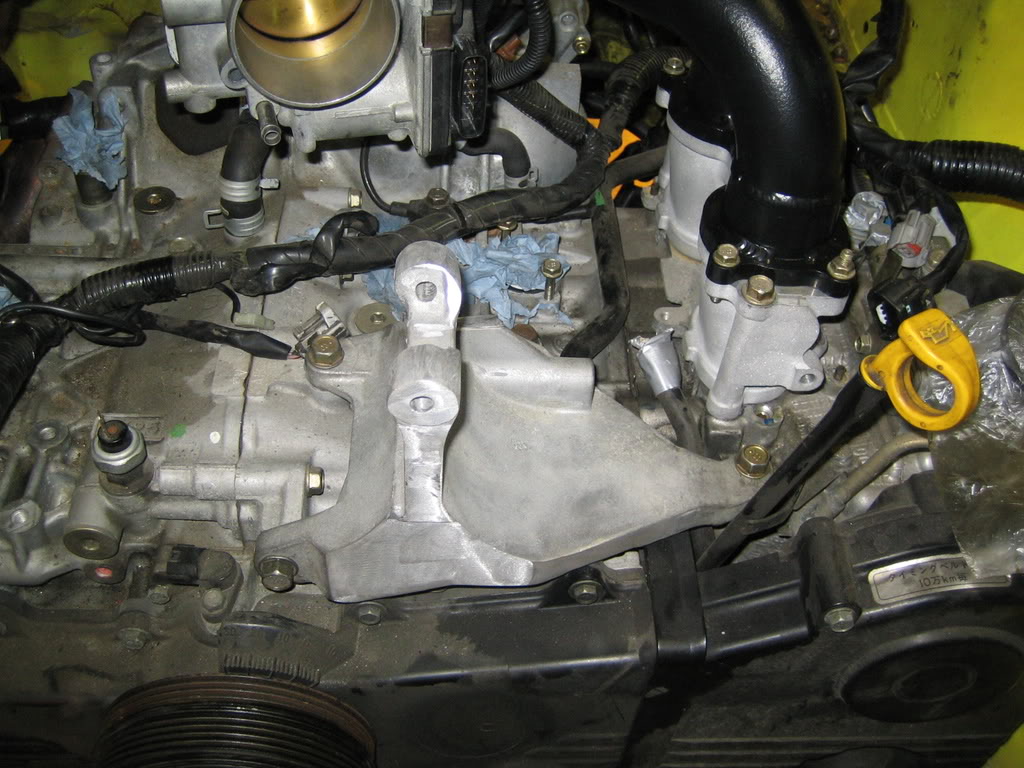
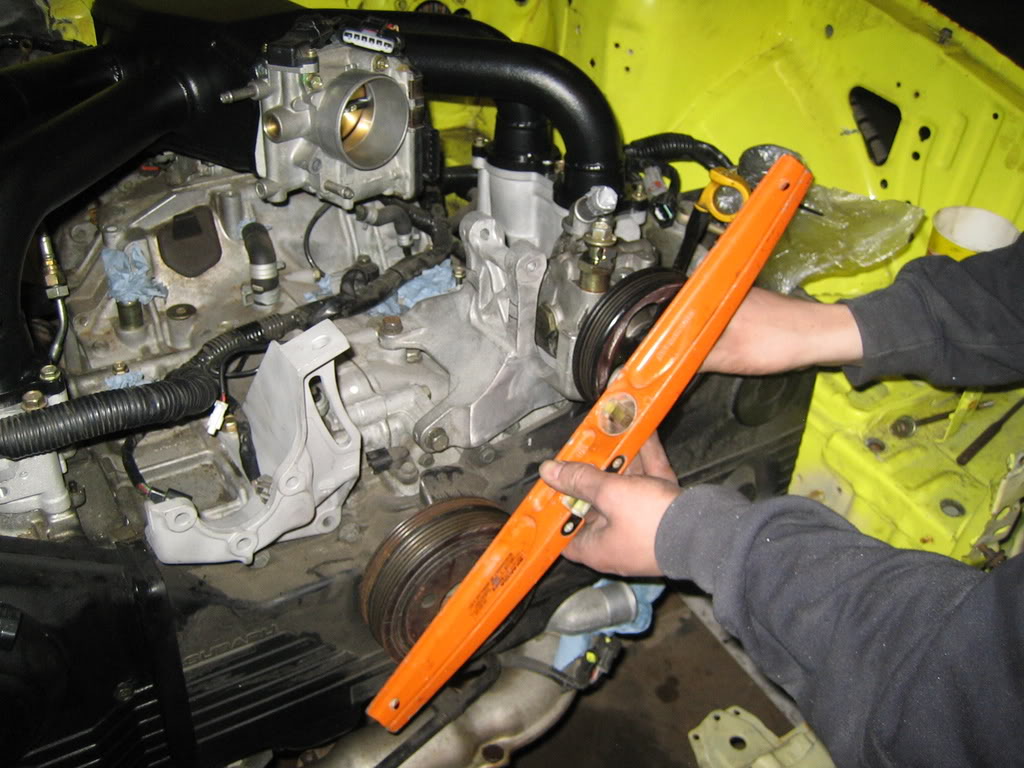
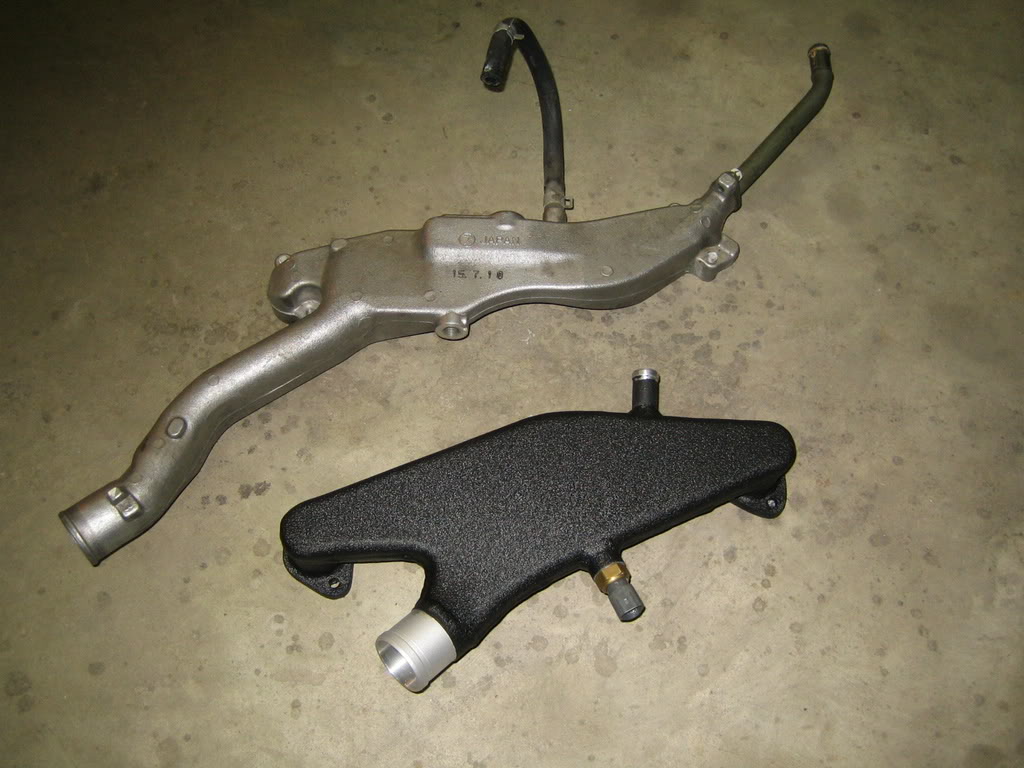
Yesterday I picked up my new inlet and water manifold.
There are a few small glitches that I have to work out but it's 99% perfect fit.
As I'm switching the airco and steerpumps I need to make new brackets.
I though it was smart to get 2 identical brackets and then switch bottoms and tops with each other.
So I started with the steering pump, but it turned out to high, so I will start from scratch again.
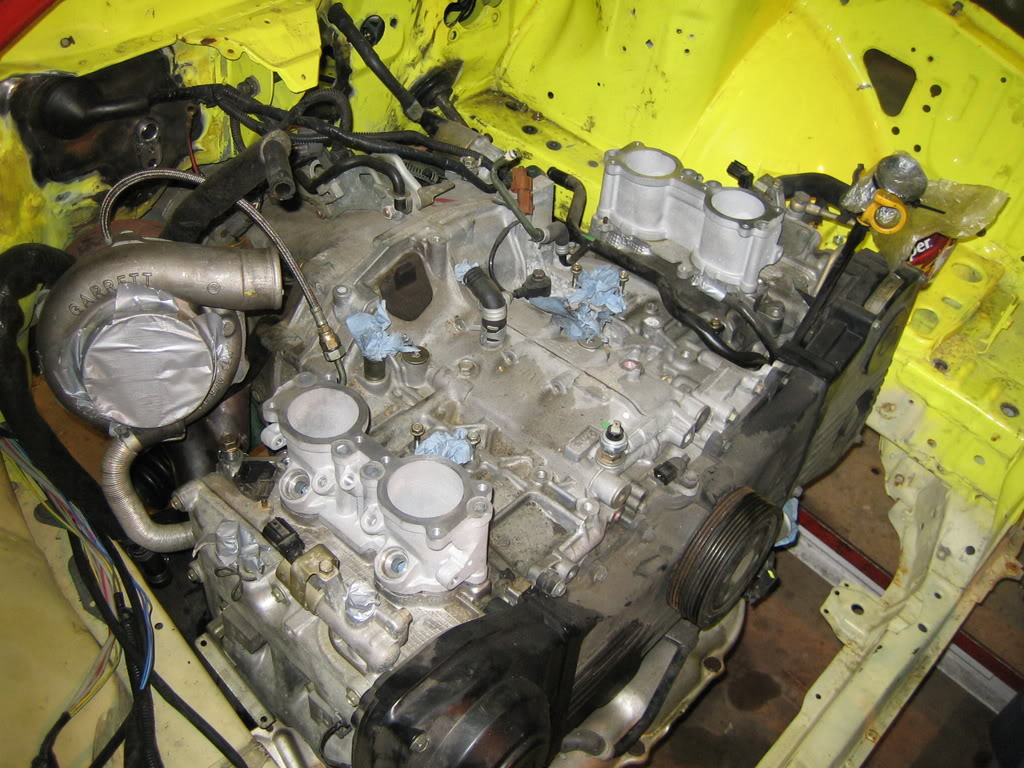
Everything needs to be as low as possible on the engine, first because of the FMIC/radiator shrouding and because of the FMIC piping from the manifold that has to run over them.
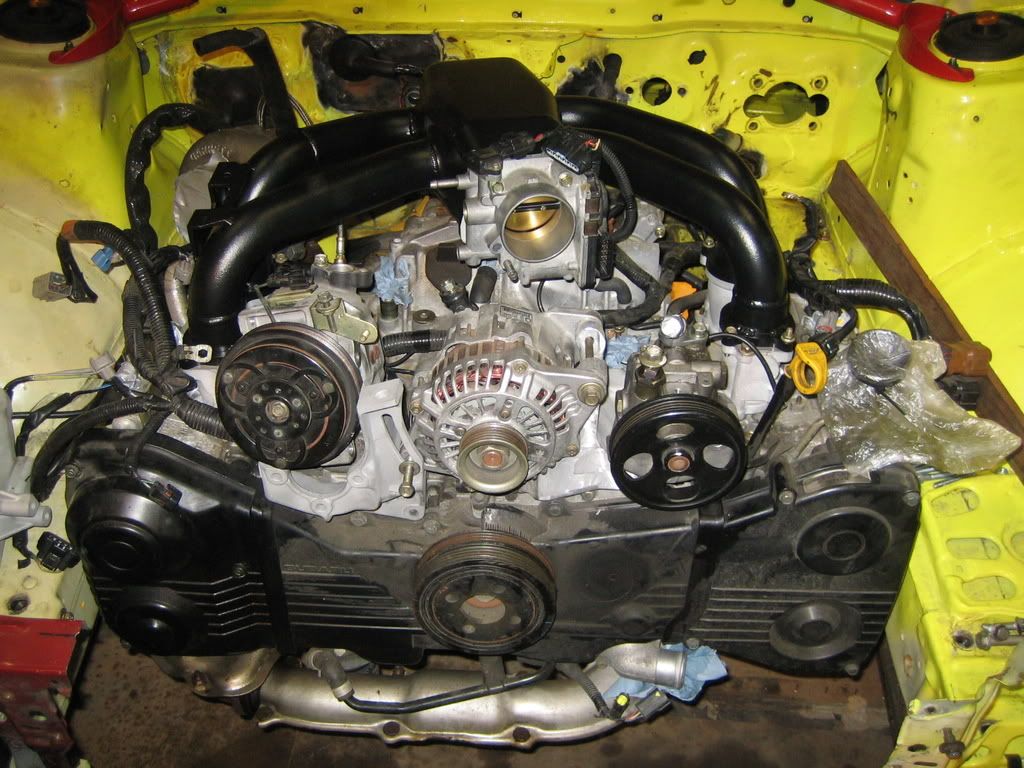
The body's in their place:
Alien!!!!! Aarghh.... uhm, sorry.
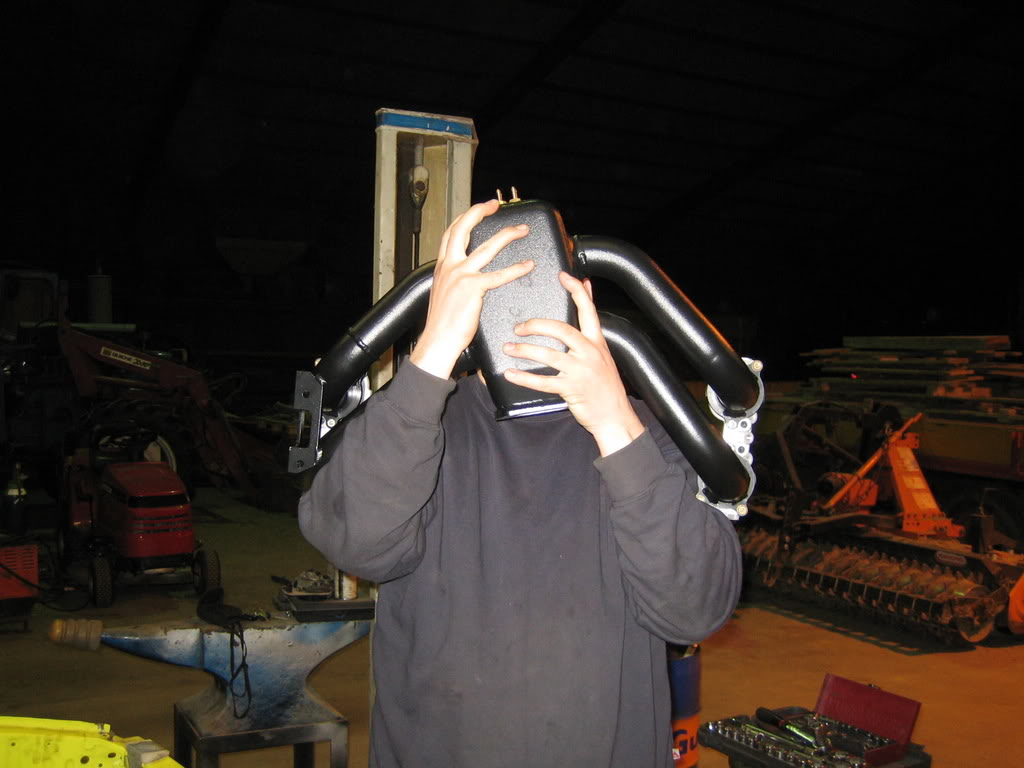
Well finished!:
In it's place:
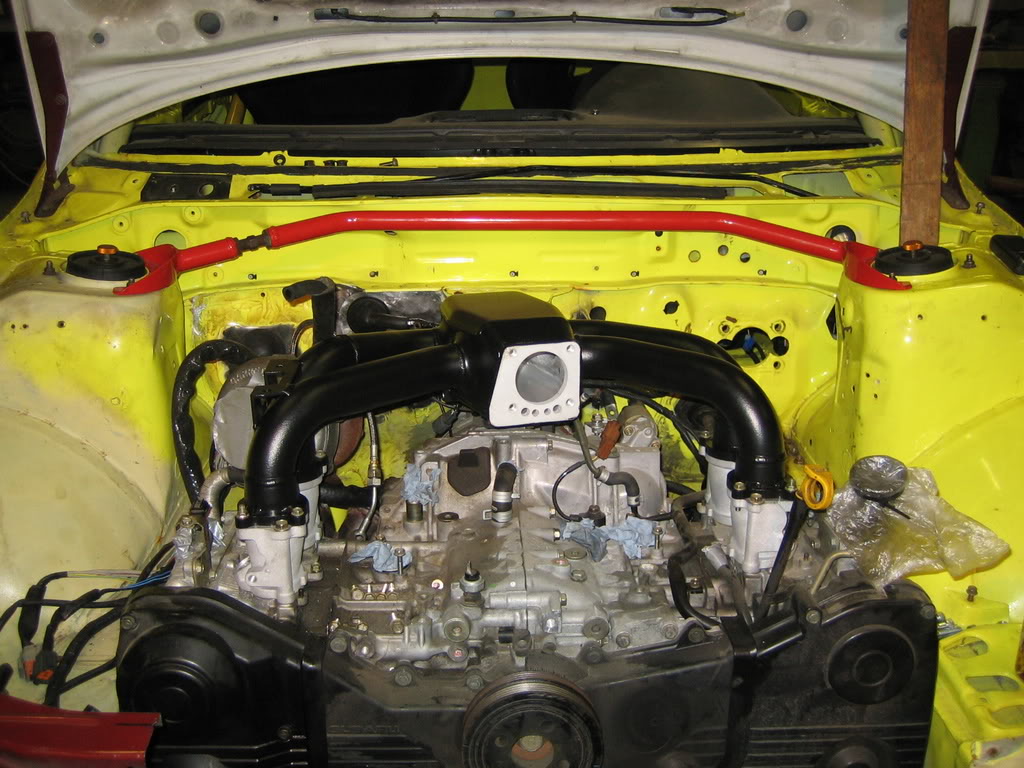
Look how neat the FMIC can go underneath:
There are a few small glitches that I have to work out but it's 99% perfect fit.
As I'm switching the airco and steerpumps I need to make new brackets.
I though it was smart to get 2 identical brackets and then switch bottoms and tops with each other.
So I started with the steering pump, but it turned out to high, so I will start from scratch again.
Everything needs to be as low as possible on the engine, first because of the FMIC/radiator shrouding and because of the FMIC piping from the manifold that has to run over them.
The body's in their place:
Alien!!!!! Aarghh.... uhm, sorry.
Well finished!:
In it's place:
Look how neat the FMIC can go underneath:
01 May 2008, 11:38 PM
#135
Scooby Regular
Thread Starter
Join Date: Dec 2002
Posts: 458
Likes: 0
Received 0 Likes
on
0 Posts
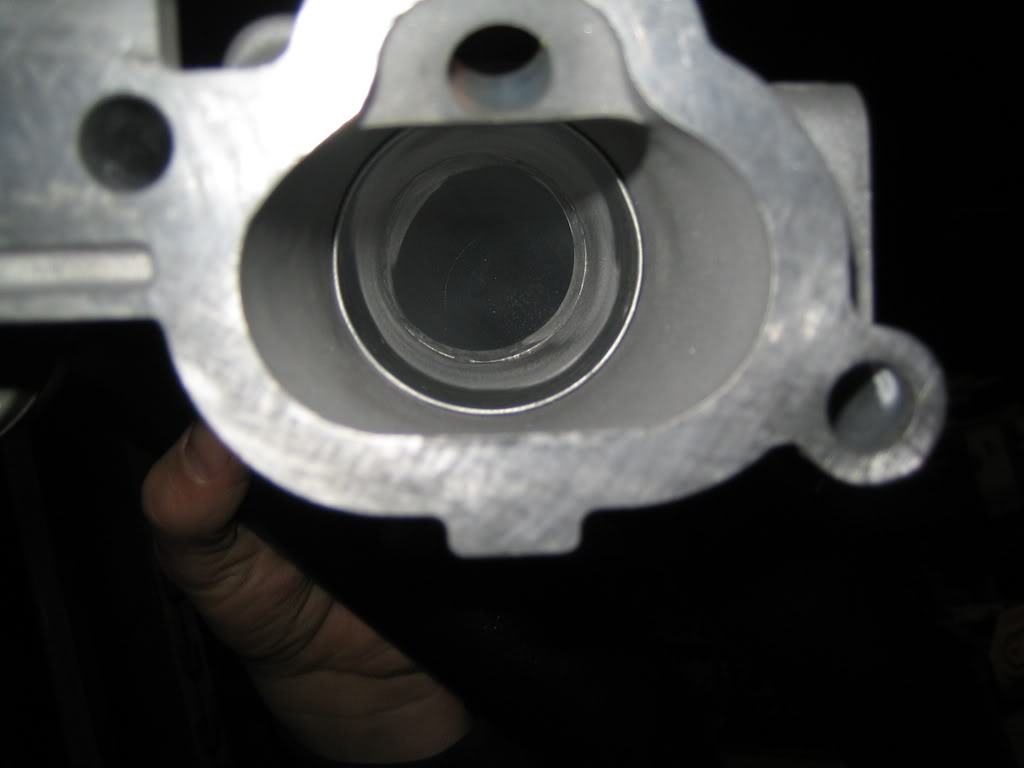
Da original:
After some cutting:
Pump bracket remade:
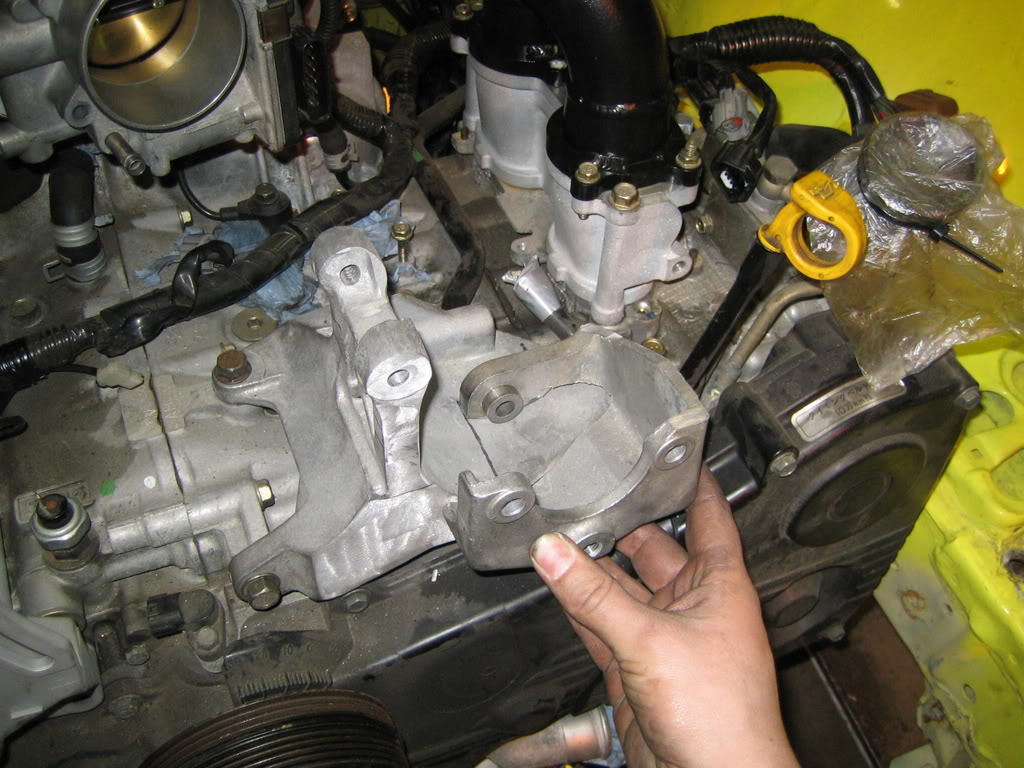
Measuring:
Not that any of this matters as it's going in the bin anyway.
Watermanifold, pitty it doesn't fit in one go:
All together:

After some cutting:
Pump bracket remade:
Measuring:
Not that any of this matters as it's going in the bin anyway.
Watermanifold, pitty it doesn't fit in one go:
All together:
 08 May 2008, 10:56 PM
#138
Scooby Regular
Thread Starter
Join Date: Dec 2002
Posts: 458
Likes: 0
Received 0 Likes
on
0 Posts
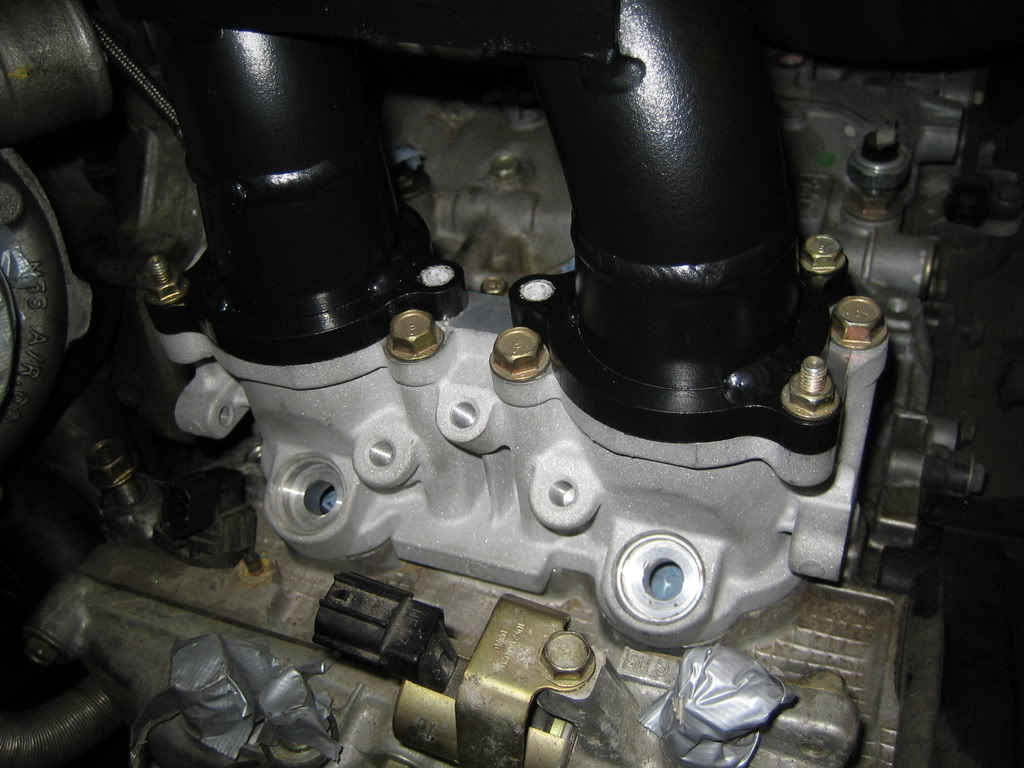
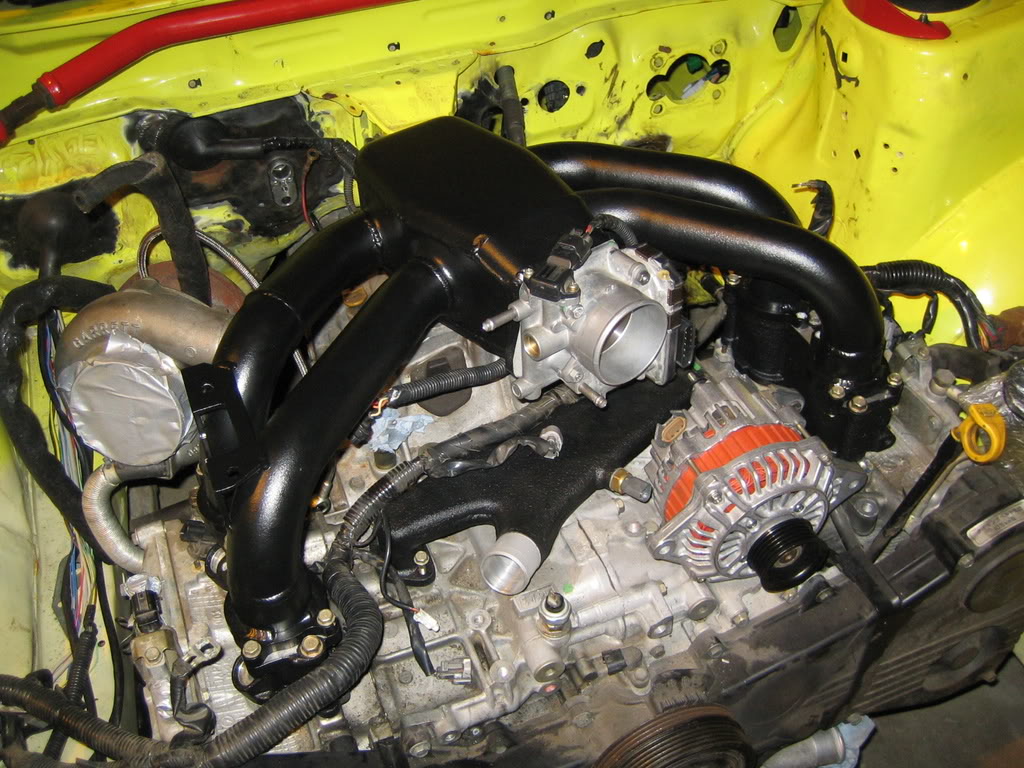
Some pics, I got the inlet manifold back, it has the throttlvalve attached now.
Throttlebody's have the same coating as the water and inlet manifold.
The positive connector on the alternator has moved from the top to the back, this is beter as the FMIC piping runs over it.
It's a bit more shiny to now.
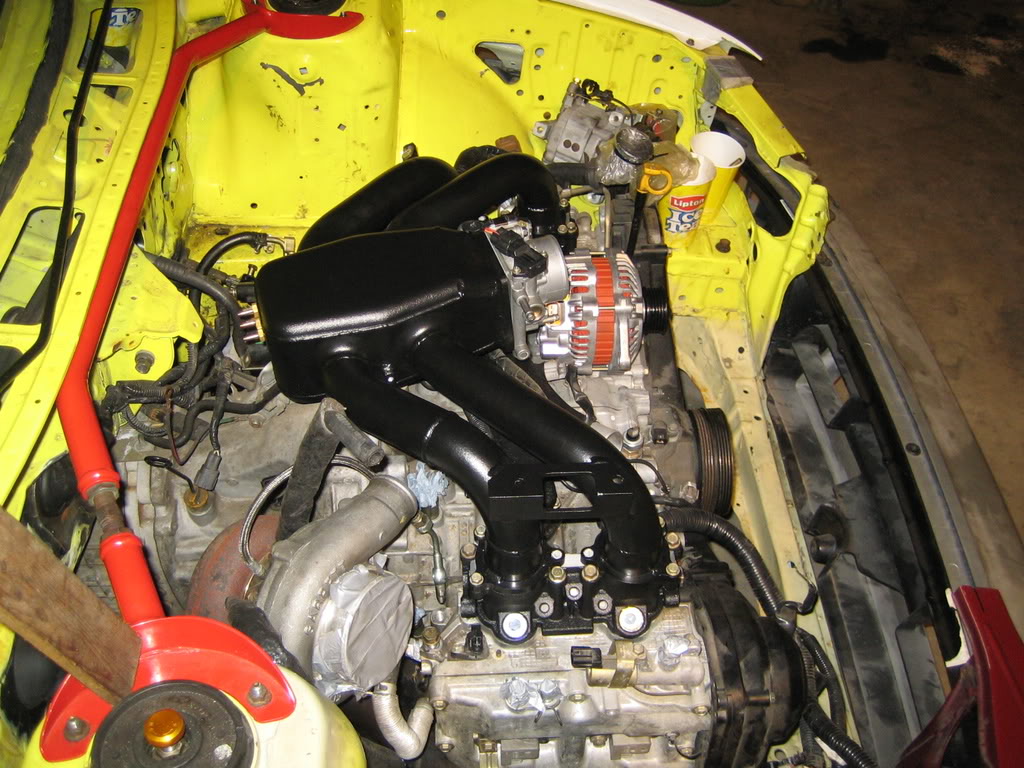
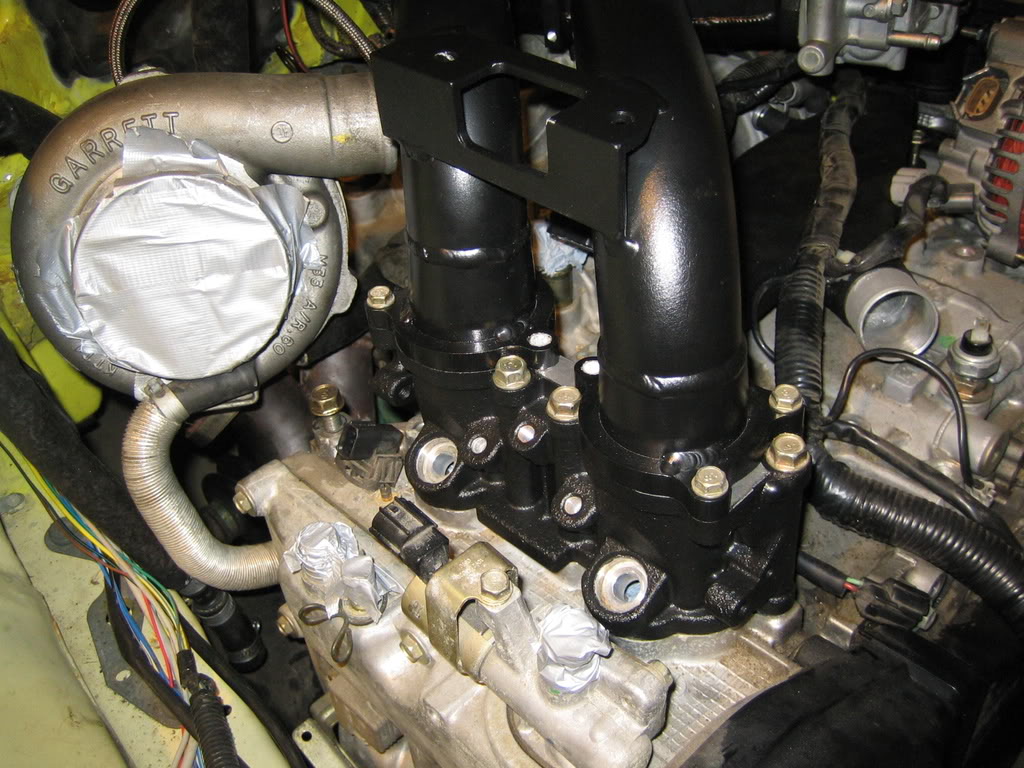
Replacement exit for crank oil fumes that sits on top of the engine, the new watermanifold sat over it so it has to be adjusted:
Throttlebody's have the same coating as the water and inlet manifold.
The positive connector on the alternator has moved from the top to the back, this is beter as the FMIC piping runs over it.
It's a bit more shiny to now.
Replacement exit for crank oil fumes that sits on top of the engine, the new watermanifold sat over it so it has to be adjusted:
11 July 2008, 10:28 PM
#140
Scooby Regular
Thread Starter
Join Date: Dec 2002
Posts: 458
Likes: 0
Received 0 Likes
on
0 Posts
Small update,
Did some stuff today after a small summer dip.
Radiator and intercooler time!
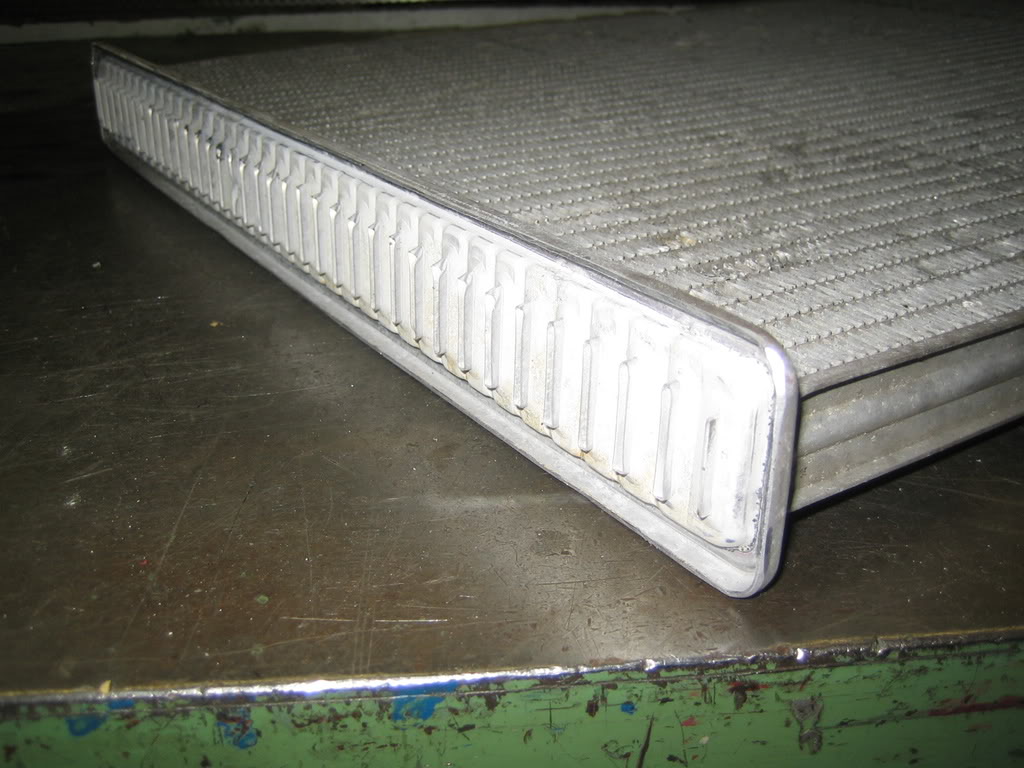
The standard GC8 radiator is very good, the only problem are the plastic end tanks which are prone to cracking on the seams after a few years.
So i needed to check if I could weld on aluminum ones.
Luckily I had an old radiator somewhere which I could use for experimenting.
If this works I'll buy a new radiator for the real thing.
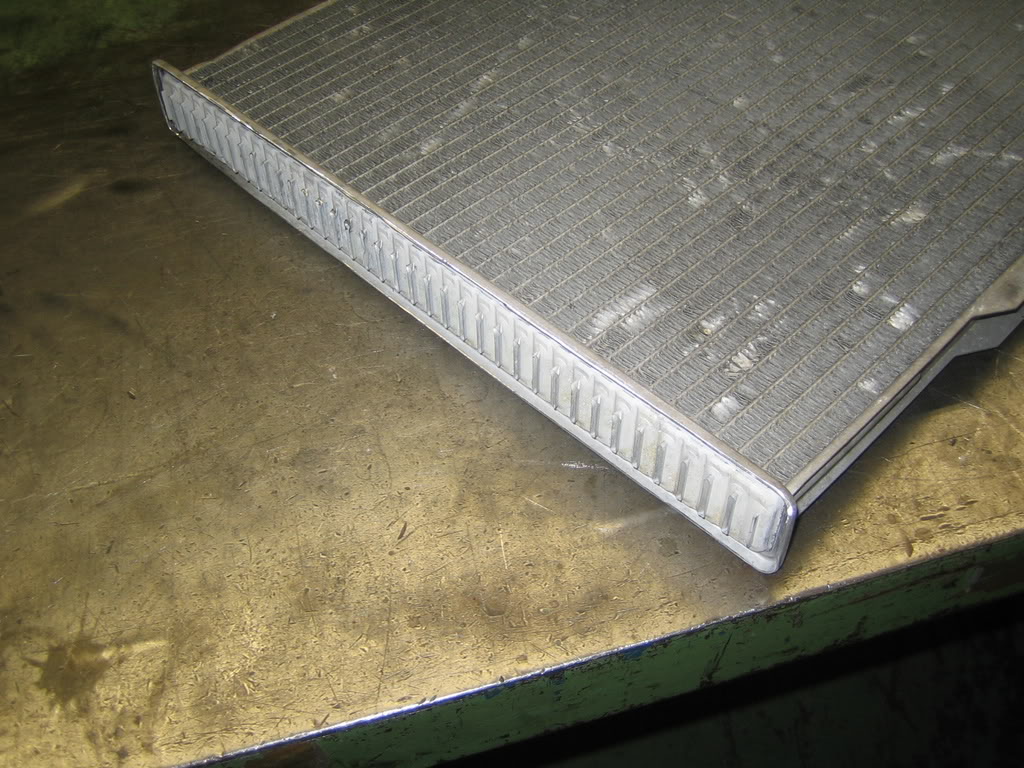
Old radiator:
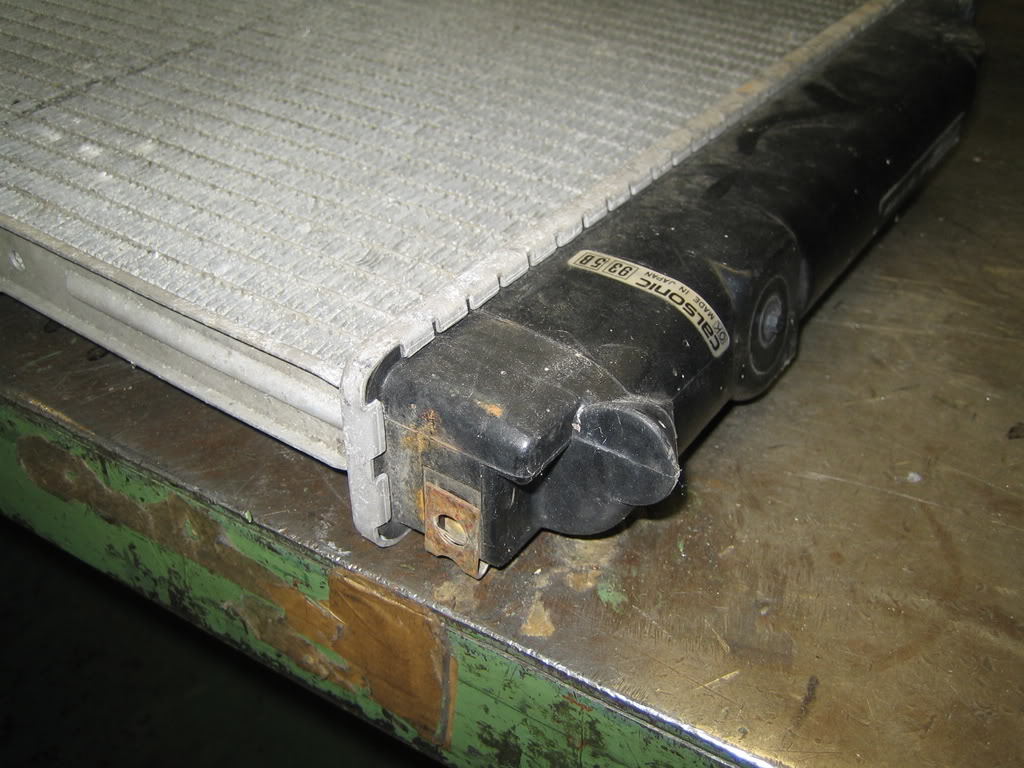
First bits off:
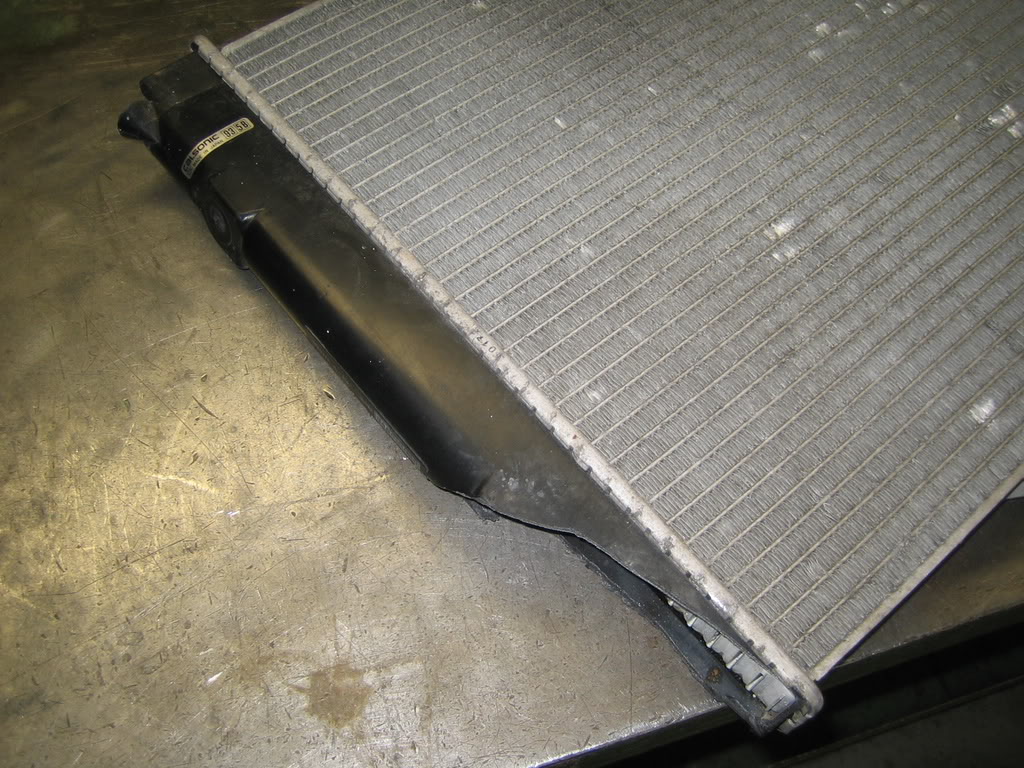
Endtanks gone and behold a nice weld-able core .
Did some stuff today after a small summer dip.
Radiator and intercooler time!
The standard GC8 radiator is very good, the only problem are the plastic end tanks which are prone to cracking on the seams after a few years.
So i needed to check if I could weld on aluminum ones.
Luckily I had an old radiator somewhere which I could use for experimenting.
If this works I'll buy a new radiator for the real thing.
Old radiator:
First bits off:
Endtanks gone and behold a nice weld-able core .
11 July 2008, 10:28 PM
#141
Scooby Regular
Thread Starter
Join Date: Dec 2002
Posts: 458
Likes: 0
Received 0 Likes
on
0 Posts
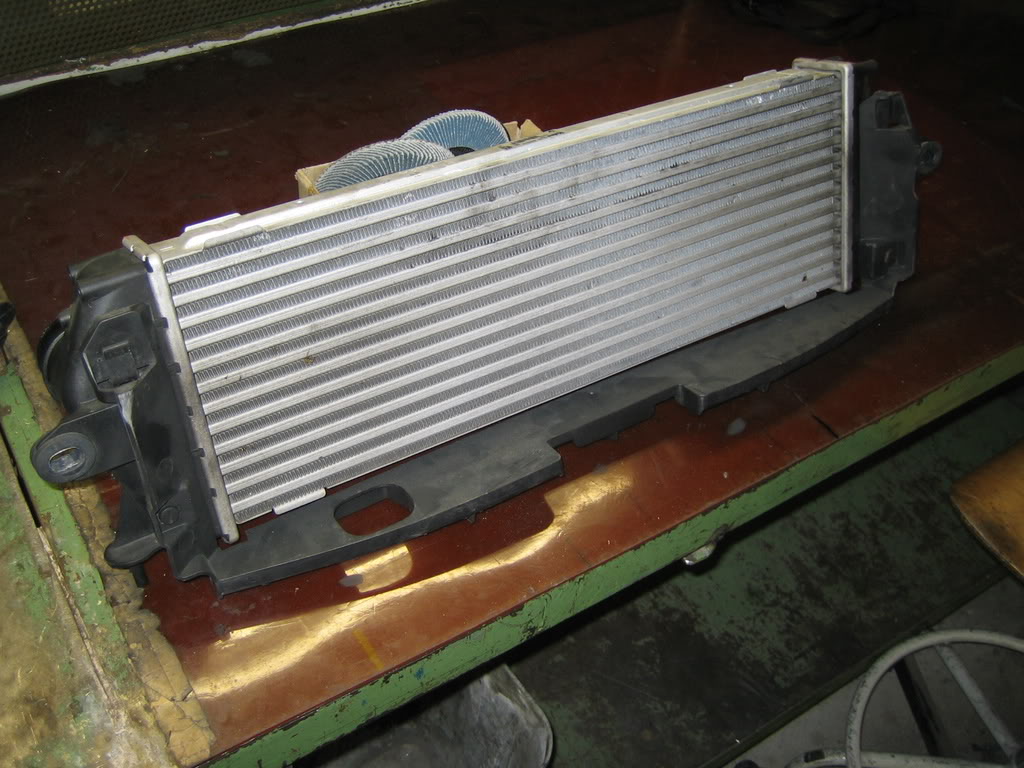
I'm not convinced by the 300 dollar taiwanese FMIC kits somehow, and I'm not the only one it seems.
After talking to some pro's the next best thing to mega expensive rally/race cores were actually cores used in production cars.
Now it was only a matter of searching for the right one.
It has to have the right measurements of course, with as much fins per inch as possible.
Also it should be thin, thick cores are not as good as a thin one with a big frontal area.
Problem is that the air going through the core is at core temp halfway through the core thus not cooling anymore.
In the end I went to a big car scrapyard searching through tons of cores.
I found one with all that I needed, except the height, so I need a second one to weld to this one.
It's from a Renault trafic from 2007.
It also has plastic end tanks, so they need to come off as well.
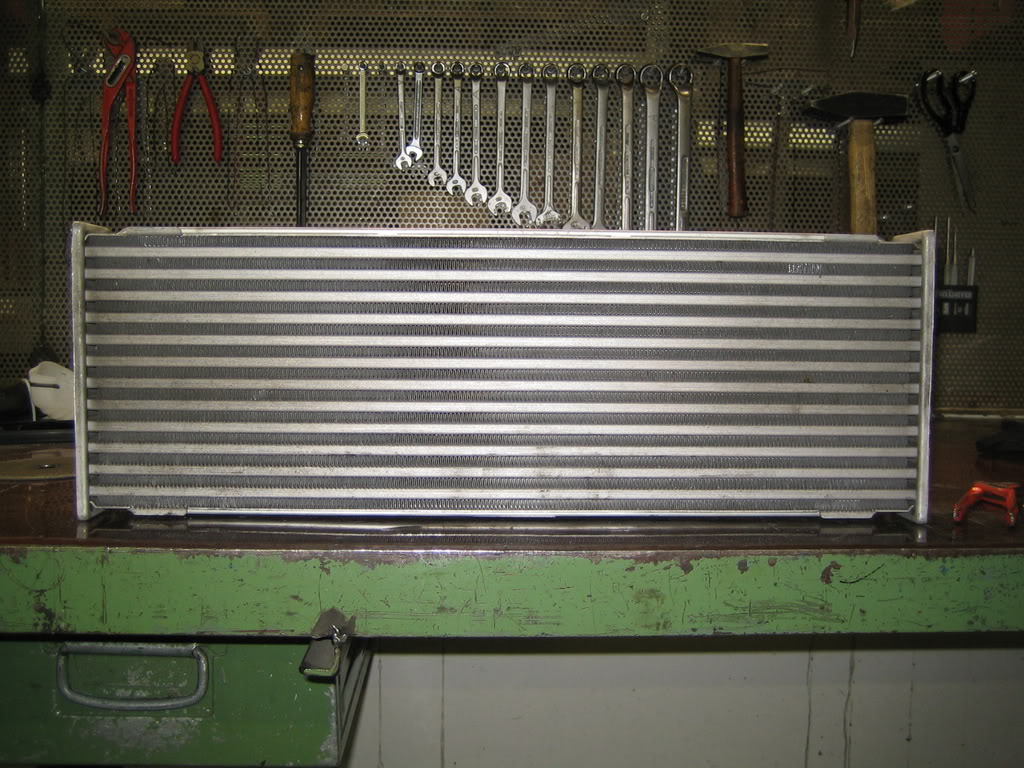
This is how it looks like new:
Sawing off the first pieces:
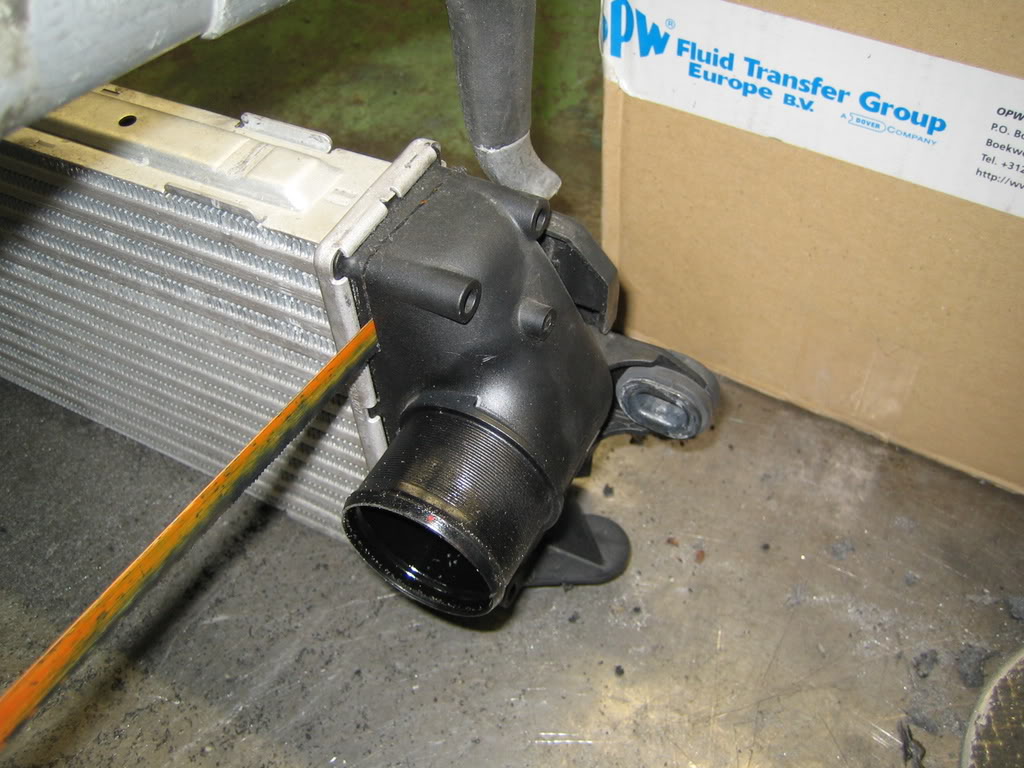
Debris:
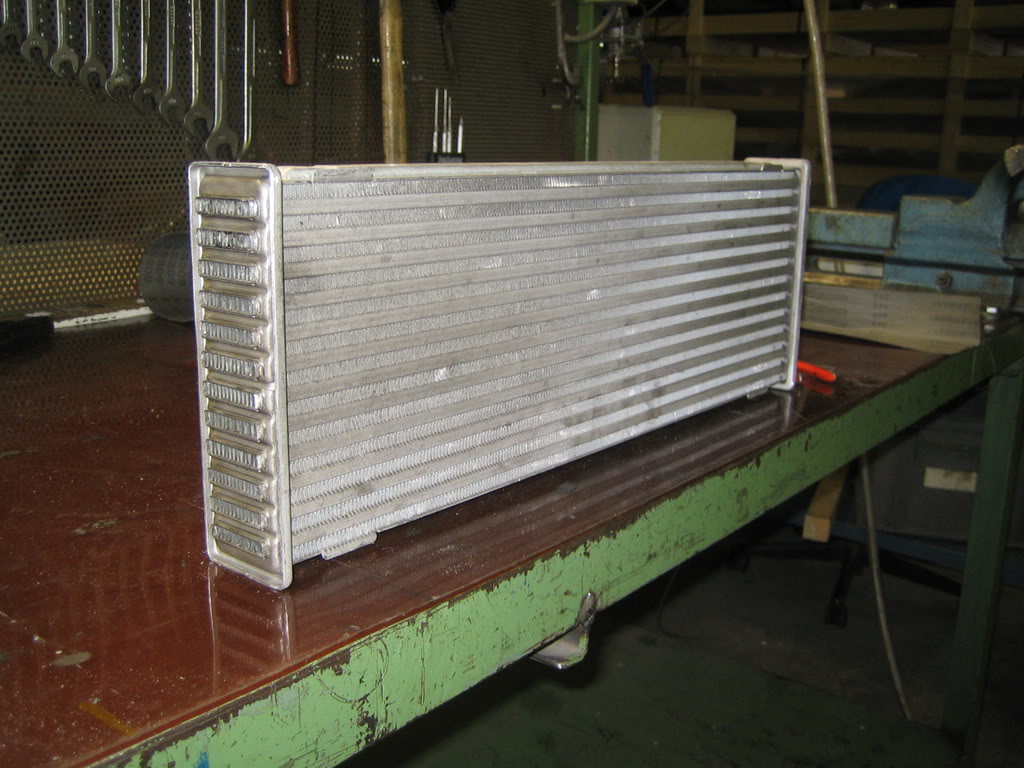
Ready for more torture:
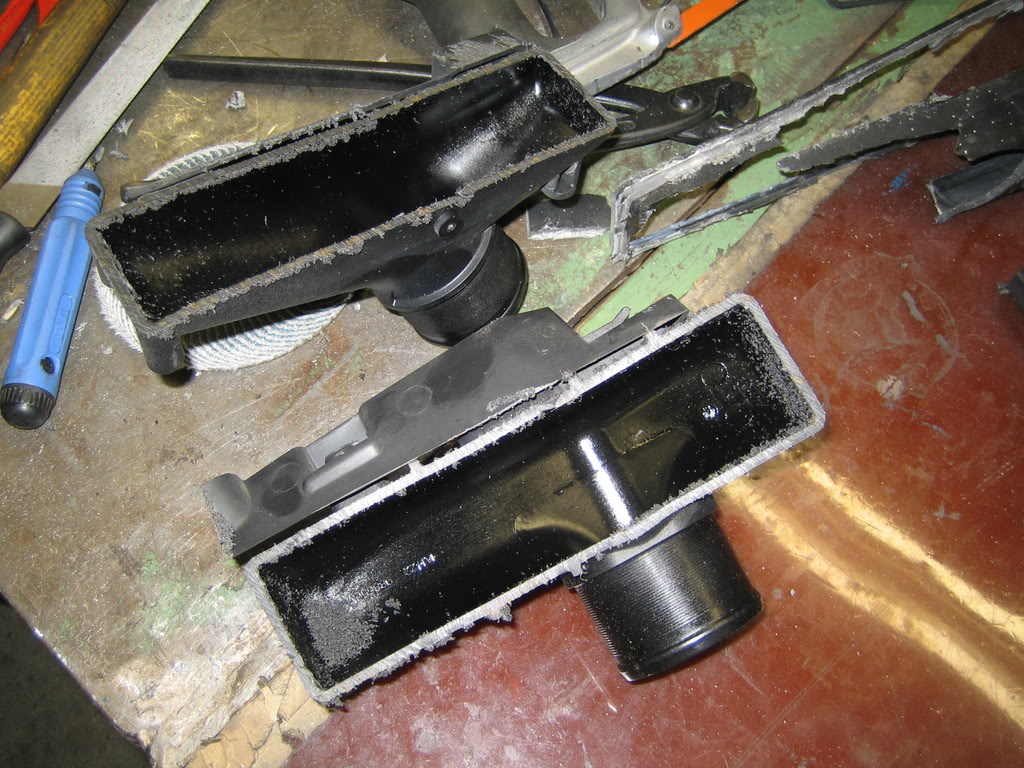
Viola:
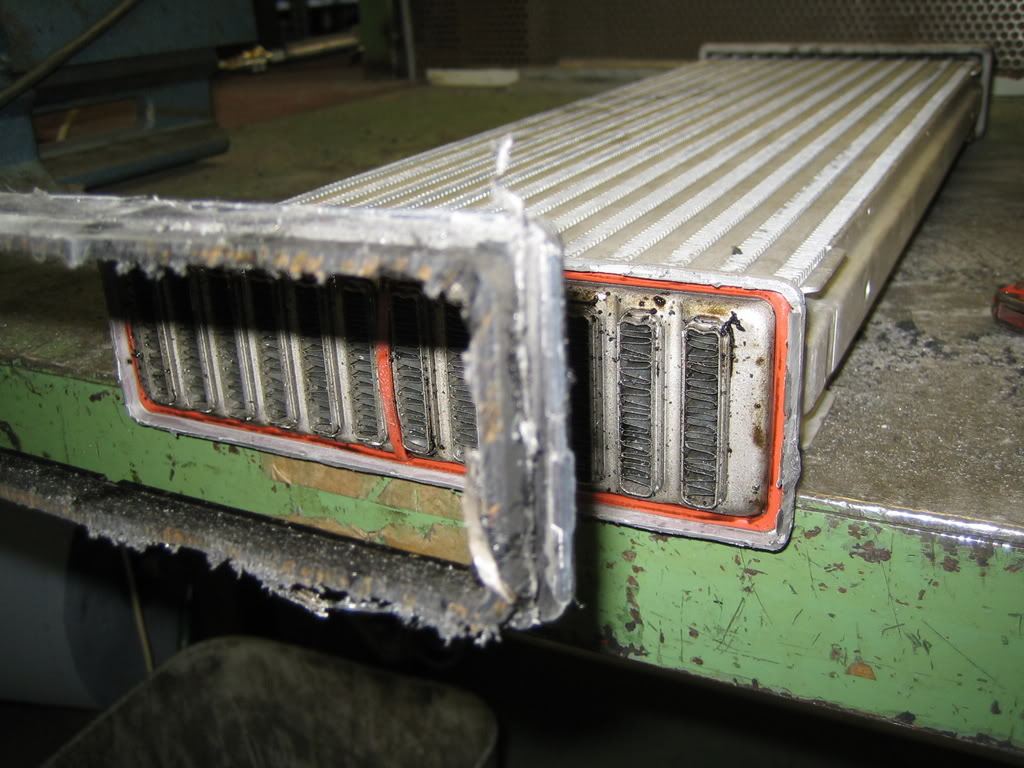
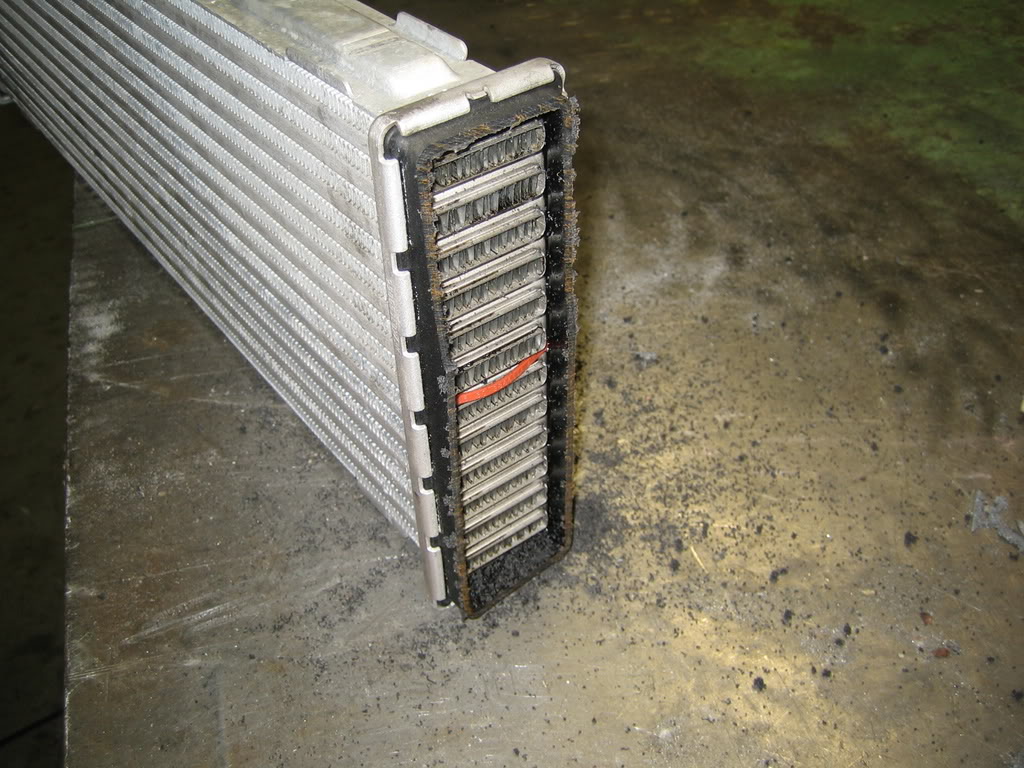
The red gasket for the plastic endtanks, check the fins in the core:
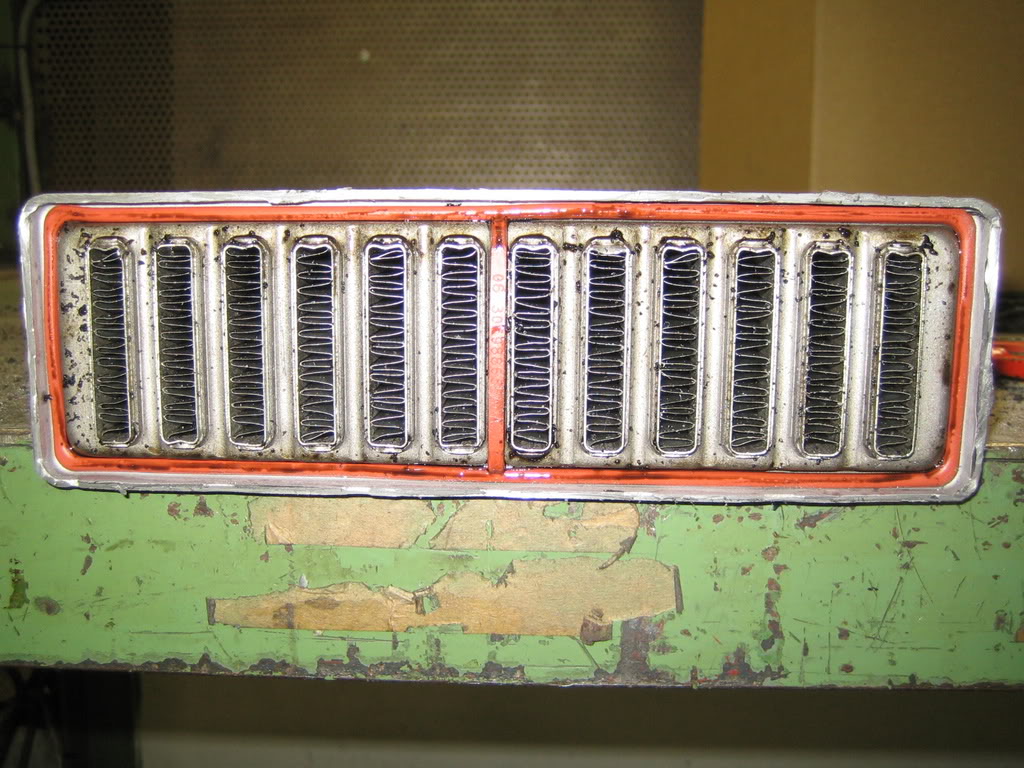
A core ready for some nice endtanks:
That was it for now!
After talking to some pro's the next best thing to mega expensive rally/race cores were actually cores used in production cars.
Now it was only a matter of searching for the right one.
It has to have the right measurements of course, with as much fins per inch as possible.
Also it should be thin, thick cores are not as good as a thin one with a big frontal area.
Problem is that the air going through the core is at core temp halfway through the core thus not cooling anymore.
In the end I went to a big car scrapyard searching through tons of cores.
I found one with all that I needed, except the height, so I need a second one to weld to this one.
It's from a Renault trafic from 2007.
It also has plastic end tanks, so they need to come off as well.
This is how it looks like new:
Sawing off the first pieces:
Debris:
Ready for more torture:
Viola:
The red gasket for the plastic endtanks, check the fins in the core:
A core ready for some nice endtanks:
That was it for now!


 15 July 2008, 12:03 PM
#146
Scooby Regular
Thread Starter
Join Date: Dec 2002
Posts: 458
Likes: 0
Received 0 Likes
on
0 Posts
True, but one is for my gearbox.
Yeah, I have to translate the story from Dutch to English aswell.
But I have to keep you guys updated don't I?
But I have to keep you guys updated don't I?
 18 August 2008, 10:46 PM
#148
Scooby Regular
Thread Starter
Join Date: Dec 2002
Posts: 458
Likes: 0
Received 0 Likes
on
0 Posts
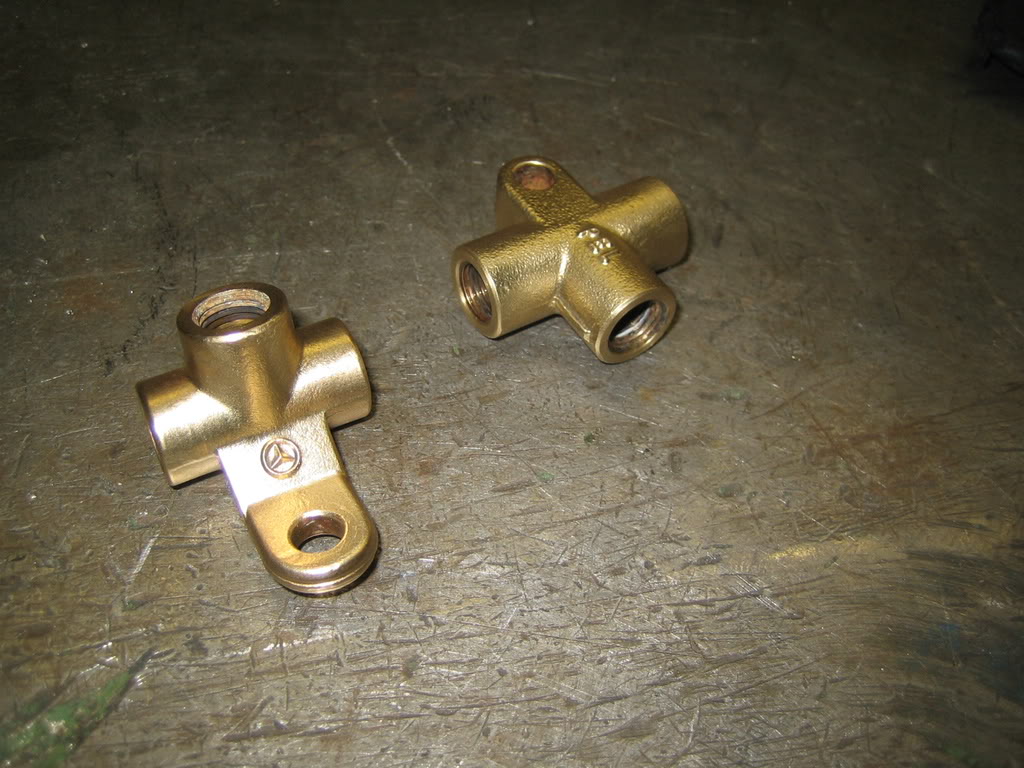
Started working on the brake lines
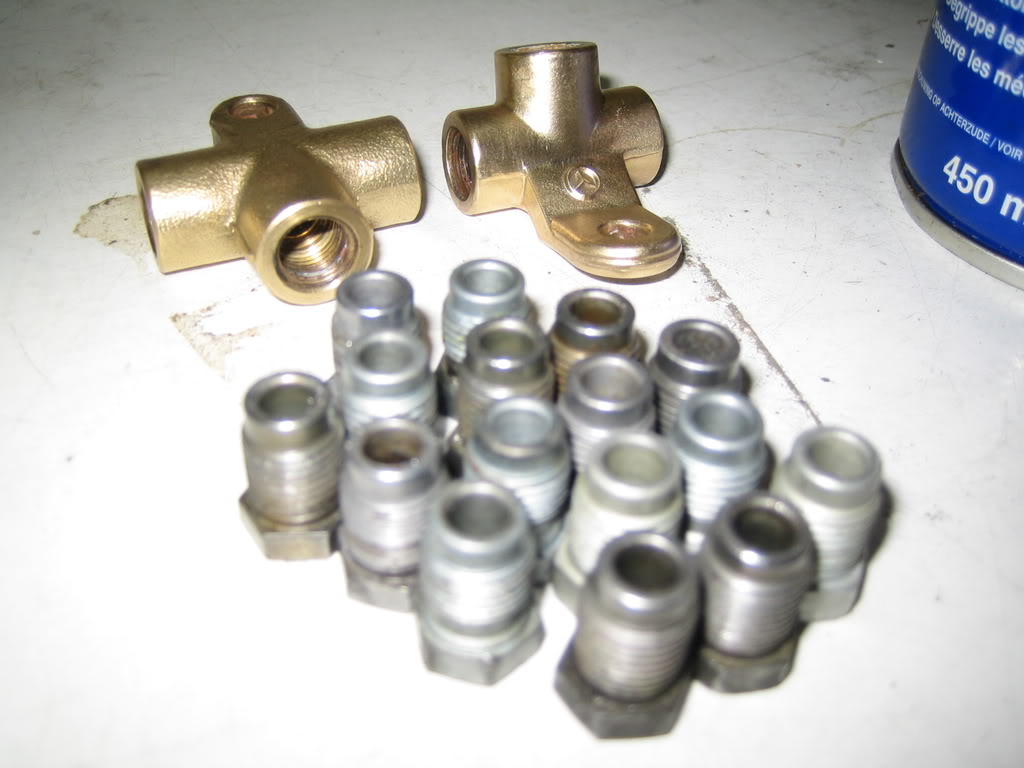
I had to get some stuff before I could start, so I went to the scrapyard and took nipples I needed, from the newest cars they had, coz then they are still shiny.
I also took 2 T-pieces which cost almost 40 euro a pop at the shop.
Nipples:
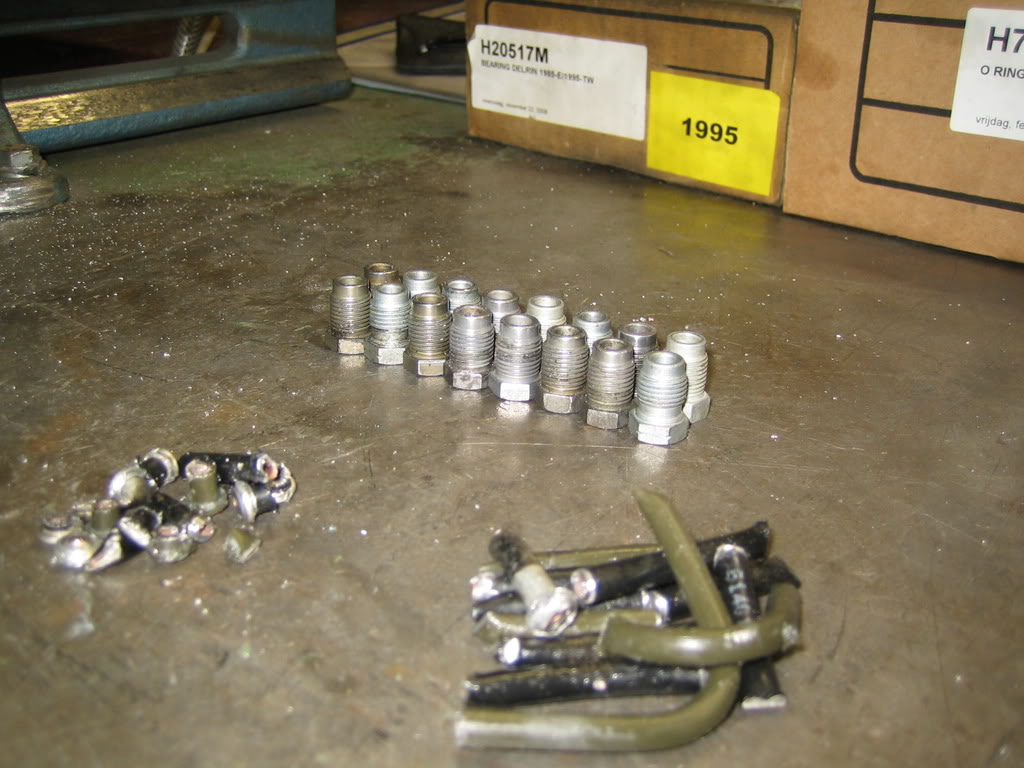
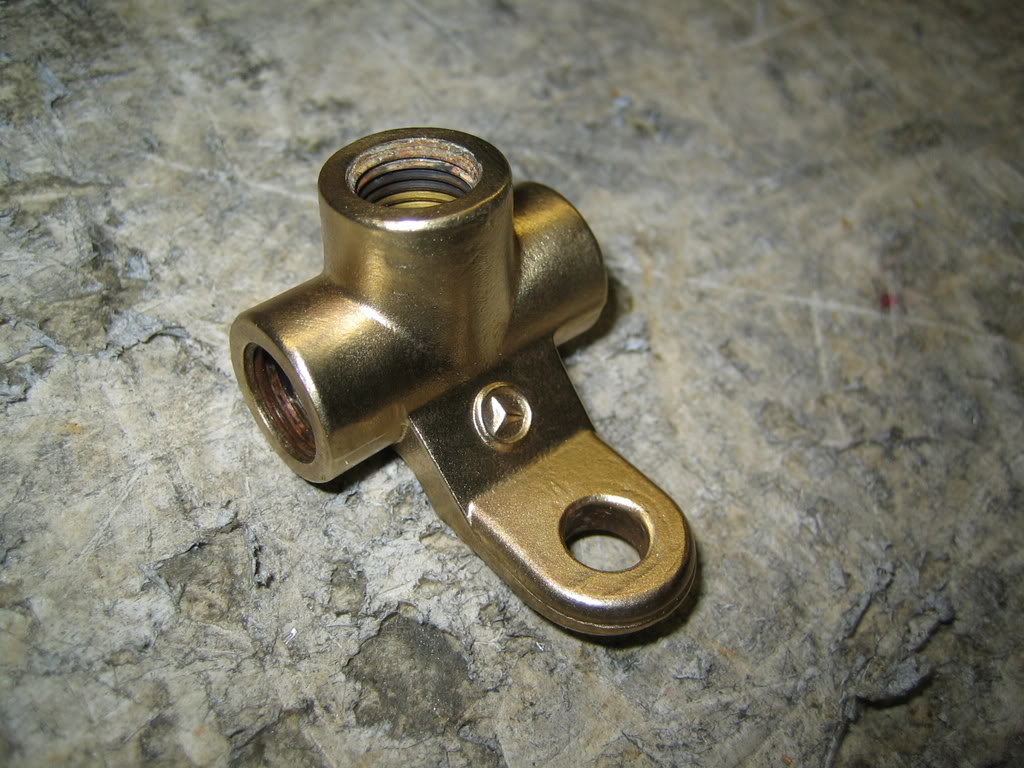
T-pieces:
Looks like donkey *****, so I polished them a bit.
As new!!:
Everything together, in the shop almost a 100 euro's, at the scrapyard 10 euro. :
I had to get some stuff before I could start, so I went to the scrapyard and took nipples I needed, from the newest cars they had, coz then they are still shiny.
I also took 2 T-pieces which cost almost 40 euro a pop at the shop.
Nipples:
T-pieces:
Looks like donkey *****, so I polished them a bit.
As new!!:
Everything together, in the shop almost a 100 euro's, at the scrapyard 10 euro.
:
18 August 2008, 10:46 PM
#149
Scooby Regular
Thread Starter
Join Date: Dec 2002
Posts: 458
Likes: 0
Received 0 Likes
on
0 Posts
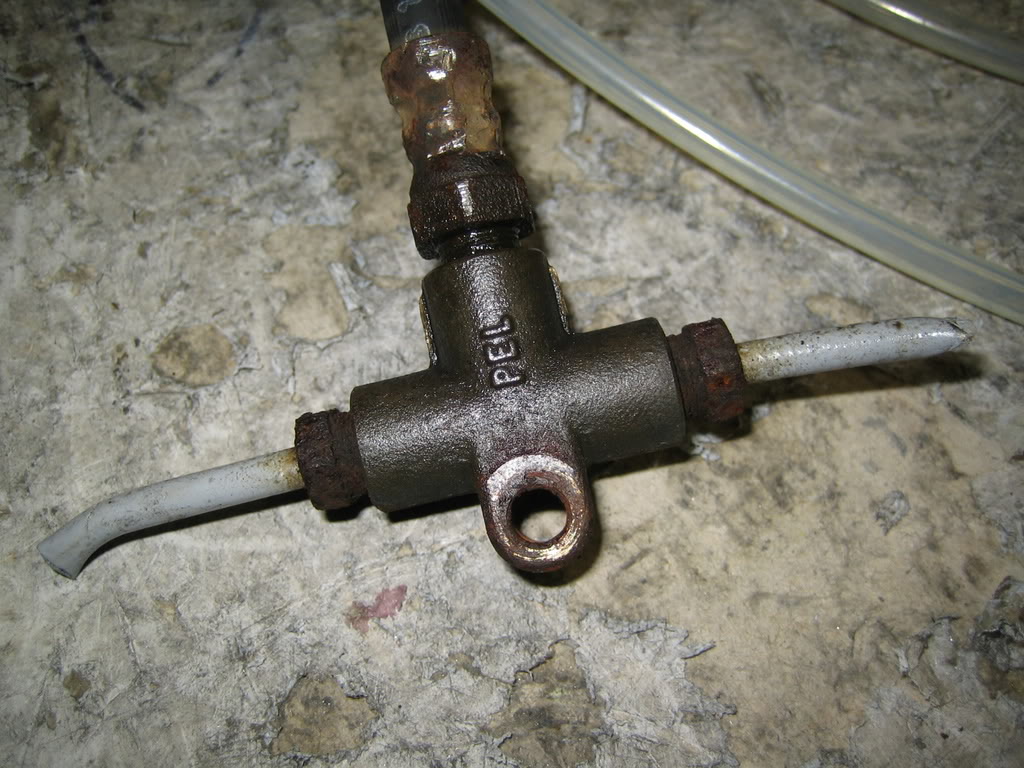
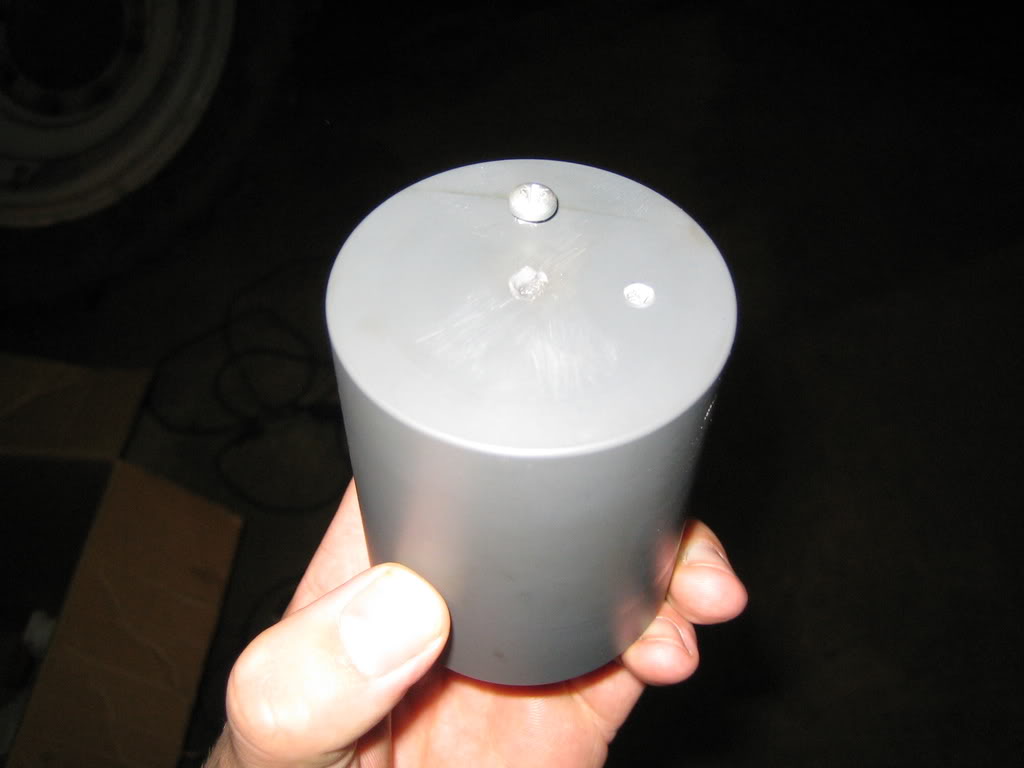
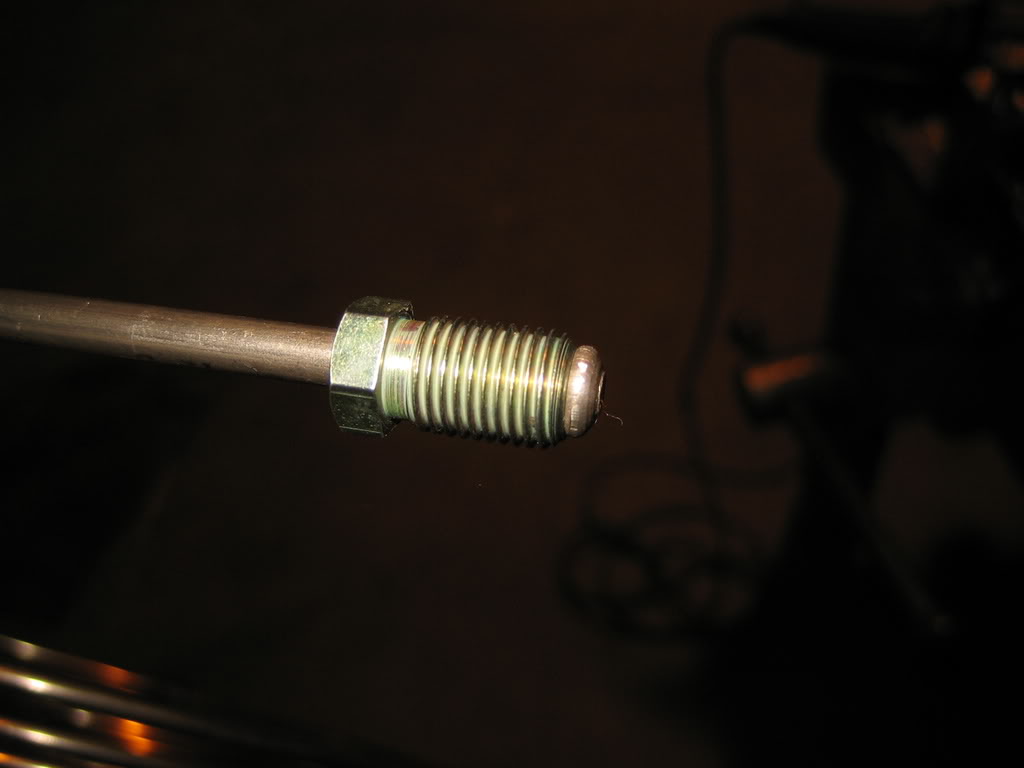
I found the measurements of the AP-Racing brake fluid reservoirs I am going to buy, so I turned a dummy from plastic:
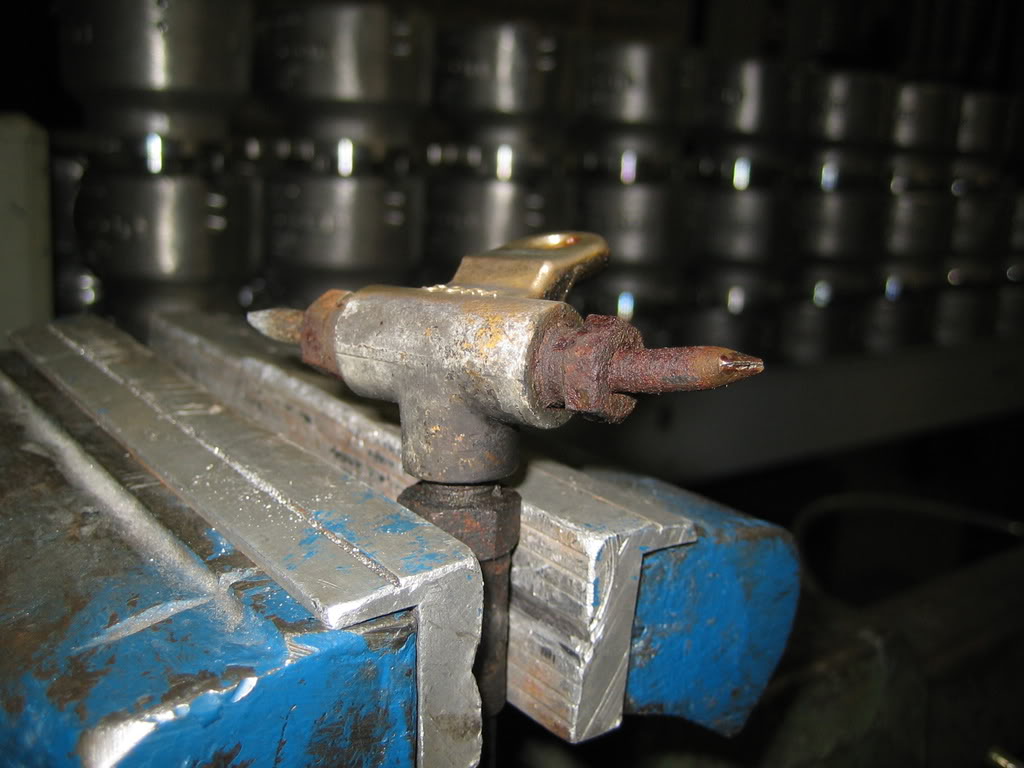
Friend of mine had a "bead" machine which I borrowed, but before using it the line had to be cut off:
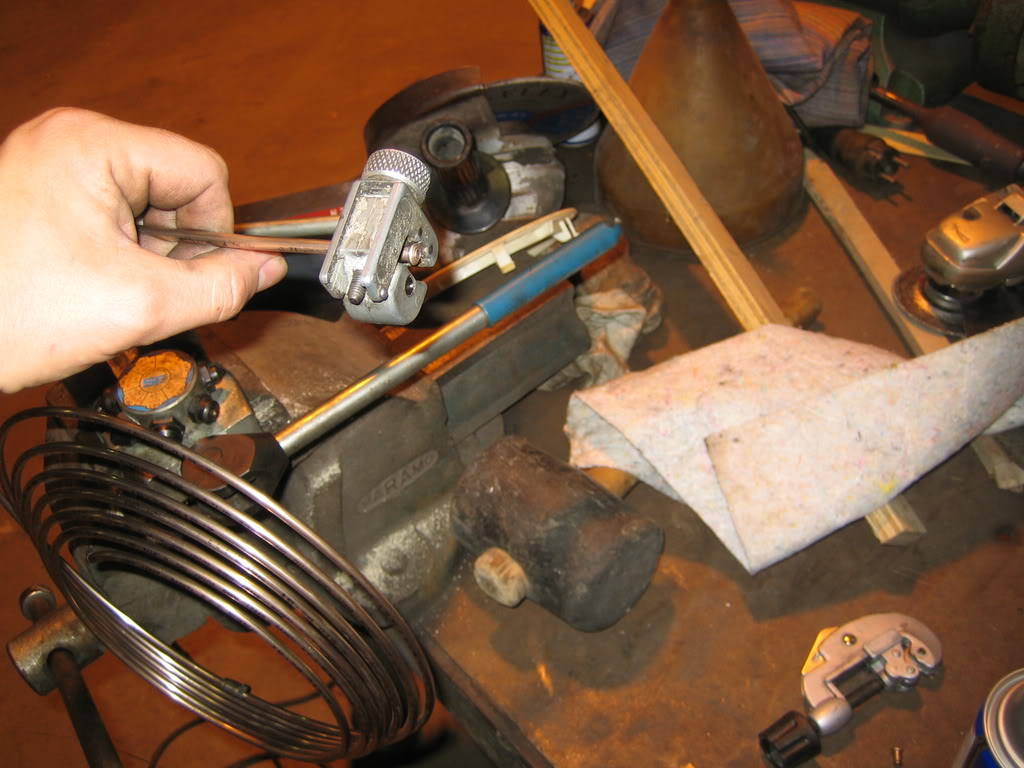
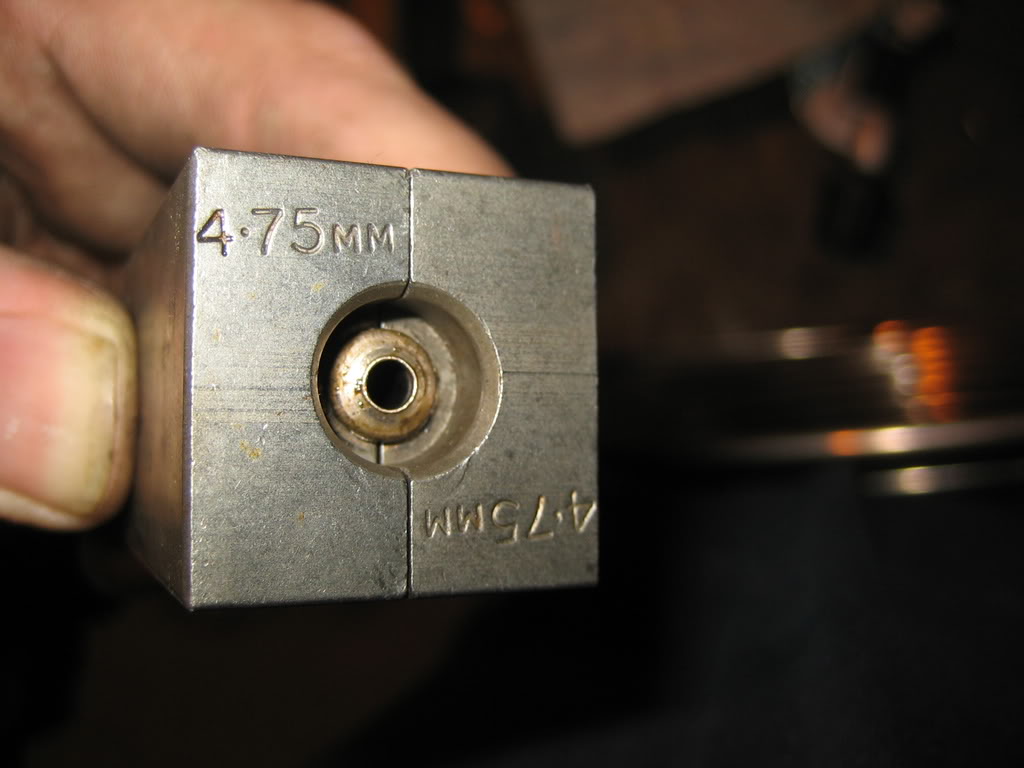
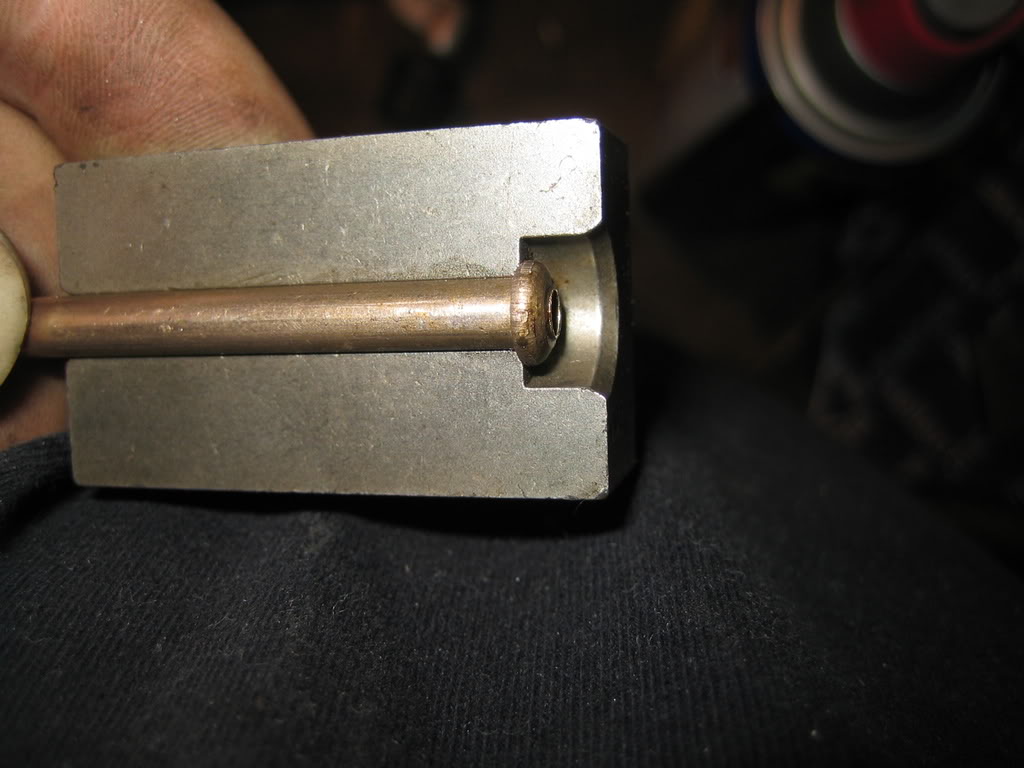
This is how it works:
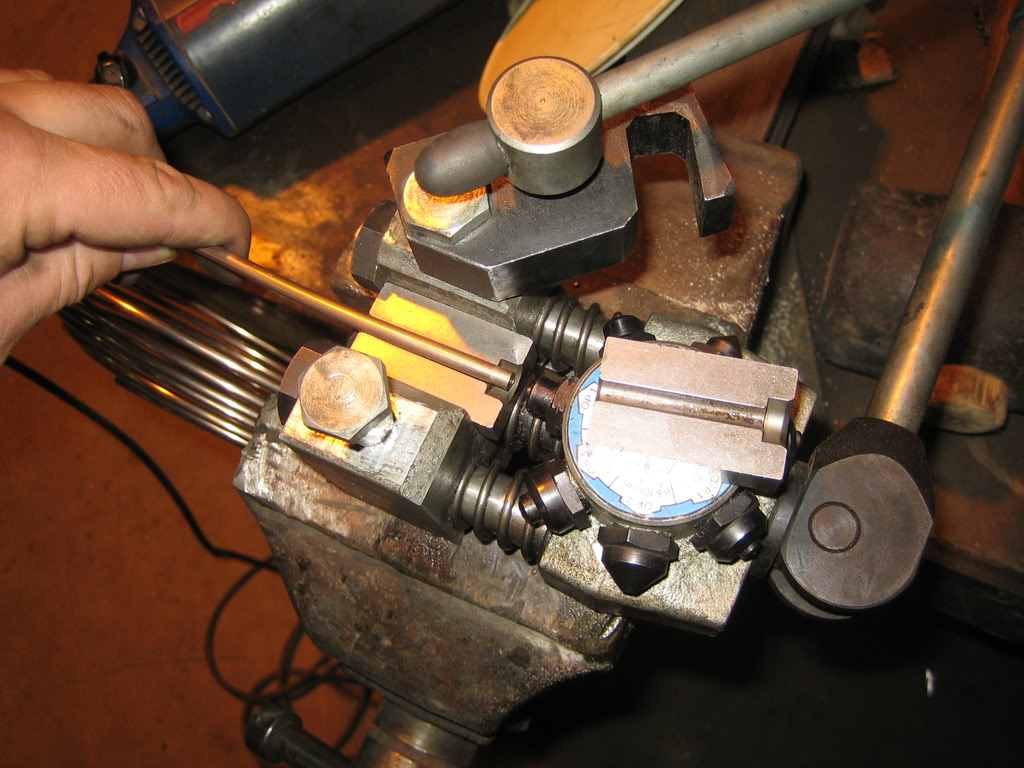
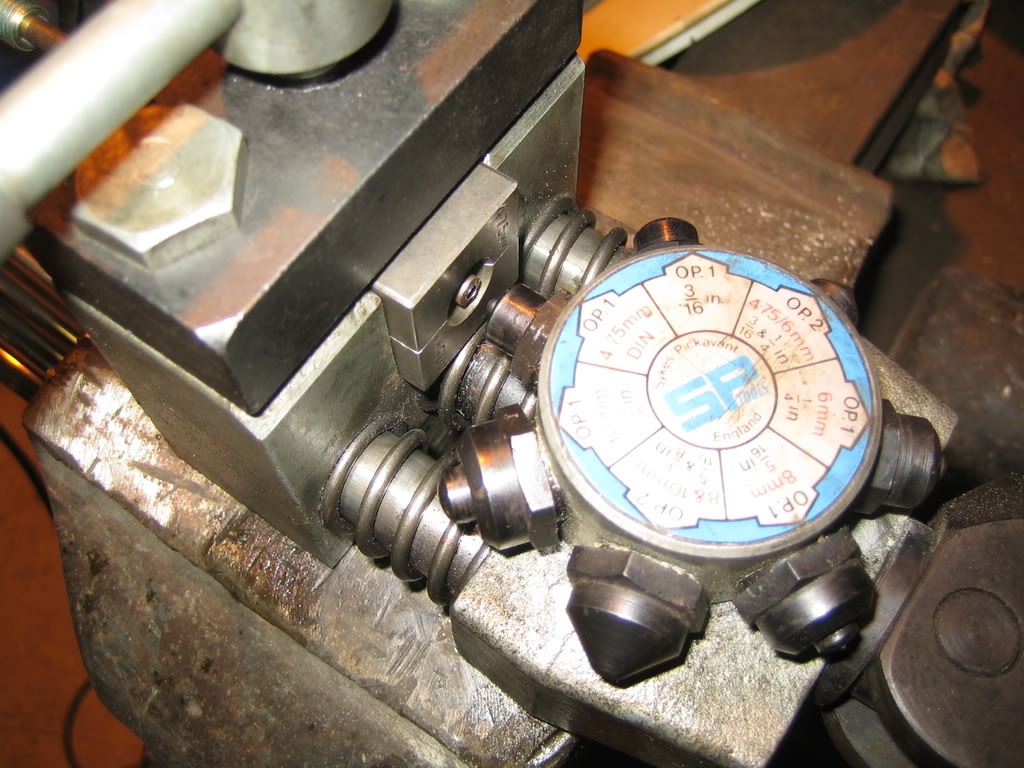

Friend of mine had a "bead" machine which I borrowed, but before using it the line had to be cut off:
This is how it works:
18 August 2008, 10:47 PM
#150
Scooby Regular
Thread Starter
Join Date: Dec 2002
Posts: 458
Likes: 0
Received 0 Likes
on
0 Posts
For assisting me with the shape I found a piece of solid core wire.
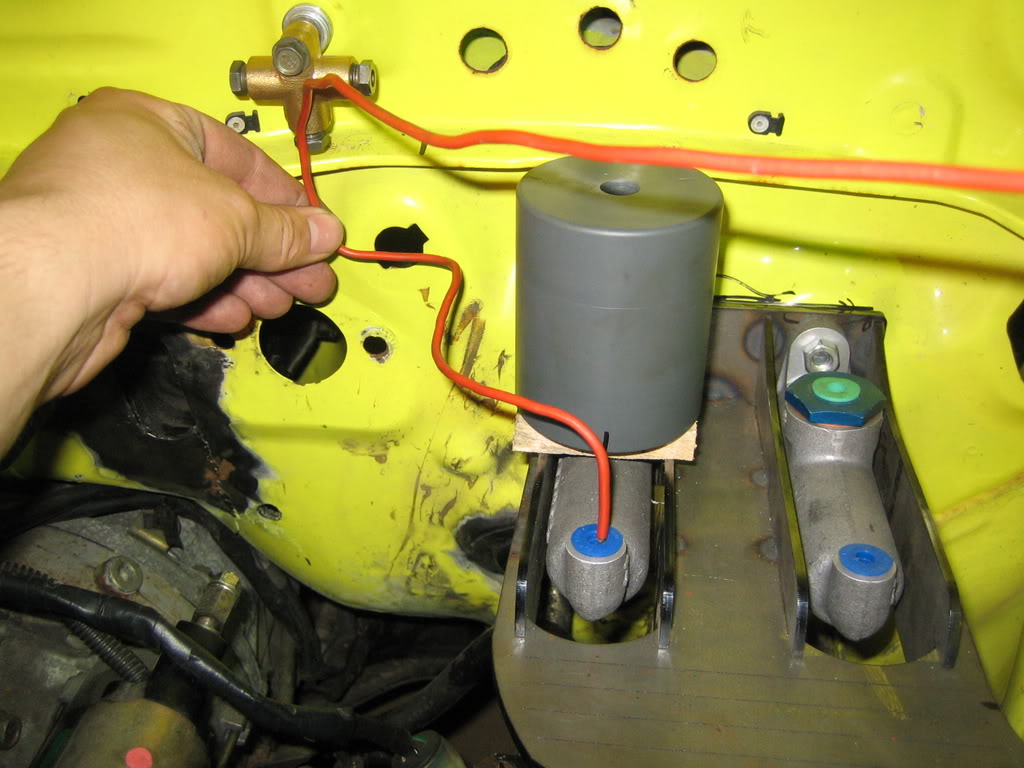
Then the real work started:
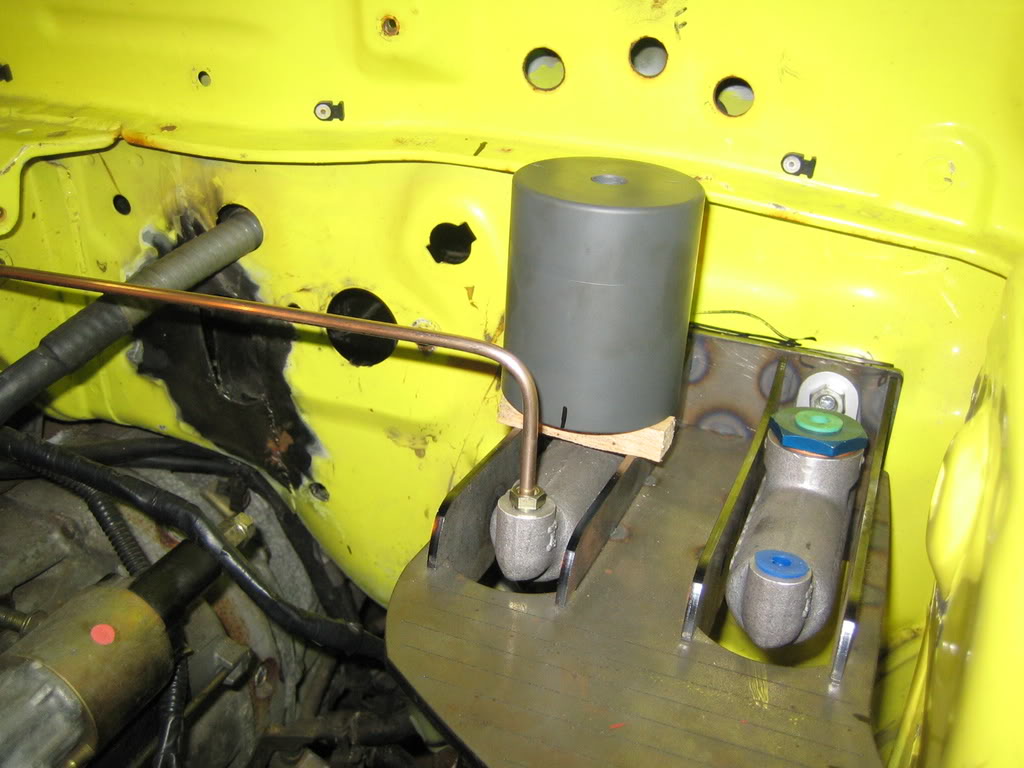
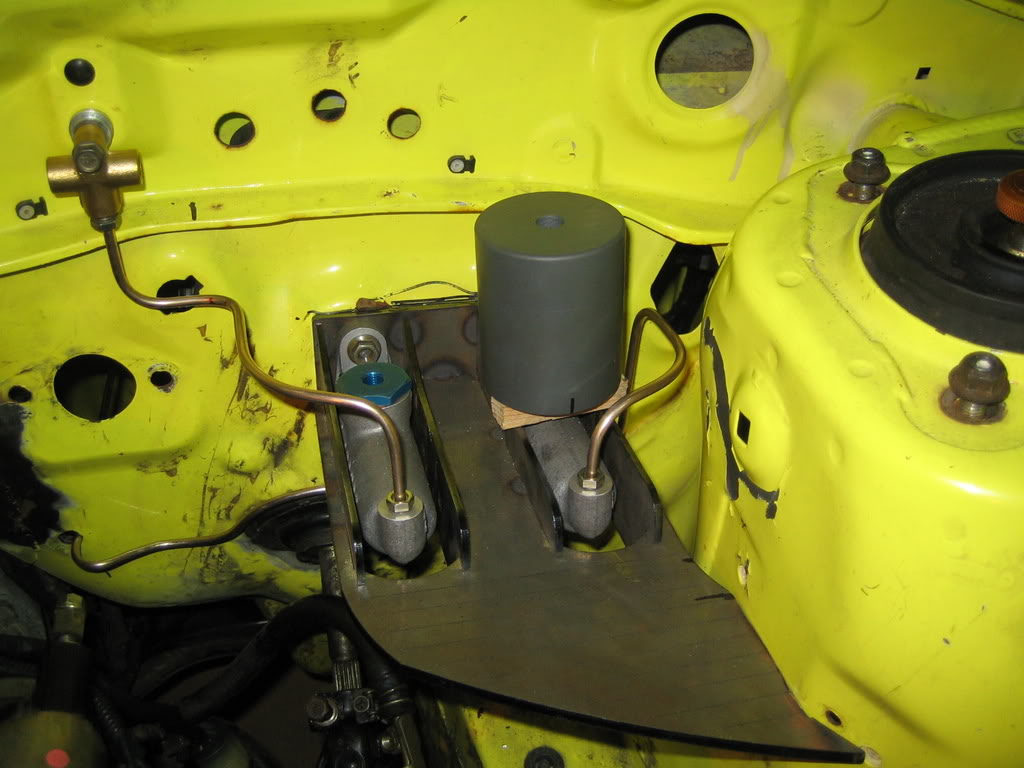
This was ok, but I wasn't really satisfied.
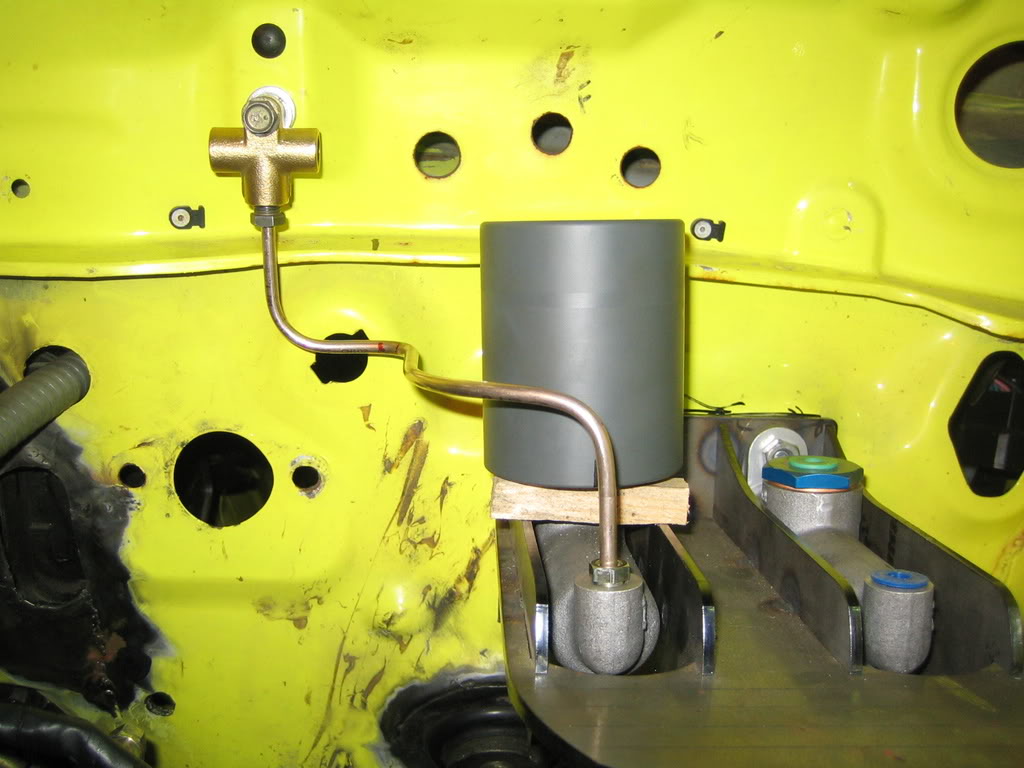
So today I redid the whole thing, and now I iz happeee:
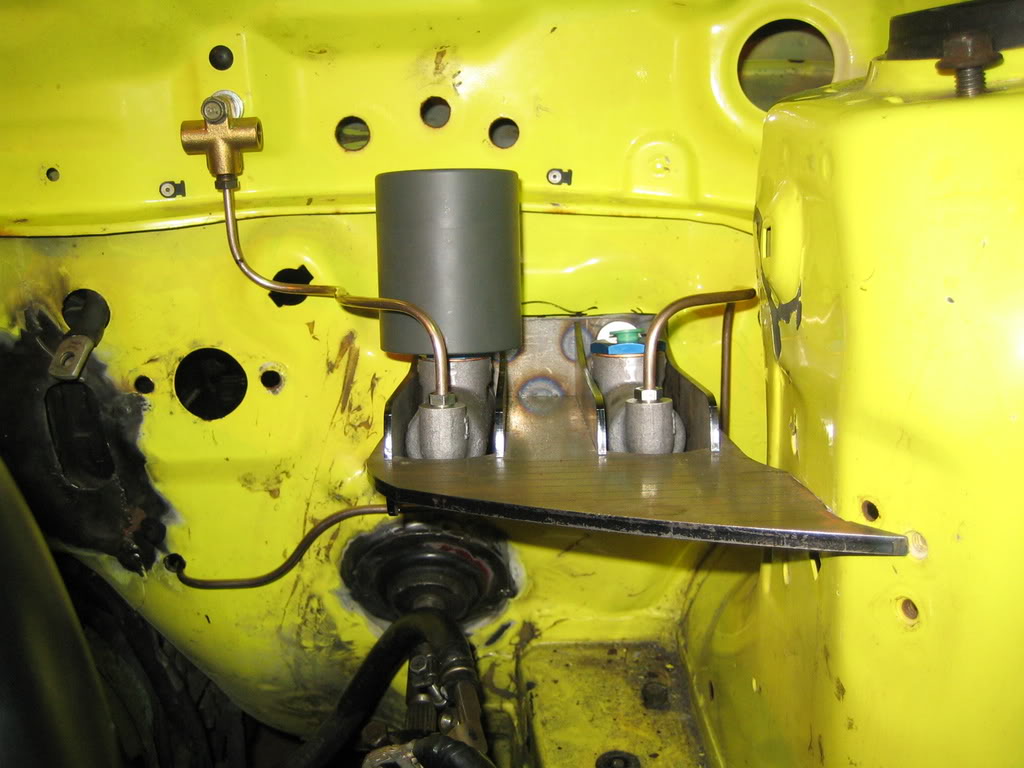
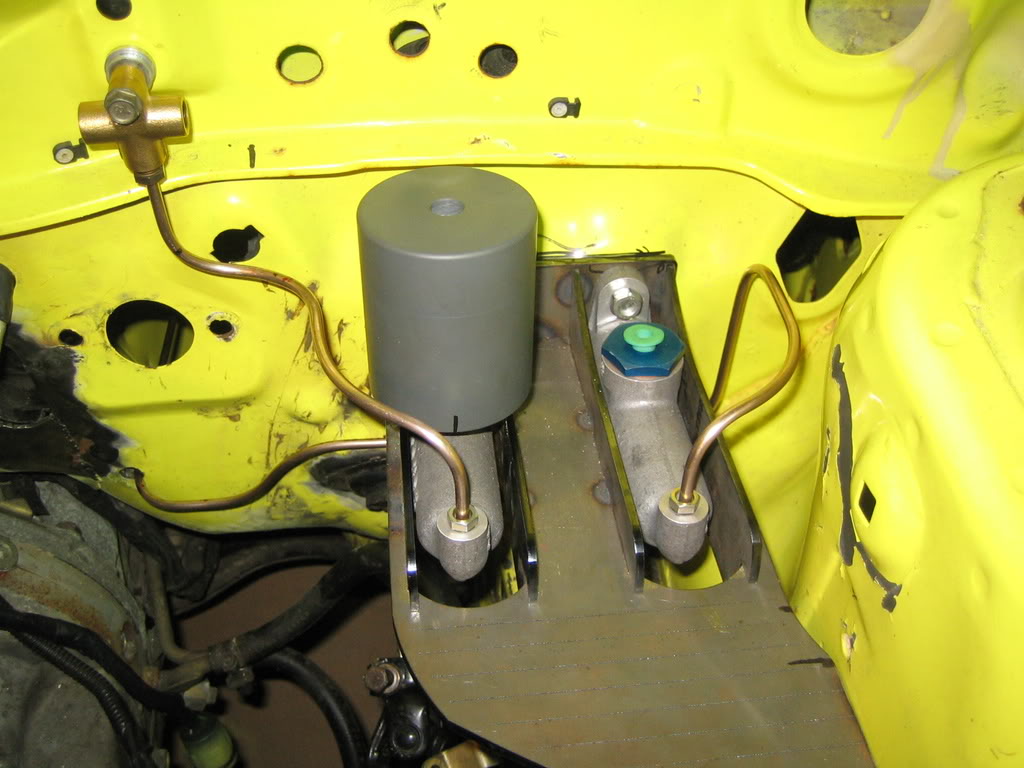
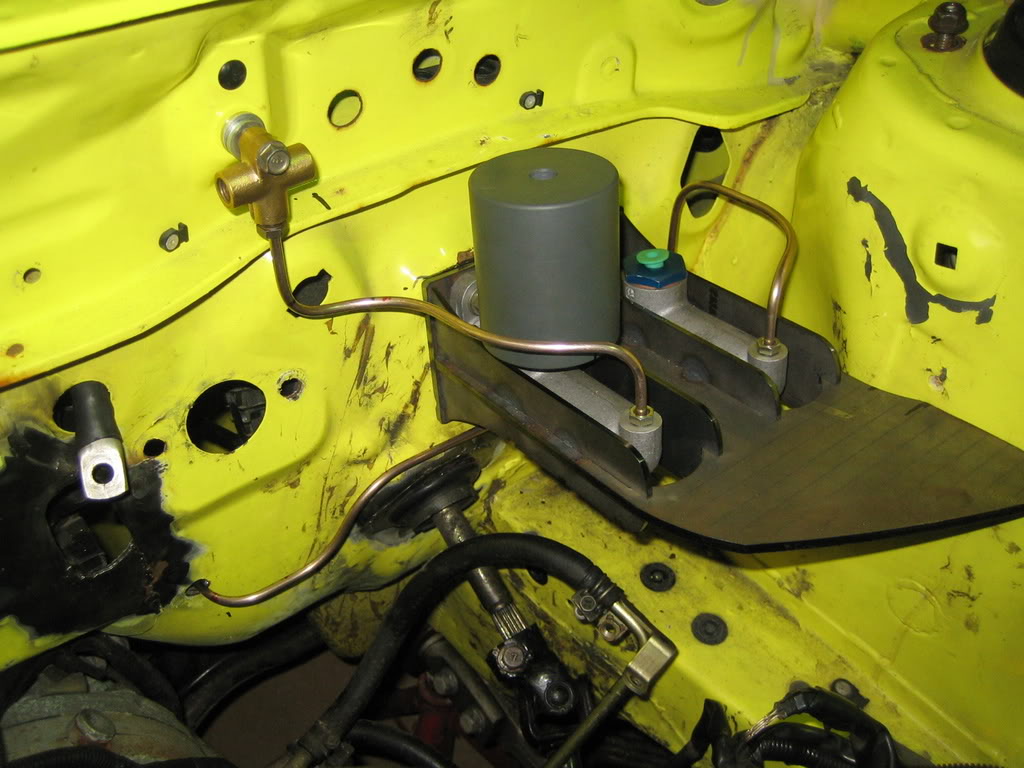
Now the rest.
Then the real work started:
This was ok, but I wasn't really satisfied.
So today I redid the whole thing, and now I iz happeee:
Now the rest.