Prodrive Grp.N. chassis street build
 05 September 2009, 04:27 PM
#241
Scooby Regular
Thread Starter

Join Date: Dec 2002
Posts: 458
Likes: 0
Received 0 Likes
on
0 Posts
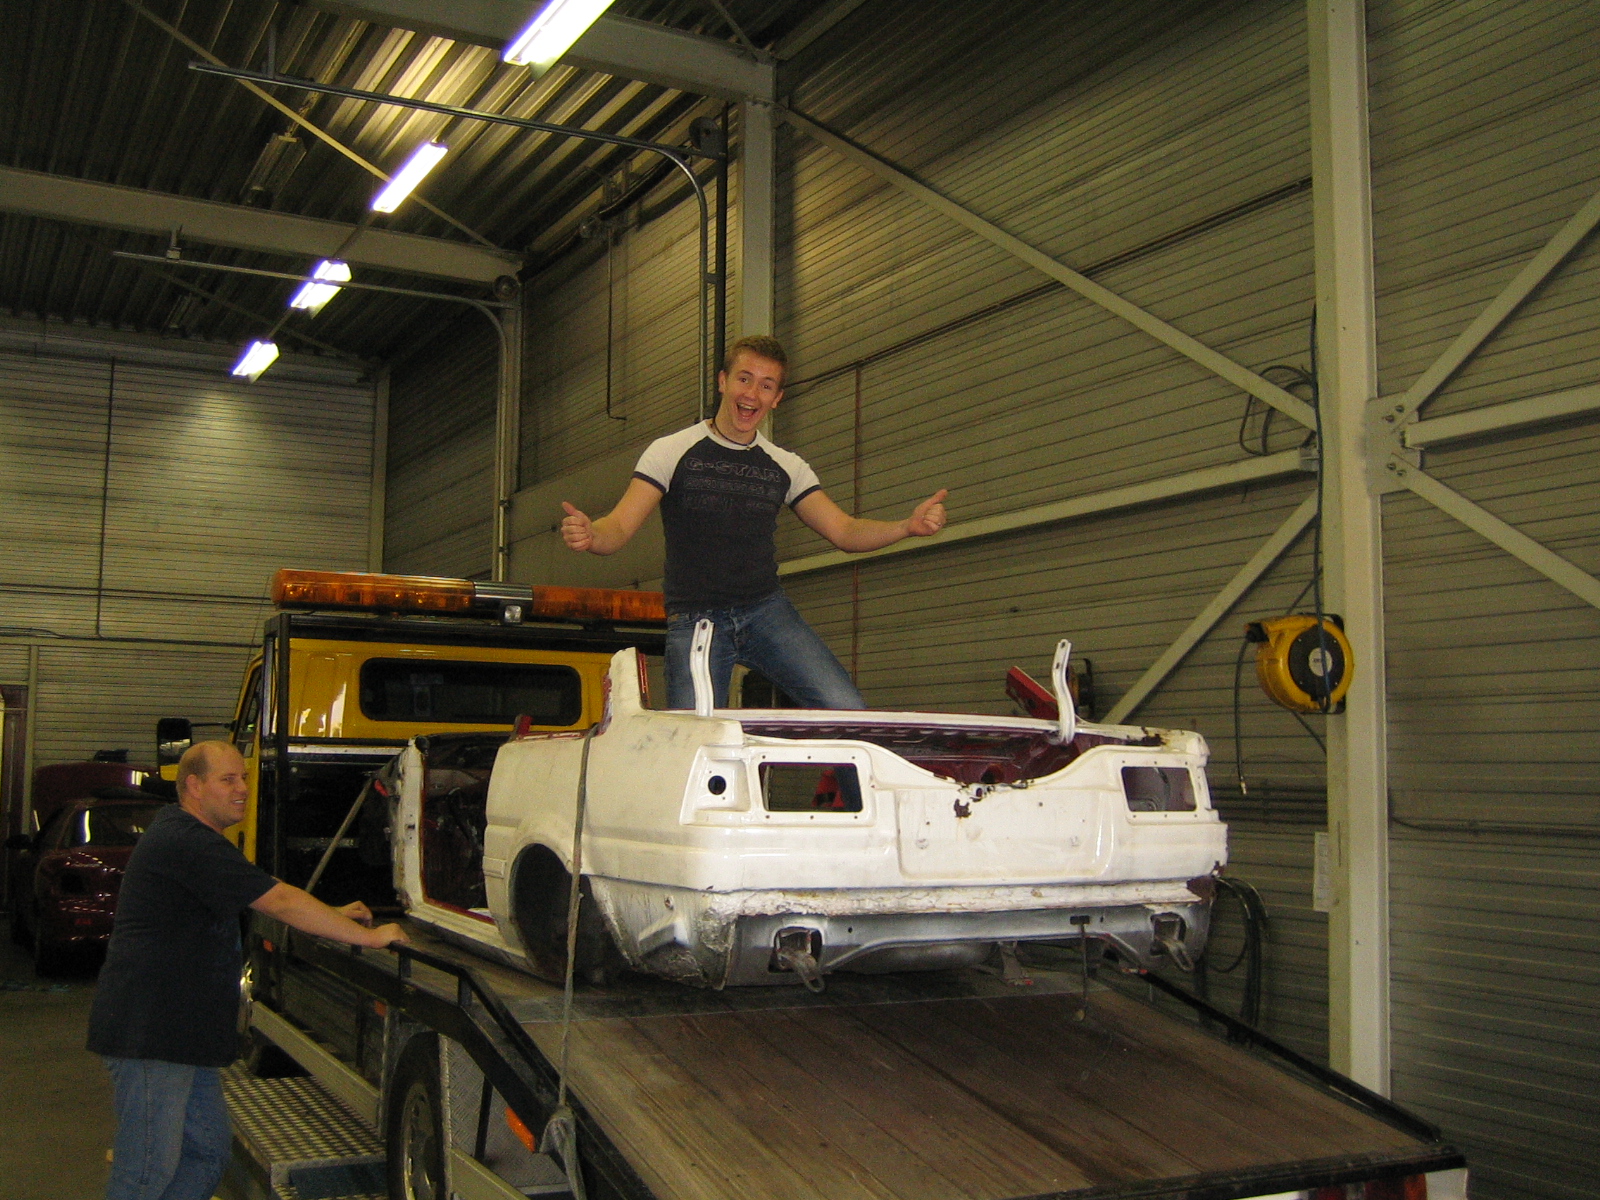
Well, today I picked up my new roof for the Hachi!!!
I went with a friend of mine to a guy who is cutting up a chassis.
He was so kind to give me the roof and some other parts I can use for my project.
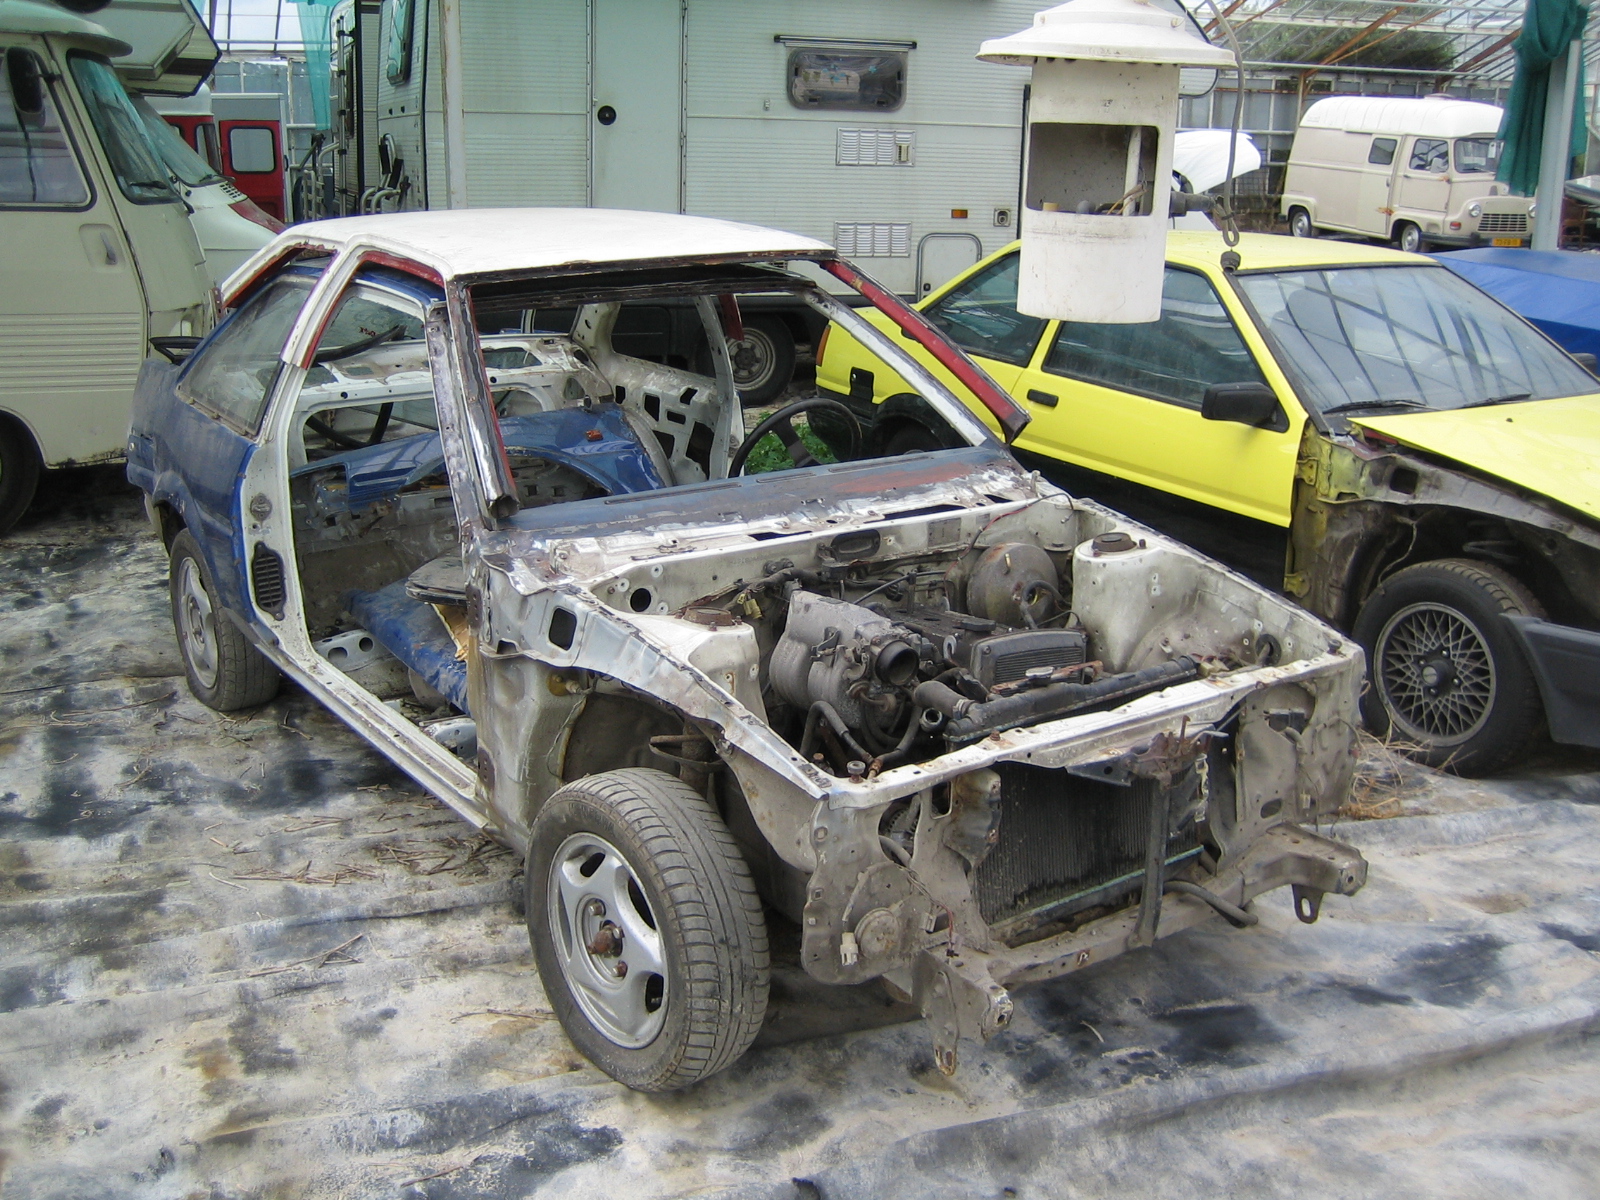
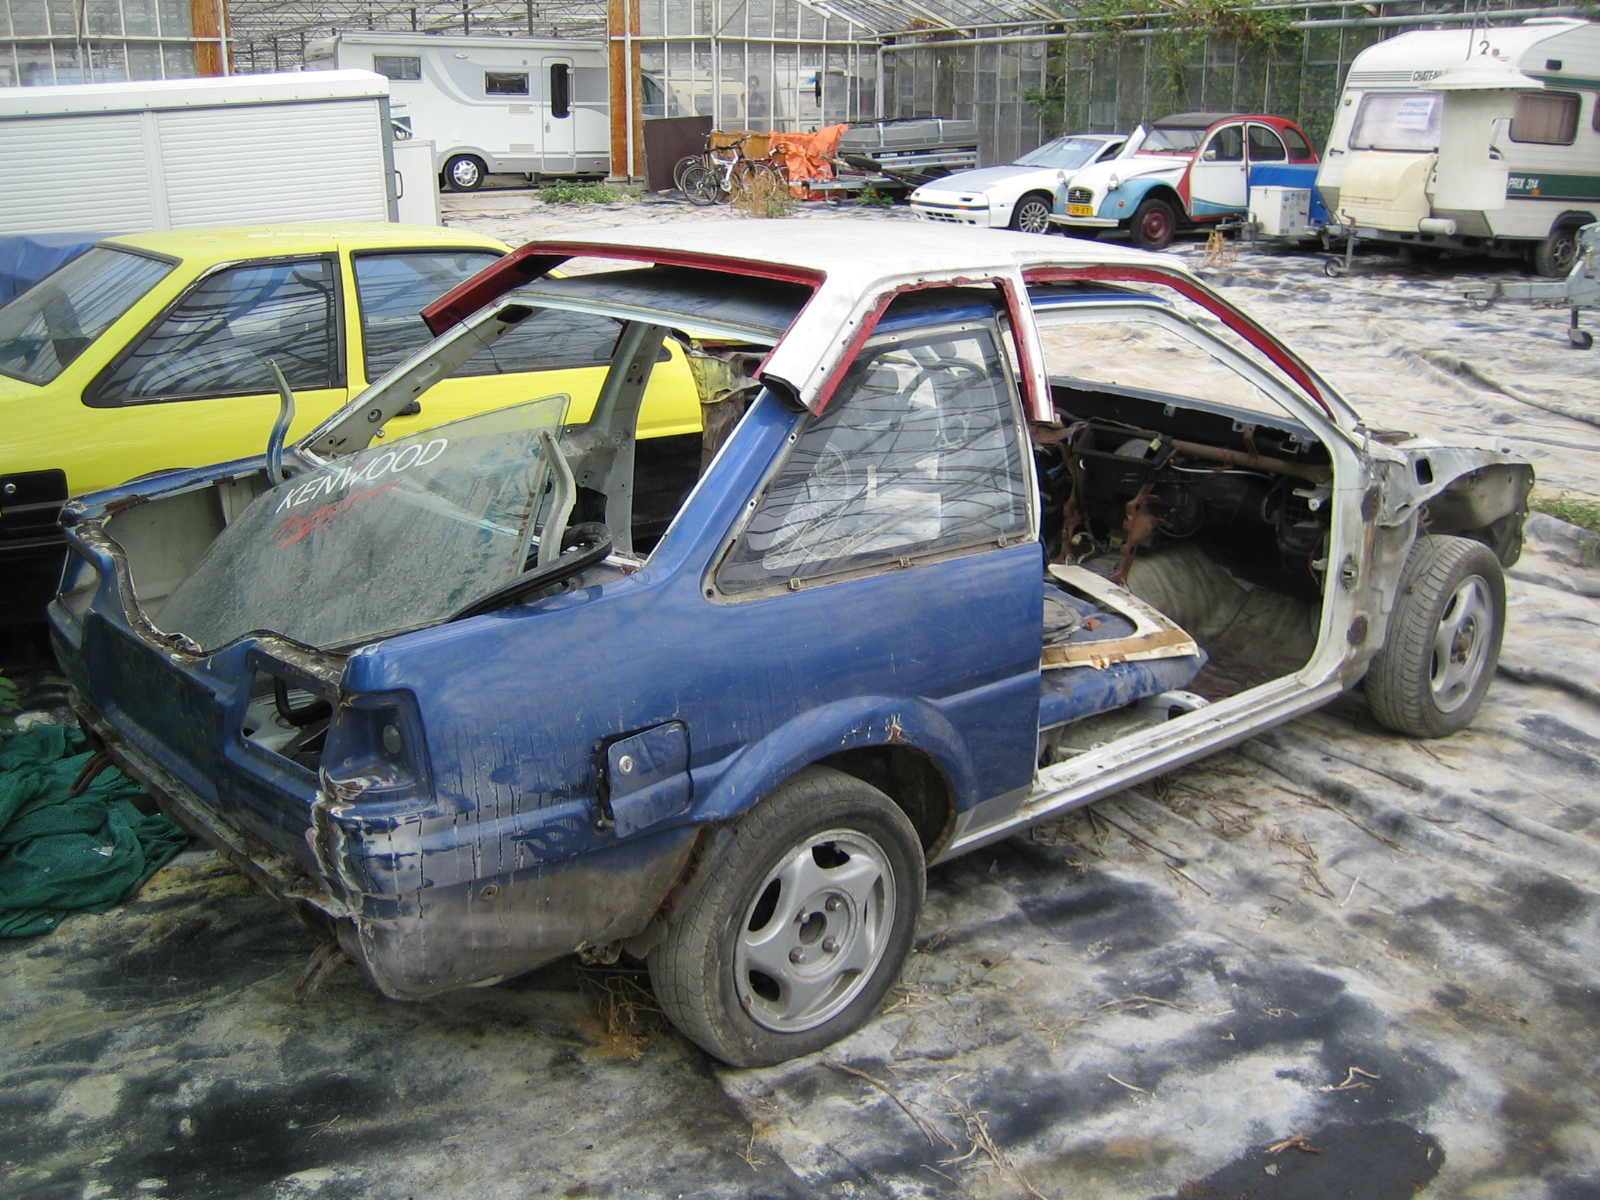
Here they introduce the all new Corolla Spider:
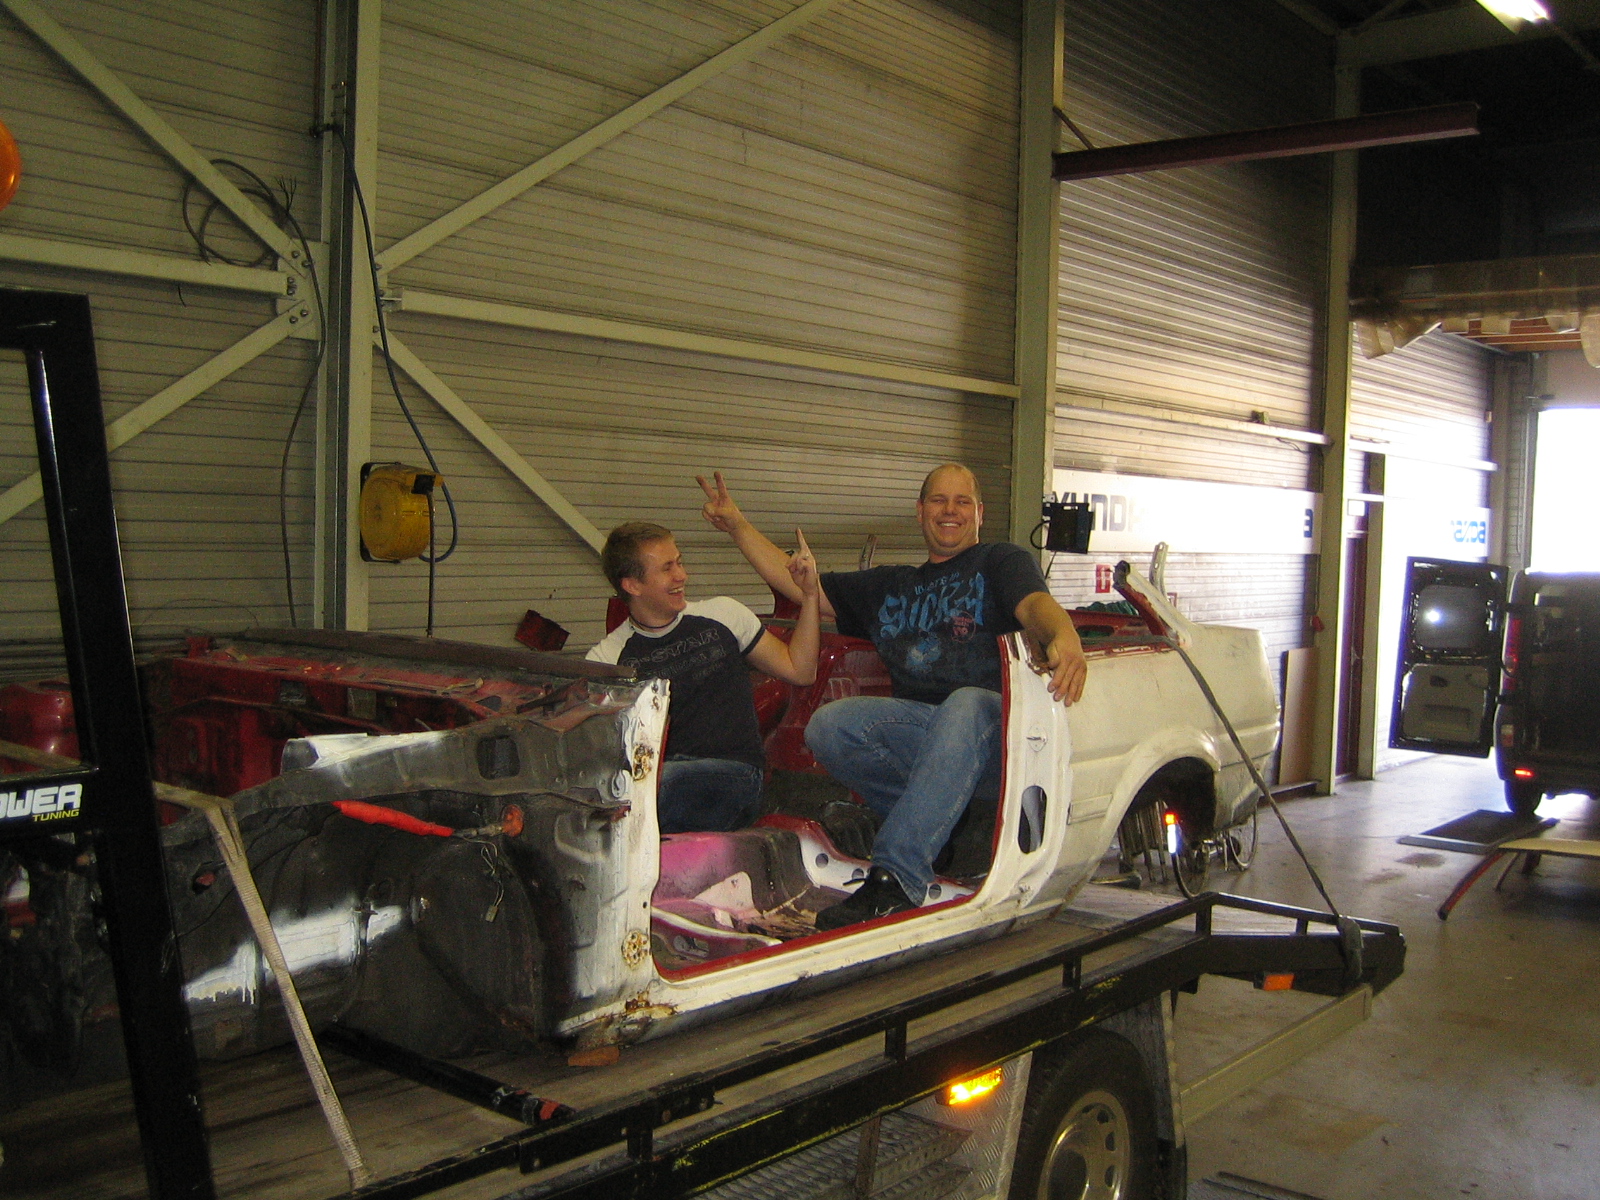
And this is the hard top that goes with it, nicely fitting in the van:
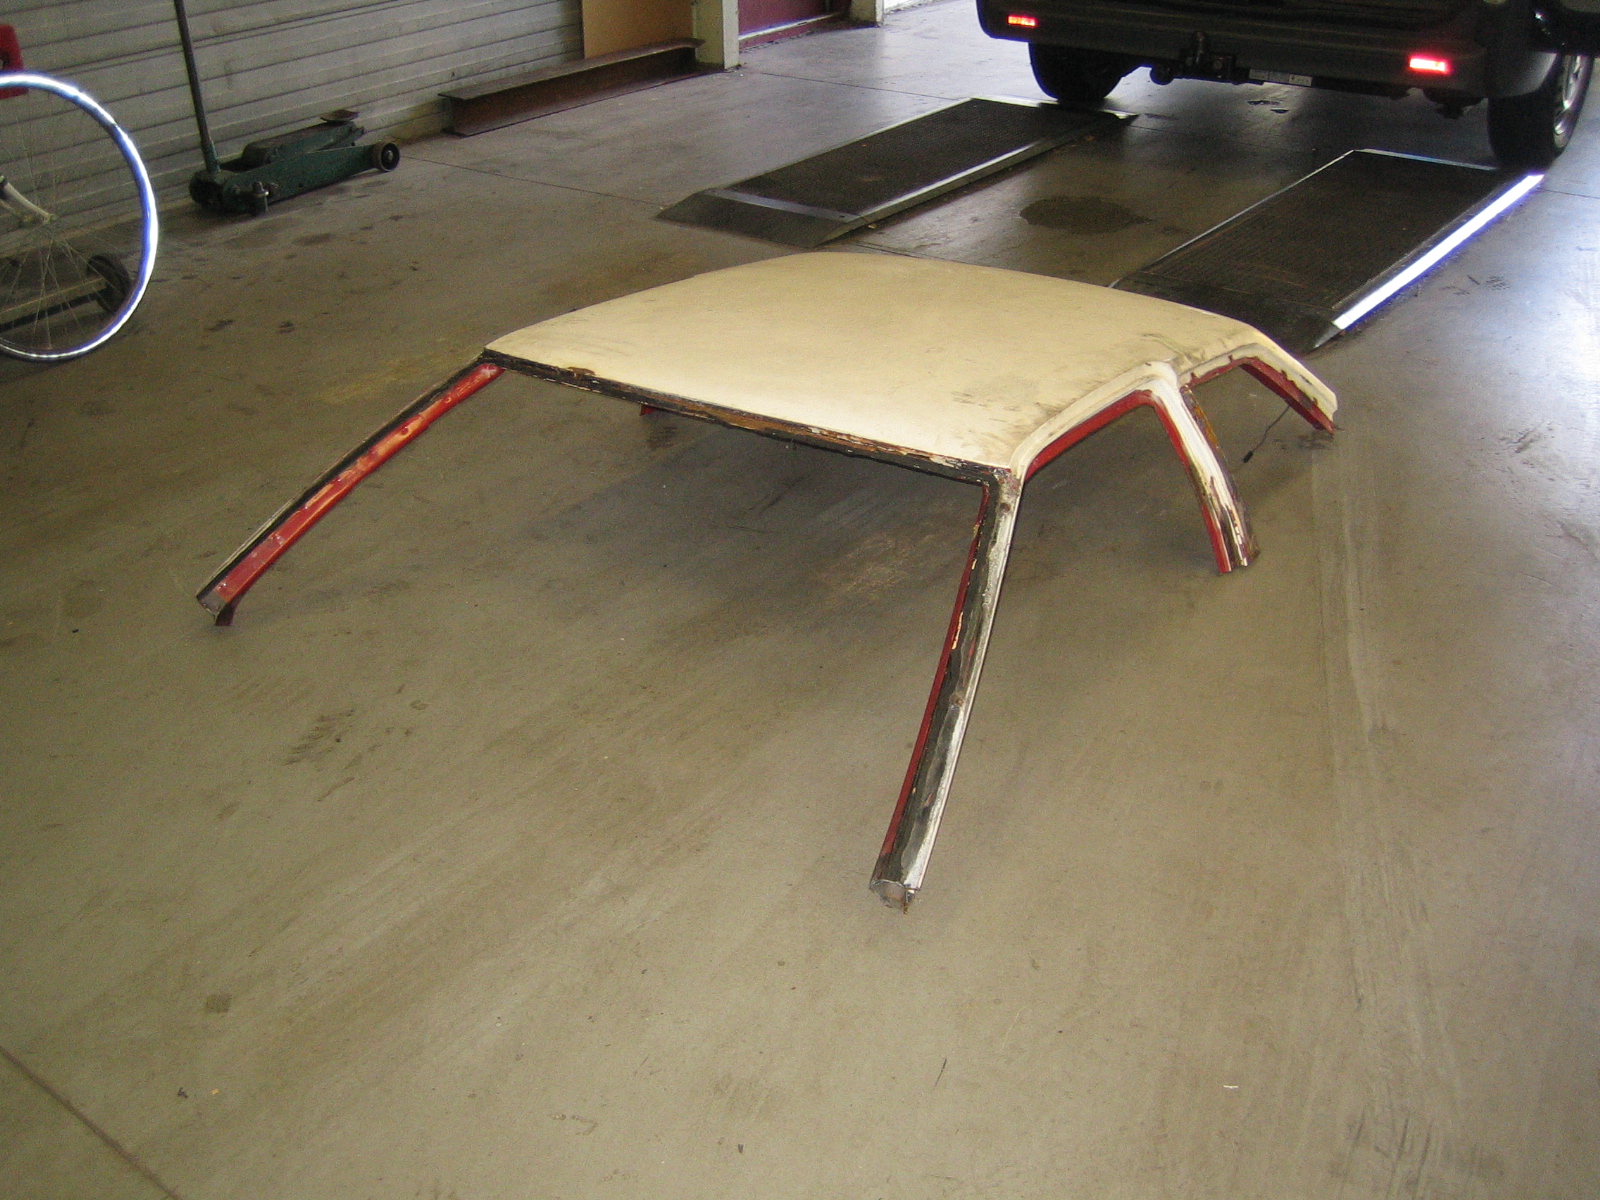
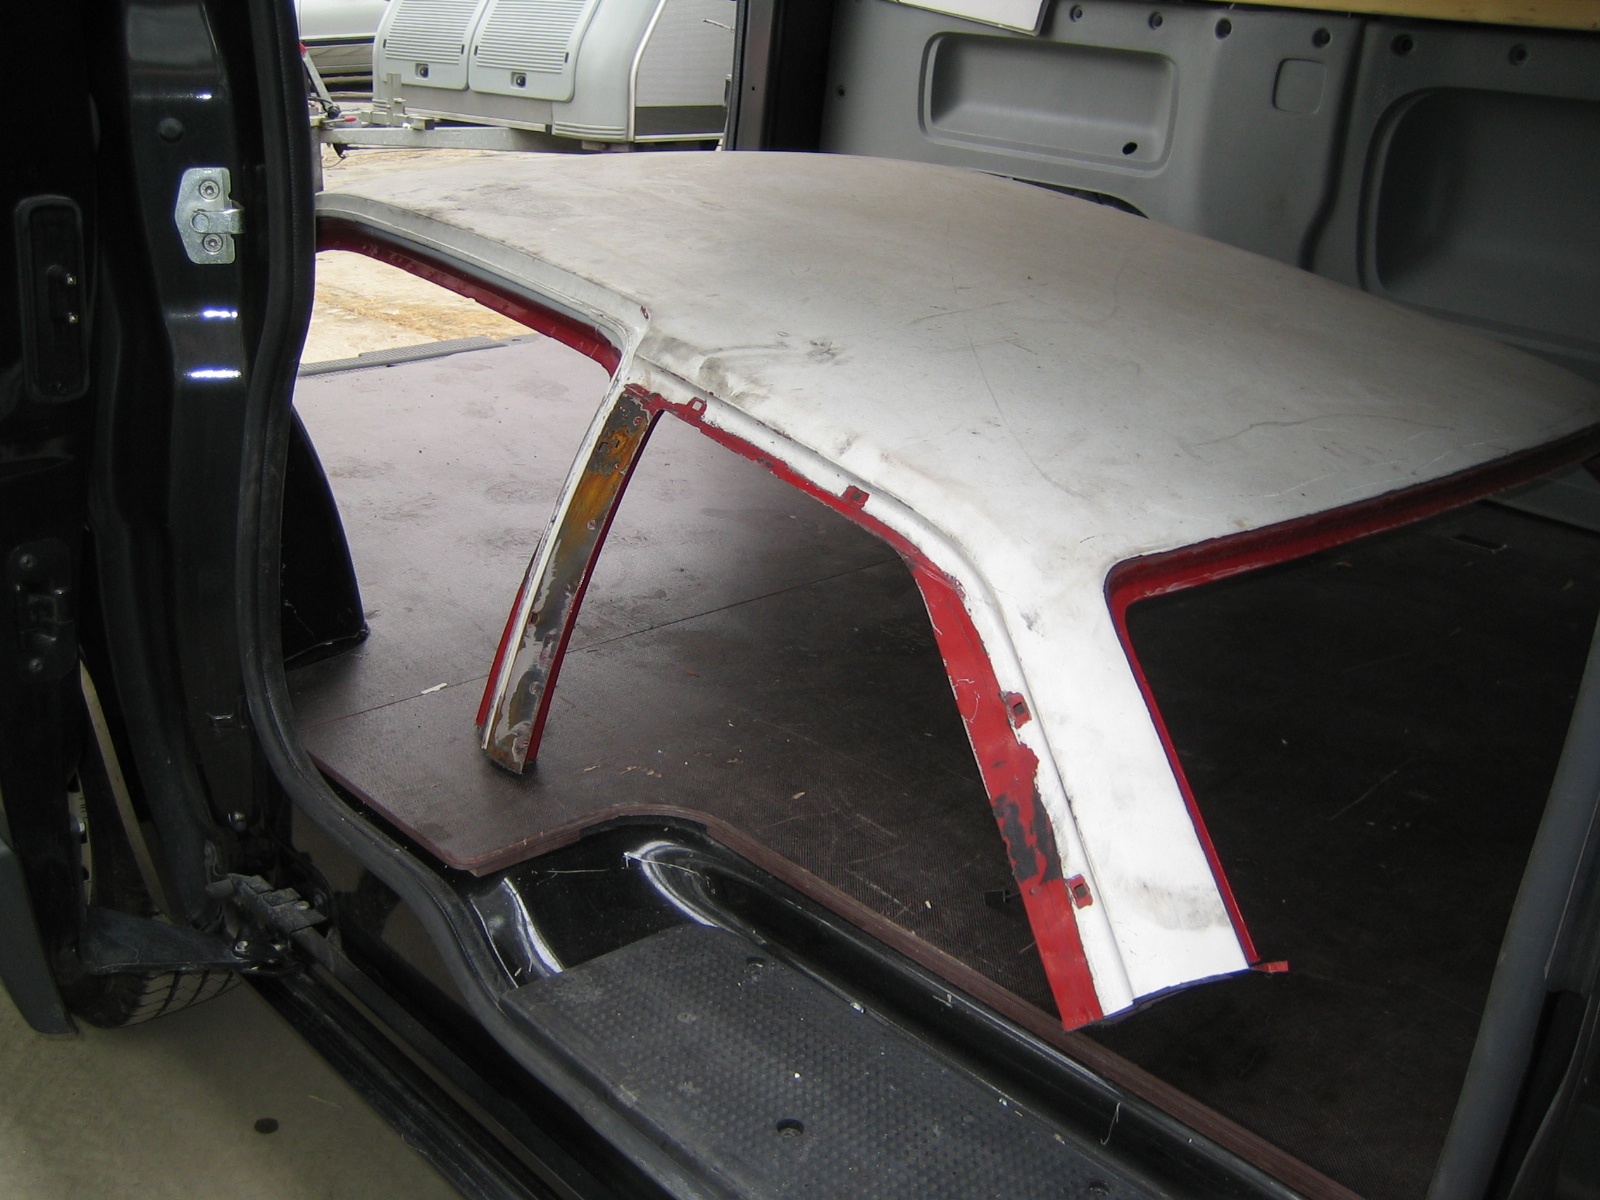
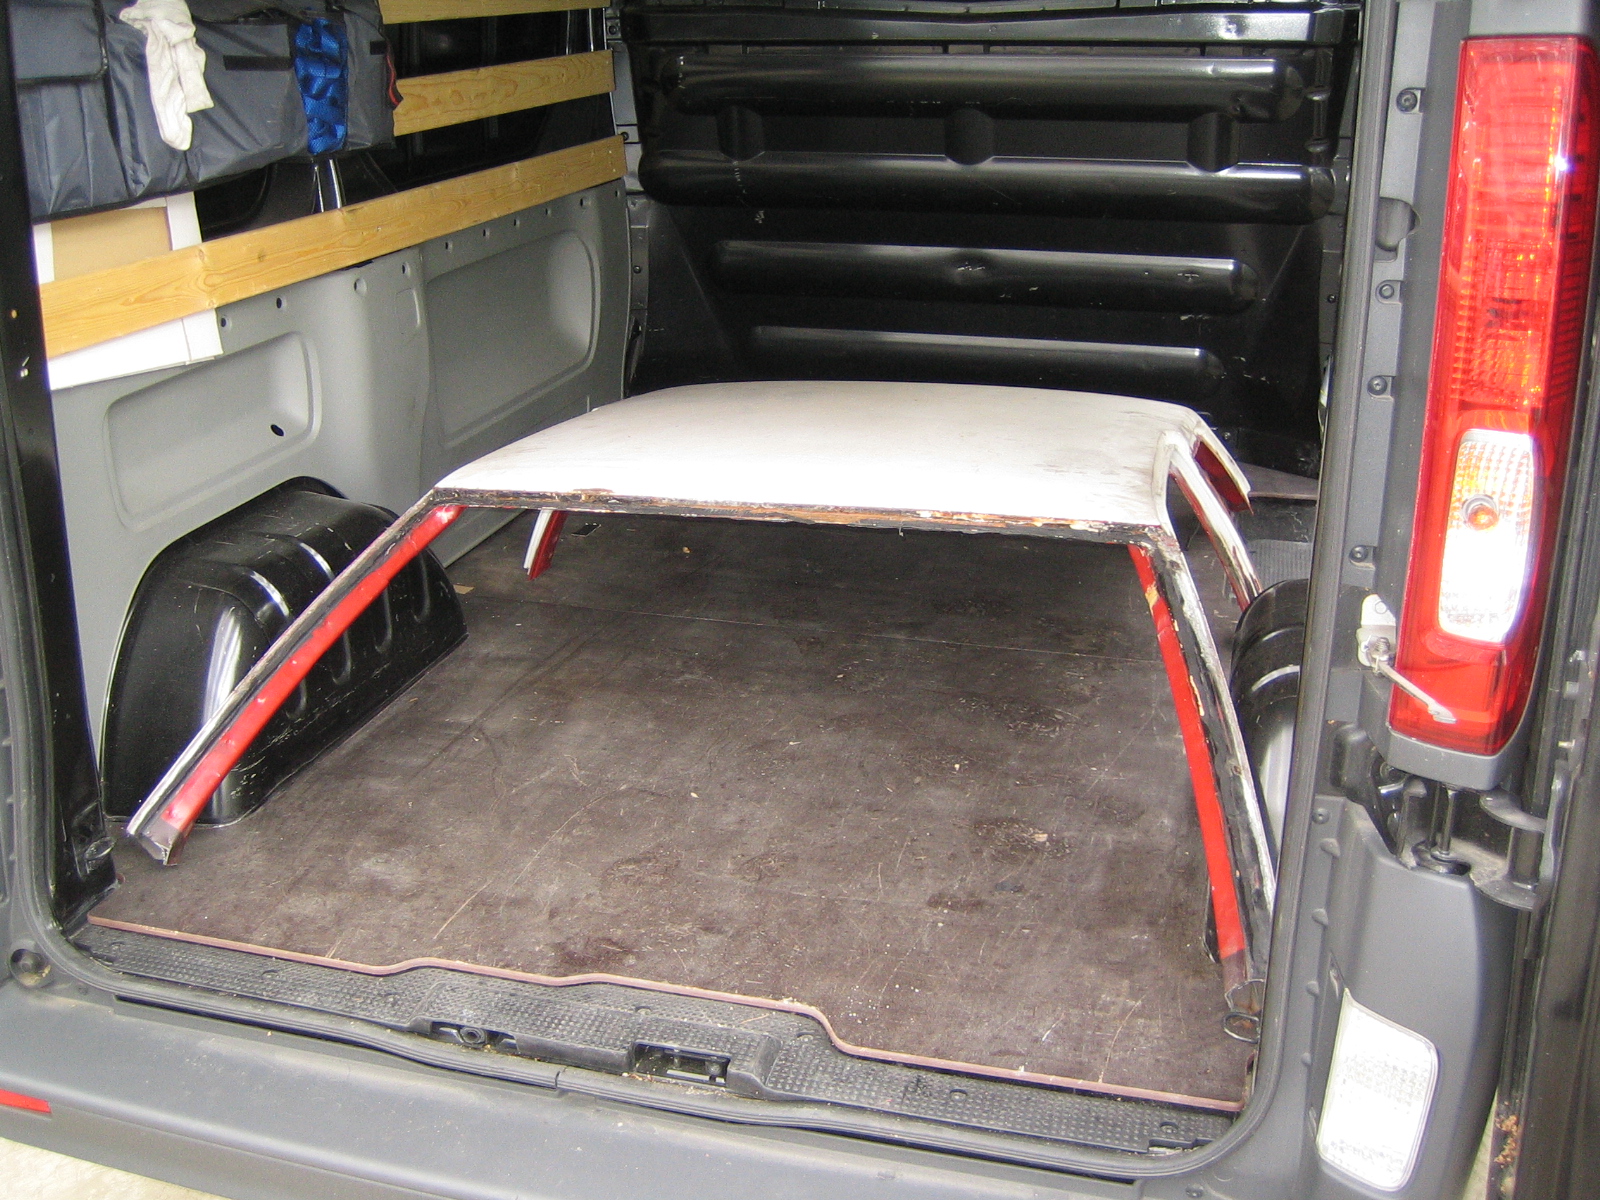
Fits like a glove!!
Weld it shut!:
Soon the restoring starts!
I went with a friend of mine to a guy who is cutting up a chassis.
He was so kind to give me the roof and some other parts I can use for my project.
Here they introduce the all new Corolla Spider:
And this is the hard top that goes with it, nicely fitting in the van:
Fits like a glove!!
Weld it shut!:
Soon the restoring starts!

 05 September 2009, 05:11 PM
#243
Scooby Regular
Thread Starter
Join Date: Dec 2002
Posts: 458
Likes: 0
Received 0 Likes
on
0 Posts
More news, the AP brakes have been sent to AP-Racing in the UK, where they will be judged and, if found fit enough, refurbished.
Also, after 4 weeks of waiting, I got an email on prices for parts for my welder.
I ordered eveything....
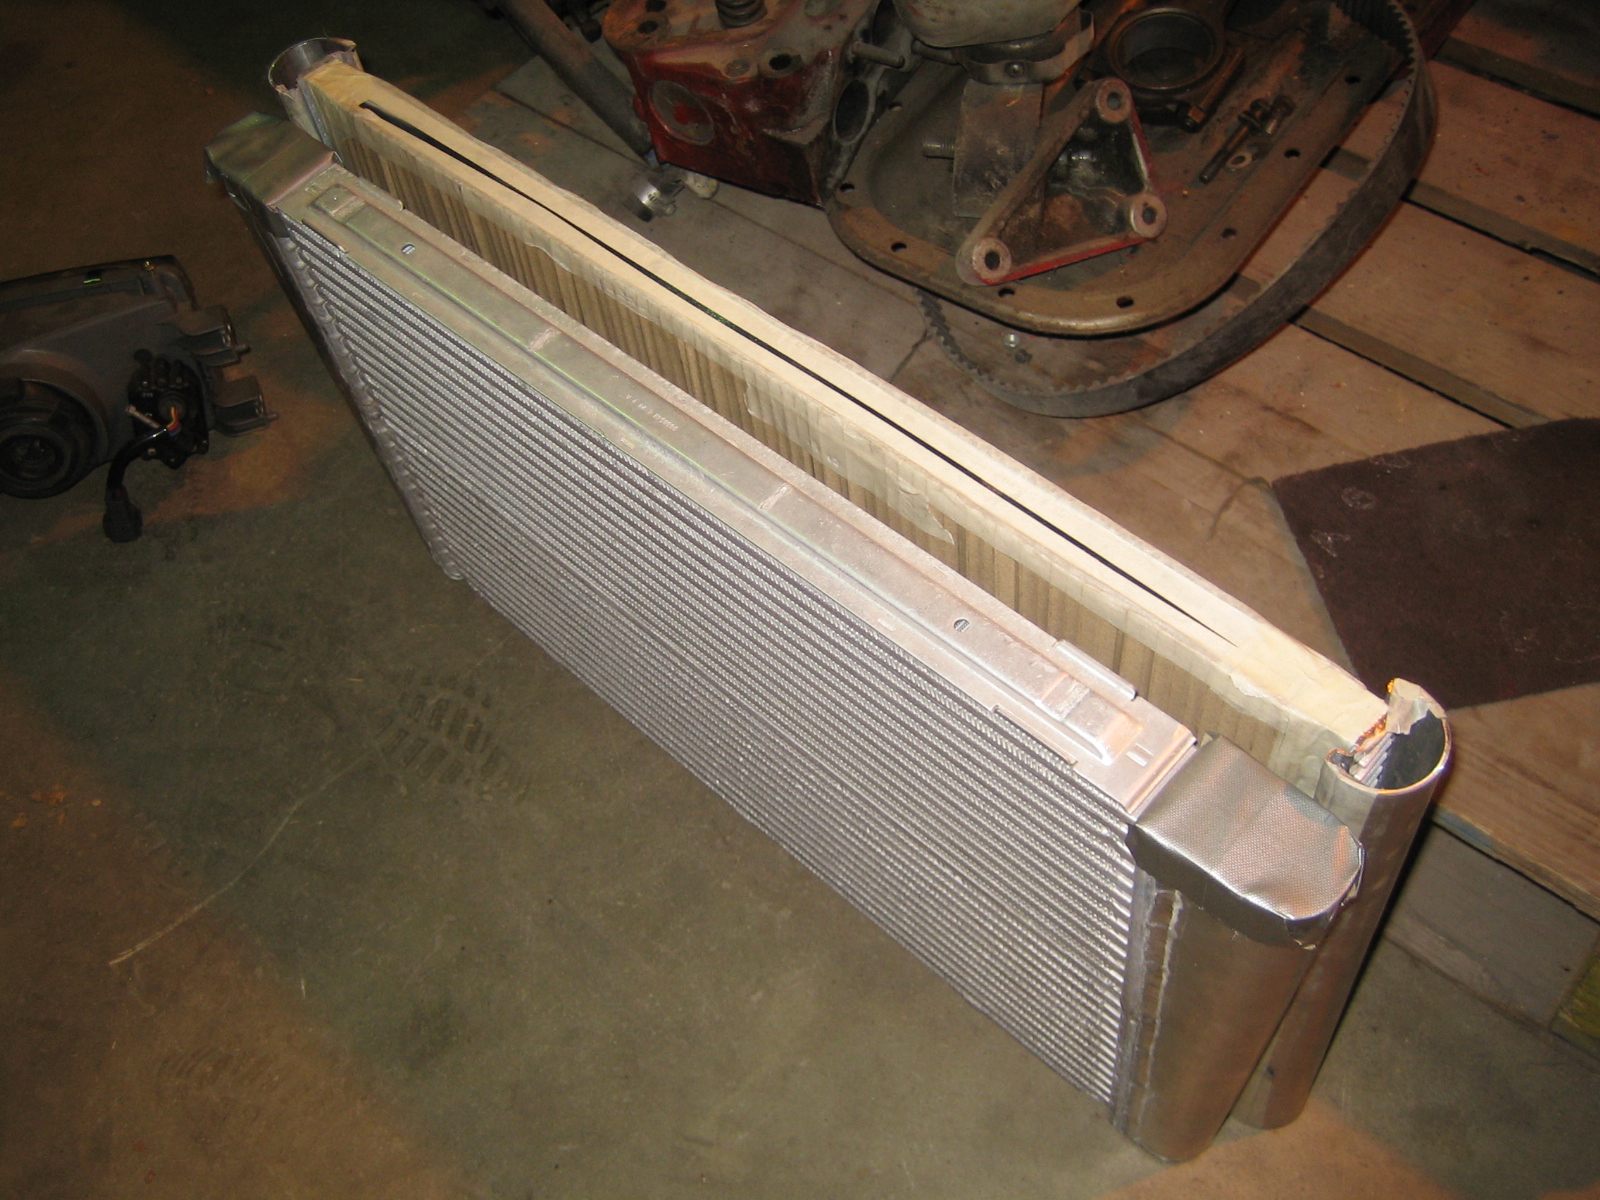
And I finaly got my radiator, well, a mock-up anyway...
Why not get started right away?
So we did.
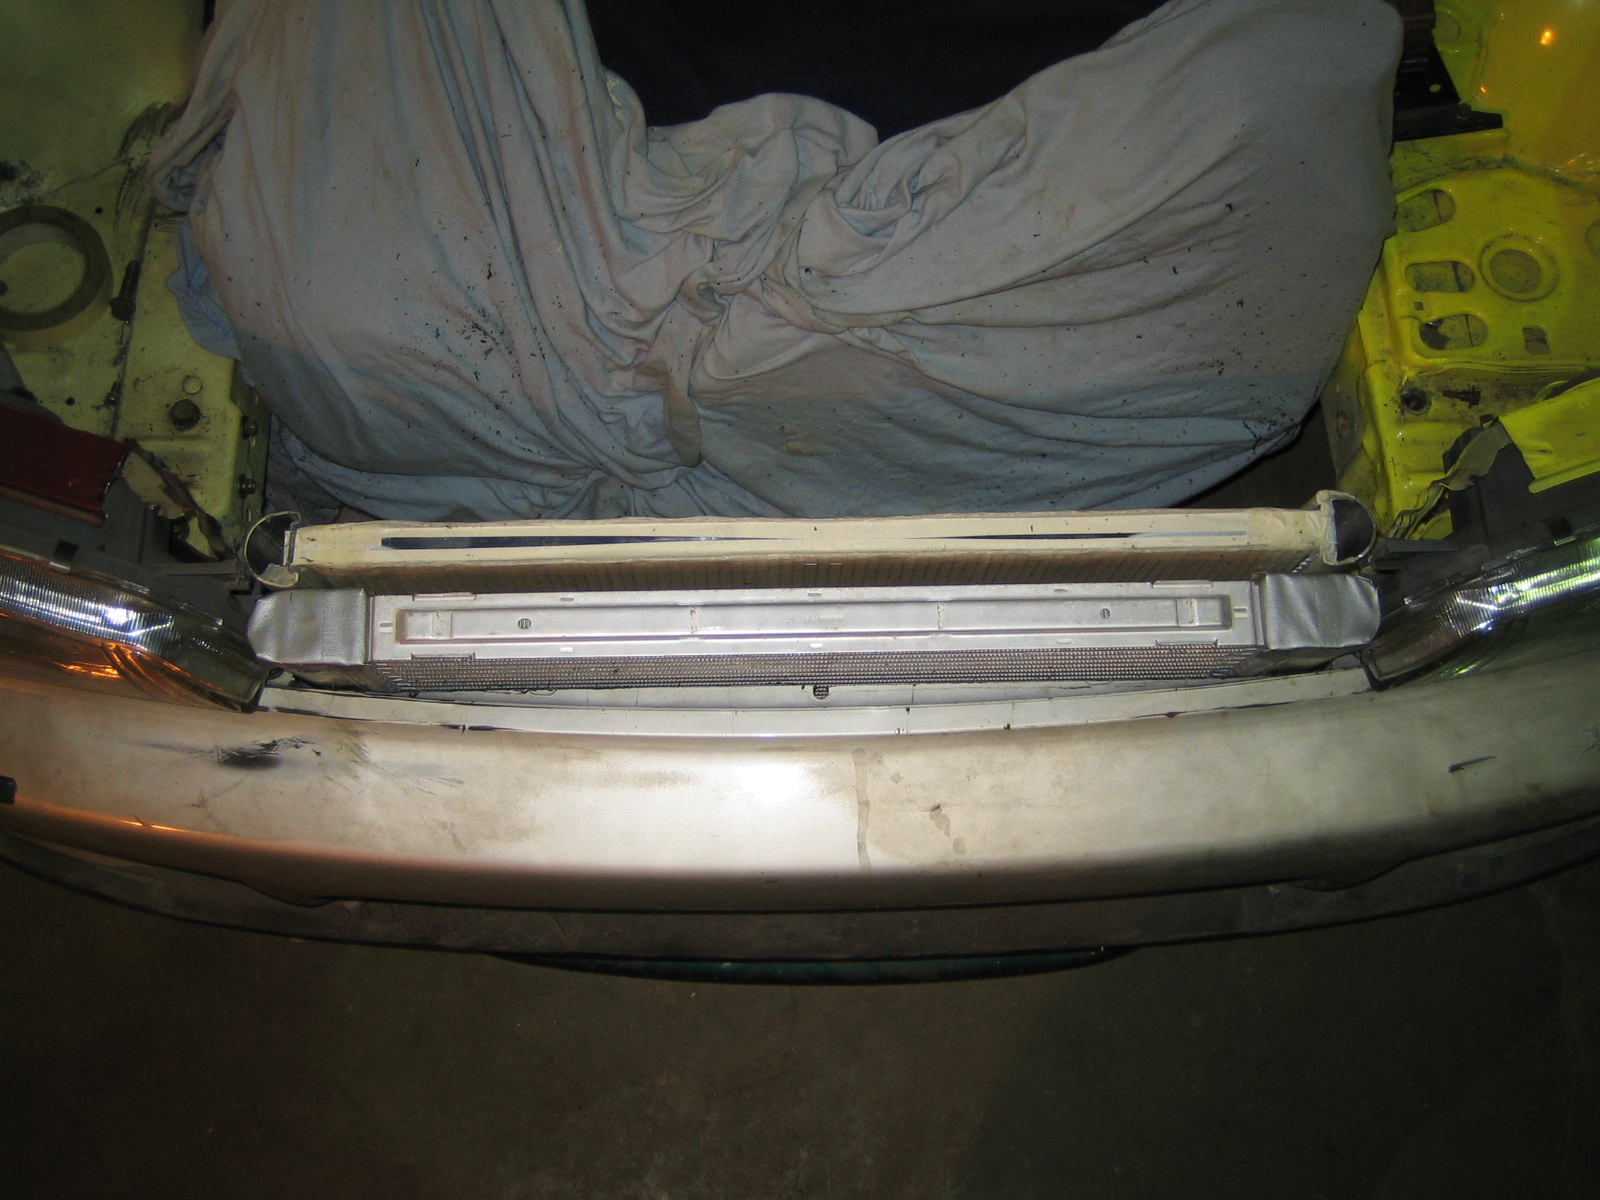
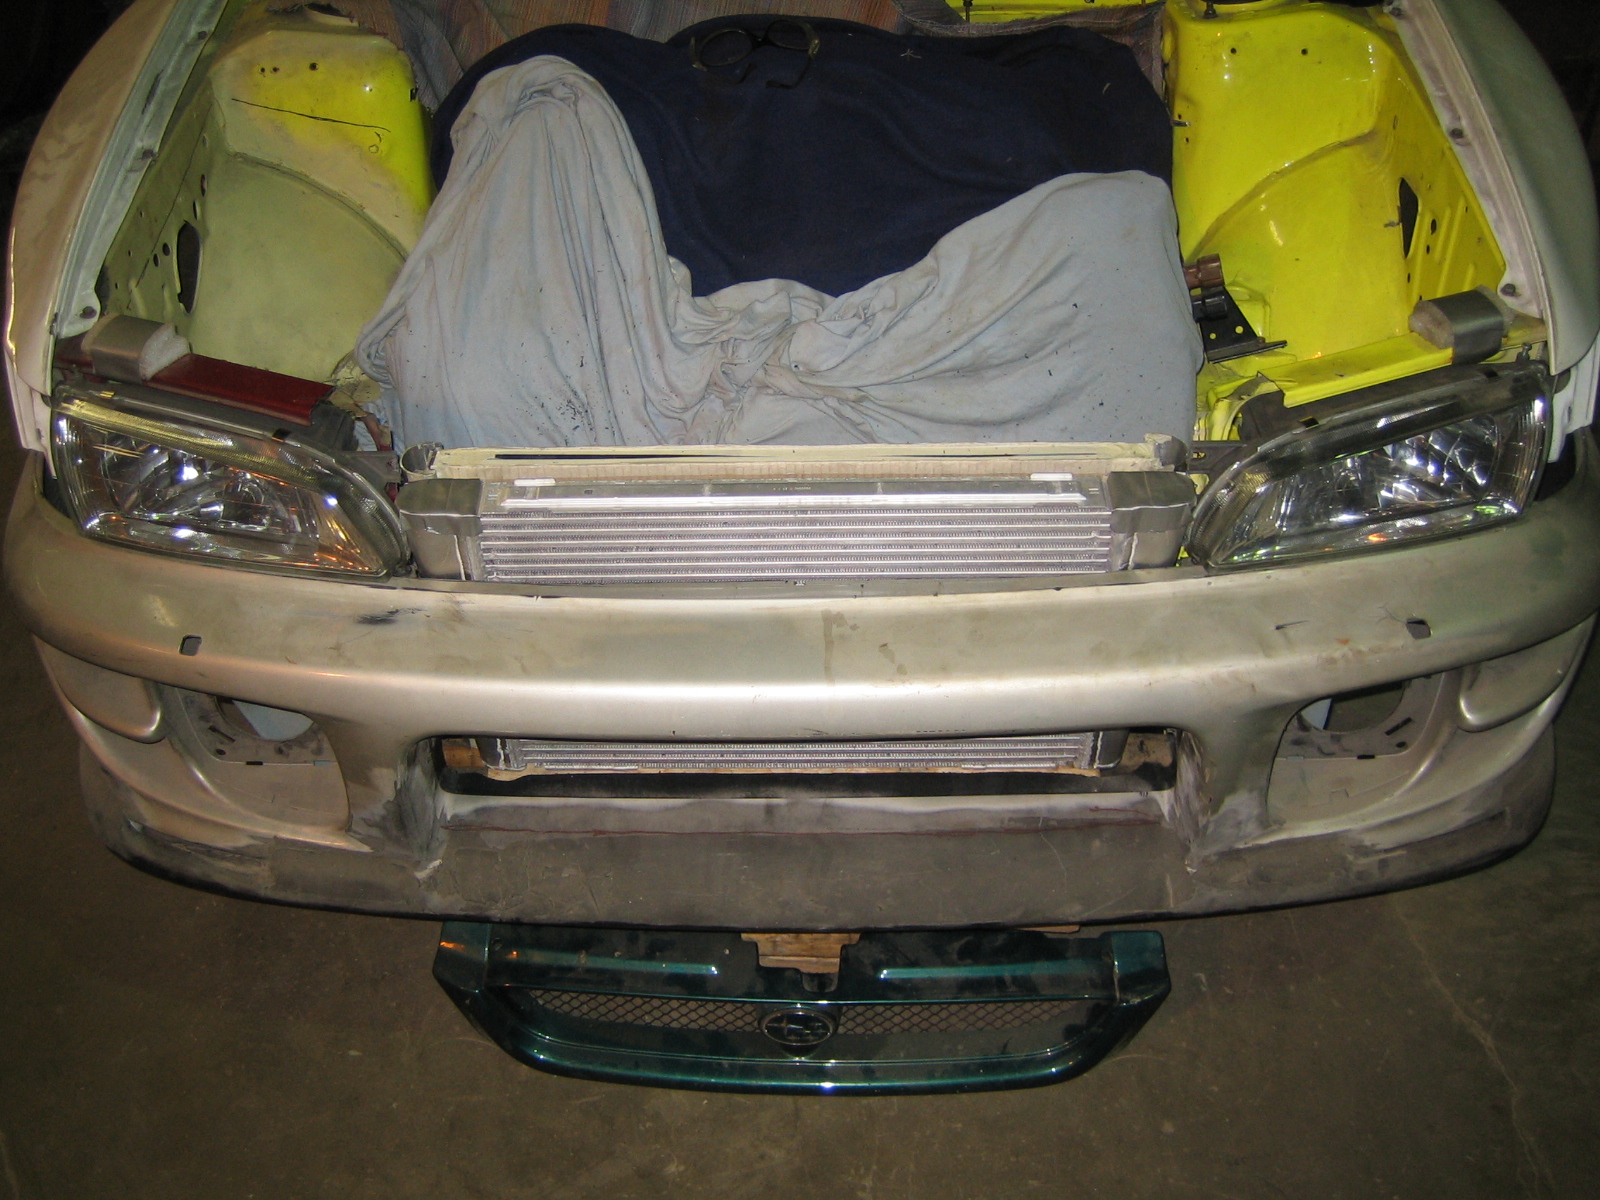
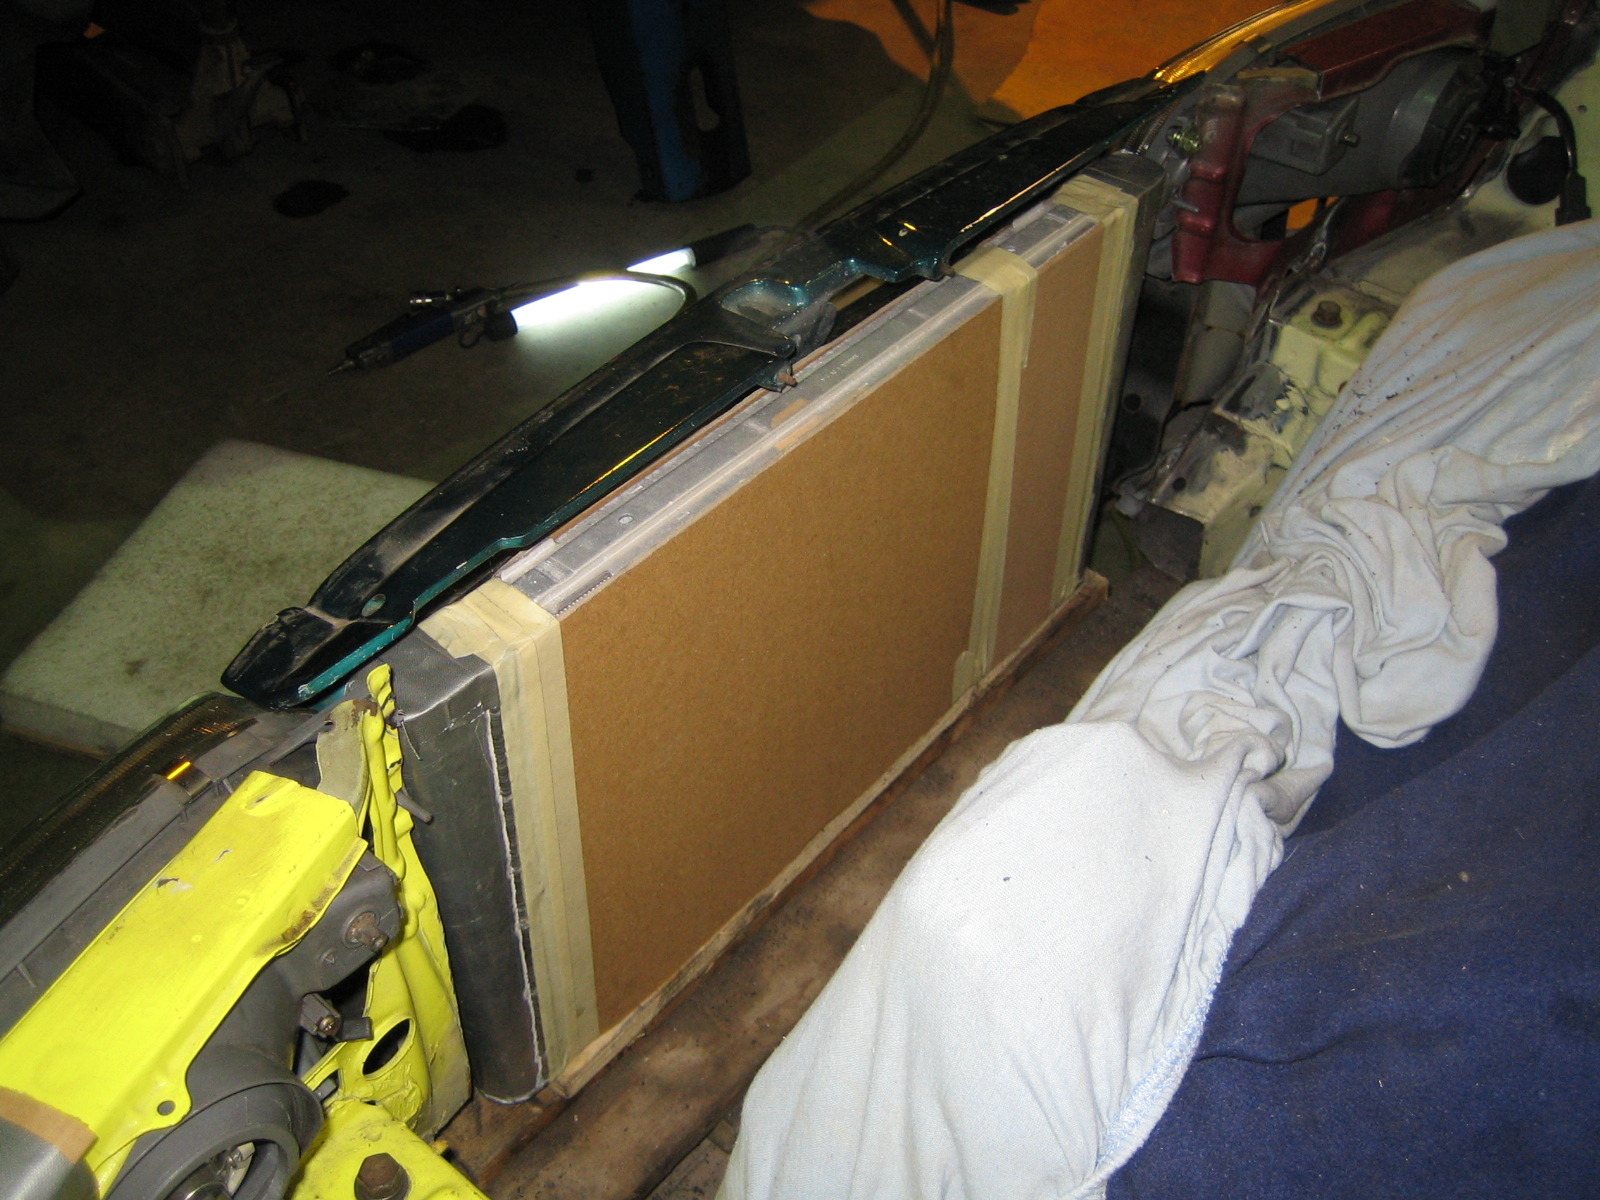
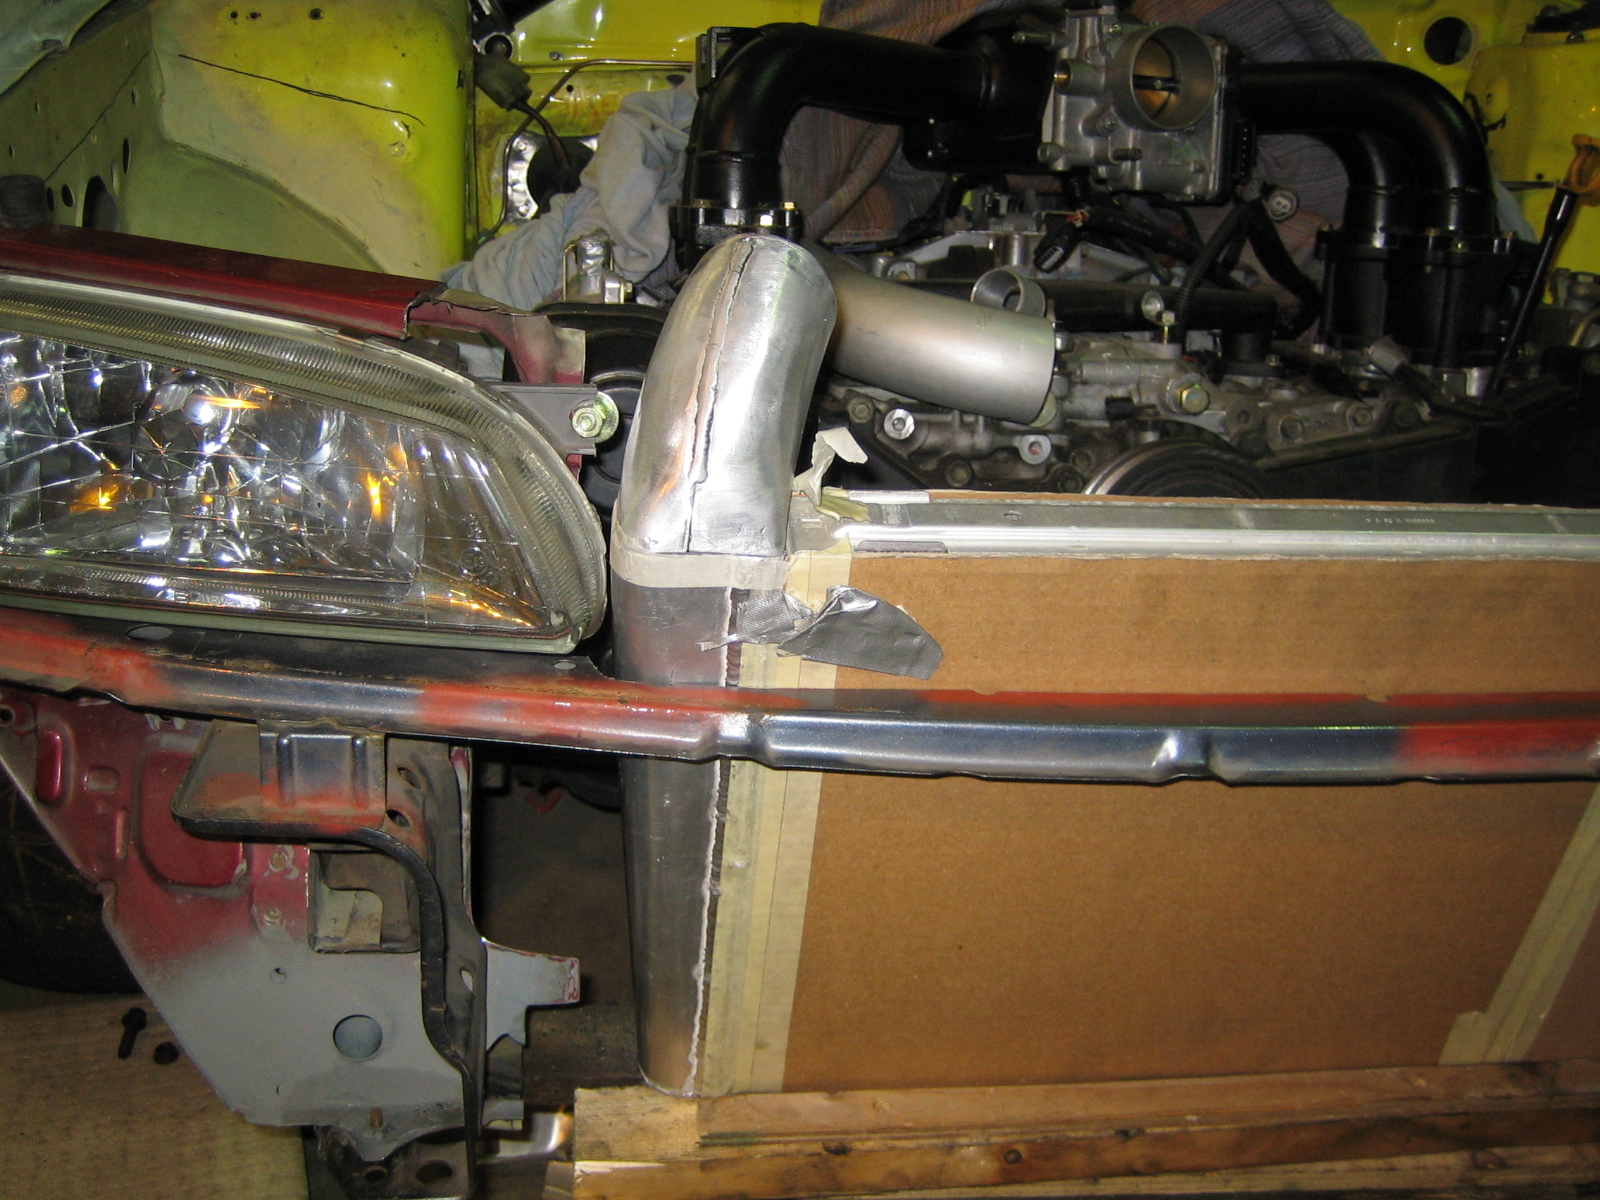
The idea is to make a rad-pack like a rallycar has.
Which basicly means putting the radiator, FMIC, airco condenser, fans and shrouding together in the car as one package.
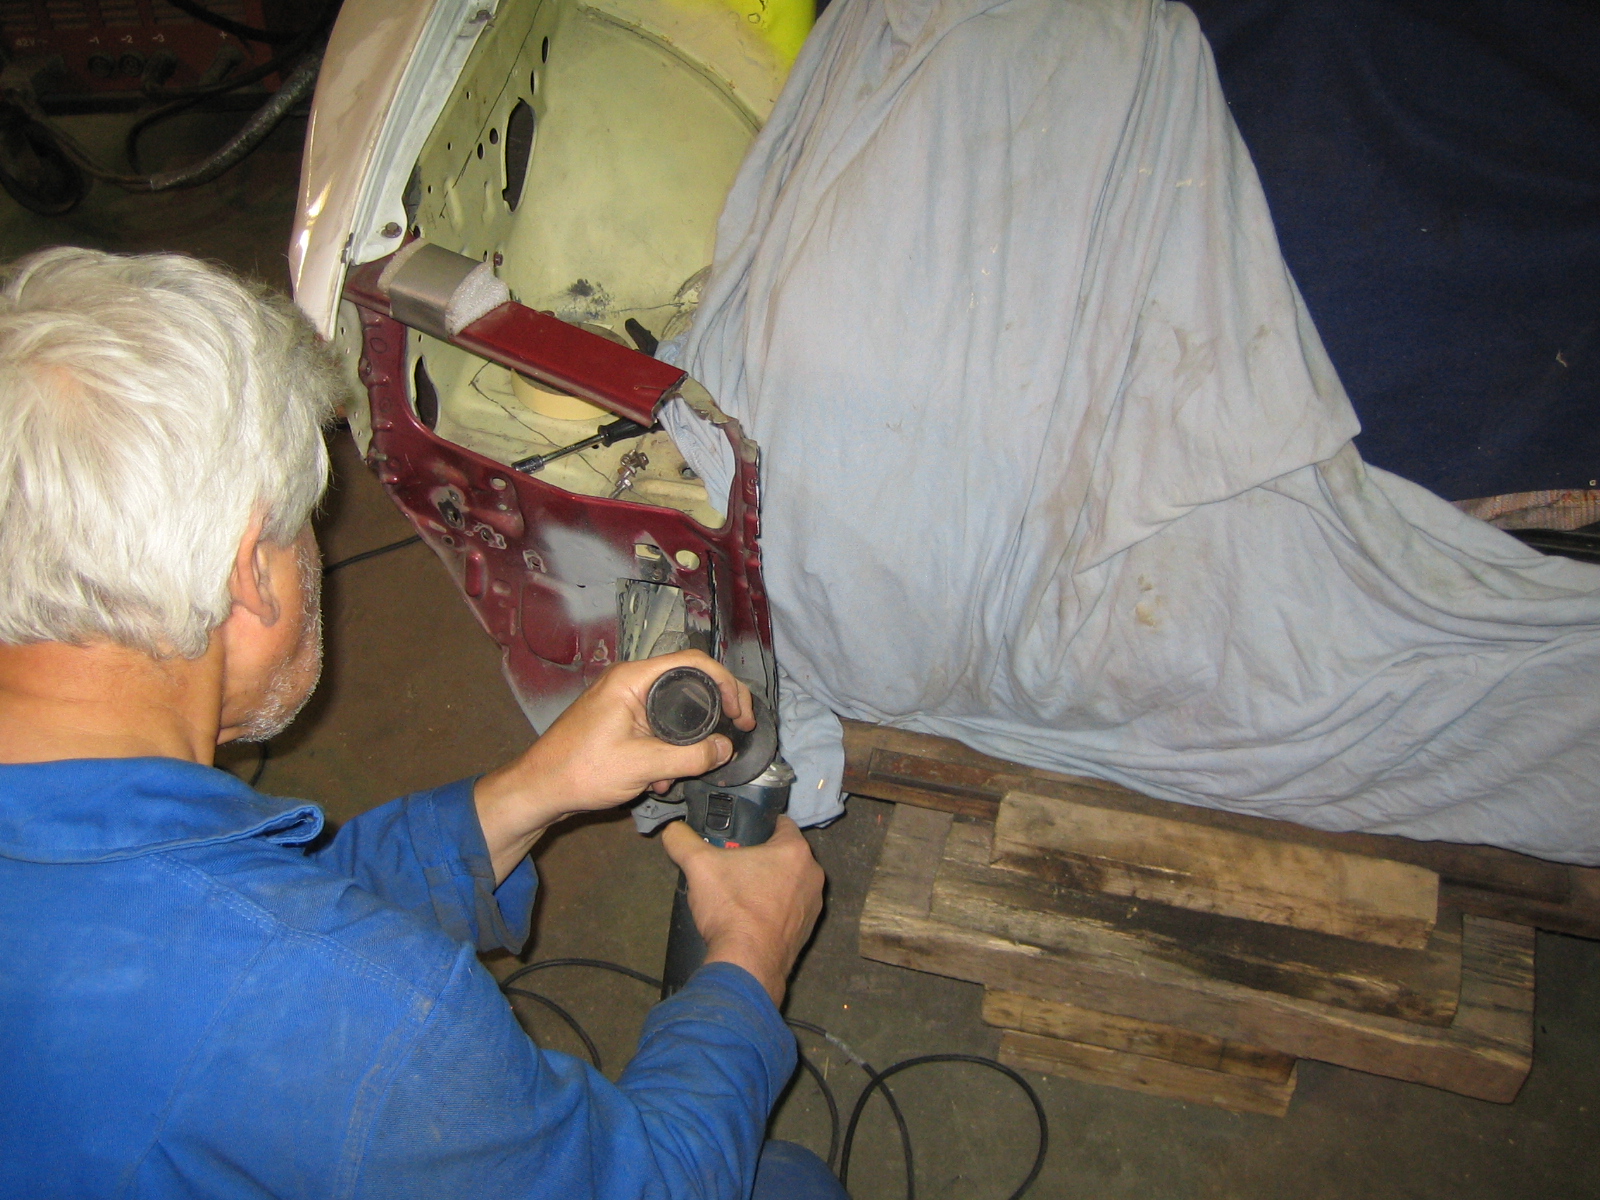
We had to free up some space so some cutting was done.
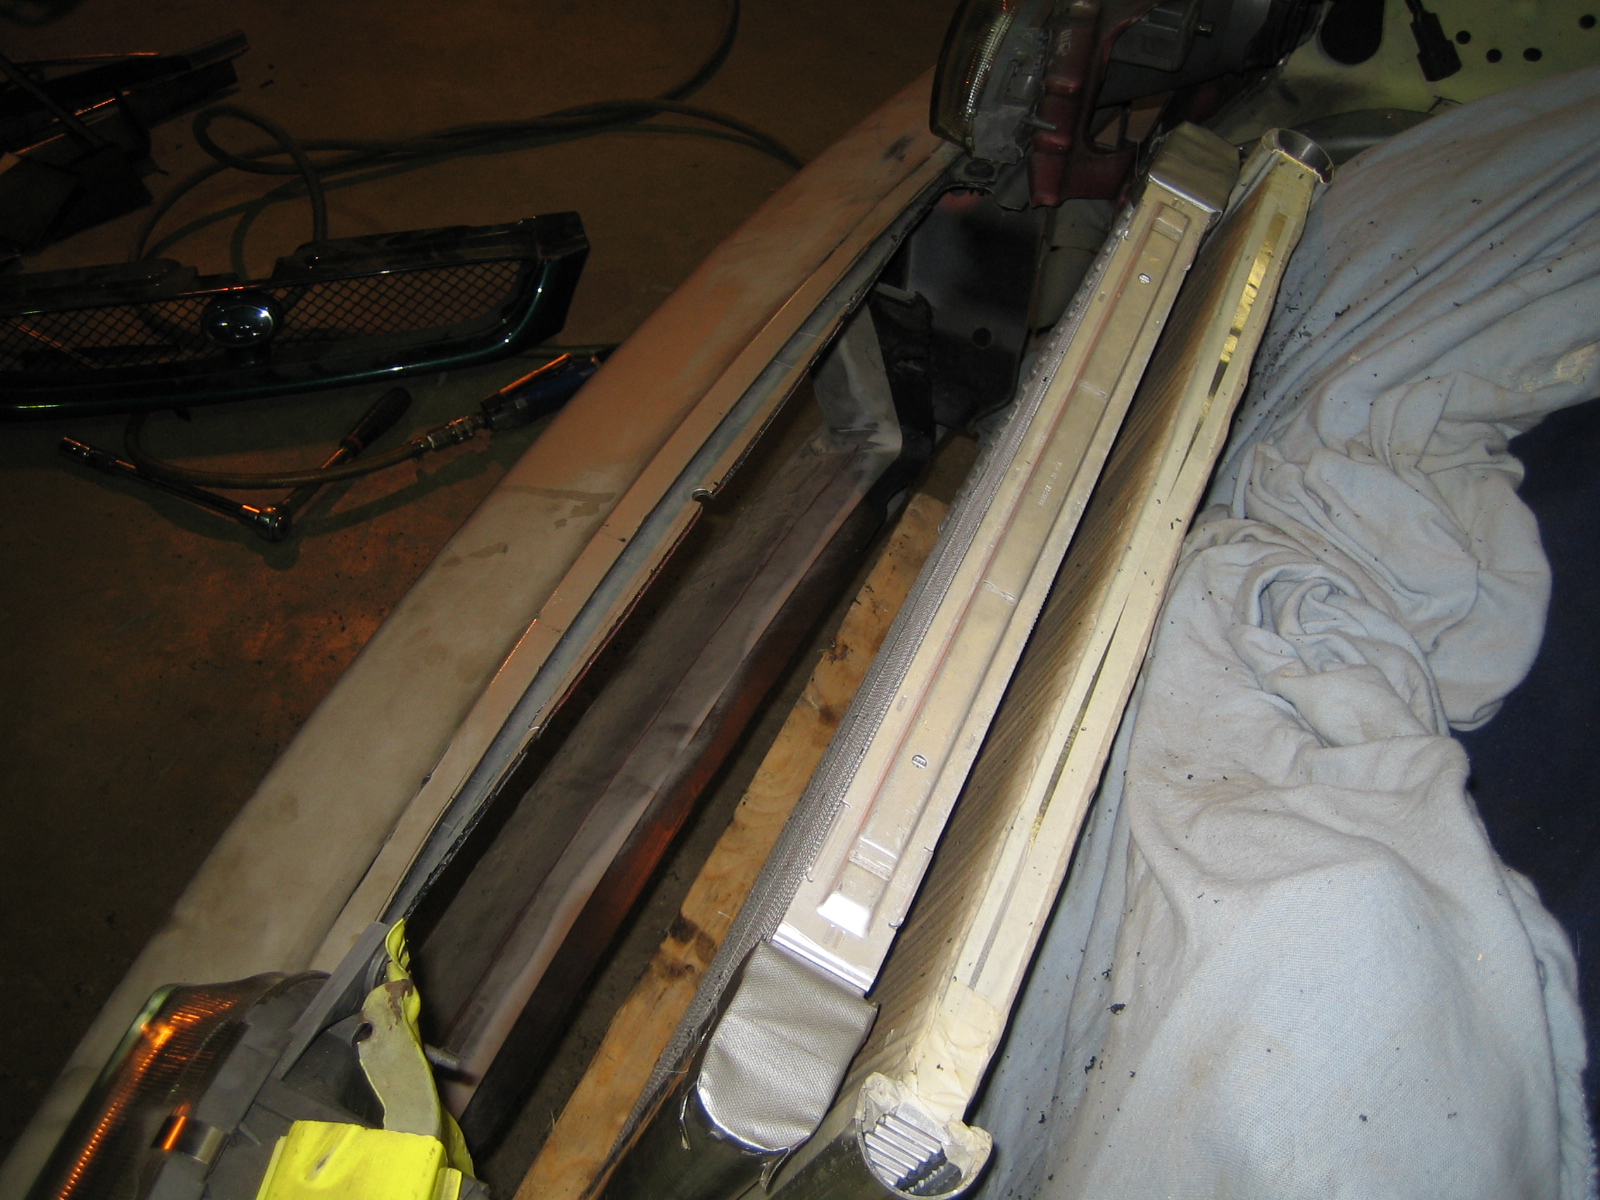
Intercooler with radiator mock-up.:
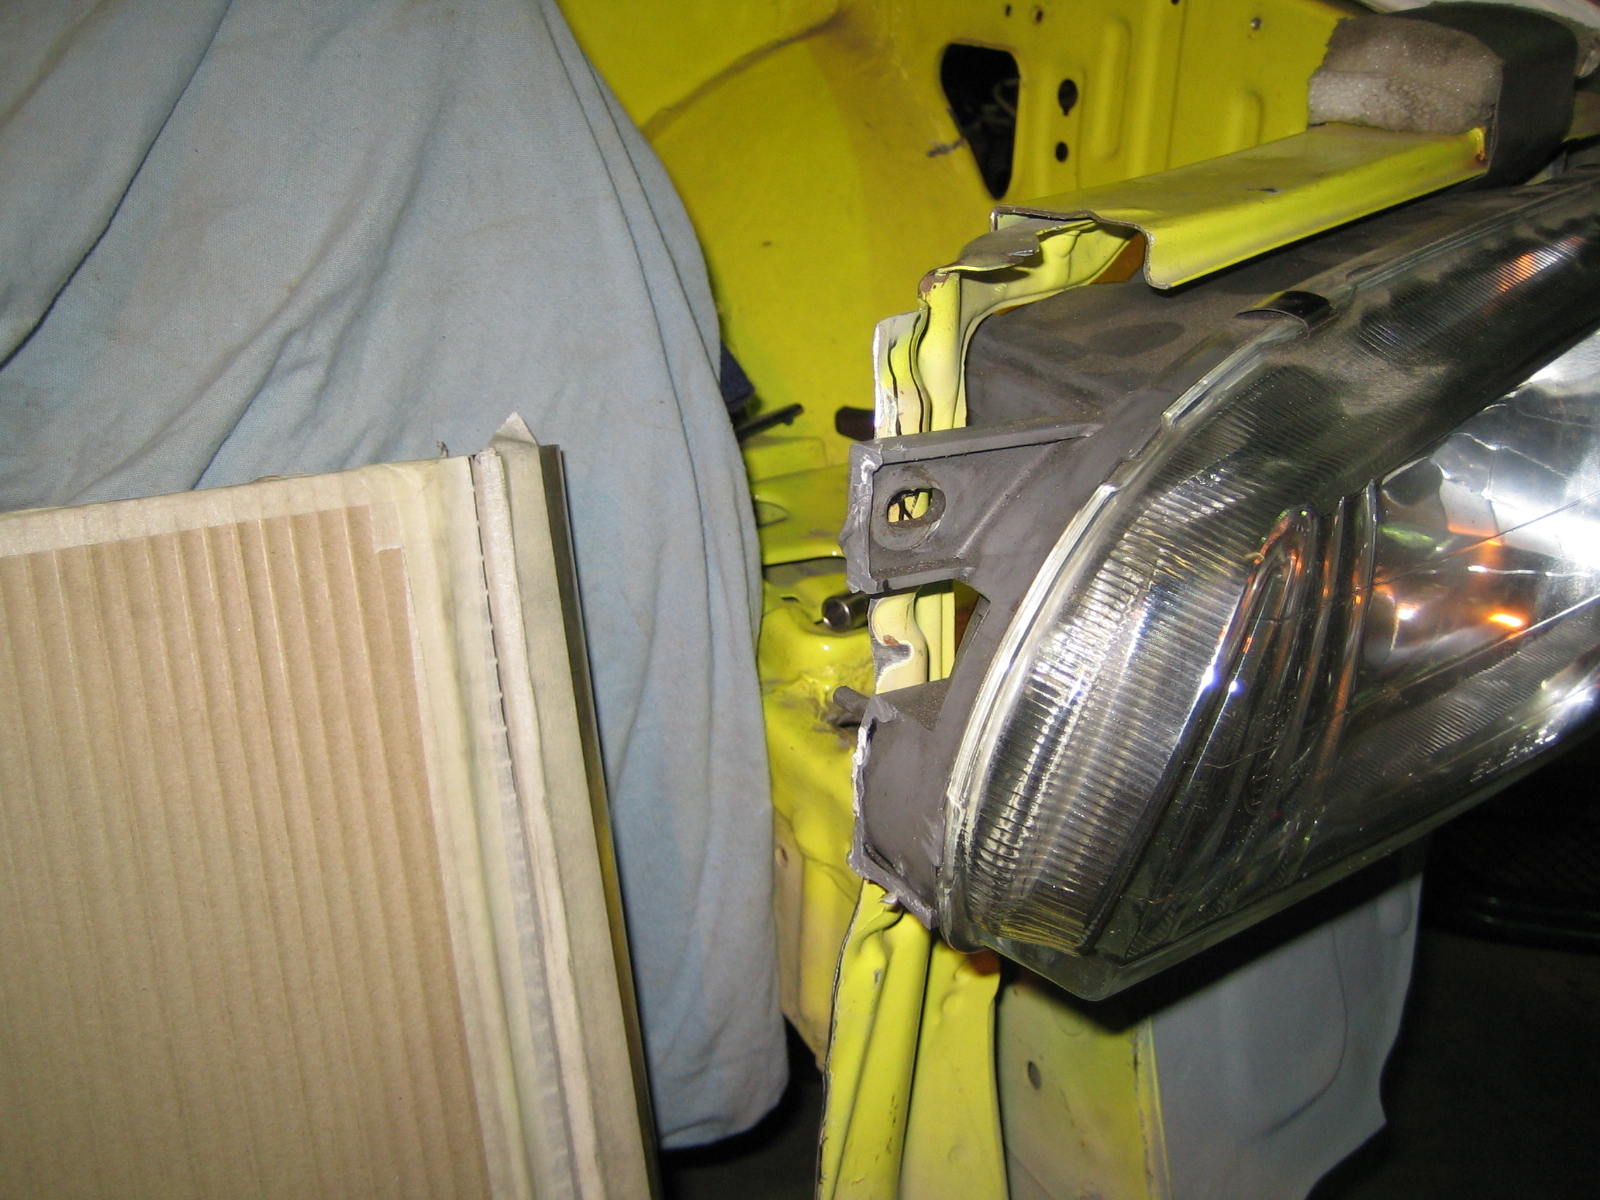
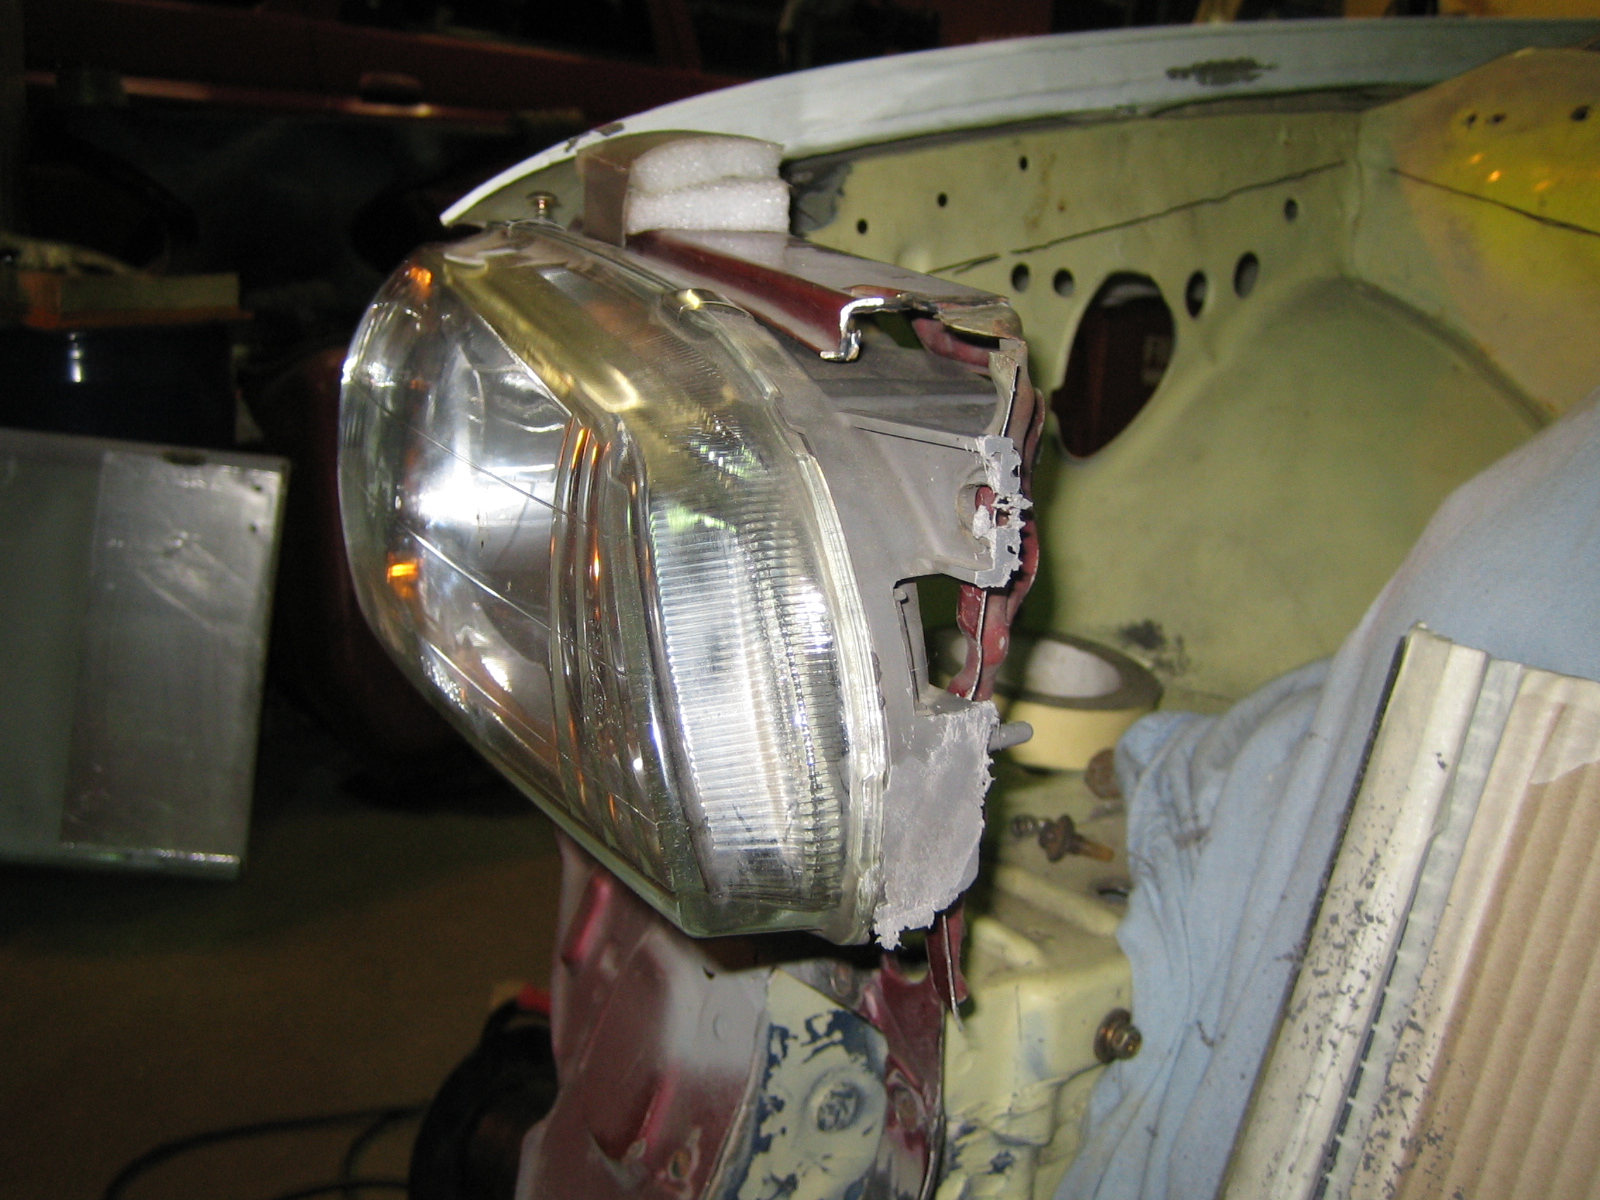
Headlight improved:
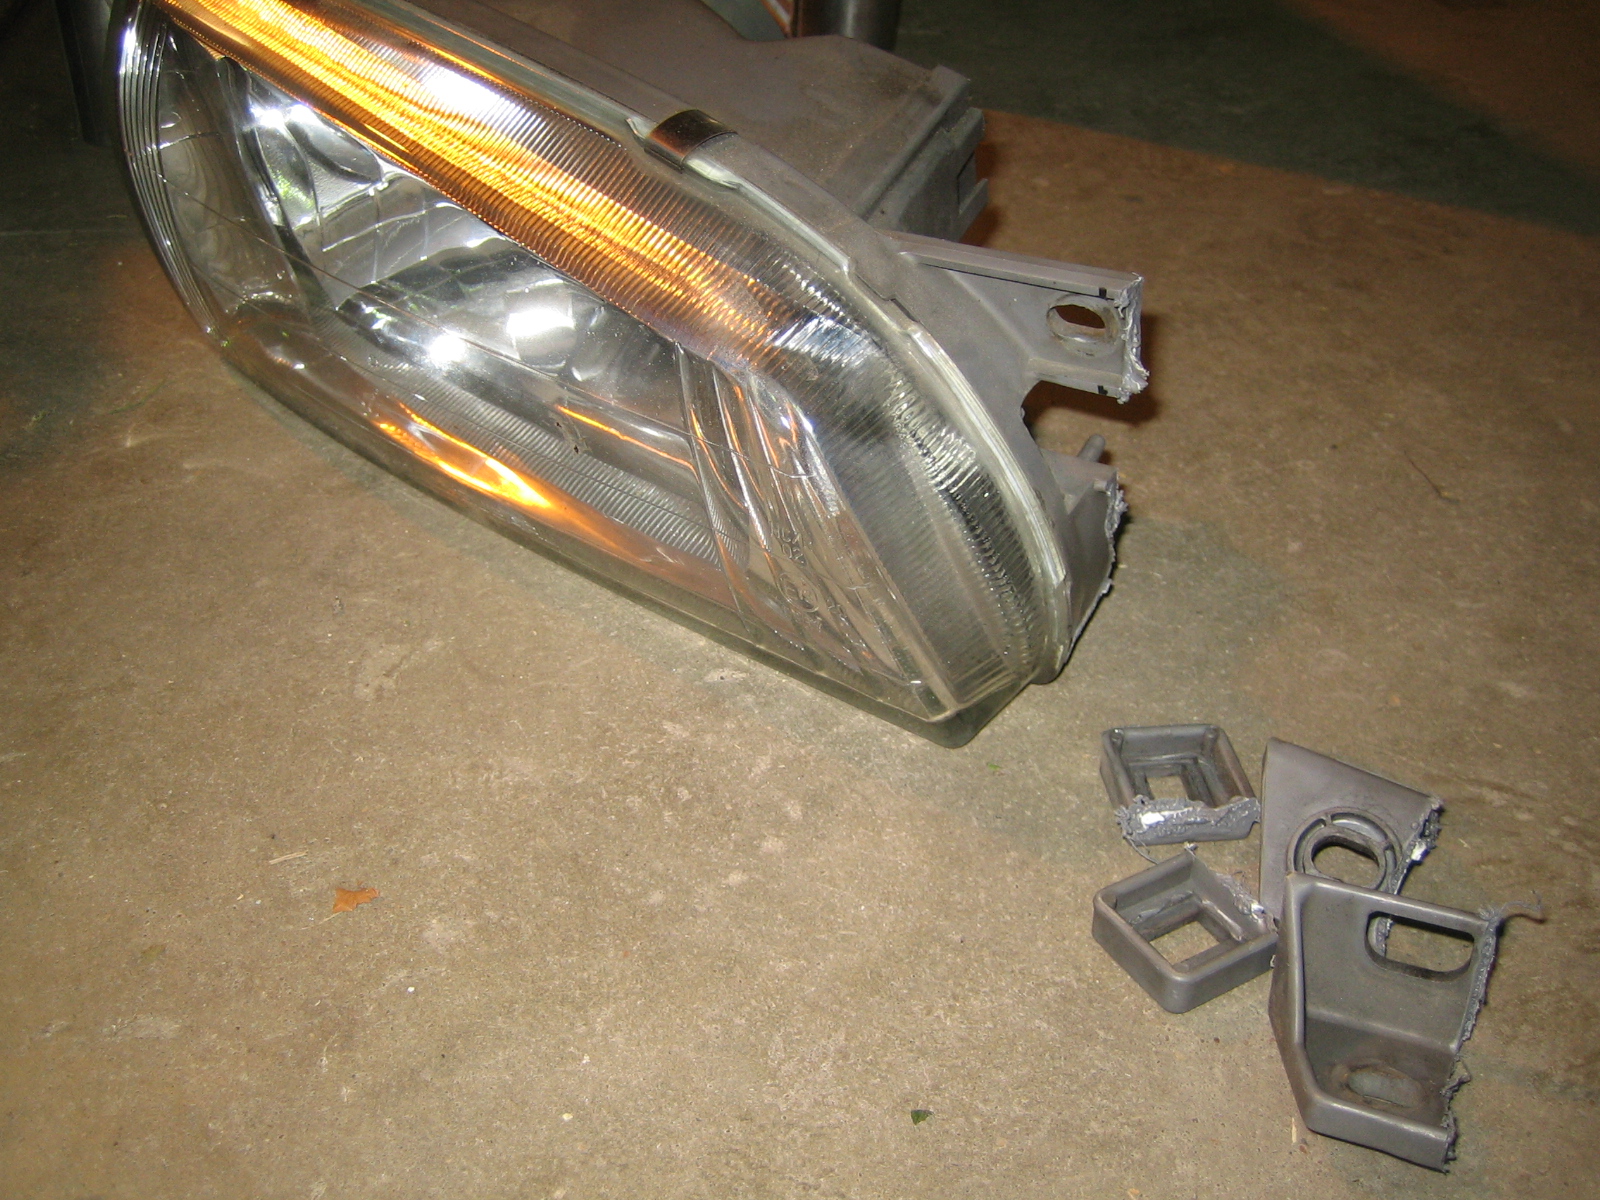
Frontpanel with lamp, both reworked:
We also cut away some panel for the airsuplly hose that will feed the airbox:
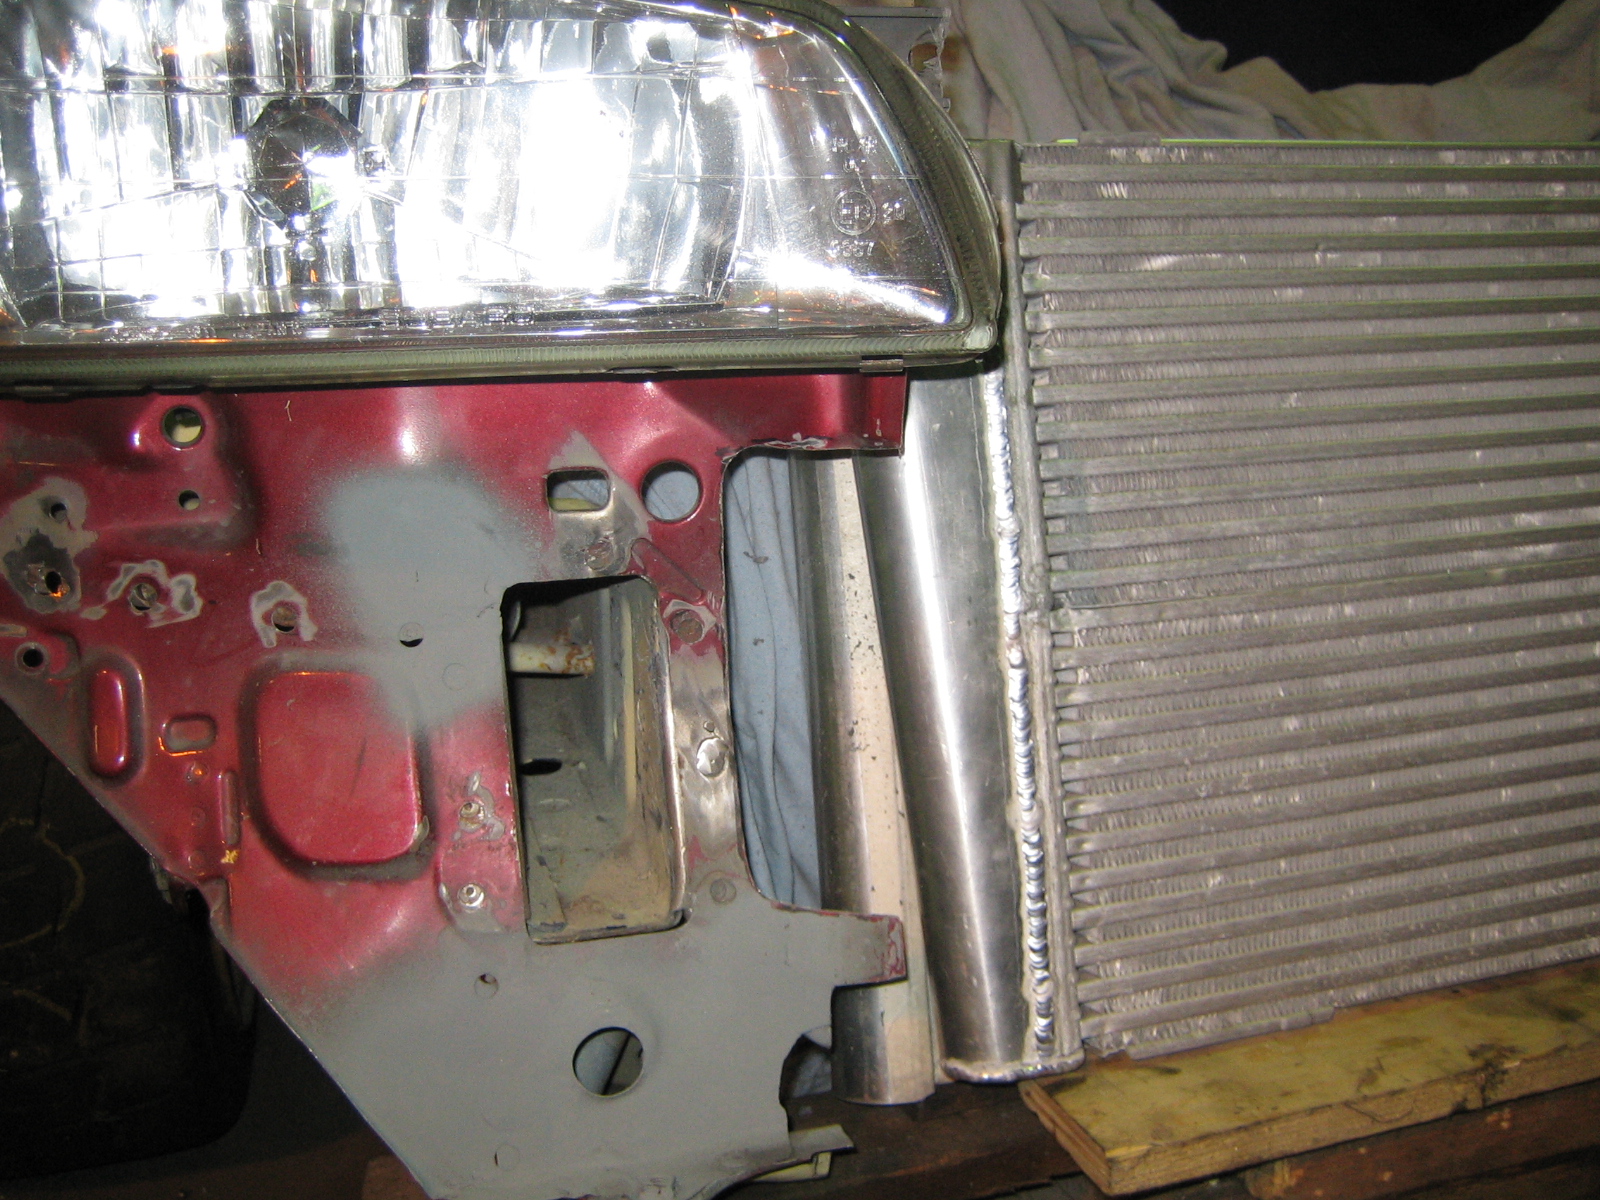
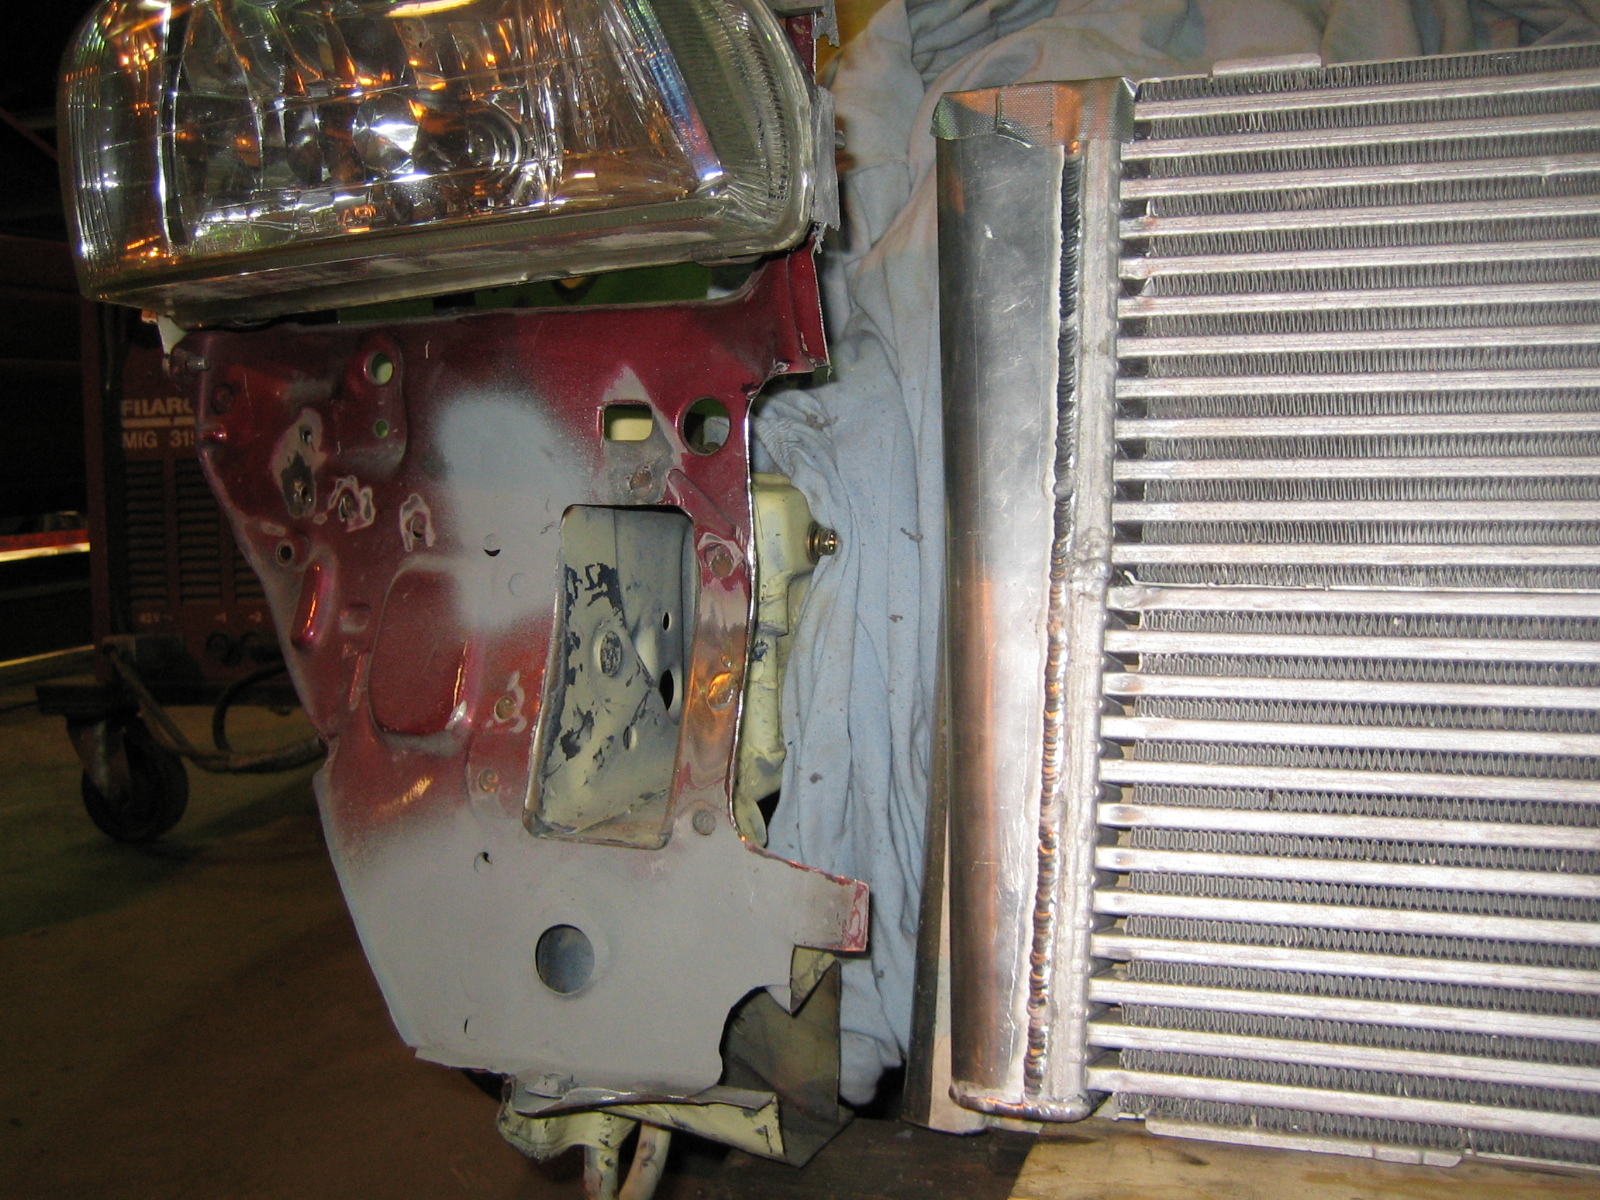
This is how it looks from above, although the radiator and FMIC are leaning a bit to much to the front in the pic.
The front panel that holds headlight should be between the two cores:
Final pic:
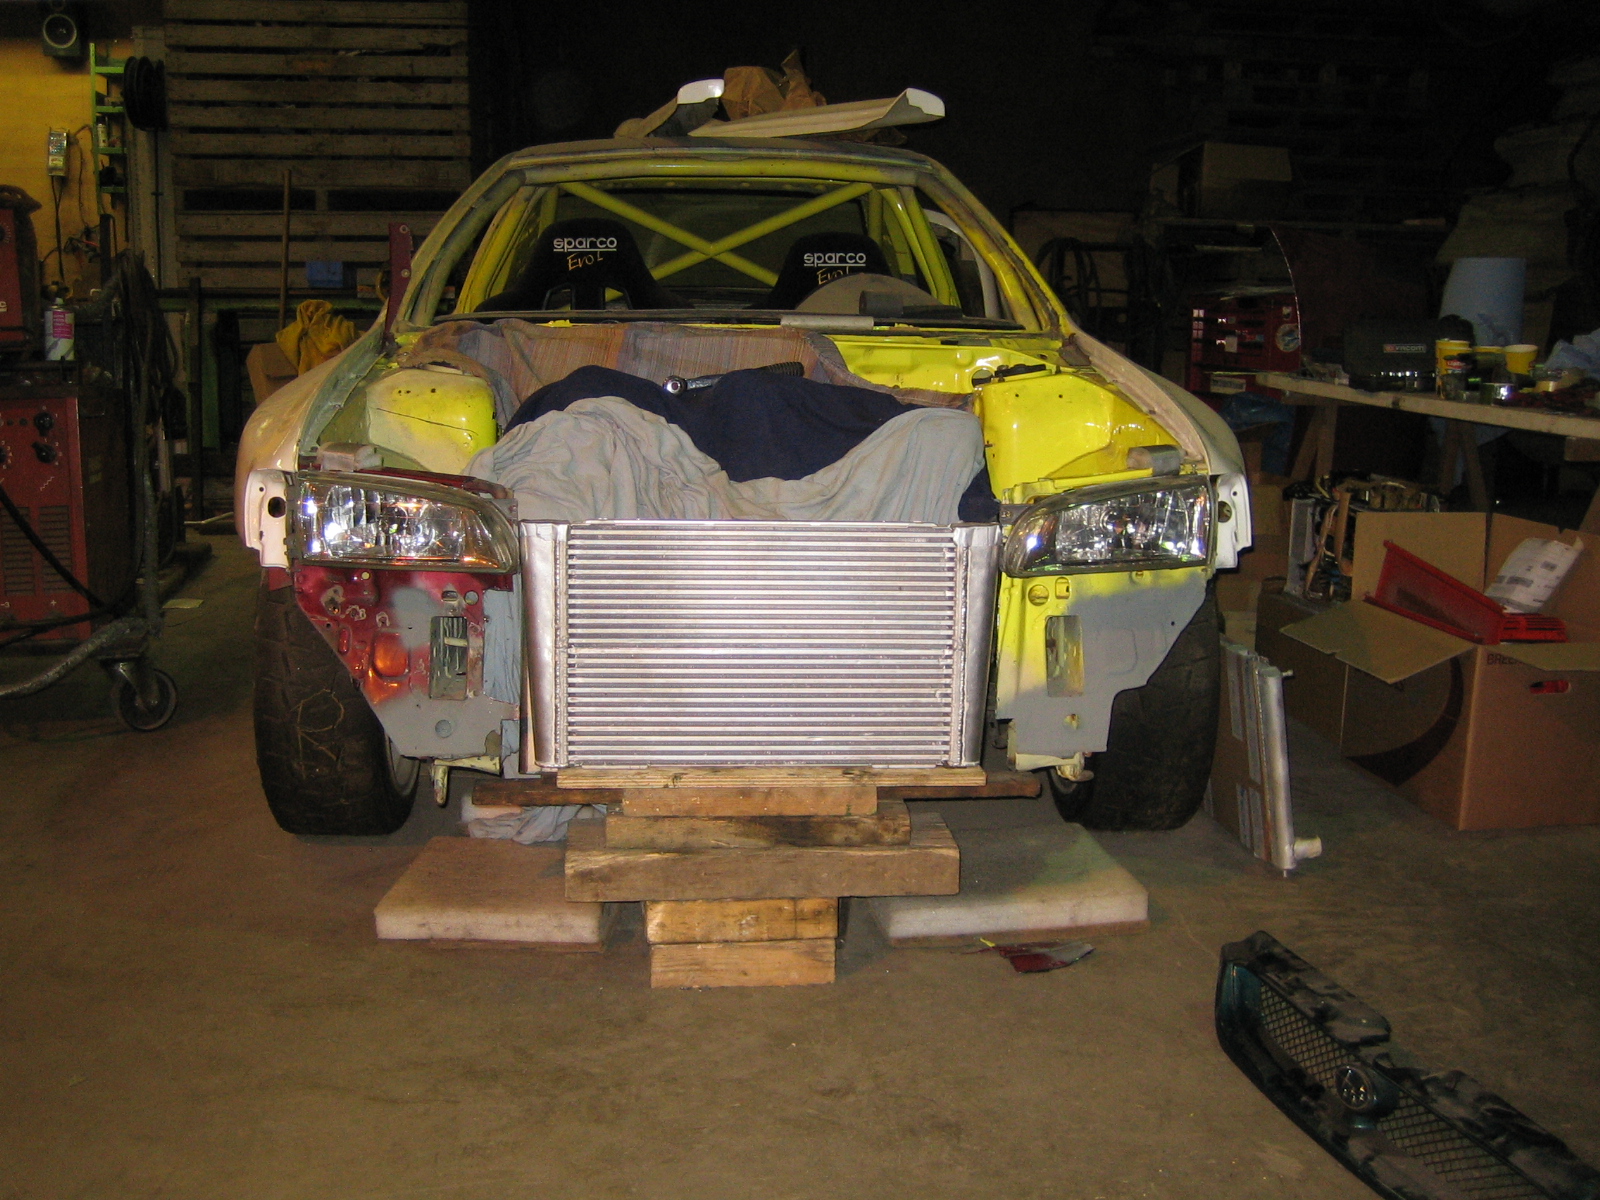
This week I'm redesigning the bumper to fit the FMIC and some other stuff.
Finally some progress on the Impreza!!
Also, after 4 weeks of waiting, I got an email on prices for parts for my welder.
I ordered eveything....
And I finaly got my radiator, well, a mock-up anyway...
Why not get started right away?
So we did.
The idea is to make a rad-pack like a rallycar has.
Which basicly means putting the radiator, FMIC, airco condenser, fans and shrouding together in the car as one package.
We had to free up some space so some cutting was done.
Intercooler with radiator mock-up.:
Headlight improved:
Frontpanel with lamp, both reworked:
We also cut away some panel for the airsuplly hose that will feed the airbox:
This is how it looks from above, although the radiator and FMIC are leaning a bit to much to the front in the pic.
The front panel that holds headlight should be between the two cores:
Final pic:
This week I'm redesigning the bumper to fit the FMIC and some other stuff.
Finally some progress on the Impreza!!
06 September 2009, 03:53 PM
#244

 07 September 2009, 10:56 PM
#246
Scooby Regular
Thread Starter
Join Date: Dec 2002
Posts: 458
Likes: 0
Received 0 Likes
on
0 Posts
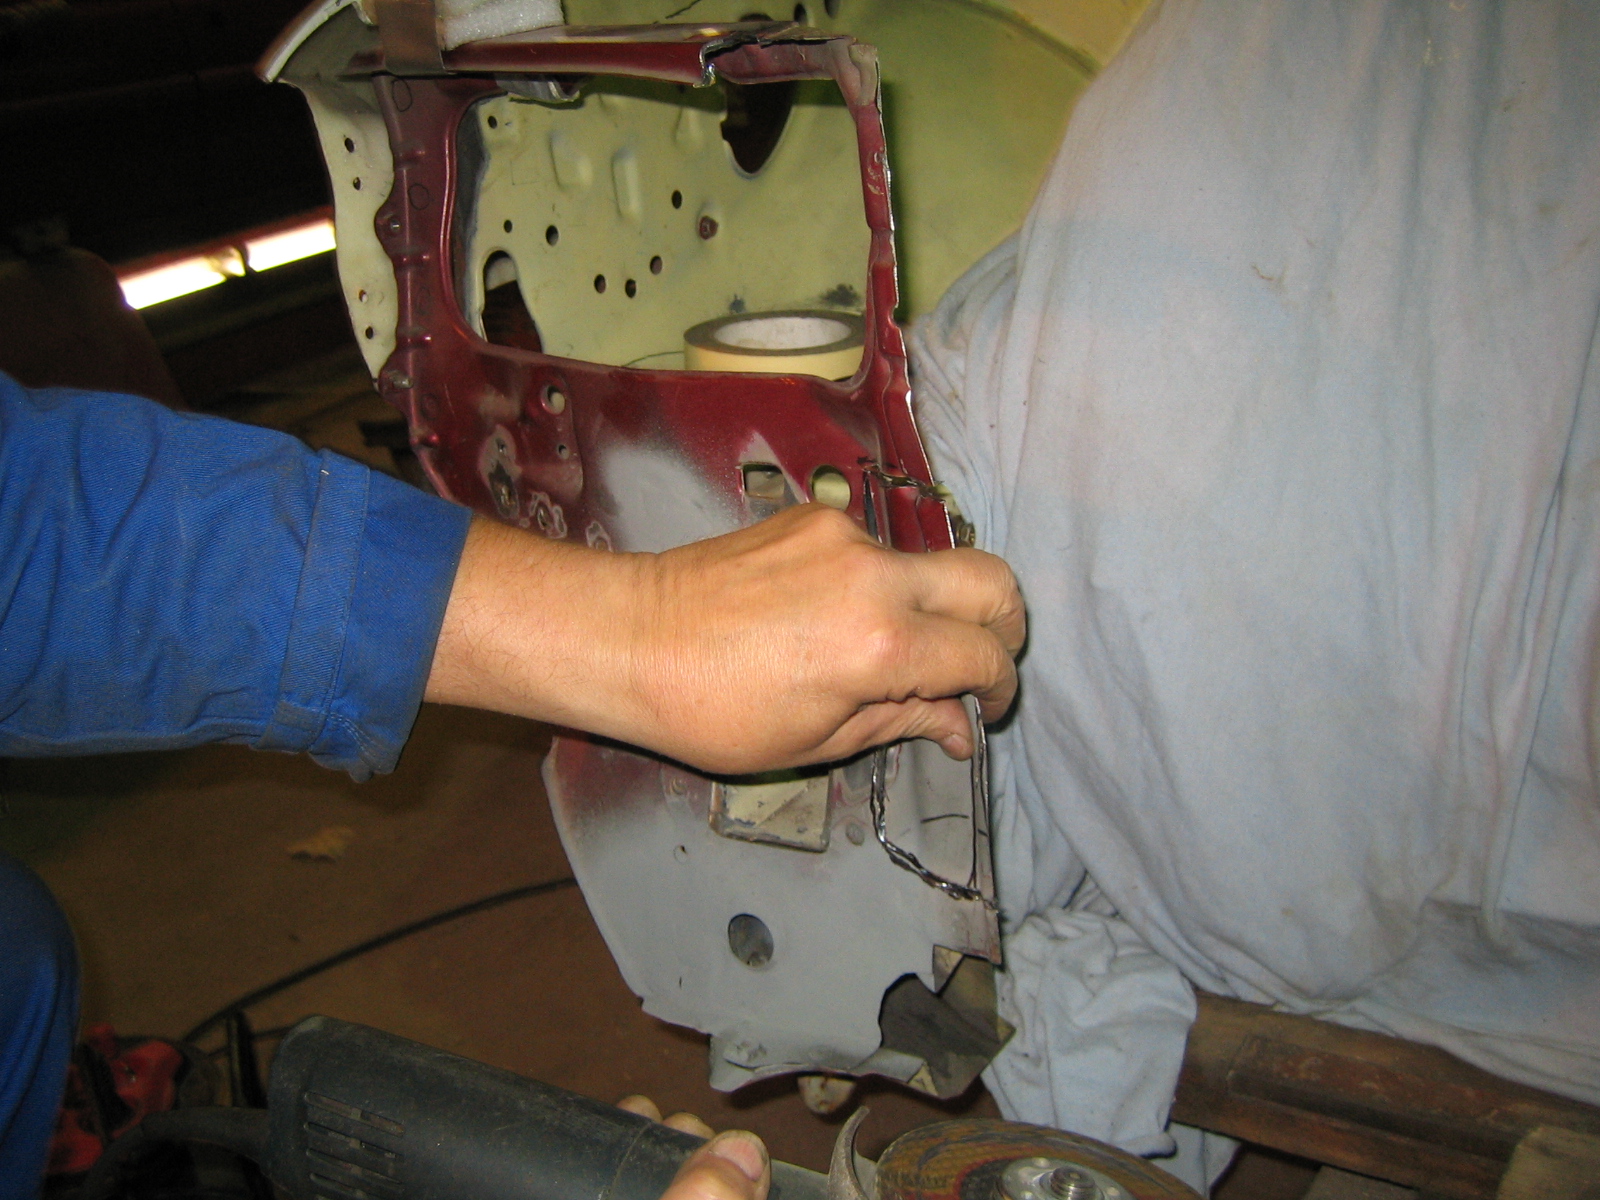
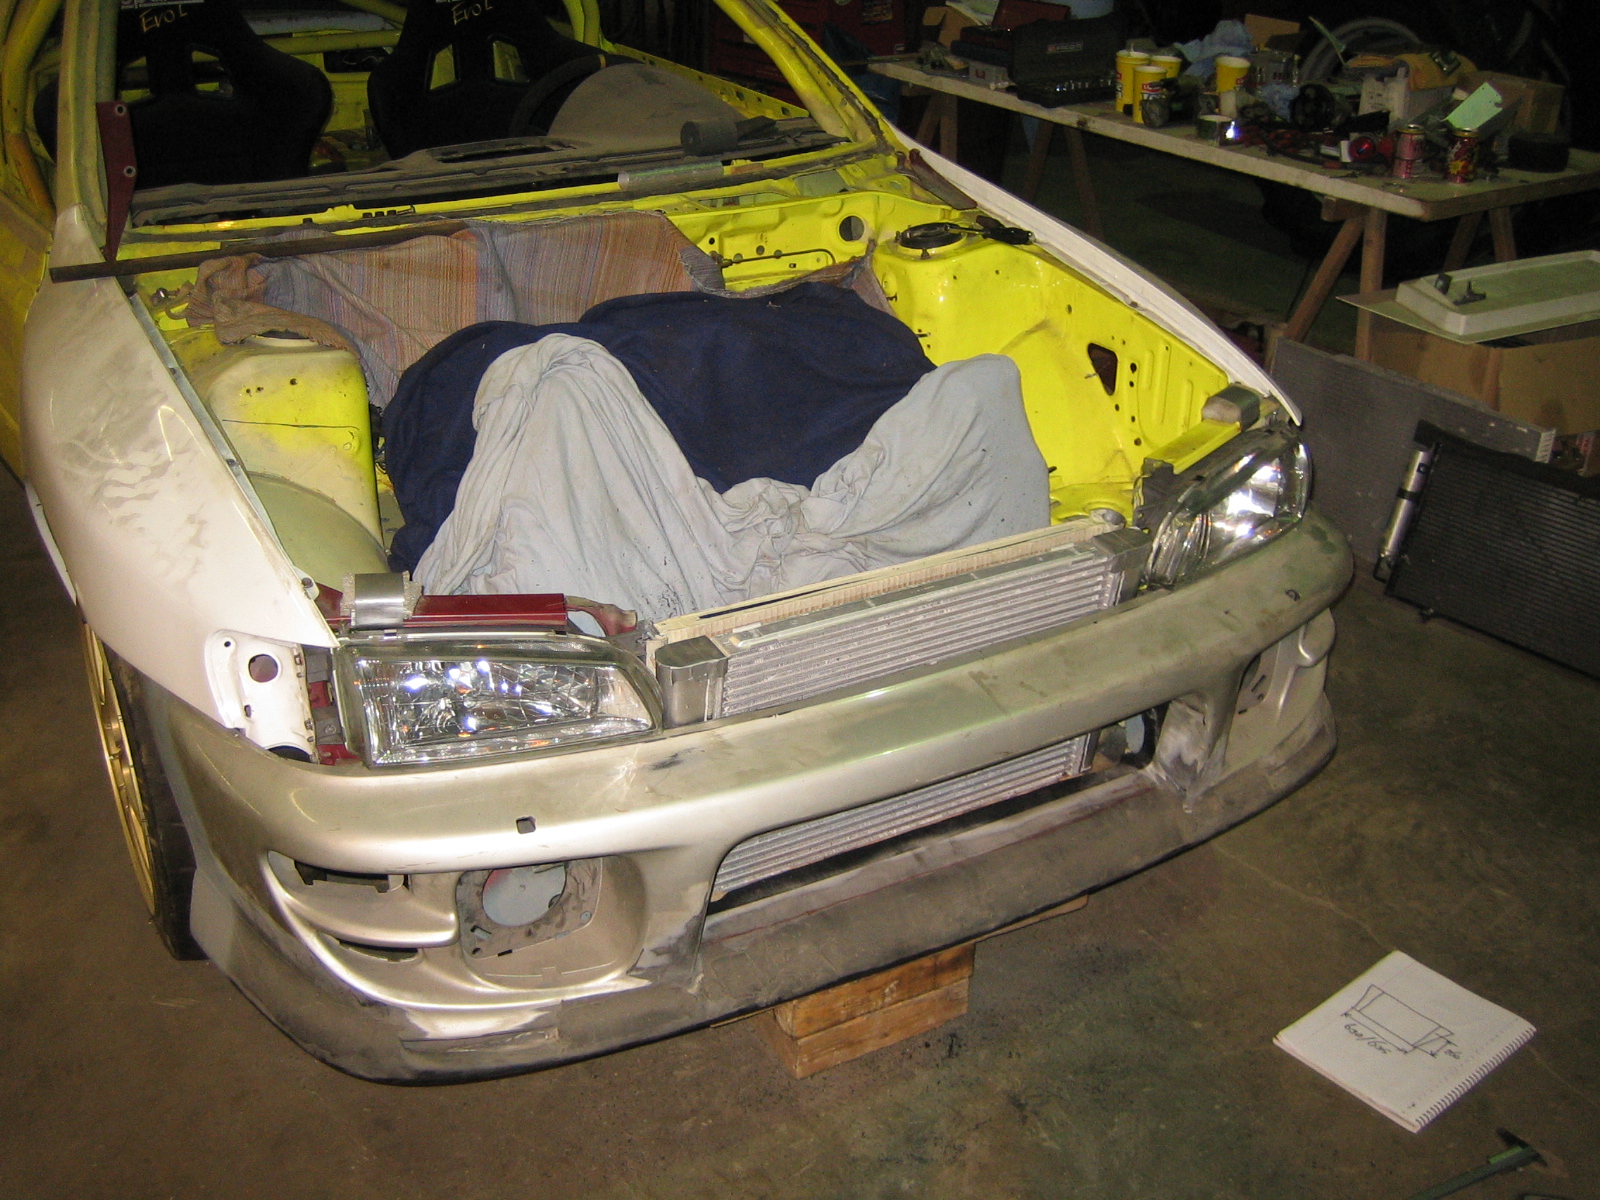
Done some bumperwork today.
To get the biggest amount of space between the radiator and engine for the shrouding the whole thing should be placed as far forwards as possible.
So I got my pneumatic saw and got to it!
Tommorow I will try to find a company that supplies airco radiators to specification, and look for suitable fans.
Leftovers:
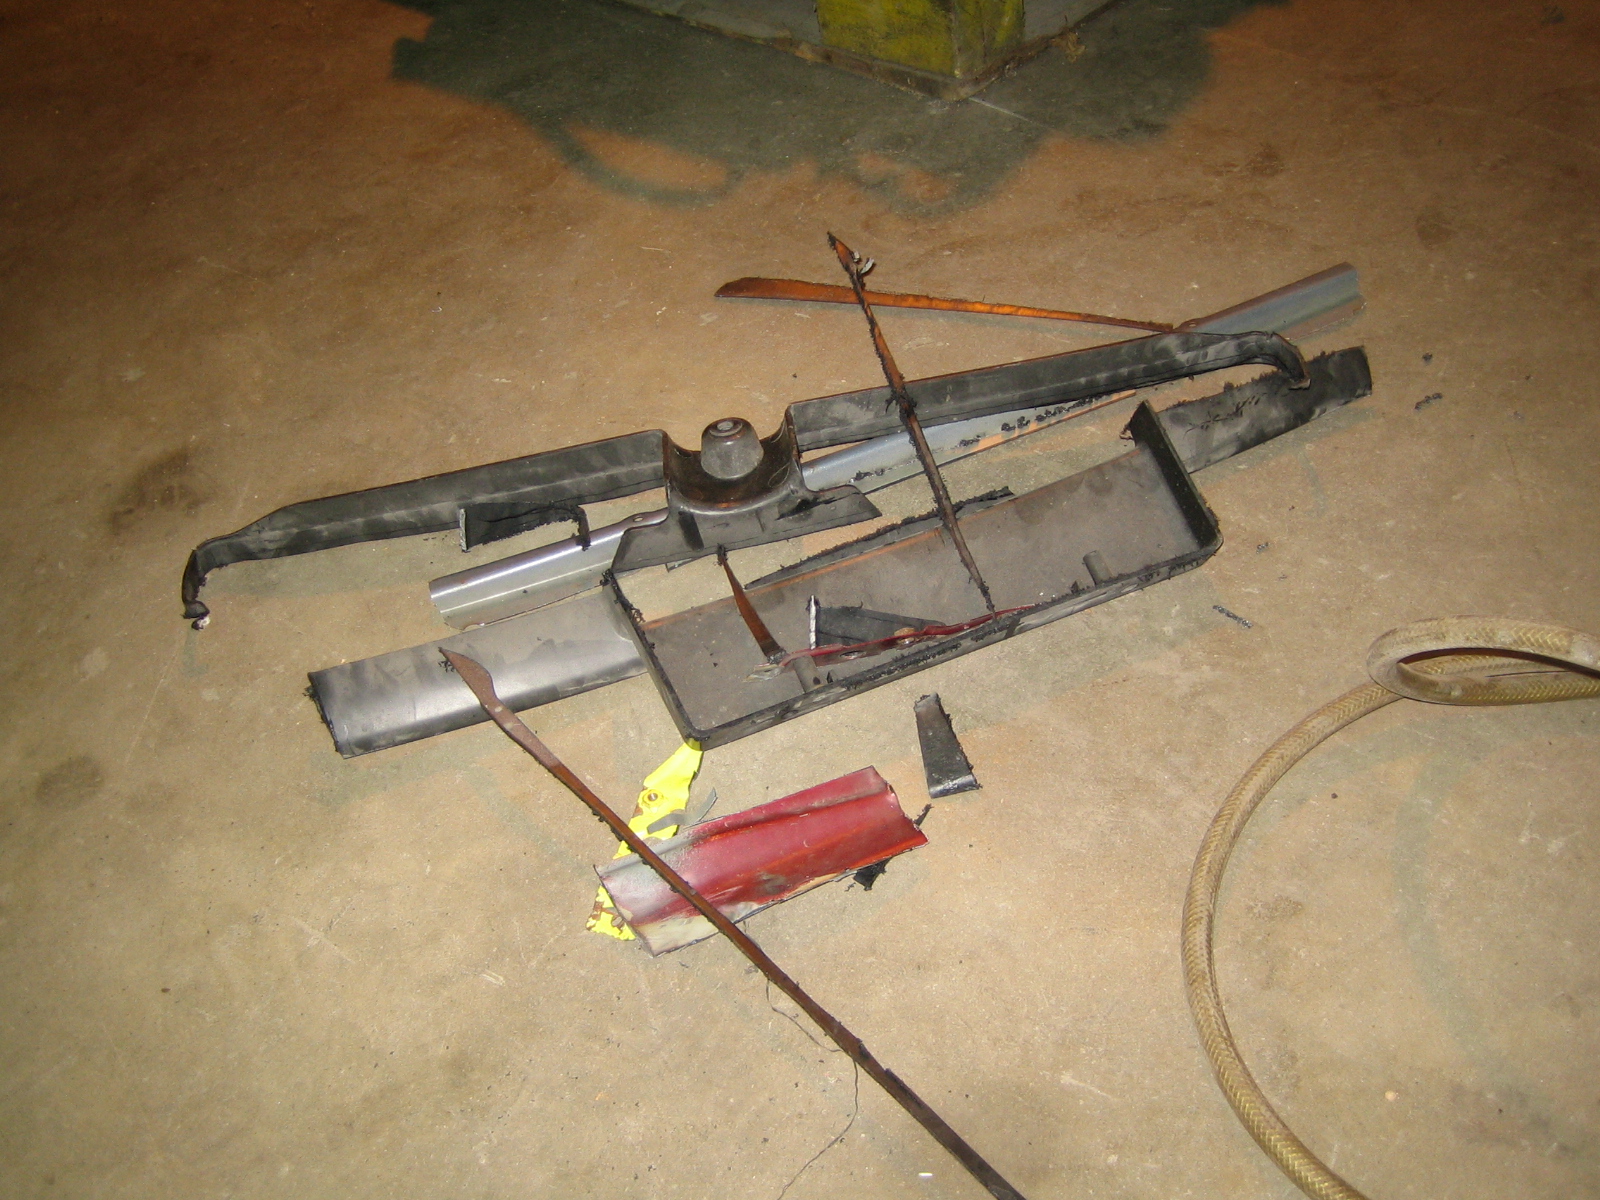
Cutaway:
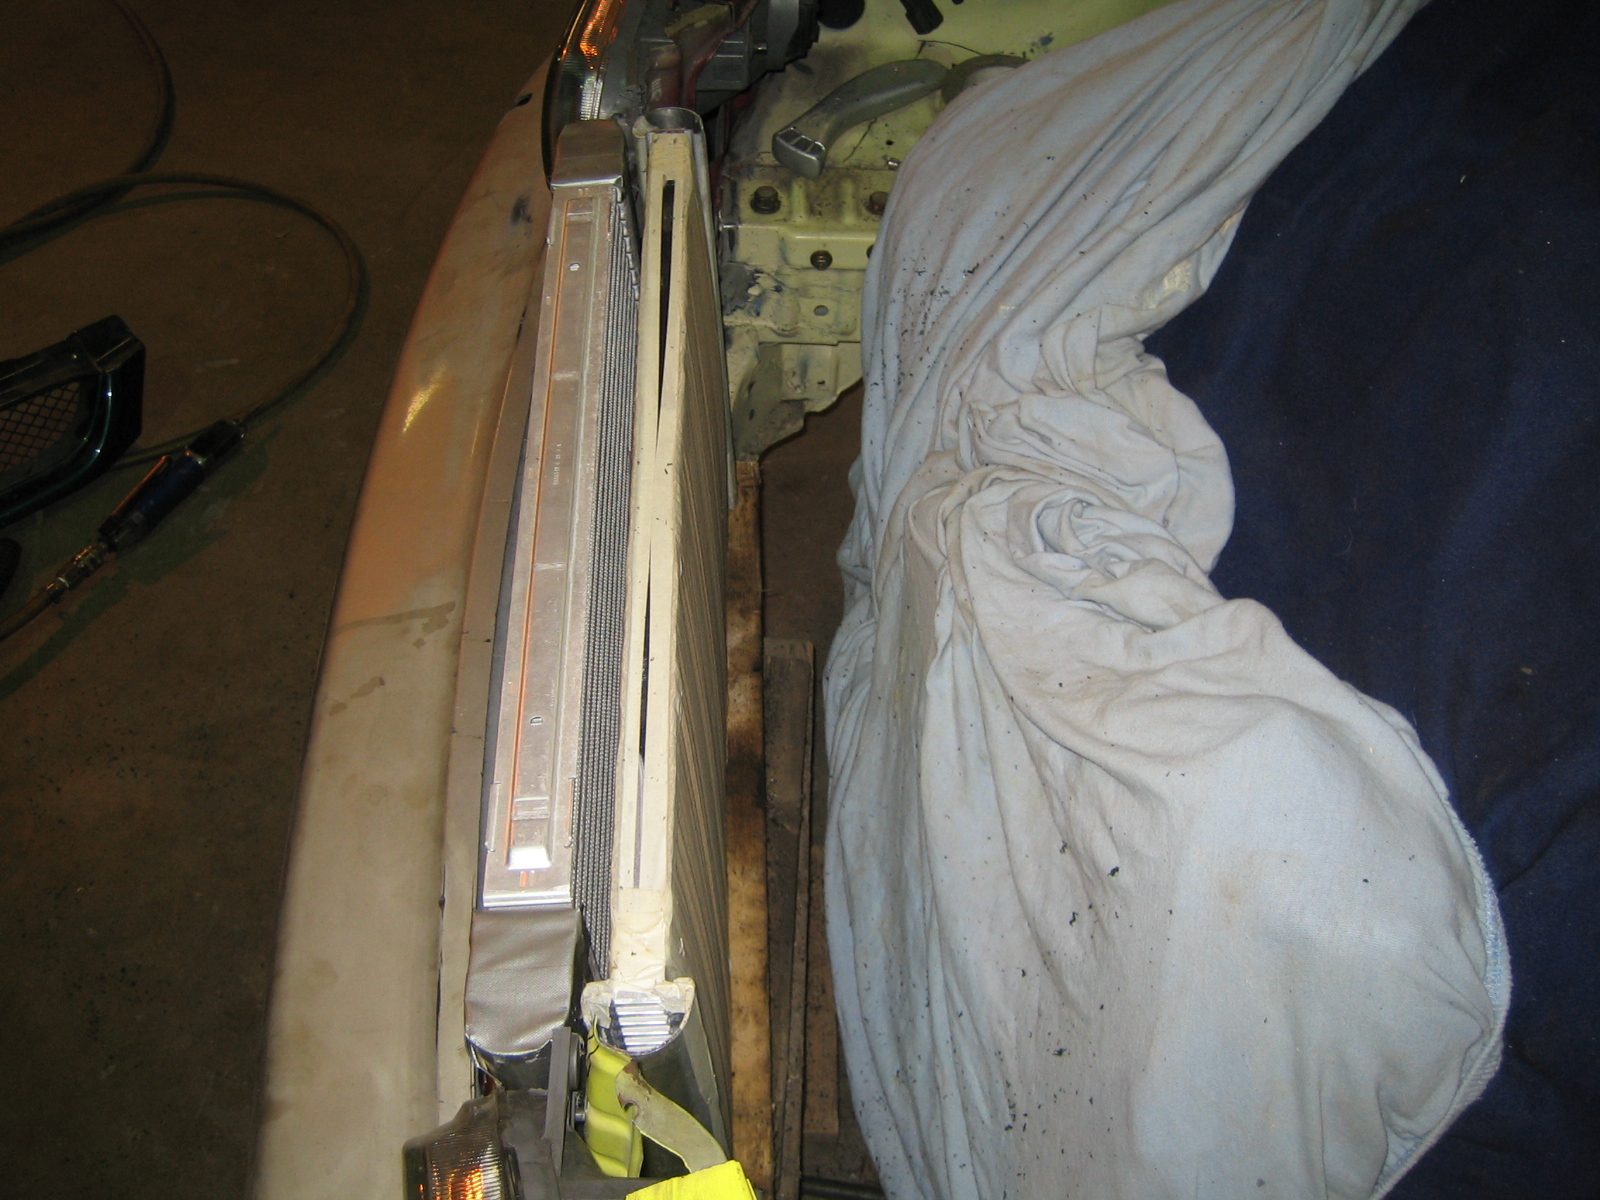
Rough fitment, everything is still a bit crooked, temporarely of course.
Nice gap between radiator and engine though:
To get the biggest amount of space between the radiator and engine for the shrouding the whole thing should be placed as far forwards as possible.
So I got my pneumatic saw and got to it!
Tommorow I will try to find a company that supplies airco radiators to specification, and look for suitable fans.
Leftovers:
Cutaway:
Rough fitment, everything is still a bit crooked, temporarely of course.
Nice gap between radiator and engine though:
 06 October 2009, 08:48 PM
#254
Scooby Regular
Thread Starter
Join Date: Dec 2002
Posts: 458
Likes: 0
Received 0 Likes
on
0 Posts
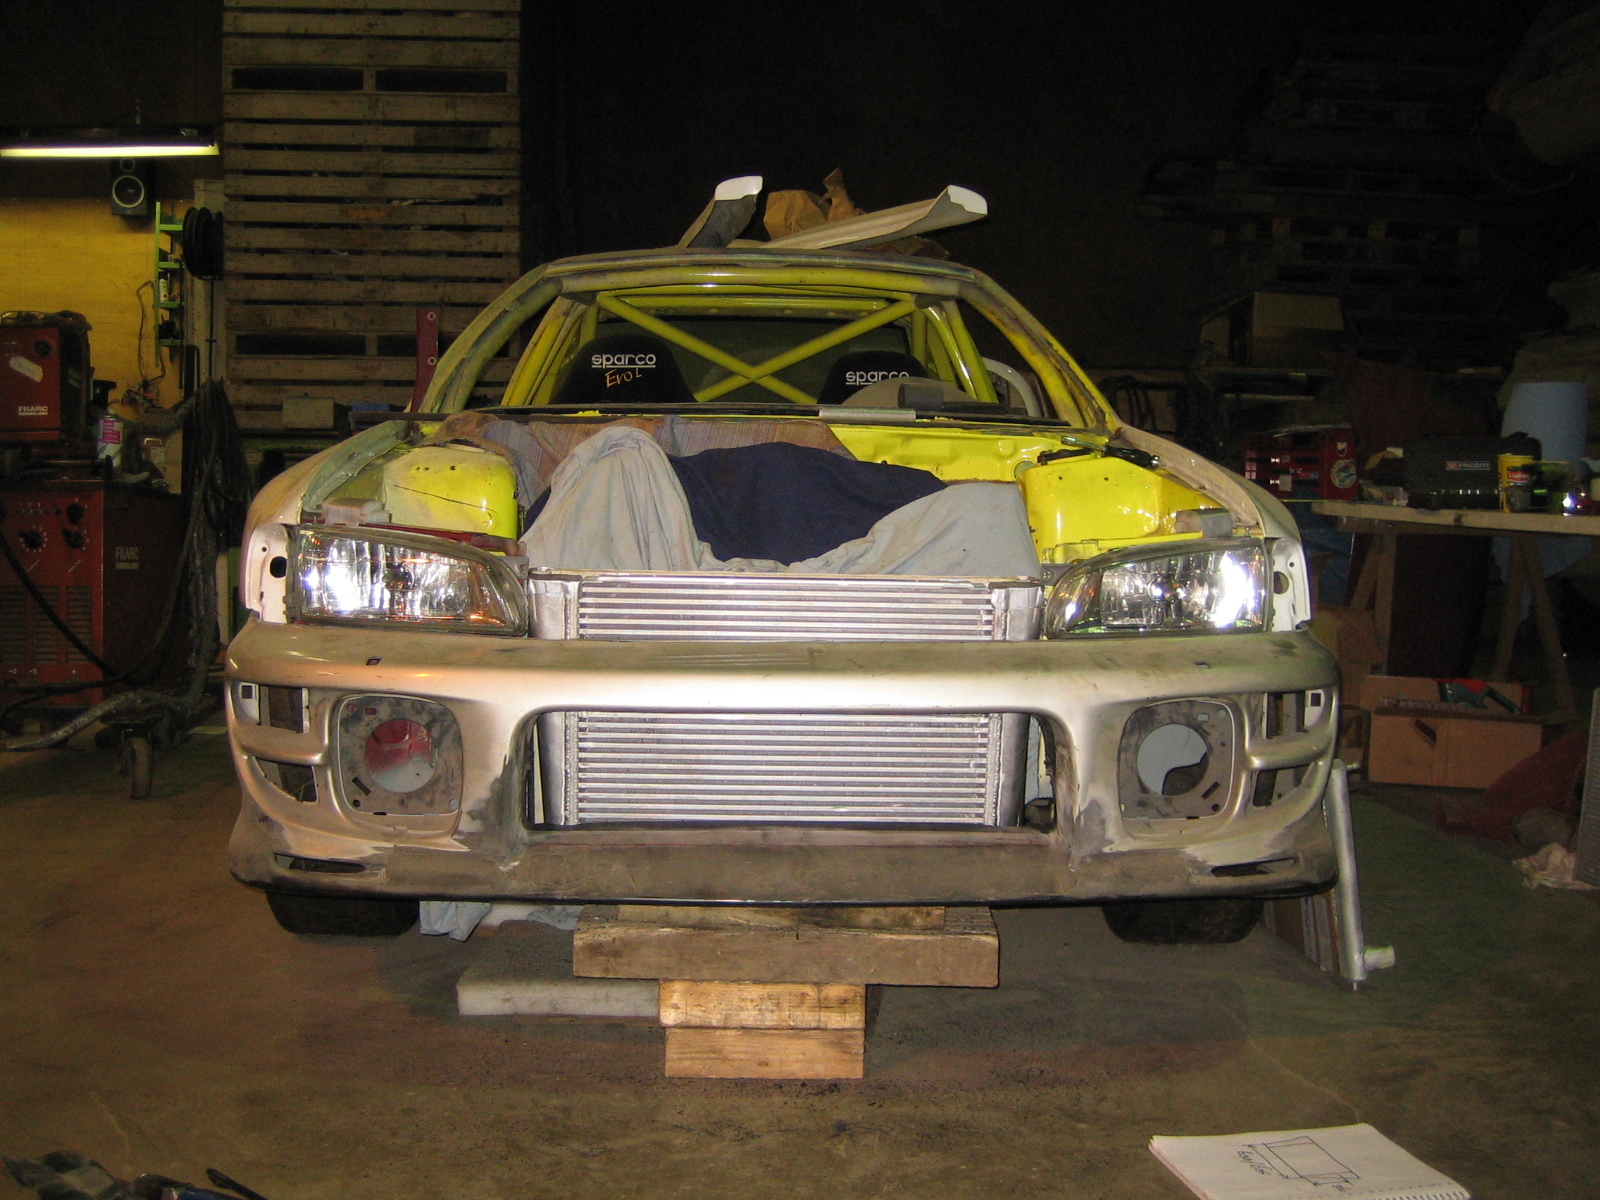
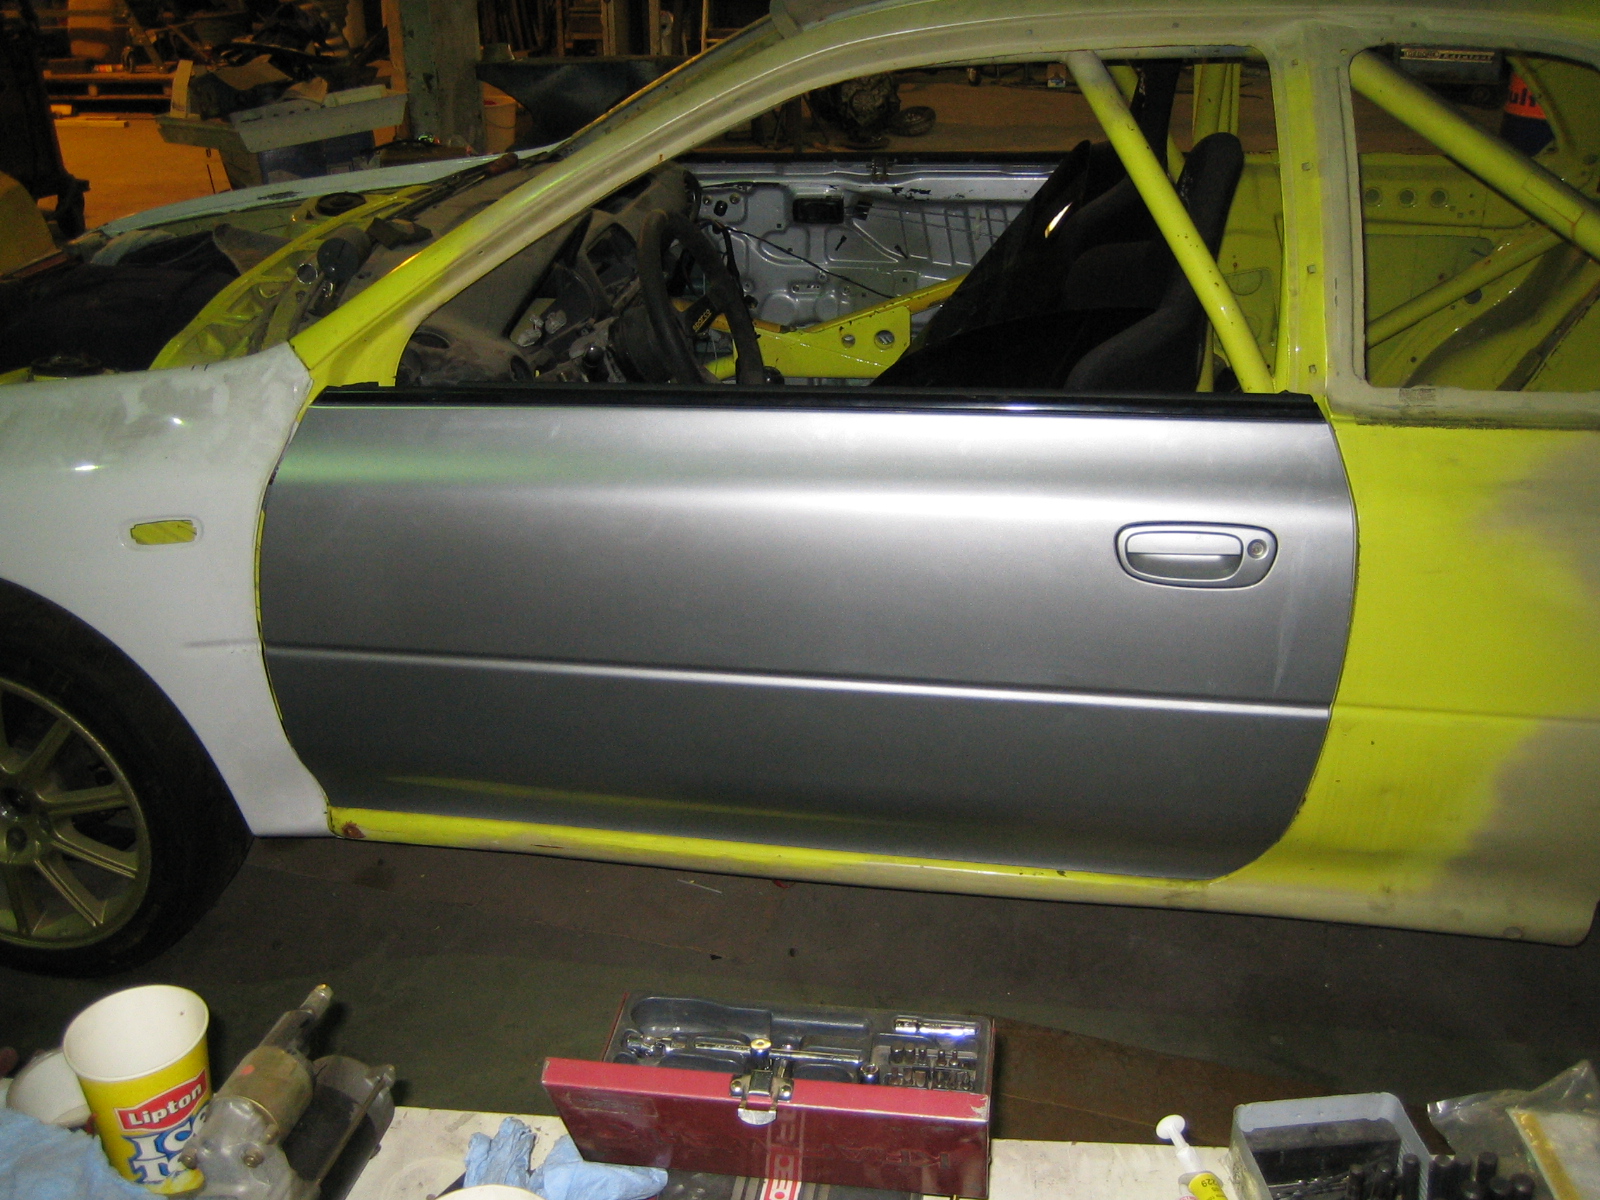
Bought another 2 door chassis, so now I got proper doors, sidewindows, rubbers, etc.
Put the doors in:
Straightened the bumper a bit, it was crooked due to some damage:

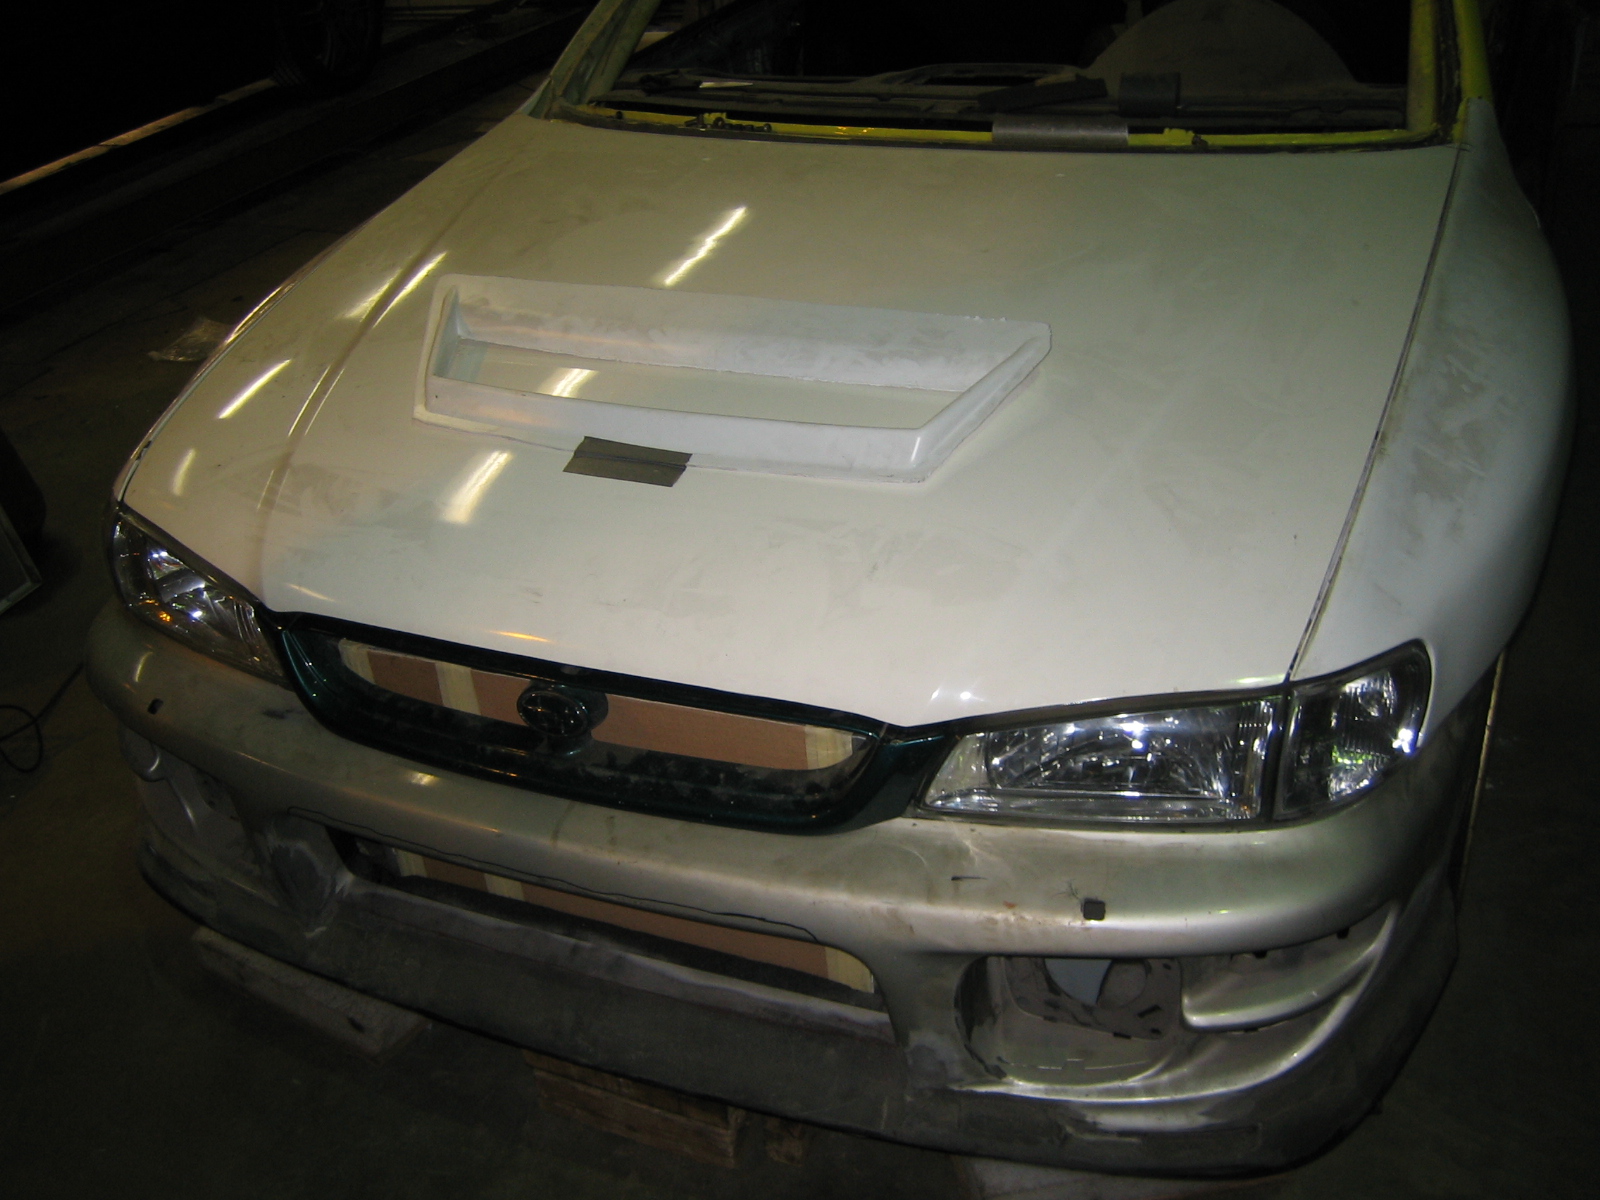
Fixed the hood:
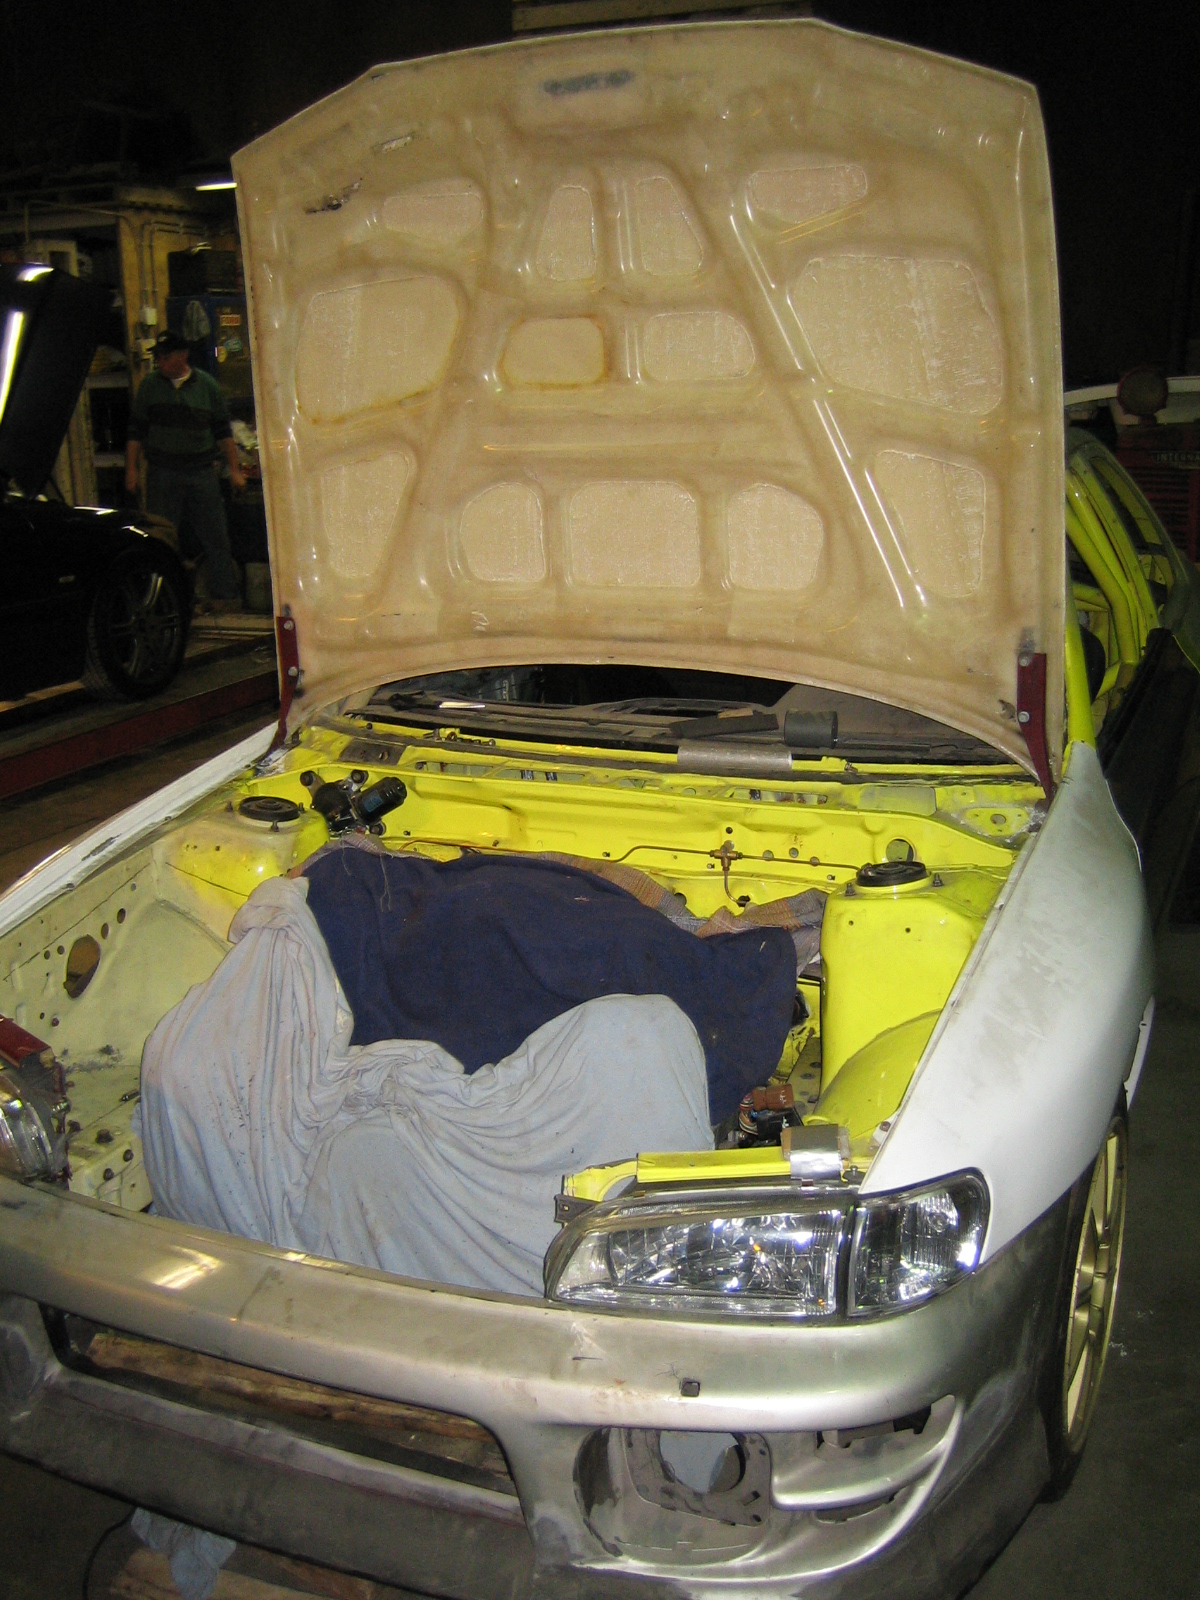
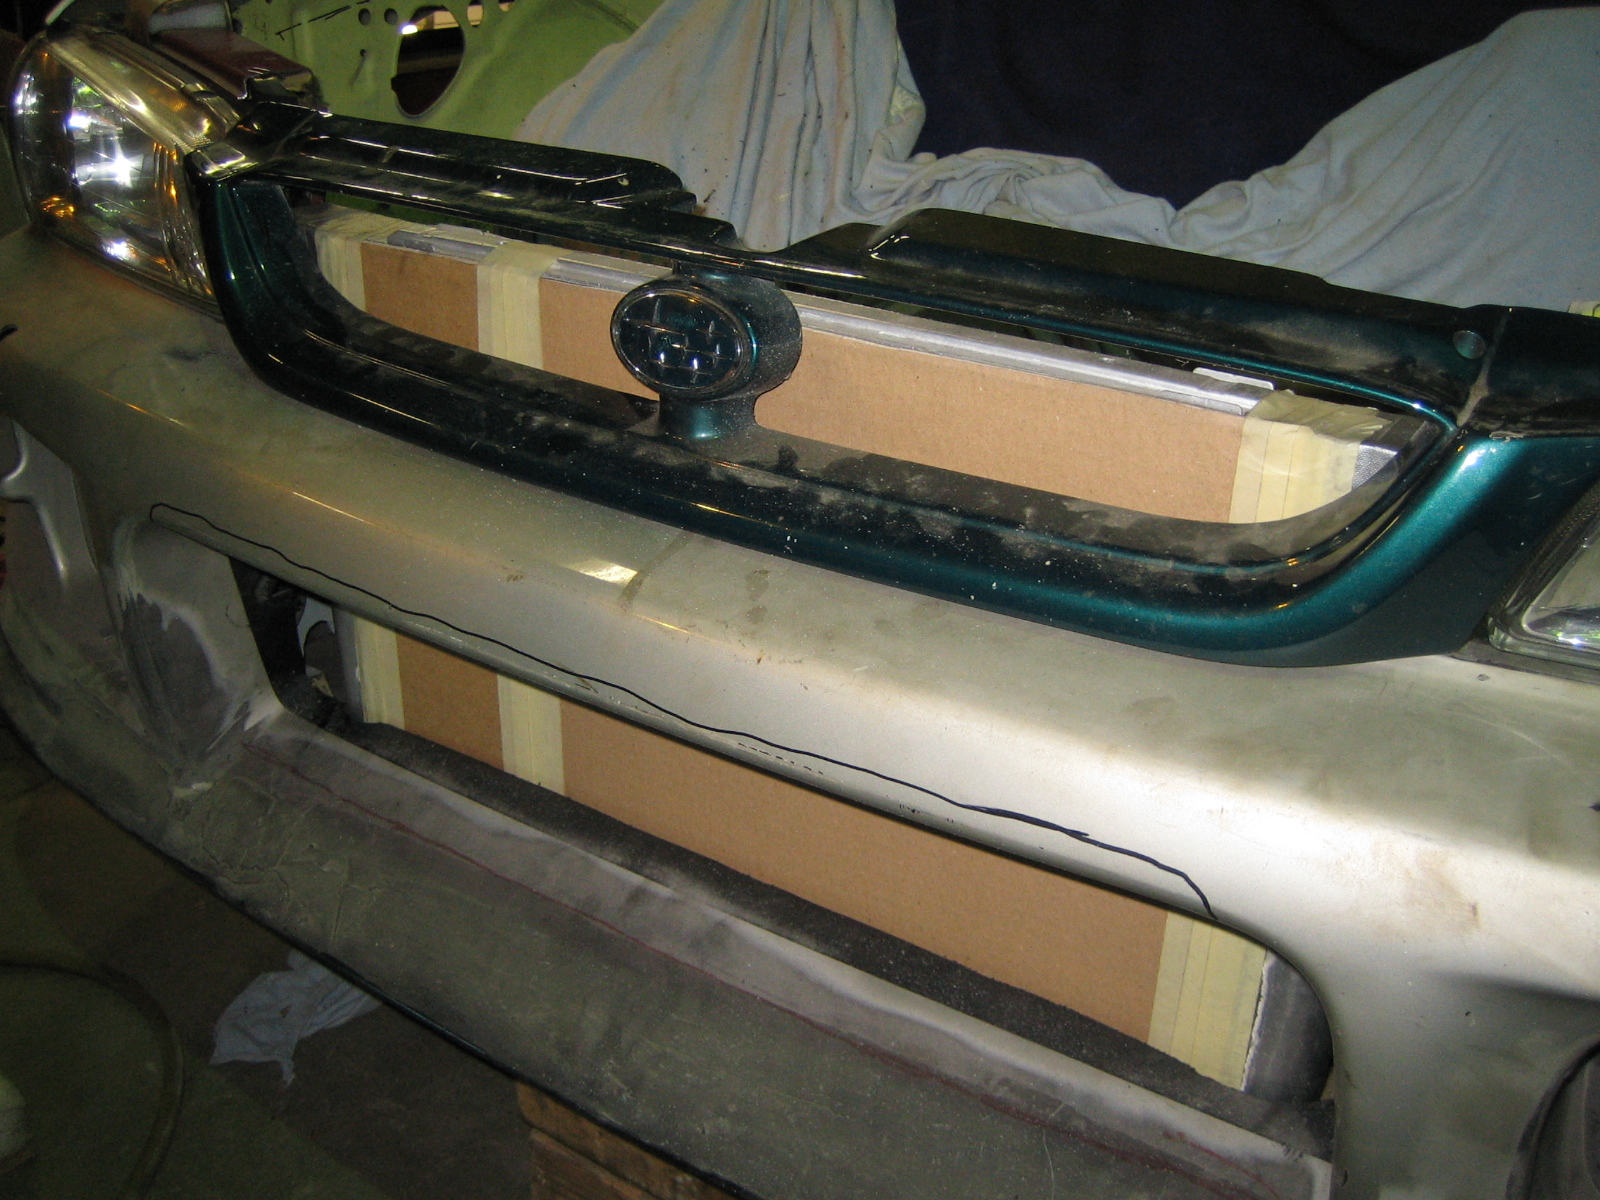
Made the grill fit with the FMIC:

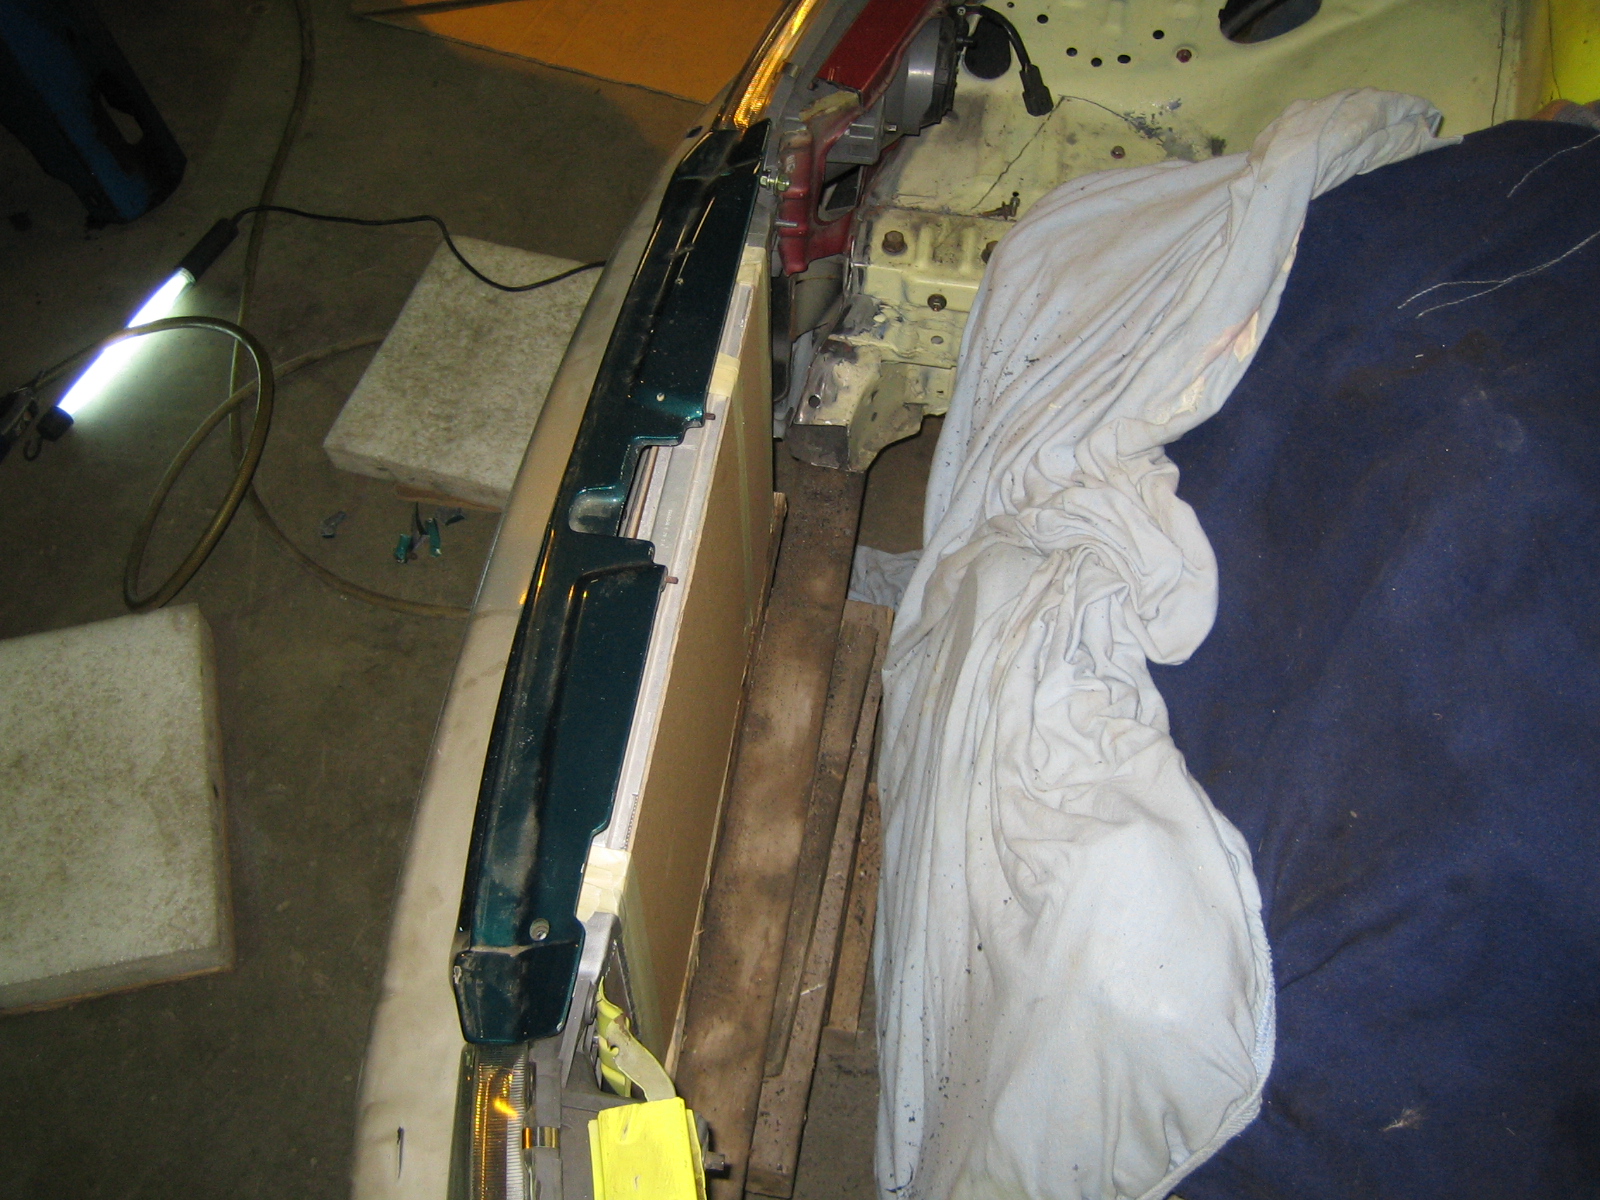
Made a start with the air exit for the hood:
More next time!
Put the doors in:
Straightened the bumper a bit, it was crooked due to some damage:
Fixed the hood:
Made the grill fit with the FMIC:
Made a start with the air exit for the hood:
More next time!


 07 November 2009, 02:10 PM
#269
Scooby Regular
Thread Starter
Join Date: Dec 2002
Posts: 458
Likes: 0
Received 0 Likes
on
0 Posts
Ok,
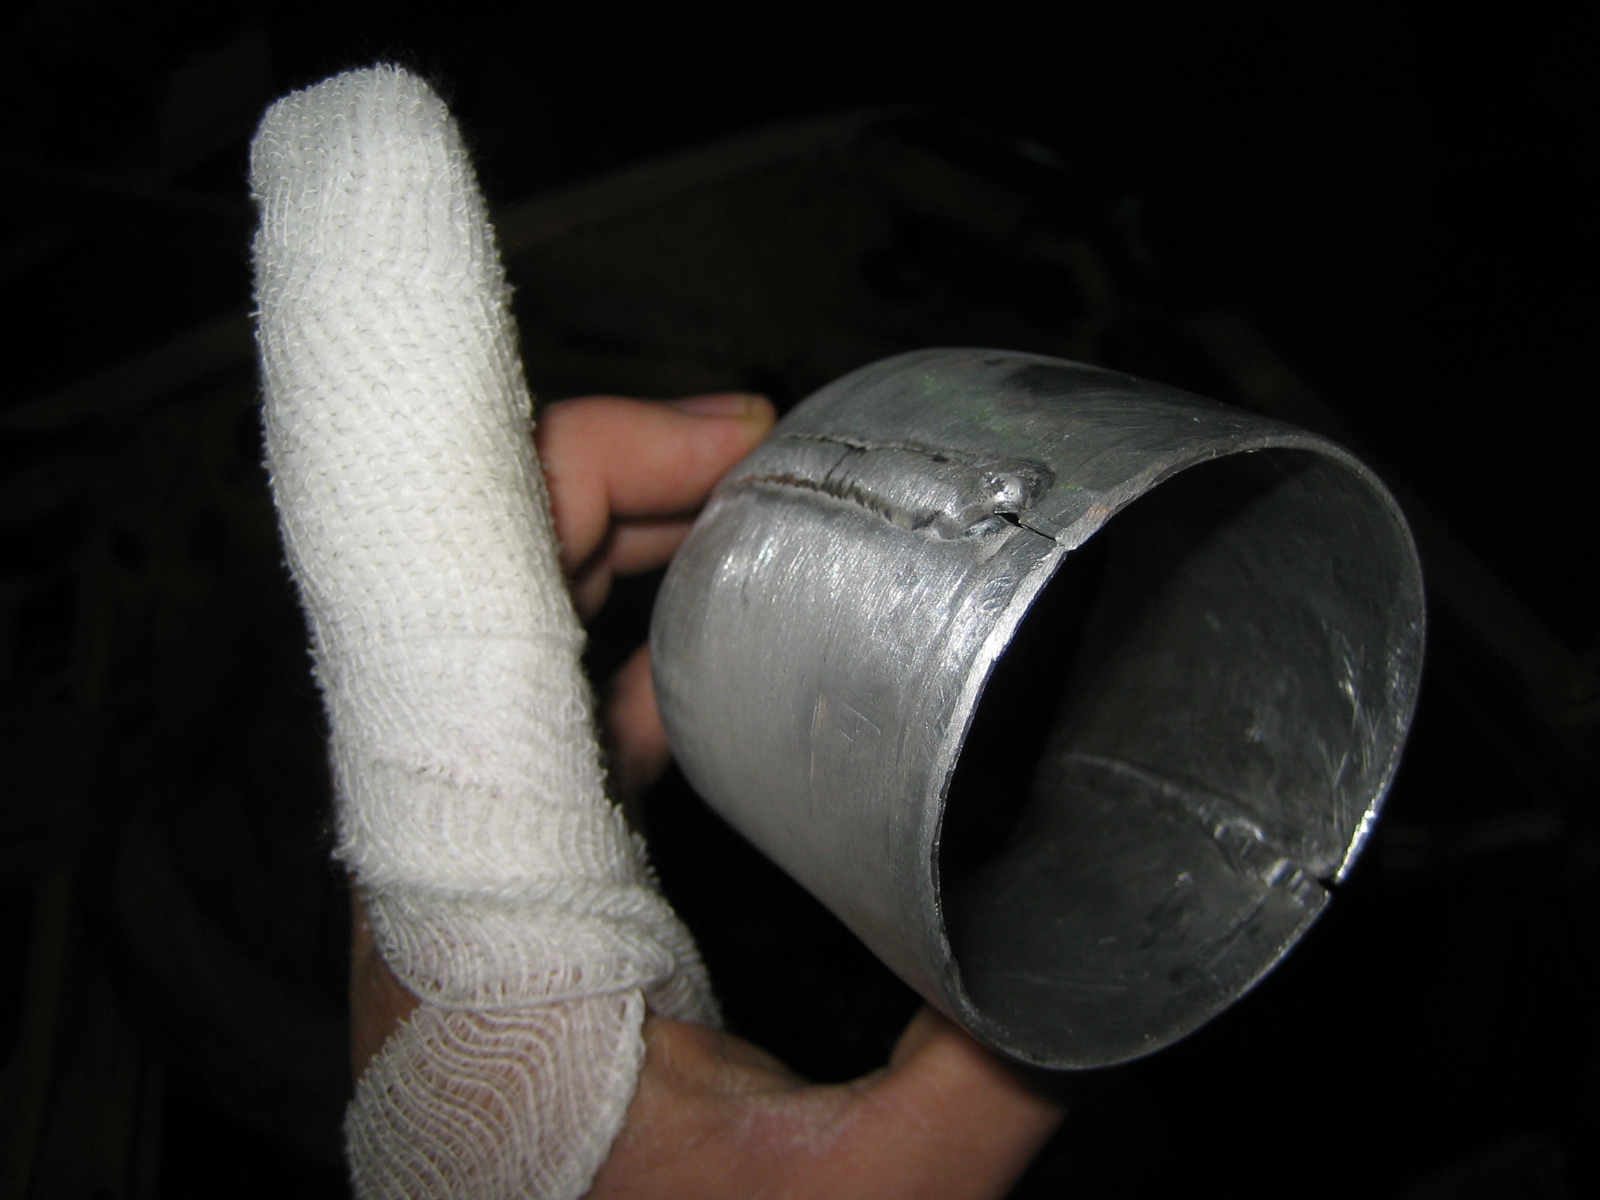
So I was stupid enough to stick my finger in milling machine while it was operating.
I know, it's about the stupidest thing to do, but that's me.
Result, severed 'till halfway the first cone (is that how it's called in English?)
Anyway my finger is gone up to just behind the nail, and that's a showstopper I can tell you.
Off course there is not alot I can do atm, but thankfully there are some peeps helping me!
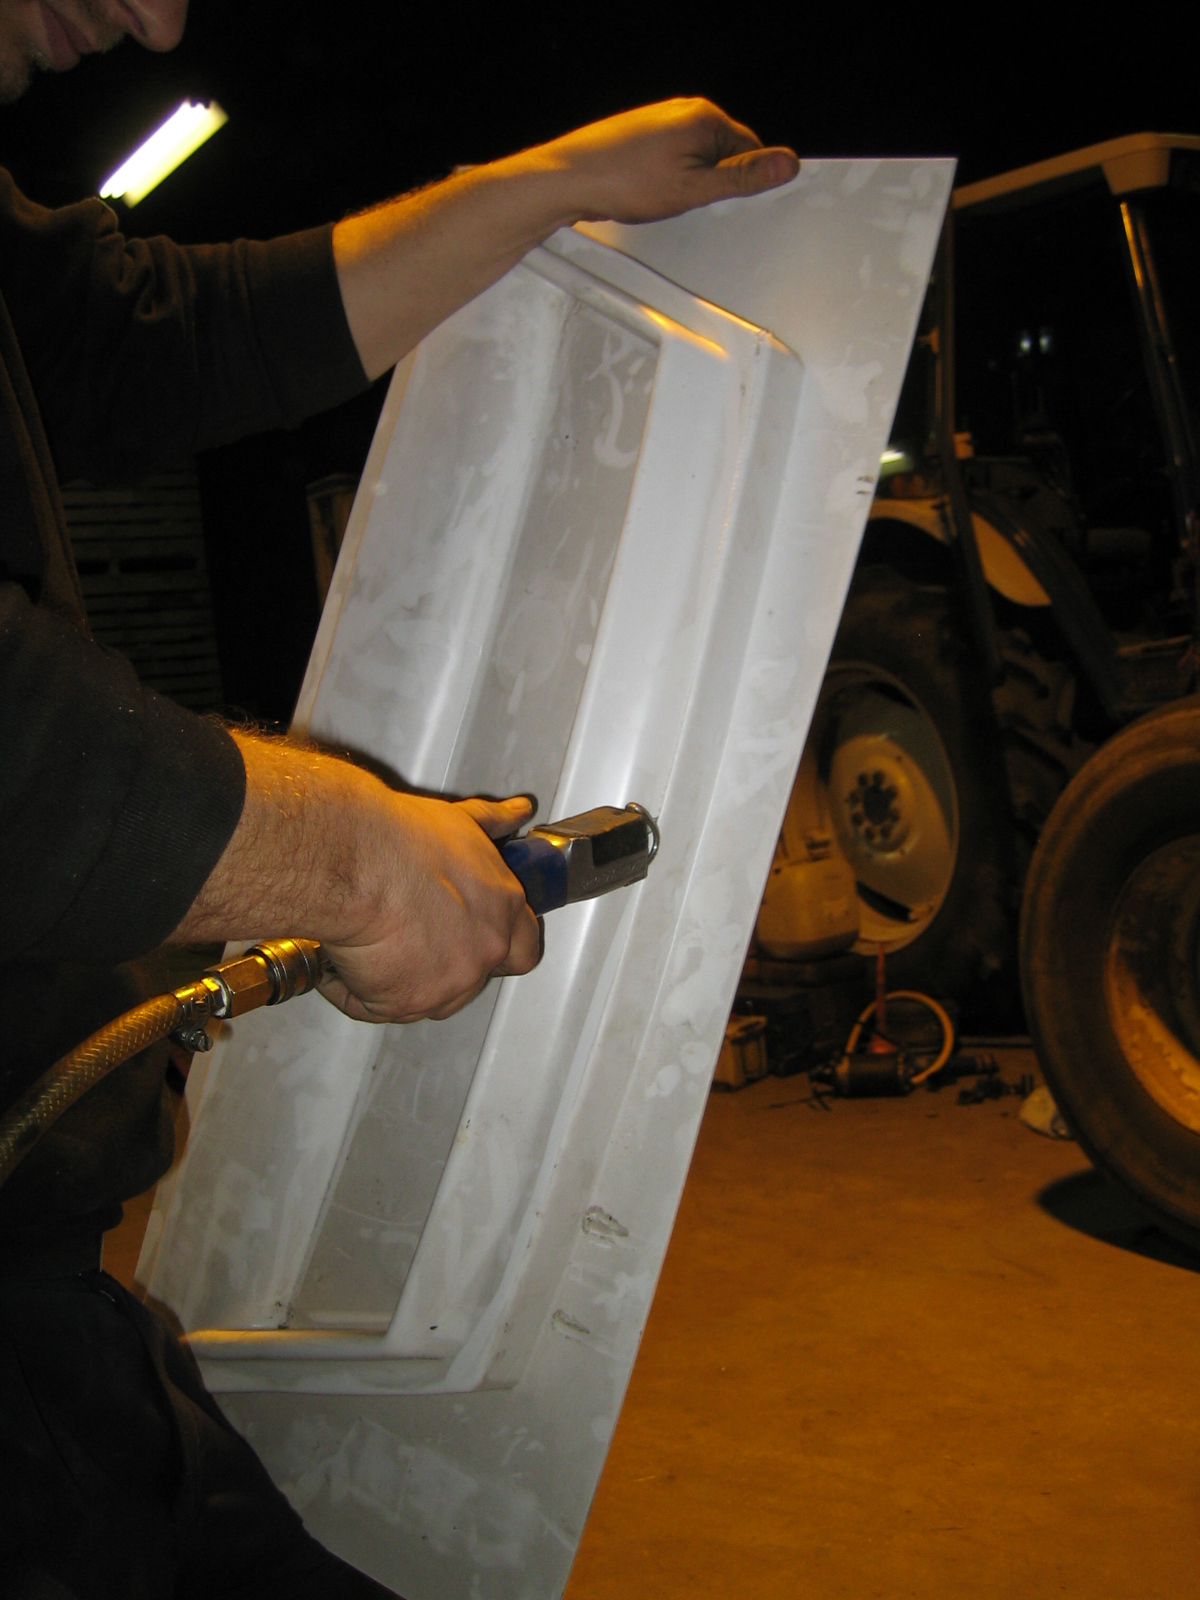
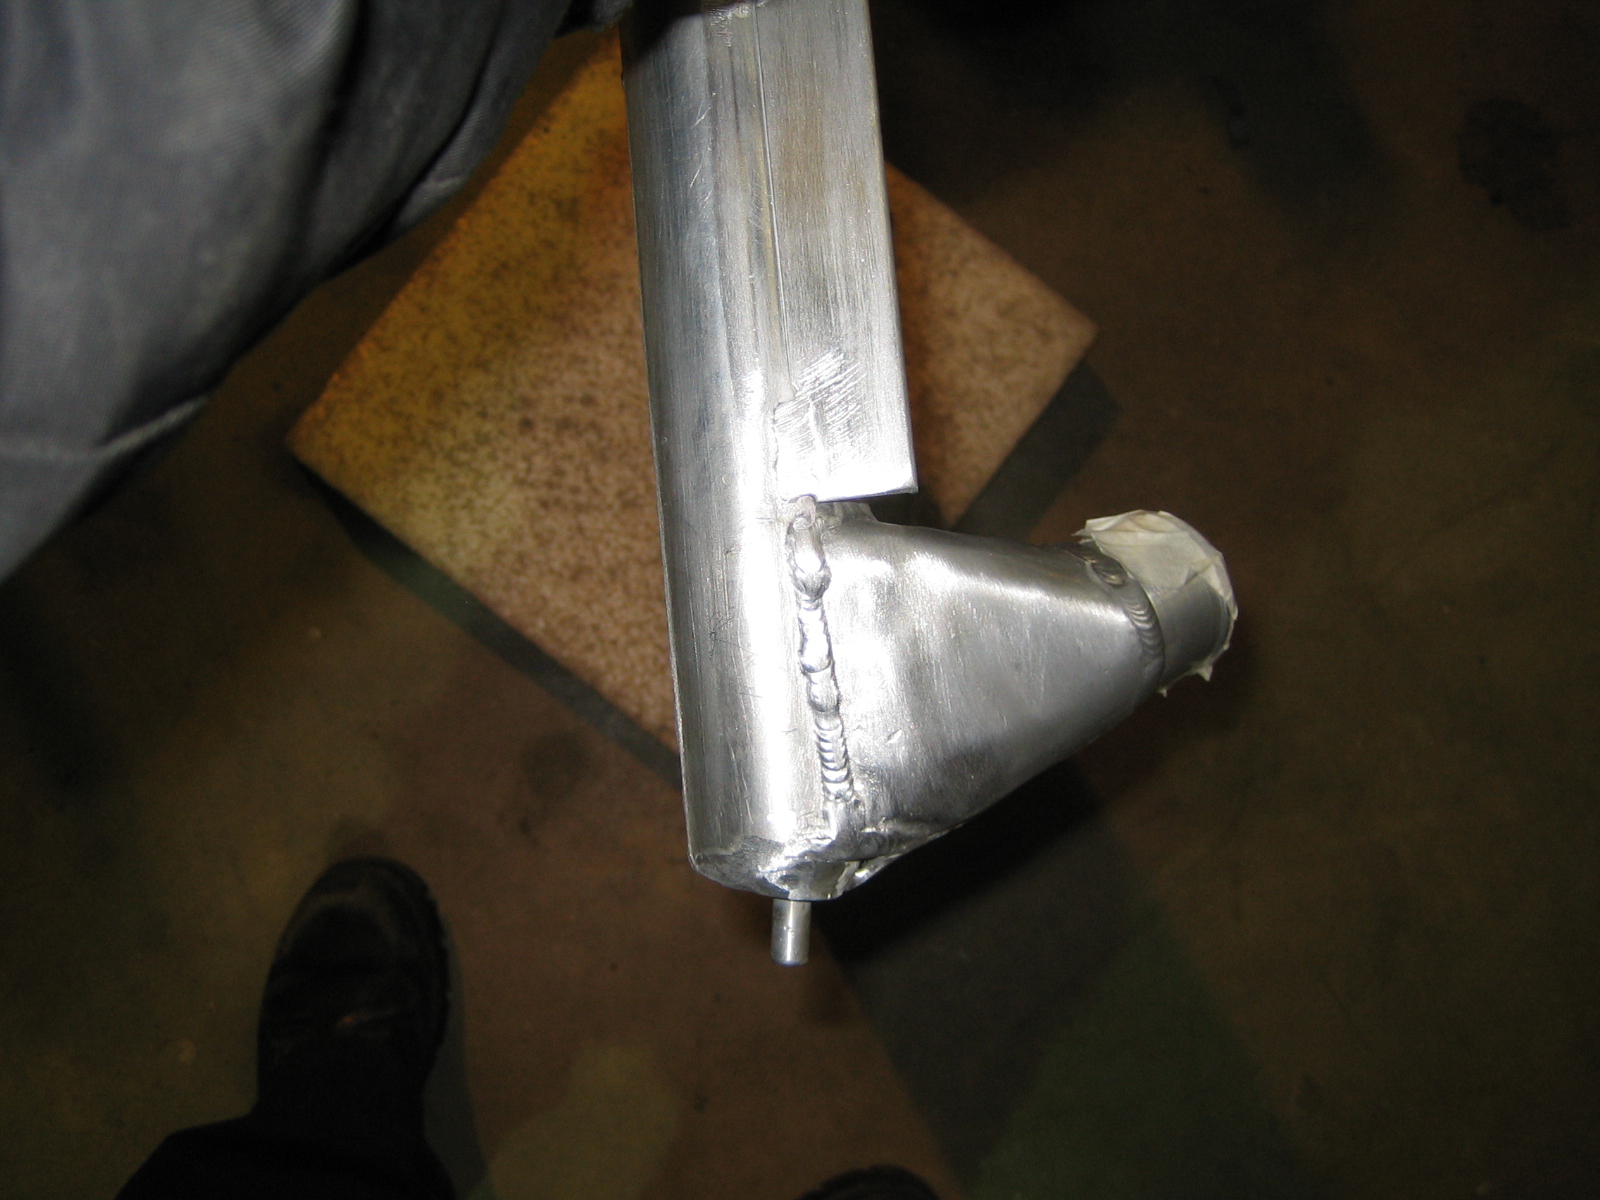
And one of them is finishing the radiator and FMIC for me.
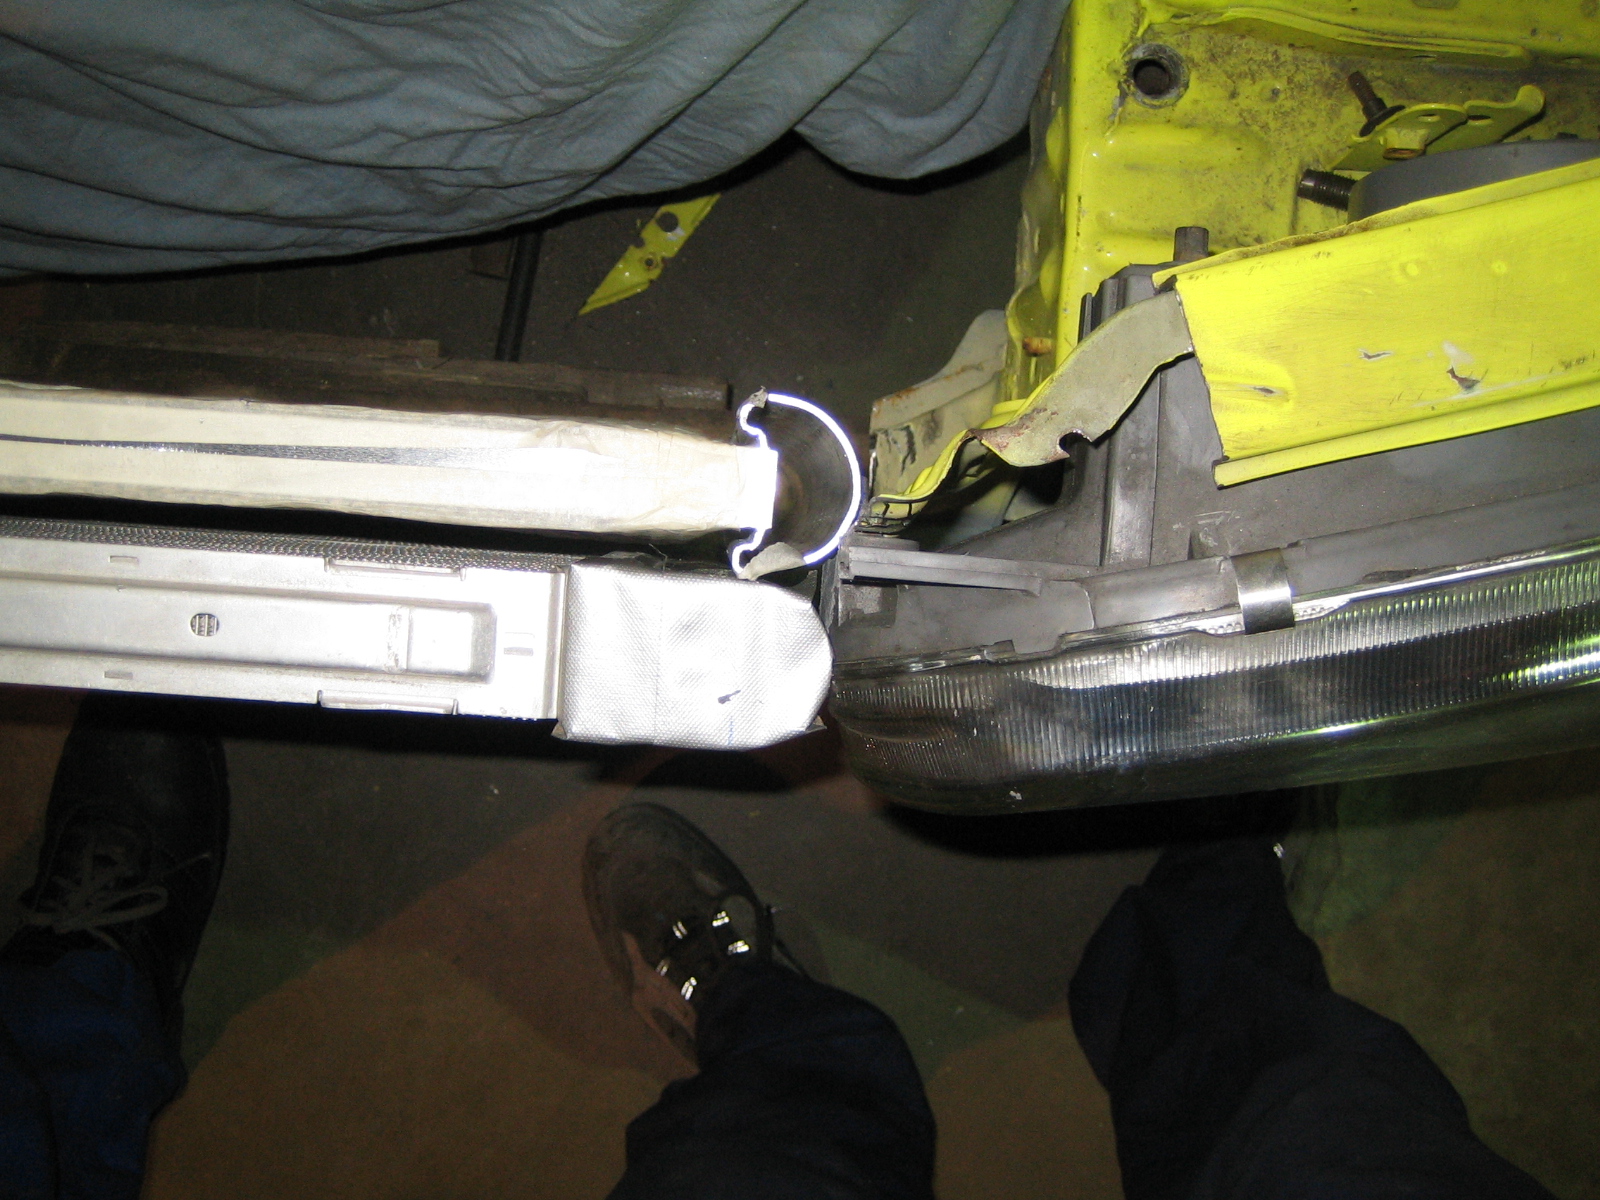
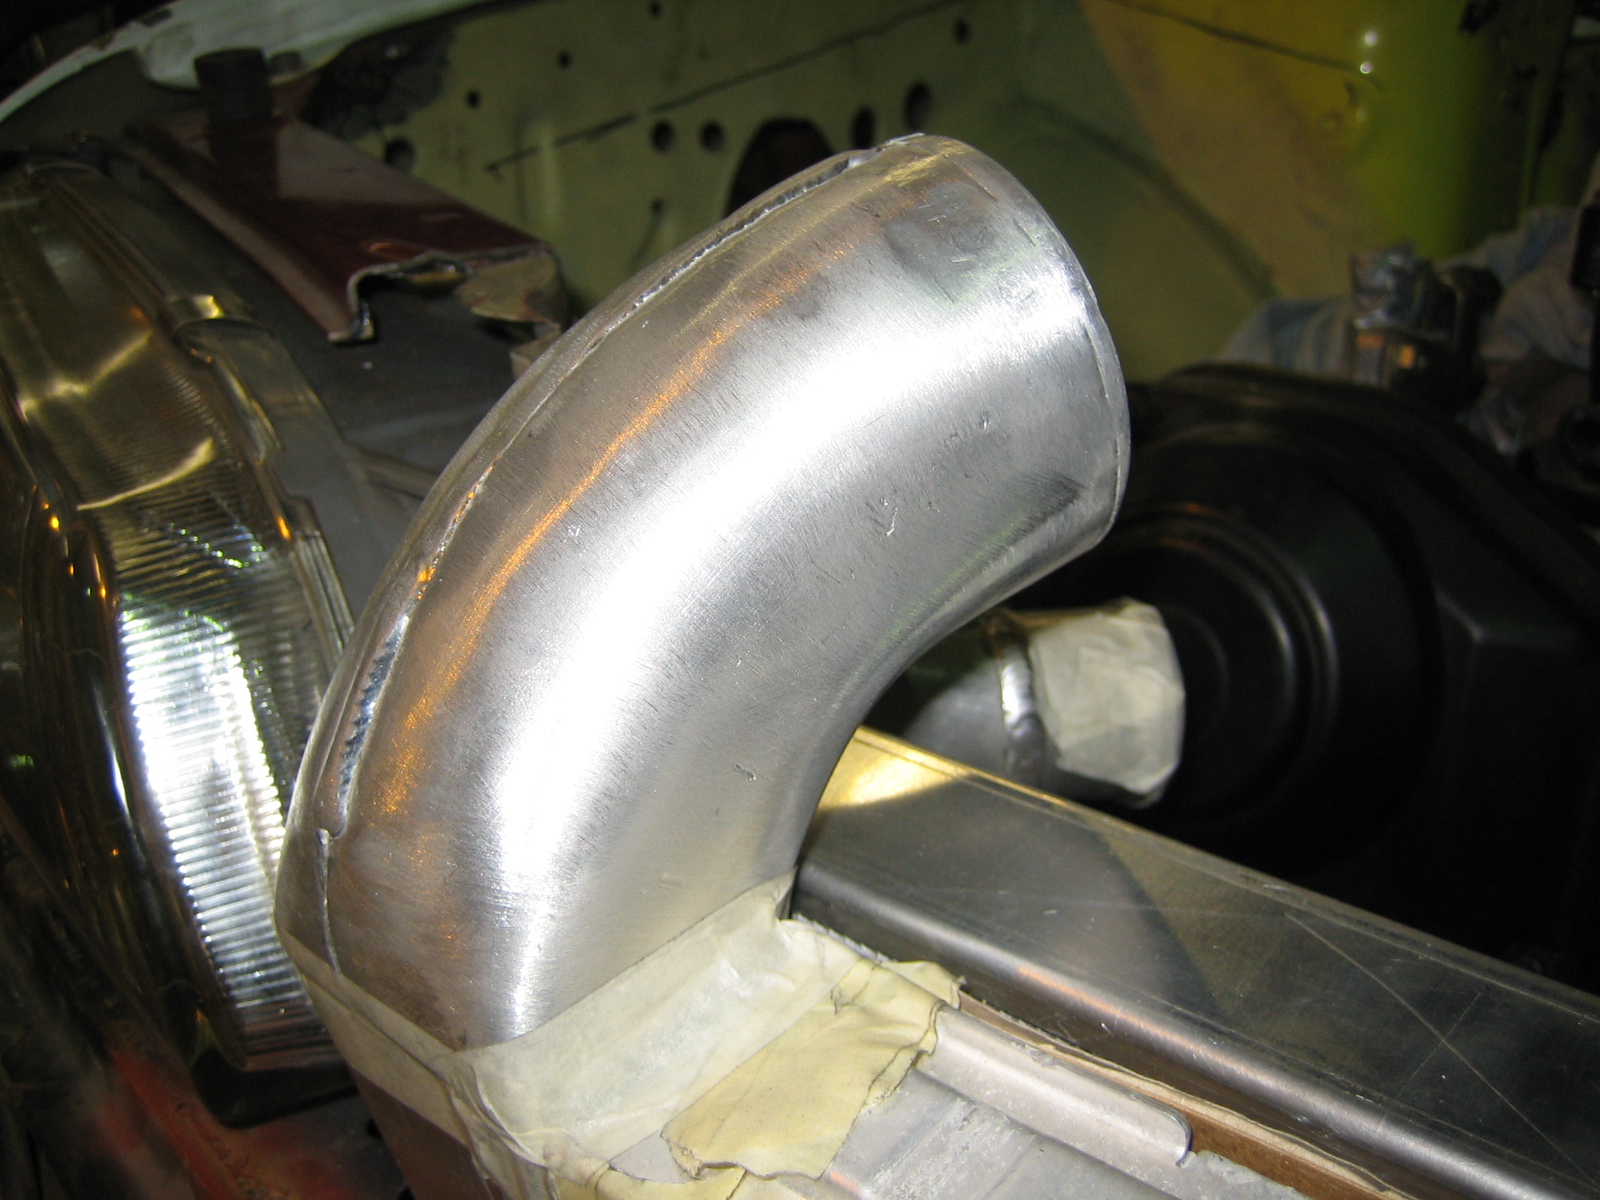
Yesterday he brought the radiator back, and the FMIC for testing if the angles are correct.
I'm really pleased with the result, he made the inlet and exit from 1.5mm alu plate.
That is hard stuff to form with panel beating.
He also made a test inlet for the FMIC which he wanted to see if it would fit.
Hopefully next week it will be done sofar!!
Pic's!
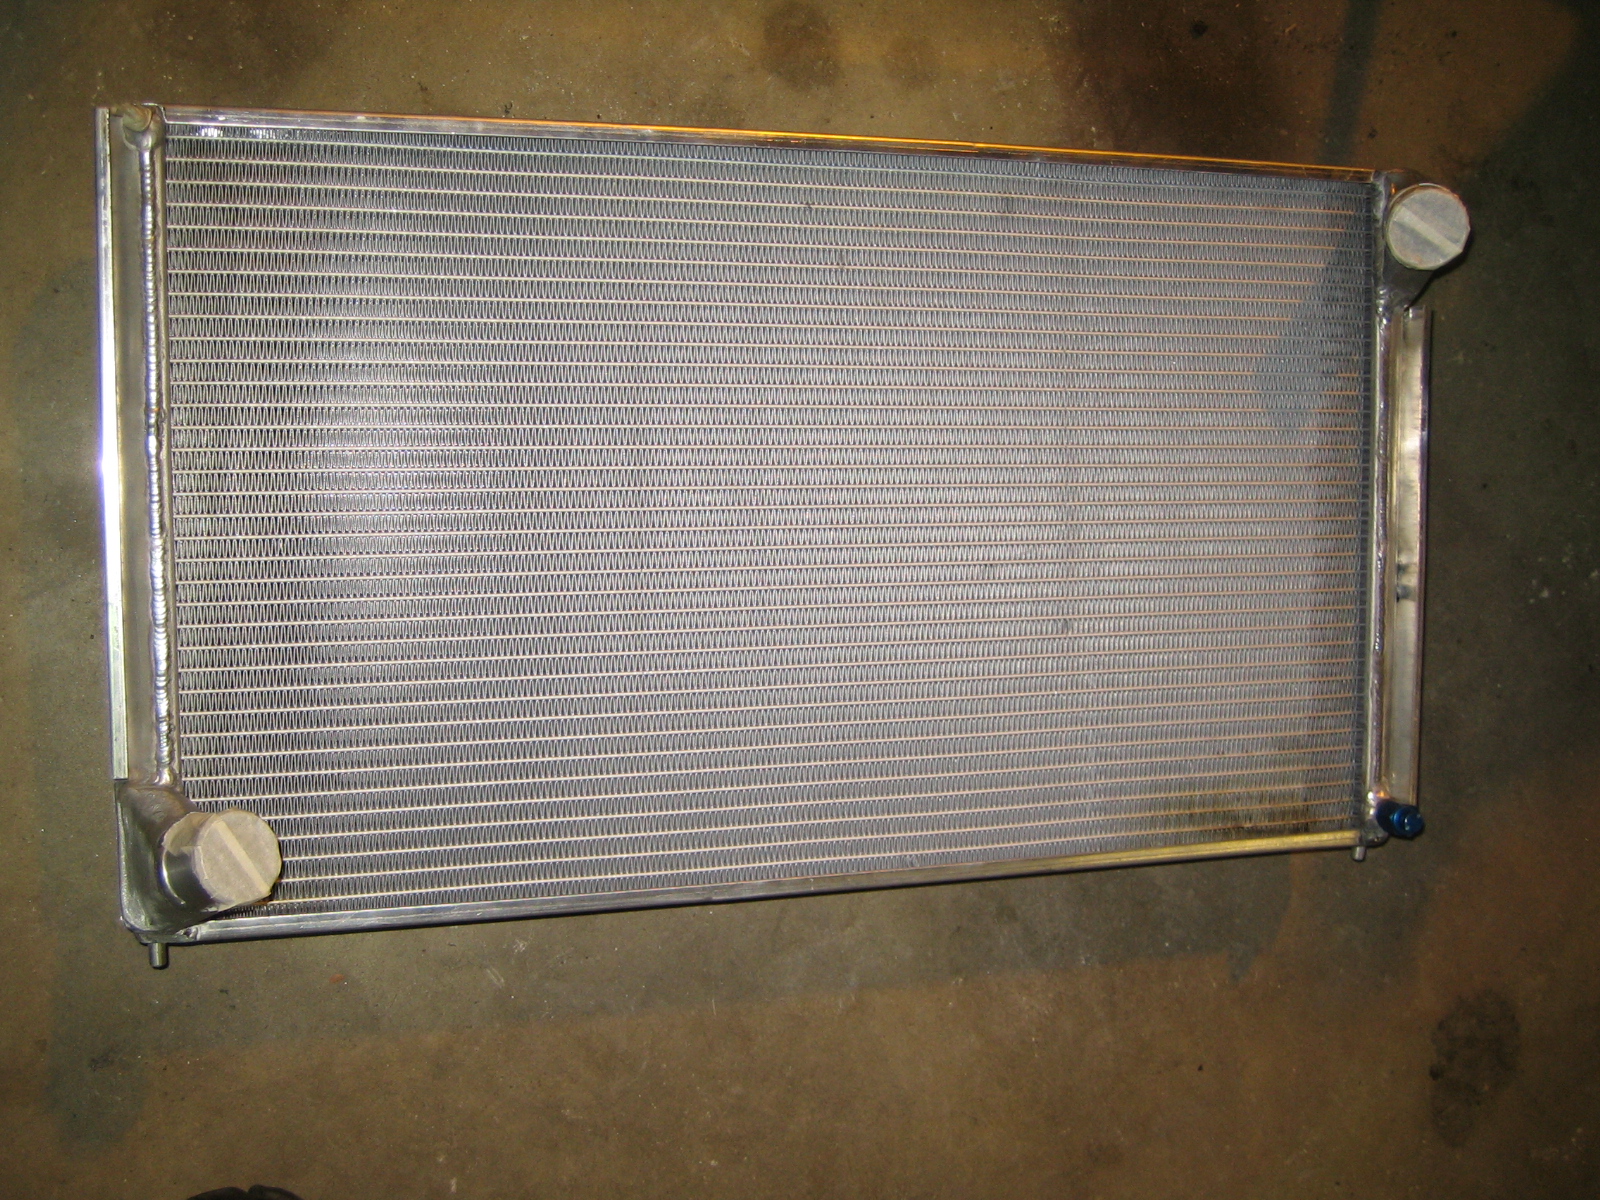
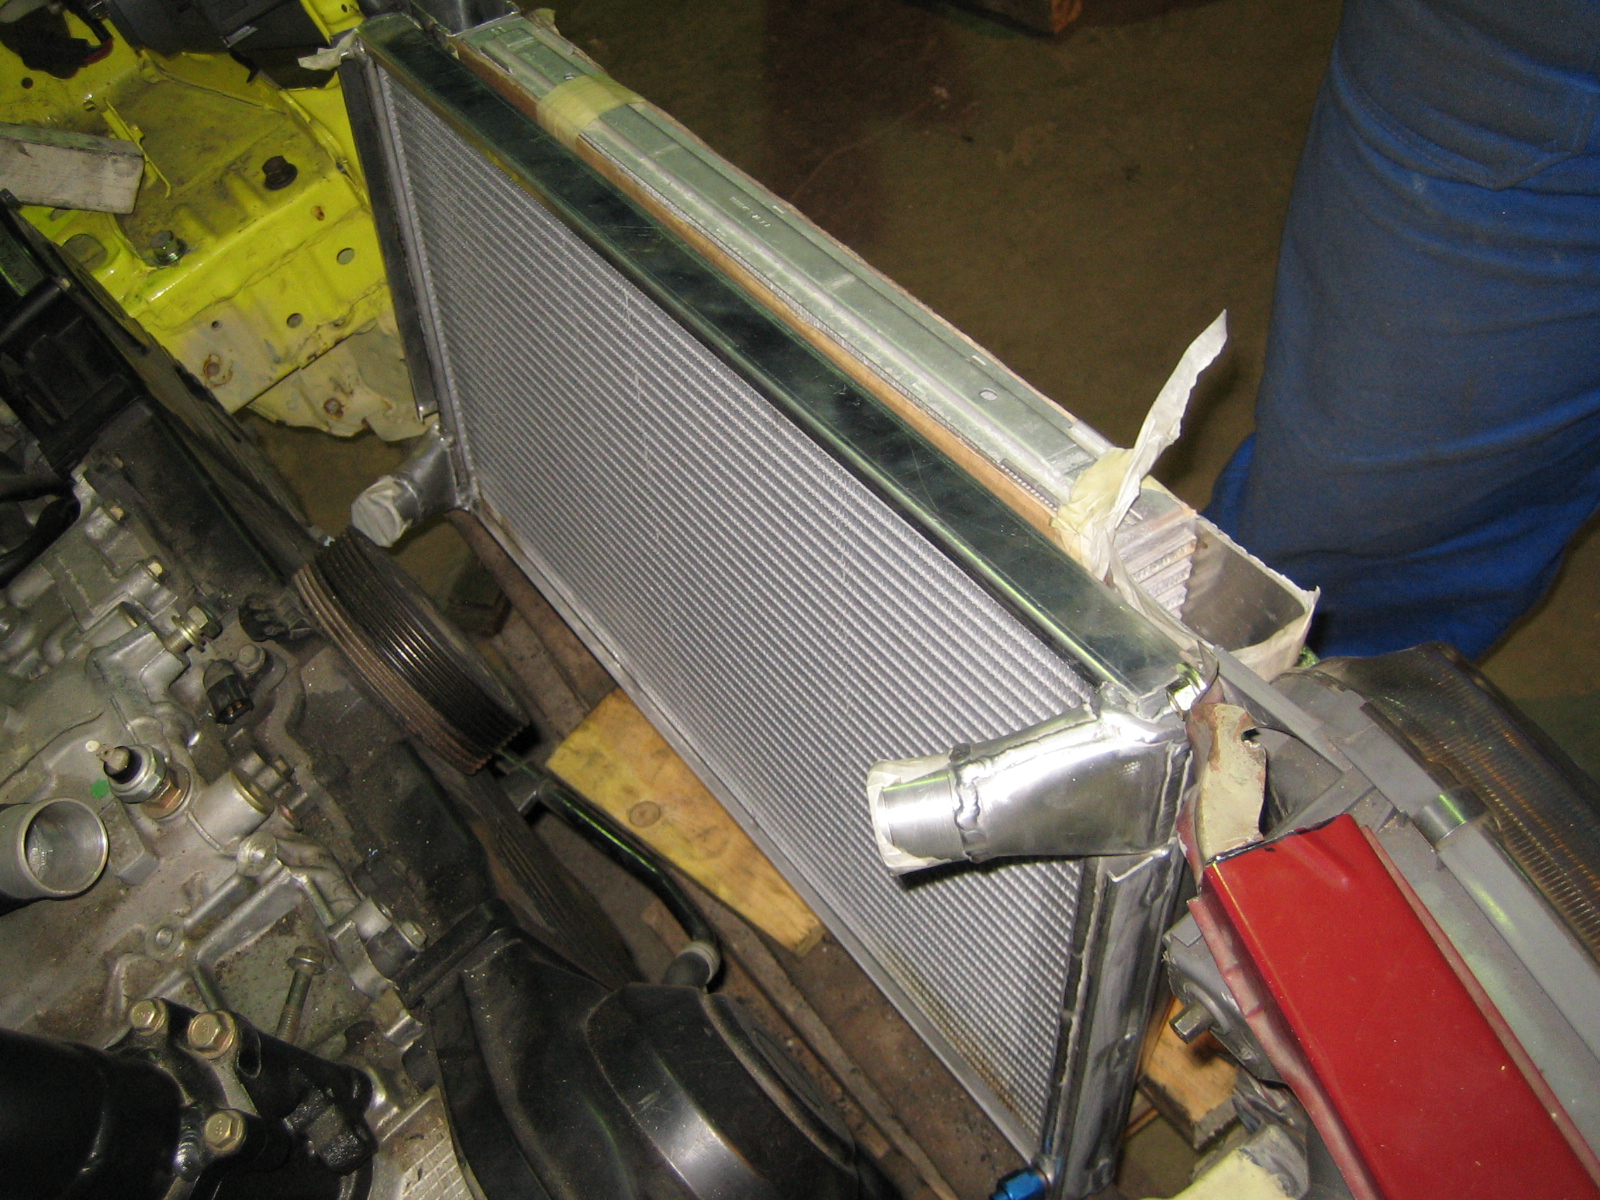
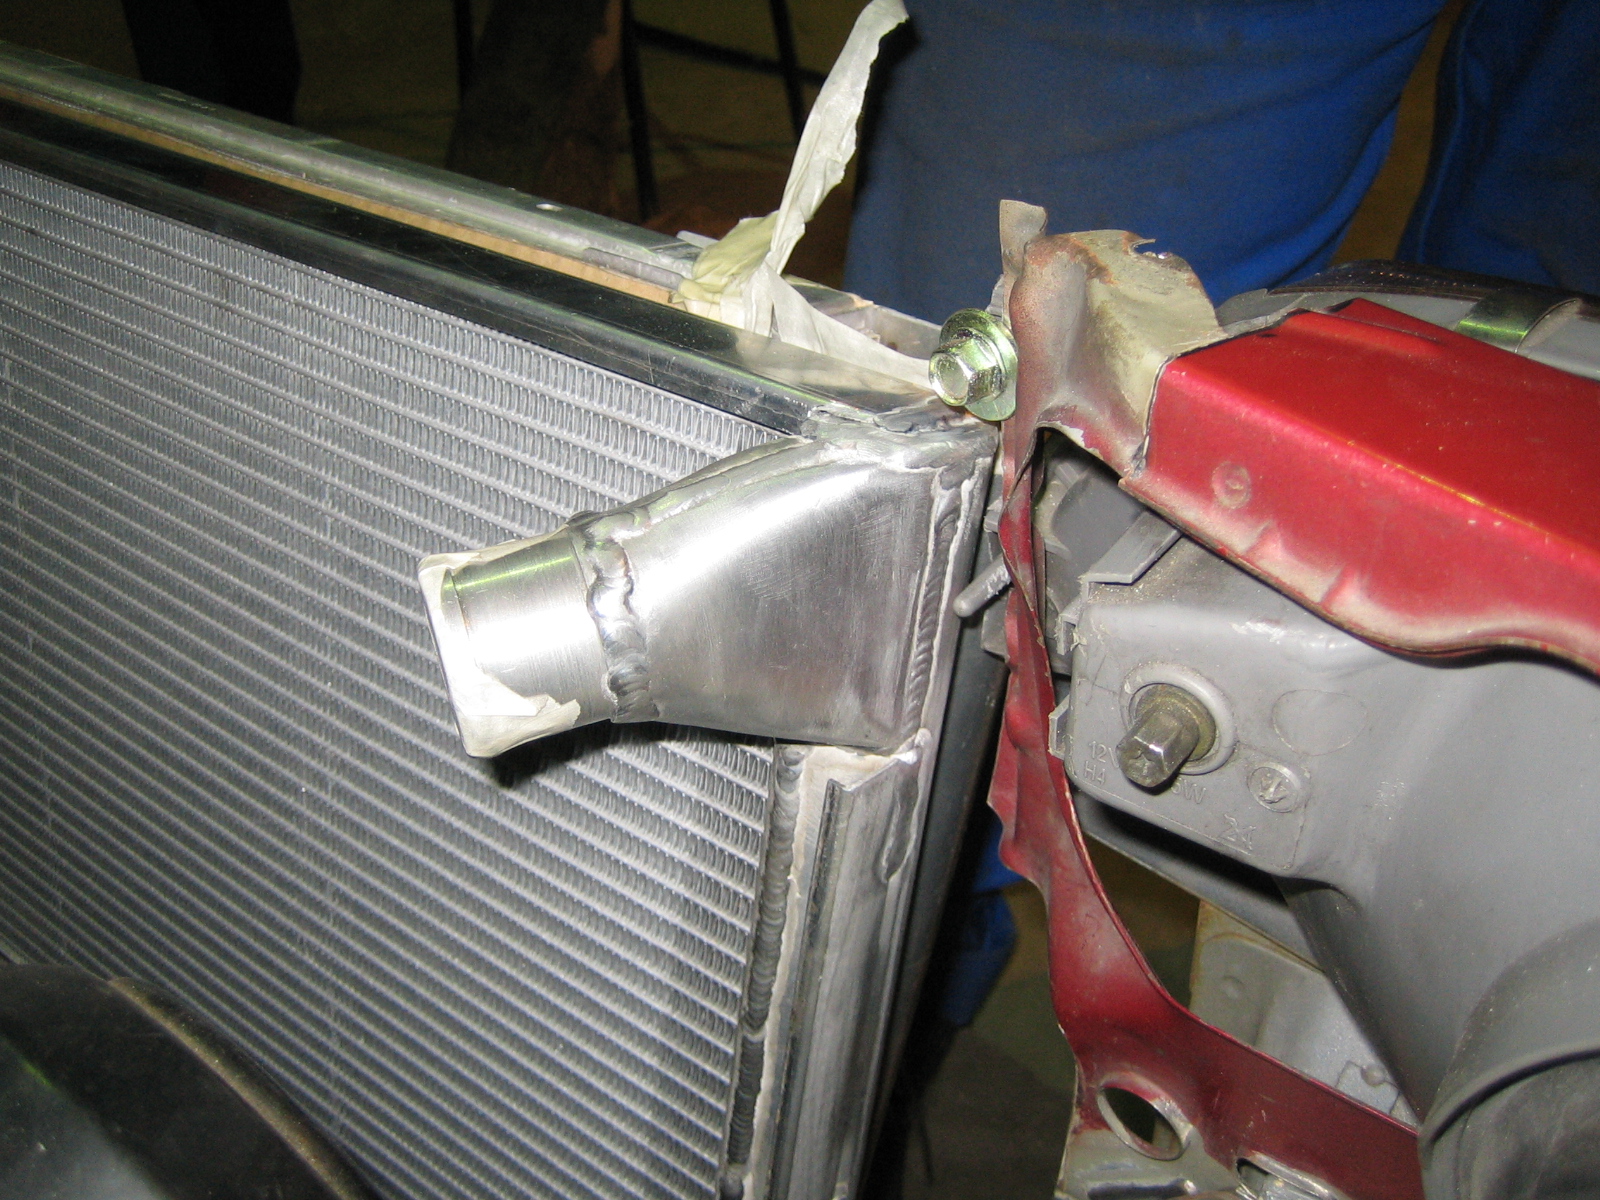
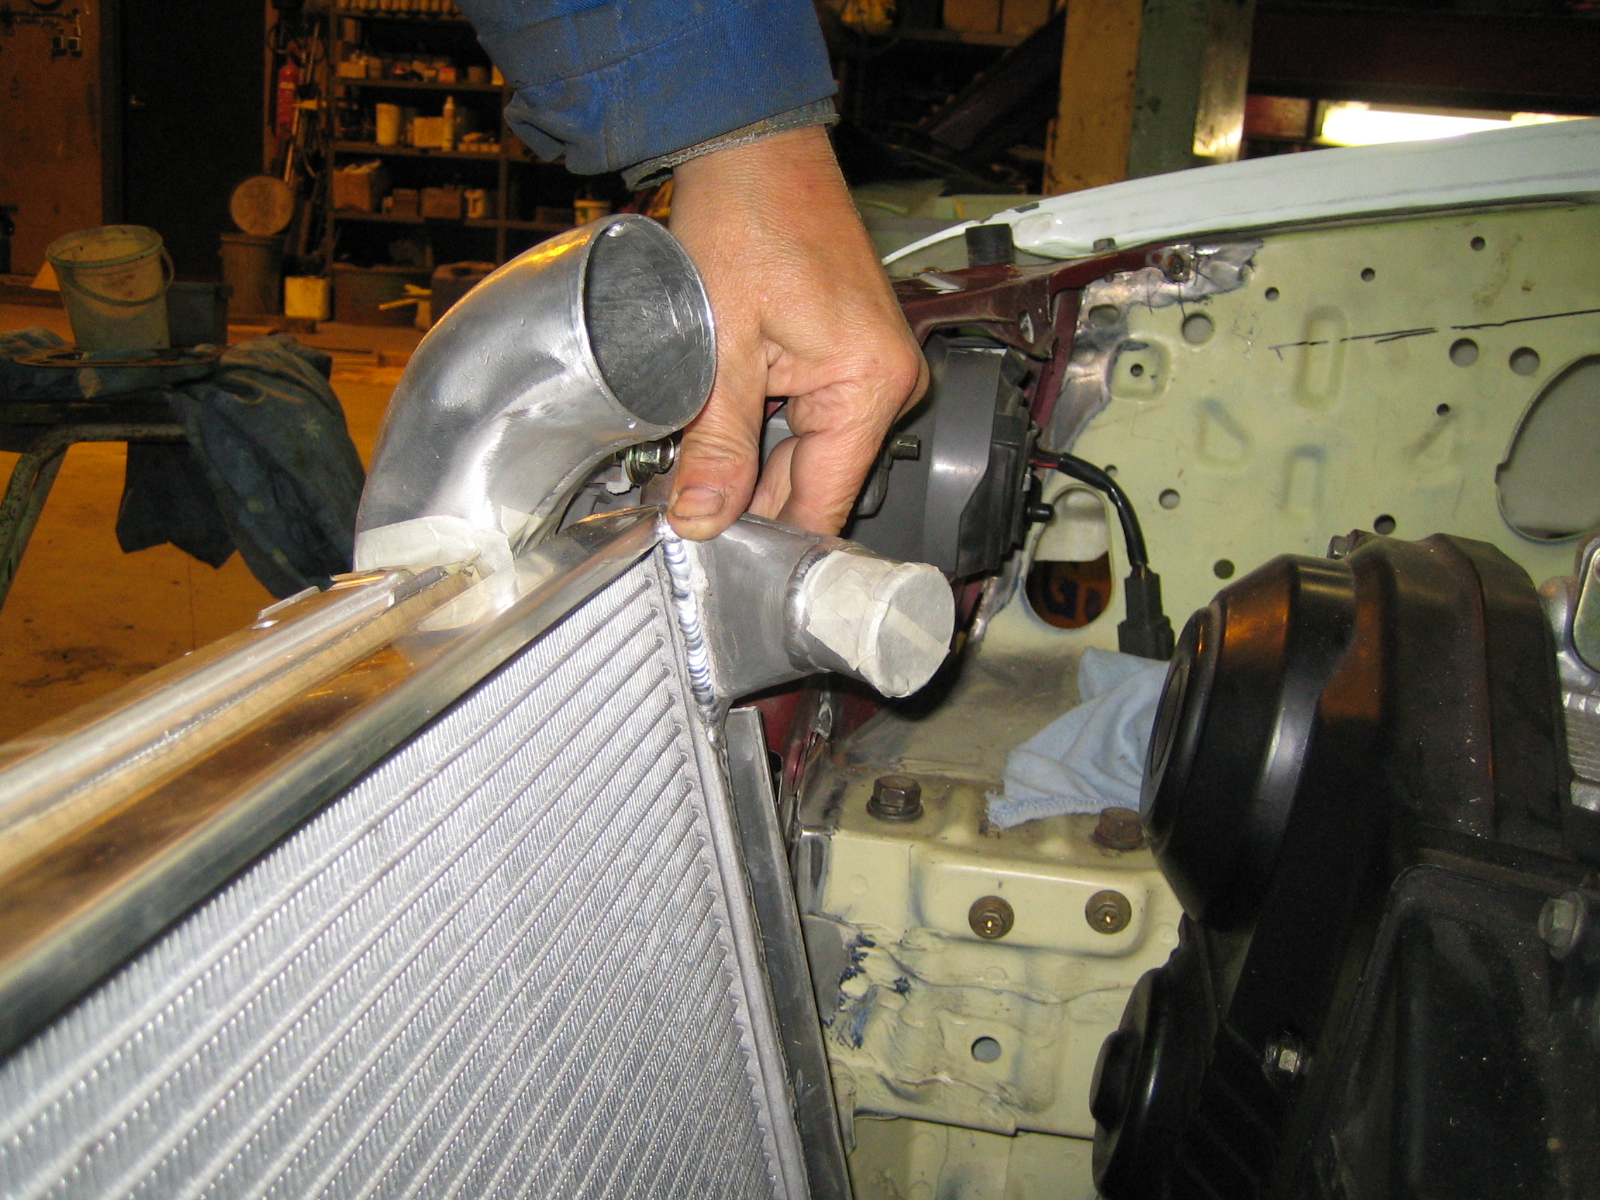
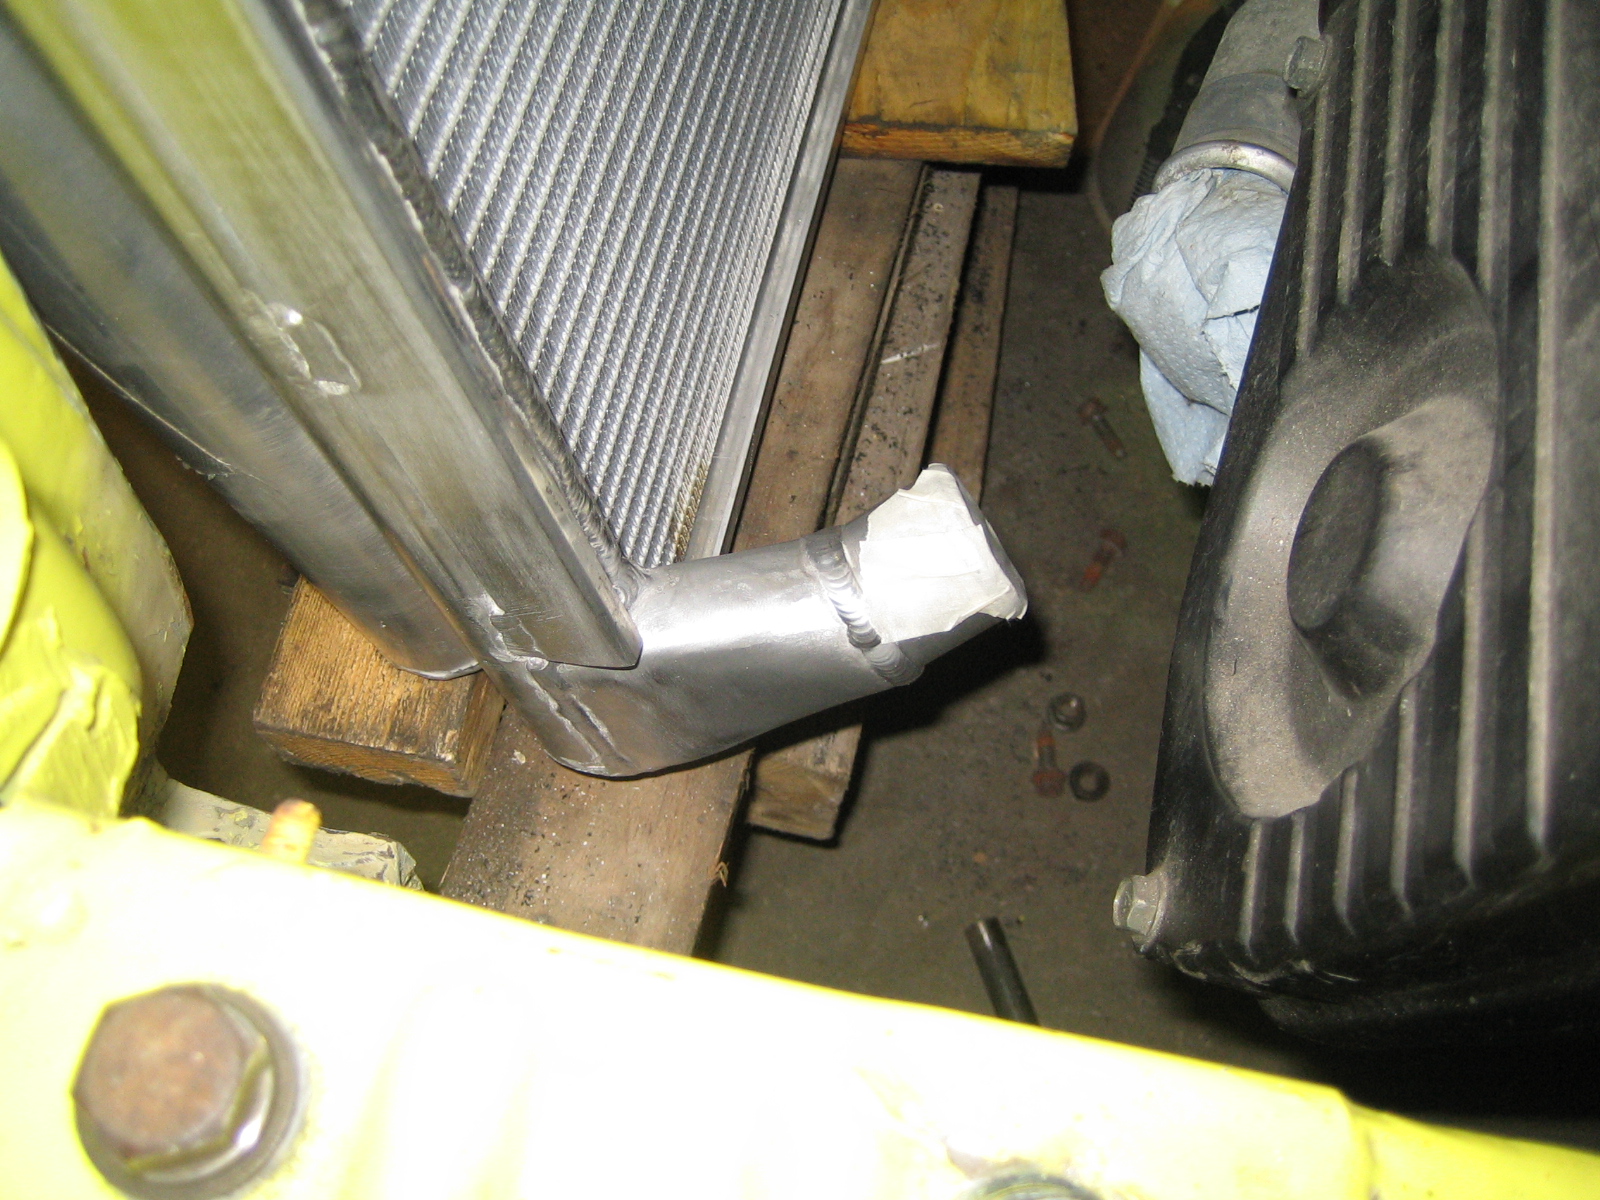
Feet are welded on under an angle:
FMIC:
1.5mm plate aluminium, 15mm shorter finger, how's that for weight saving!!
So I was stupid enough to stick my finger in milling machine while it was operating.
I know, it's about the stupidest thing to do, but that's me.
Result, severed 'till halfway the first cone (is that how it's called in English?)
Anyway my finger is gone up to just behind the nail, and that's a showstopper I can tell you.
Off course there is not alot I can do atm, but thankfully there are some peeps helping me!
And one of them is finishing the radiator and FMIC for me.
Yesterday he brought the radiator back, and the FMIC for testing if the angles are correct.
I'm really pleased with the result, he made the inlet and exit from 1.5mm alu plate.
That is hard stuff to form with panel beating.
He also made a test inlet for the FMIC which he wanted to see if it would fit.
Hopefully next week it will be done sofar!!
Pic's!
Feet are welded on under an angle:
FMIC:
1.5mm plate aluminium, 15mm shorter finger, how's that for weight saving!!