
HID Group Buy

 23 December 2006, 05:03 PM
#423
Scooby Regular
Thread Starter
iTrader: (18)
Join Date: May 2006
Location: Middx / Herts / Bucks / Essex
Posts: 3,420
Likes: 0
Received 2 Likes
on
1 Post
Originally Posted by PCM
I want some HID for my spec c type ra,will this unit be ok with the original loom etc?
Has anyone had any problems on a new age sti with this package?
Has anyone had any problems on a new age sti with this package?
Plenty of these units have been sold to new age owners with no problems at all
 23 December 2006, 05:06 PM
#424
Scooby Regular
Thread Starter
iTrader: (18)
Join Date: May 2006
Location: Middx / Herts / Bucks / Essex
Posts: 3,420
Likes: 0
Received 2 Likes
on
1 Post
Originally Posted by Tiss
Is this group buy still open??, I am interested in some for my classic.
Thanks
Chris
Thanks
Chris
Yes this GB is still open but as scoobyschef has said you wont be getting an order thru now til after the new yr - but delivery time is very, very fast!

For your classic you will need one set of H4 bi-xenon bulbs to oporate your dips & full beam.
24 December 2006, 09:04 PM
#426
Scooby Regular
Thread Starter
iTrader: (18)
Join Date: May 2006
Location: Middx / Herts / Bucks / Essex
Posts: 3,420
Likes: 0
Received 2 Likes
on
1 Post
Originally Posted by Tiss
Ok cheers mate I will order them in january, are they easy enough to fit??
thanks again
Chris
thanks again
Chris
If you look a few pages back, ryan has kindly done a full walk through guide to fitting - its not hard and will take the average person a couple hours from start to finish
26 December 2006, 04:33 PM
#427
Scooby Regular

Join Date: Aug 2003
Location: Teesside
Posts: 1,247
Likes: 0
Received 0 Likes
on
0 Posts
Cheers for the info Alex where has everyone else put their ballasts on a classic cause can't be bothered takin the bumper off to fit them, or is it necessary??
Chris
Chris
 28 December 2006, 01:44 PM
#429
Scooby Regular

Join Date: Jun 2003
Location: Either buying or burning 99RON fuel !!
Posts: 153
Likes: 0
Received 0 Likes
on
0 Posts
Alex (& Genuine)
Sincere compliments on an excellent GB. And, to anyone still swithering, buy one of these kits - you will not be disappointed!!
From going onto PayPal to getting my kit in my hands only took 6 days and that was over a weekend just before Crimbo when deliveries had probably reached levels of 'mentally' busy.
Have to say I was pretty impressed with the service, then I opened up my pressie and things got better. This really is a rather well built and put together kit.
I went for a 6000K H1 kit to fit the dips on my 55 plate MY05 'blob' WRX.
If anyone's looking at doing a similar fit, I'd recommend popping the h/lamps out and mounting the ballasts on the metal shelf (Top Tip from jasonius - thanks Jason!).
The foglamp placement on blob WRXs knacker ballast placement 'STi' style without some major bracket and air intake chamber re-fashioning. I mounted my ballasts with waterproof foam pads too but also secured them with corrosion resistant brass wire - just in case heat was an issue.
Seeing as the lamp units were out, I popped in some wide angled LEDs to the sidelights. The crystal diffusers in the blob lamp units seem to work well with the LEDs - way more bright than the std 5W bulbs and the colour is much closer to the xenons.
Installation of the wiring loom and xenon bulbs is pretty straightforward. Having the h/lamps out makes things much easier and will let you do a near professional job. I found some minor reshaping of the bulb securing spring was required and also that drilling the plastic covers with a 19mm wood bore then resealing with a modified 20mm blanking gromet and a little silicon let me mount everything, keep it all watertight and didn't exert any undue pressure on anything. Also, decided to solder and shrinkwrap the relay into the n/s dipped beam plug (the grey one mounted under the lamp unit) rather than use the spade terminals. Should mean hassle free motoring and easy re-installing of the std halogens if required.
If you pop the plastic WRX foglamp surrounds out there's an almost purpose built space in the bumper box section for you to thread the cabling through to the o/s ballast - does away with cable ties near heat sources.
One final tip for blob owners is after taking your grille out, remove the 9 black plastic pop clips on the top bit of the bumper (5 under the grille and 2 each beside each headlamp). This will make h/lamp removal & replacement much easier and also lower the likliehood of dinging the wing and precious paintwork with the h/lamp mounting balljoints.
Anyway, put it all back together and found only minor adjustment needed to the headlamp alignment (mark the beam centrepoints on a wall or garage door before you do the job) so FYI, on the blob, the adjusting screws on the outside of the units do horizontal alignment and the adjusters under the motor units sort vertical alignment.
Have now covered over 540 dark miles with the xenons lit up. (Me & Mrs. SKS were doing all the Xmas visiting this year)
WOW!
Light is nothing short of amazing - have only used the mains to flash other motorists, there just isn't any need to have them on anymore. Did about 80 miles in fog and am now thinking that my foglamps are surplus to requirements too.
I am very pleased to report that despite the heaps of extra light in those miles, haven't been flashed once by an oncoming motorist nor have I seen anyone in front have to dip their mirror which has got to be good.
Also, ballast heat doesn't seem to be of issue so far either. Whether the ballasts just don't get massively hot or the tray on the blobs is well ventilated there just isn't any kind of issue with wiring or plastic lamp units so far. Popped the bonnet to check after two longish runs (2hrs+) and neither ballast was 'scorchio' to the touch.
Once again guys, thumbs up and hope my ramblings are useful to any 'blob' HID owners /prospective buyers!!
Cheers all,
Stewart.
Last edited by SKS; 28 December 2006 at 01:48 PM.
28 December 2006, 07:08 PM
#430
Scooby Regular

Join Date: May 2003
Posts: 147
Likes: 0
Received 0 Likes
on
0 Posts
I completely agree with the last post fitted them to my 03 sti and even in the fog they lit up as well as any fogs I have had before . Had the 6000k's fitting took 2 hours had to take the lamps out.... But they are worth every penny had a mini and a cl 500 actually pull over to let me pass they were soo scared....heheh no oncoming flashes so they are not blinding just very good lights used the supplied loom... love the way flare then light slowly as u turn them on.... u wont be disappointed..............
 29 December 2006, 10:02 AM
#432
Scooby Regular
Thread Starter
iTrader: (18)
Join Date: May 2006
Location: Middx / Herts / Bucks / Essex
Posts: 3,420
Likes: 0
Received 2 Likes
on
1 Post
Stewart, I'm glad you're so pleased with the HID's!
I will definately be passing on yours and all other positive comments to Genuine Auto (I'd pass negative comments too... if there were any, )
)
Remember these HID's have applications for many other car makes, so if anyone else you know likes them then arrangements could be made so that they also benefit from these 'blinders'!
Ade, this is what you'd be after matey... H4 bi-xenon kit for Ł135 (Ł113+Ł22 shipping)...
Payments can be made through Paypal – genuine.auto@gmail.com
Here is the info they need when you check out:
1. Bulb size
2. colour temp
3. daytime phone #
4. reference group buy 177
I will definately be passing on yours and all other positive comments to Genuine Auto (I'd pass negative comments too... if there were any,
)Remember these HID's have applications for many other car makes, so if anyone else you know likes them then arrangements could be made so that they also benefit from these 'blinders'!
Ade, this is what you'd be after matey... H4 bi-xenon kit for Ł135 (Ł113+Ł22 shipping)...
Payments can be made through Paypal – genuine.auto@gmail.com
Here is the info they need when you check out:
1. Bulb size
2. colour temp
3. daytime phone #
4. reference group buy 177
30 December 2006, 04:16 PM
#433

Originally Posted by SC008Y_MAD
I have fitted some LED sidelight bulbs and match the 6000K HID perfictly...now wheres that link...hold on...
...found it Welcome to UltraLeds.co.uk
...found it Welcome to UltraLeds.co.uk
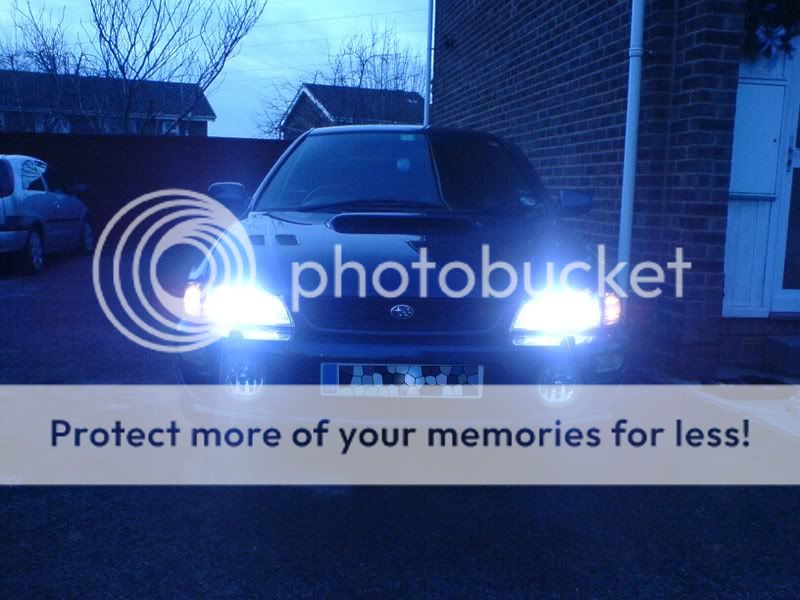
just fitted mine today with the help of bottomfeeder and all good. will put up some pics later.
only think is now the sidelights are looking crap and yellow compared to the HID's

so you mention ultraleds and alex mentions another company. do you know which is the best and which is the quickest to get hold of.
cheers boys
30 December 2006, 08:30 PM
#434
some pics of the install.
only took two of us 2 1/2 hours, so not bad. and that included bumper off, painting of bumper bar, fitting of HID kit, refit bumper, test, cups of tea and all before the rain started.
some pics of actual lights coming soon
https://www.scoobynet.com/members-ga...ting-last.html
only took two of us 2 1/2 hours, so not bad. and that included bumper off, painting of bumper bar, fitting of HID kit, refit bumper, test, cups of tea and all before the rain started.
some pics of actual lights coming soon
https://www.scoobynet.com/members-ga...ting-last.html
 31 December 2006, 11:00 AM
#436
Scooby Regular
Thread Starter
iTrader: (18)
Join Date: May 2006
Location: Middx / Herts / Bucks / Essex
Posts: 3,420
Likes: 0
Received 2 Likes
on
1 Post
I found a seller on eBay... velocity LED's and they do loads of different types. They ship from the US and do take a while to deliver, but they are VERY cheap in comparison to UK supplied LED's. Check em out?! 


 02 January 2007, 07:09 PM
#439
Scooby Regular
Thread Starter
iTrader: (18)
Join Date: May 2006
Location: Middx / Herts / Bucks / Essex
Posts: 3,420
Likes: 0
Received 2 Likes
on
1 Post
Looks wikid mate! Seriosuly bright... a nice set of HID look side lights would go down a treat!
BTW you should get that number plate sorted, sum1 has taken a hammer to it and smashed it up good!
BTW you should get that number plate sorted, sum1 has taken a hammer to it and smashed it up good!
02 January 2007, 08:15 PM
#440
Originally Posted by alex_00s
I found a seller on eBay... velocity LED's and they do loads of different types. They ship from the US and do take a while to deliver, but they are VERY cheap in comparison to UK supplied LED's. Check em out?!
02 January 2007, 08:43 PM
#442
Scooby Regular

bumper is easy to remove.
remove the grill and you will see a load of screws running along the top of the bumper.
one screw at each wheel arch.
on screw at the bottom corner of the bumper and maybe one in the middle.
wiring for the lights are just connector blocks and just unplug.
Its a 5 to 10 minute job.
remove the grill and you will see a load of screws running along the top of the bumper.
one screw at each wheel arch.
on screw at the bottom corner of the bumper and maybe one in the middle.
wiring for the lights are just connector blocks and just unplug.
Its a 5 to 10 minute job.
03 January 2007, 09:04 AM
#445
Originally Posted by ScuuBdoo
bumper is easy to remove.
remove the grill and you will see a load of screws running along the top of the bumper.
one screw at each wheel arch.
on screw at the bottom corner of the bumper and maybe one in the middle.
wiring for the lights are just connector blocks and just unplug.
Its a 5 to 10 minute job.
remove the grill and you will see a load of screws running along the top of the bumper.
one screw at each wheel arch.
on screw at the bottom corner of the bumper and maybe one in the middle.
wiring for the lights are just connector blocks and just unplug.
Its a 5 to 10 minute job.
it depends on classic or newage. guessing you are classic.
yes to the above about the screws and bolts, however a better way is like this.
remove grill (with badge) by poking a screwdriver into the holes at the top, drop down the little catches and it will gently come off.
Then you can see the 6 lugs across the top of the bumper. Undo them, one big long one at front of bumper under number plate and maybe one underneath.
The wheel arches are the pain. You need to access the nut and bolt that holds the end of each corner of bumper.
You will need to take off at least three screws/bolts in the actual arches themselves. one hold the twp halfs of the lining together and another two at the rim of the lining. This should give you enough space to bend the lining back and access with two spanners the nut and bolt.
Then it is just a case of gently pulling the bumper towards you. But be careful, if you have fogs connected, then you will need to disconnect the wires to them (usually spade connectors). also whilst balancing the bumper on your knee
, disconnect the hose to the headlamp washers (if you have them) and bung the pipe up with something.Only then can you take the whole bumper off.
Then it is a case of wiring and locating stuff.
see my thread in members gallery or on here for locations of ballasts etc.
Also note that by now you should have removed the side and main lights .
and dont forget that you have to run a feed to the battery, so be prepared to have that disconnected and removed for ease of acess.
there are a few threads on here for more tips.
have fun
Last edited by SwissTony; 03 January 2007 at 09:29 AM.
03 January 2007, 09:29 AM
#447
Scooby Regular
Thread Starter
iTrader: (18)
Join Date: May 2006
Location: Middx / Herts / Bucks / Essex
Posts: 3,420
Likes: 0
Received 2 Likes
on
1 Post
Originally Posted by scoobyp1
sorry to seem thick
What is the colour temp ? i want a set for my P1
What is the colour temp ? i want a set for my P1
As Tony said, the colour depends on bulb temperature which is measured in Kelvins... below are the colours (as the Kelvins increase, the light output decreases so for best light go for 4300k or 6000k) -
12000K

10000K

8000K

6000K

4300K


