Red Painting the Inlet Manifold and Stuff.
#32
I know it is a big ask, but is there any chance you can make a mod guide for this with pictures (I know know that it is fitted, but maybe the next contender can give it a go) as everyone would like to benefit from your hard work!! I am sure all classic owners want shiny red manifolds!!
tgt
tgt
#34
Thread Starter
18 June 1815 - Waterloo
iTrader: (31)
Joined: Dec 2004
Posts: 19,156
Likes: 14
From: To the valley men!
Funnily enough I do have a photo history of the "Undertray How To" but not got round to posting it yet. Been a busy bear at work!
With regards to the engine bay it's not had much done since I got the car in April, just one degunge.
But for the mileage, 96K, it's doing and looking OK. It was a Grey Import with zero miles via Warrender in 1999. £27995 new! I have all the receipts, MOT's, V5's etc in a big folder along with the Original Service book with all the stamps. Every bit of servicing by Subaru or Specialists. So, pulleys and suspension rubberware is on the cards, after ten years it needs it.
Hopefully pics tonight

#36
Thread Starter
18 June 1815 - Waterloo
iTrader: (31)
Joined: Dec 2004
Posts: 19,156
Likes: 14
From: To the valley men!
Get yourself a Newage undertray and a large piece of cardboard.
Trace around the old Classic undertray marking the holes for the screws. Cut out the template and place it against the Newage undertray and mark the holes against it. Only a few holes line up.
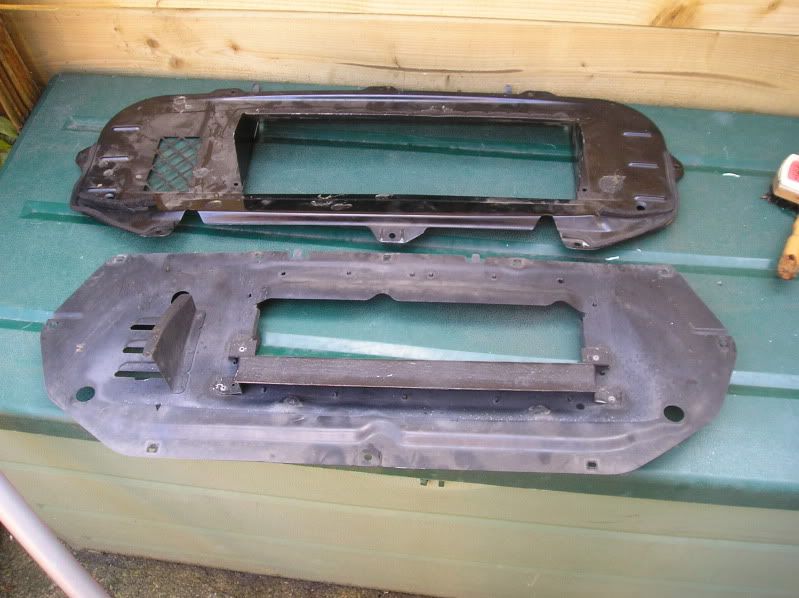
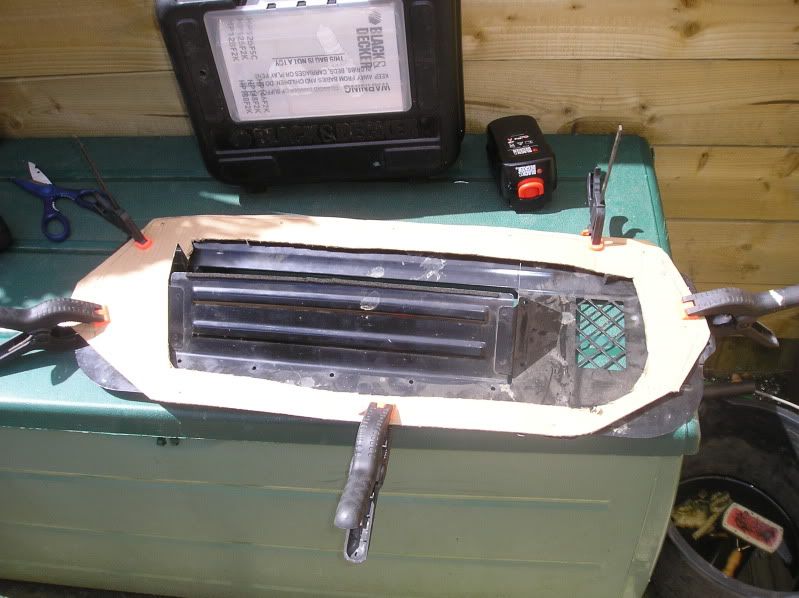
Cut through the side supports of the newage tray and push the "flap down then cut about 15mm off the top of the side supports.
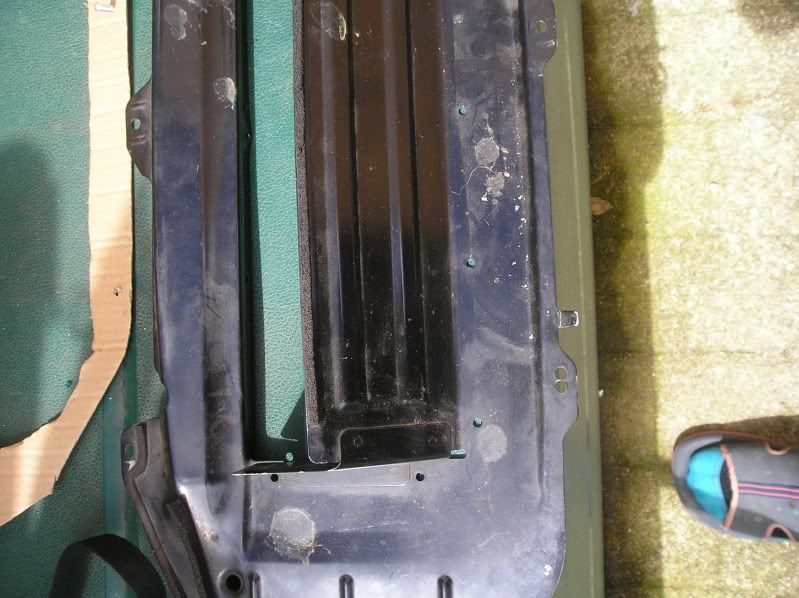
Cut some alloy sheet 20mm longer than the original flap and bend each end 90 degrees on the end.
Pop rivet them to the original side supports.
Put some extra pop rivets in to stop the OE flap from being forced down when your on the go.
Next get some "L" shape alloy from B&Q less than a £5 for 20mm x 20mm x 500 m. Measure up against the OE holes from the newage rubber shroud brackets (if it's not there, mine wasn't!) measure to length and bolt it on. The front piece is still there so the sides and the back need doing. I had some heavy duty rubber matting spare and cut a long strip about 35mm deep. Fed it around and placed a holding strip on the back and front.
Make sure it lines up and fits. Lots of on and off to make sure.
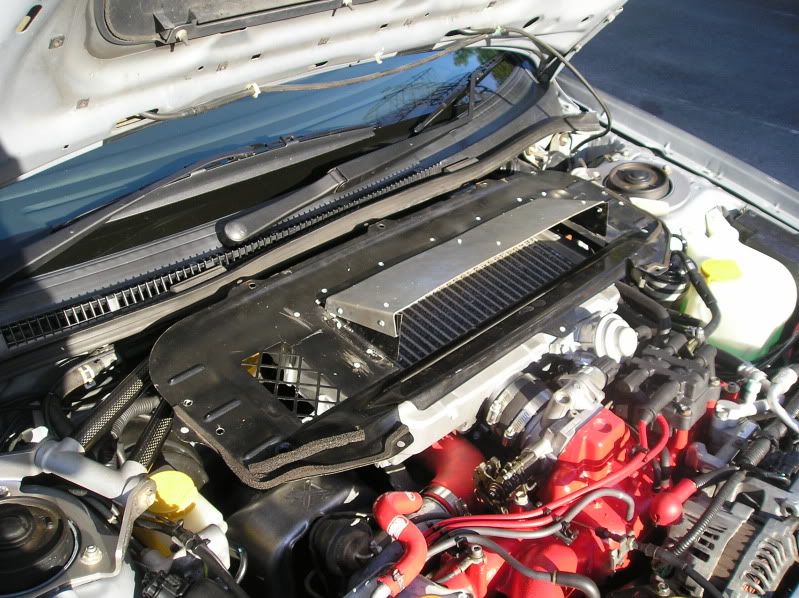
Then bolt it on with the screws that line up.
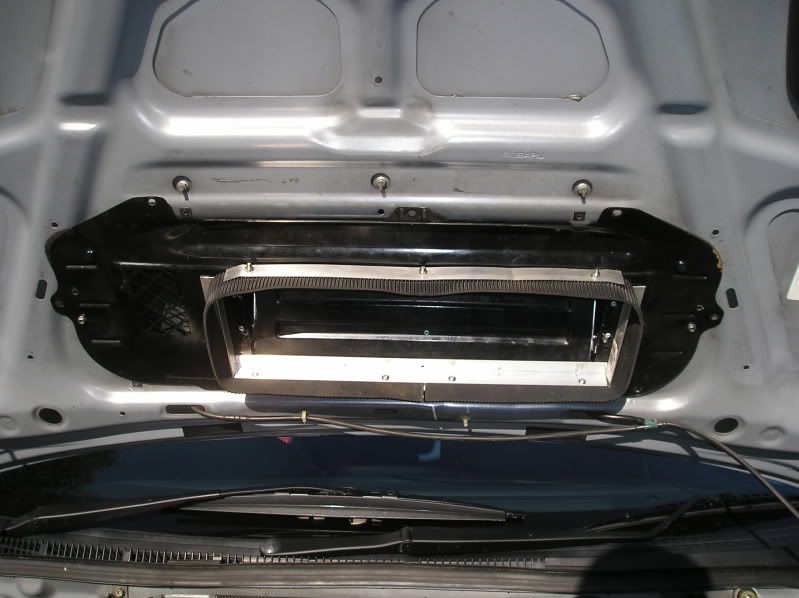
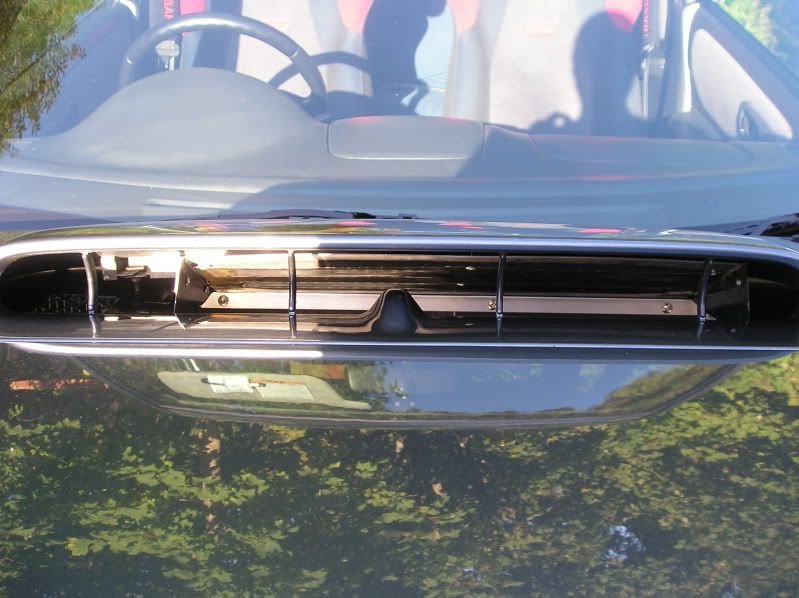
This is a bit simplistic but with a bit of fiddling and headscratching it worked out fine.
Trace around the old Classic undertray marking the holes for the screws. Cut out the template and place it against the Newage undertray and mark the holes against it. Only a few holes line up.


Cut through the side supports of the newage tray and push the "flap down then cut about 15mm off the top of the side supports.

Cut some alloy sheet 20mm longer than the original flap and bend each end 90 degrees on the end.
Pop rivet them to the original side supports.
Put some extra pop rivets in to stop the OE flap from being forced down when your on the go.
Next get some "L" shape alloy from B&Q less than a £5 for 20mm x 20mm x 500 m. Measure up against the OE holes from the newage rubber shroud brackets (if it's not there, mine wasn't!) measure to length and bolt it on. The front piece is still there so the sides and the back need doing. I had some heavy duty rubber matting spare and cut a long strip about 35mm deep. Fed it around and placed a holding strip on the back and front.
Make sure it lines up and fits. Lots of on and off to make sure.

Then bolt it on with the screws that line up.


This is a bit simplistic but with a bit of fiddling and headscratching it worked out fine.
Last edited by The Trooper 1815; 14 September 2009 at 07:35 PM.
Thread
Thread Starter
Forum
Replies
Last Post
Mattybr5@MB Developments
Full Cars Breaking For Spares
28
29 December 2015 12:07 AM
Mattybr5@MB Developments
Full Cars Breaking For Spares
12
18 November 2015 08:03 AM


