
Project stealth pics, Manual converted!


 29 June 2011, 08:25 PM
#38
Scooby Regular
Thread Starter
iTrader: (21)
Join Date: Jan 2010
Posts: 1,111
Likes: 0
Received 0 Likes
on
0 Posts
Hello Guys and Gals!
Heres an update so far!
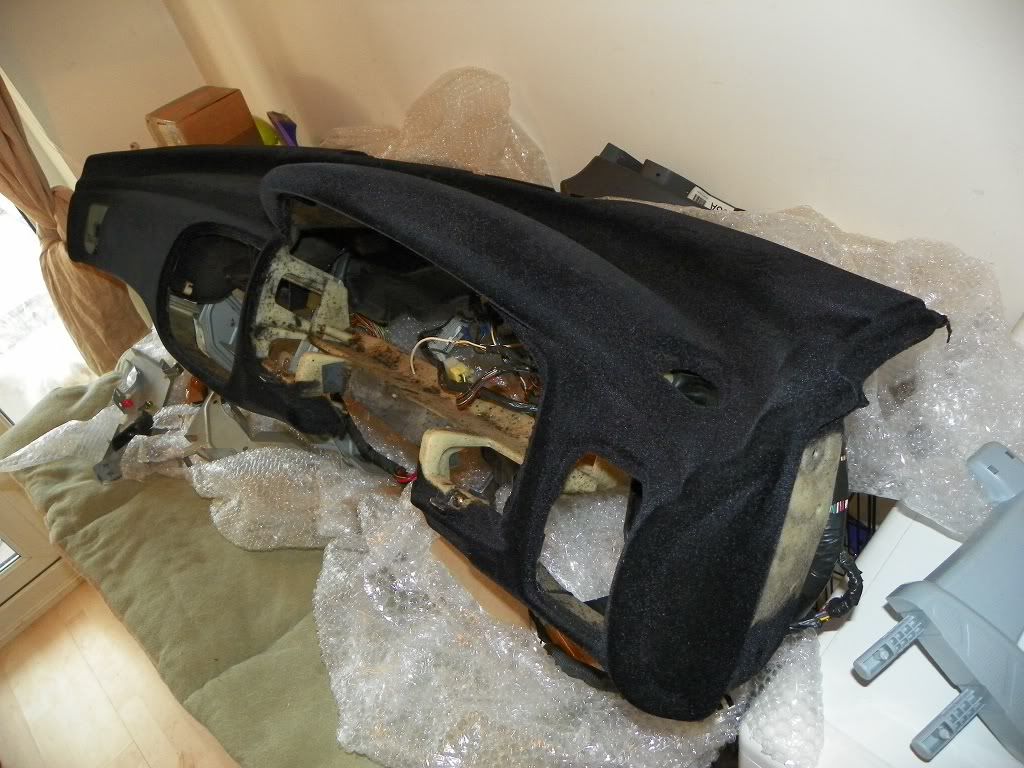
I have the top half of the flocked dashboard. This has been finished off in black. I have transferred the loom and the vent ducting along with mounting brackets, ready for the lower half to be fitted. Pics below :

I have stripped the doorcards down of the old tired cloth. They are being sent to manchester friday to be flocked black on the outside, and grey on the centres. I have Spec C front seats going in, so should look grand when its all in Pic :
Pic :

I have the lower half of the dashboard, along with glovebox, instrument surround, odometer surround, stereo surround all the way up to the armrest waiting at the post office for me to pickup I have had this flocked in dark grey to give my interior some definition. I will add pics of this when I pick it up tomorrow.
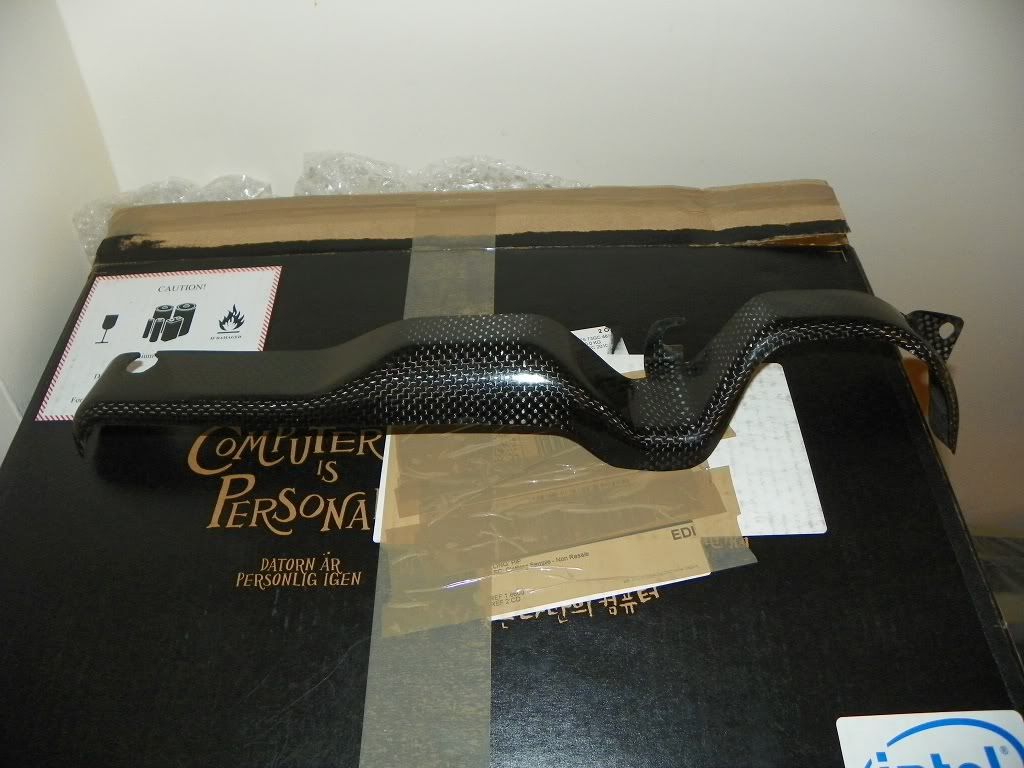
I have also bought a carbon fibre altenator cover pic here :
And a HUGE brand new FMIC. I have all the pipework, fittings etc, but have taken a pic of the FM for you. Seen in this pic below :

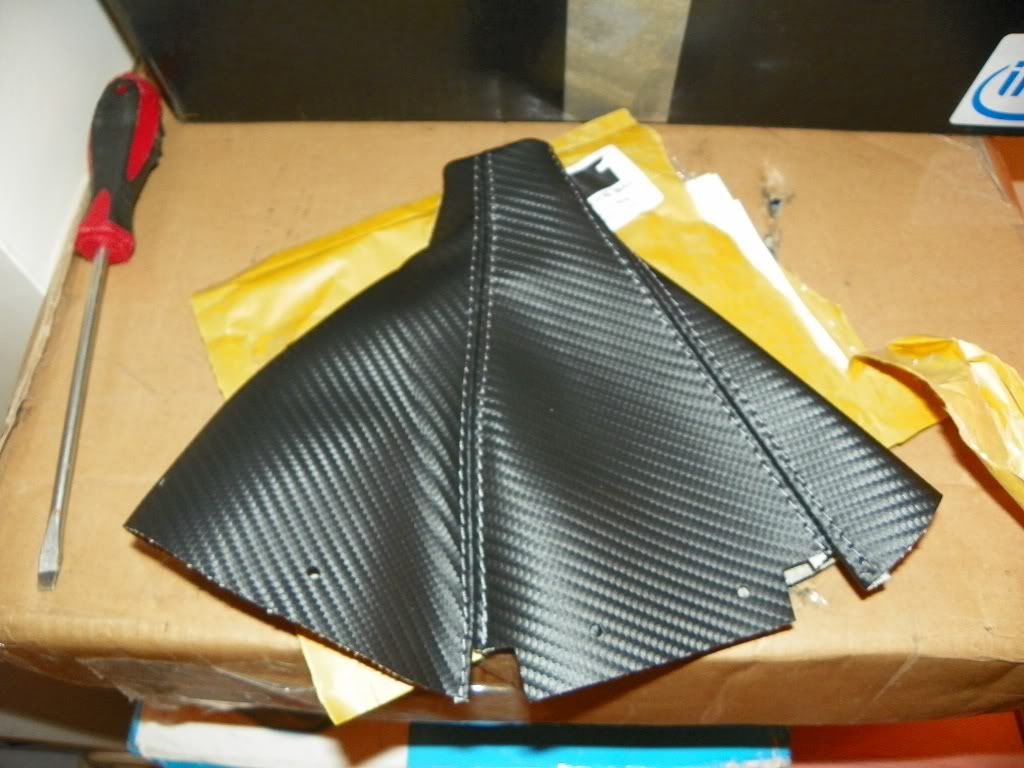
Also.... I have bought a carbon fibre effect grey gearstick gaitor to replace the old tatty one. Pic :
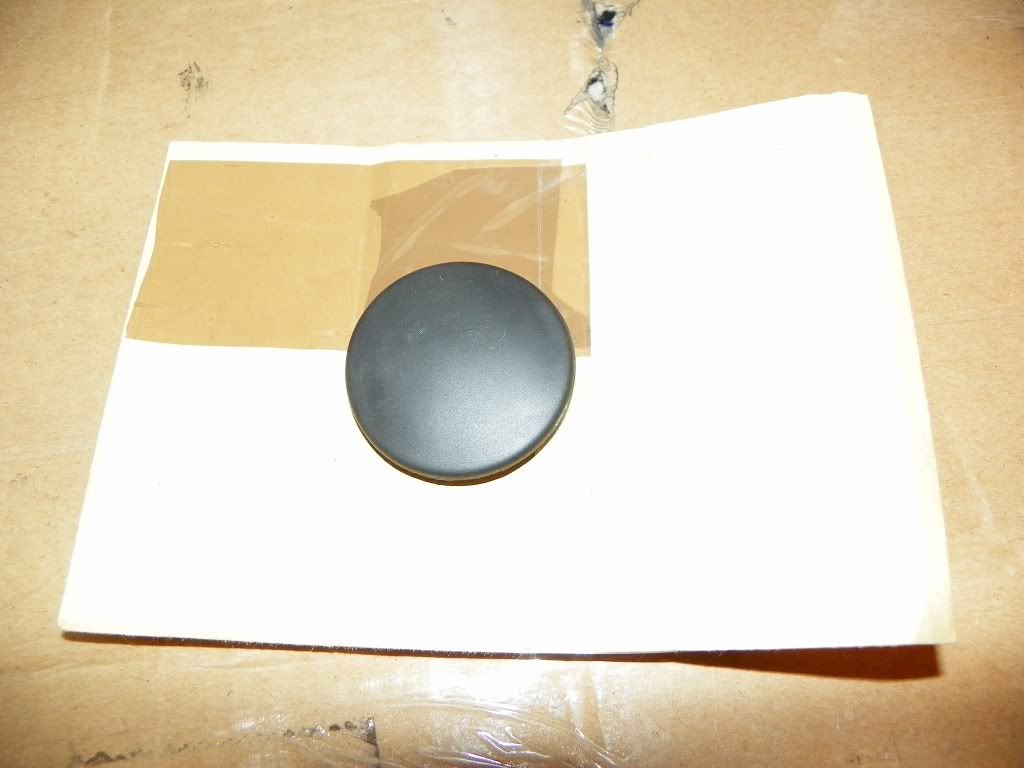
And.... lol, here is a picture of a grommit this is going to perfectly fit the hole there will be when I remove that rear window wiper! Happy days, comments welcomed.
FMIC & Dash being fitted the weekend, weather permitted.
Heres an update so far!
I have the top half of the flocked dashboard. This has been finished off in black. I have transferred the loom and the vent ducting along with mounting brackets, ready for the lower half to be fitted. Pics below :
I have stripped the doorcards down of the old tired cloth. They are being sent to manchester friday to be flocked black on the outside, and grey on the centres. I have Spec C front seats going in, so should look grand when its all in
Pic : I have the lower half of the dashboard, along with glovebox, instrument surround, odometer surround, stereo surround all the way up to the armrest waiting at the post office for me to pickup
I have had this flocked in dark grey to give my interior some definition. I will add pics of this when I pick it up tomorrow.I have also bought a carbon fibre altenator cover pic here :
And a HUGE brand new FMIC. I have all the pipework, fittings etc, but have taken a pic of the FM for you. Seen in this pic below :
Also.... I have bought a carbon fibre effect grey gearstick gaitor to replace the old tatty one. Pic :
And.... lol, here is a picture of a grommit
this is going to perfectly fit the hole there will be when I remove that rear window wiper! Happy days, comments welcomed.FMIC & Dash being fitted the weekend, weather permitted.
01 July 2011, 12:43 PM
#41
Scooby Regular
Thread Starter
iTrader: (21)
Join Date: Jan 2010
Posts: 1,111
Likes: 0
Received 0 Likes
on
0 Posts
Grommit has to be done! and Oh yes.... my intercooler pipework has the adapter to fit the ssqv!Happy. Days! Another Update * Just bought a SimTek plug and play ECU * Has antilag, shift light, etc...
19 July 2011, 10:56 PM
#42
Scooby Regular
Thread Starter
iTrader: (21)
Join Date: Jan 2010
Posts: 1,111
Likes: 0
Received 0 Likes
on
0 Posts
Hello peeps.
Here is an update from last weeks escapades! The weather is ****e at the moment and with work, im doing what I can.
I have added a few bits to the car, and have also ordered some. Check it out below!
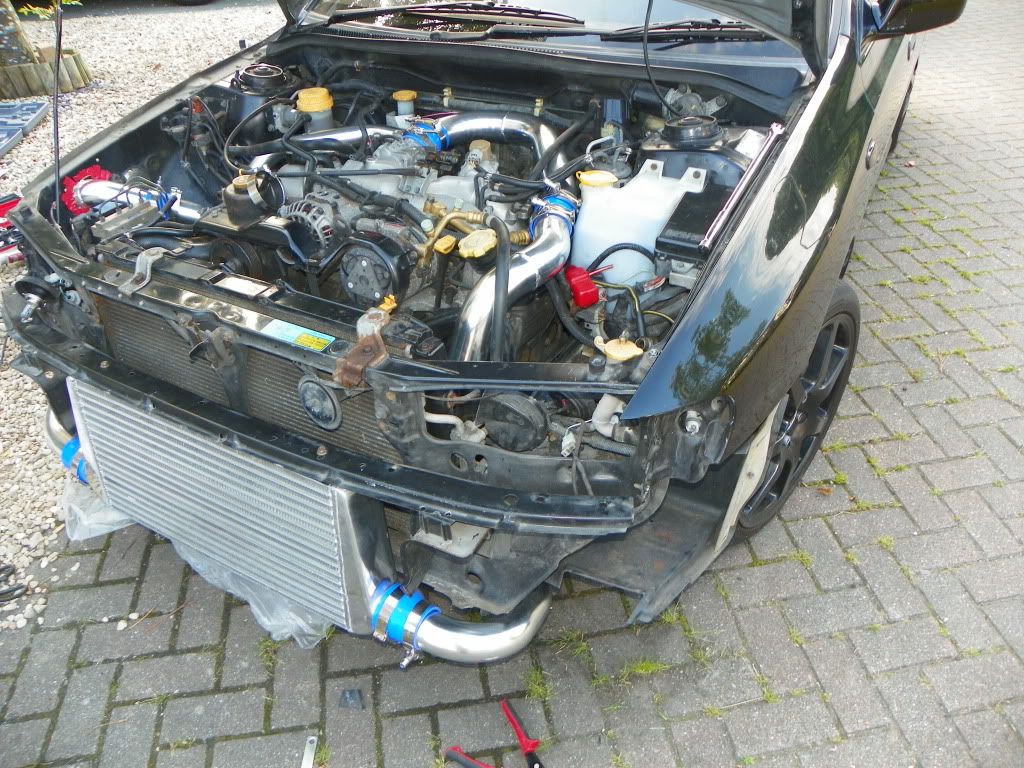
Firstly, I wanted to get a move on with fitting the FMIC. I wanted to get all the oil cooling and engine cooling elements in place, so here we go...
First of all, panel and engine bay preperation. Off with the wing for easier access to the pipework :
Also the bumper bar seen here :
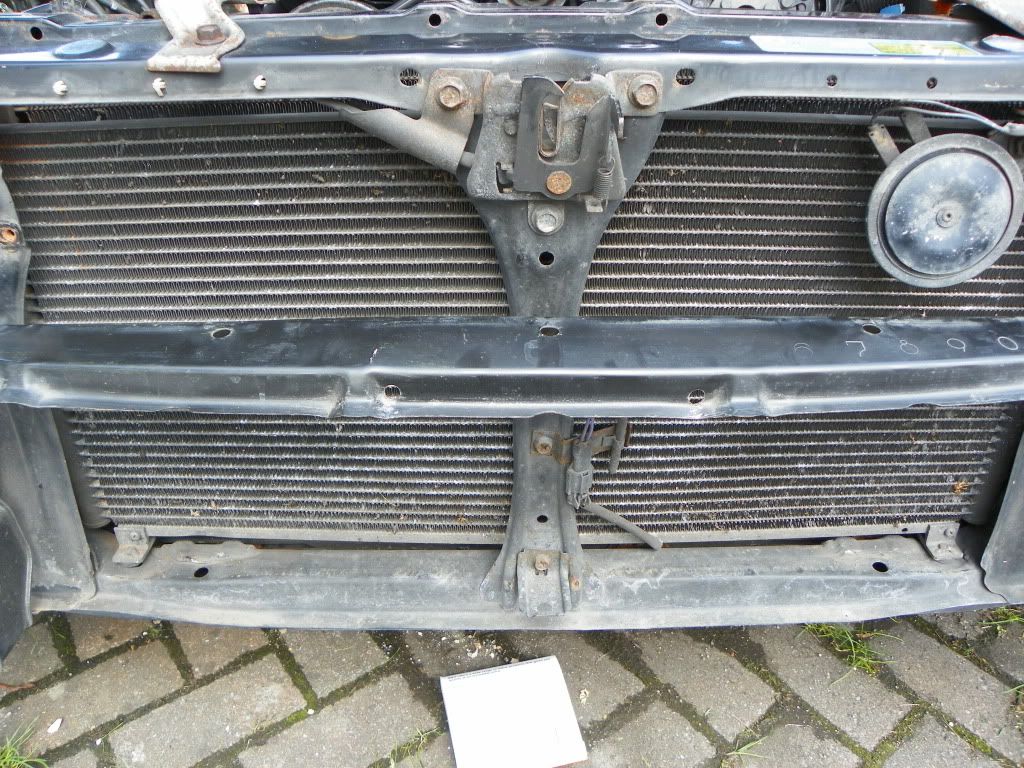
Requires removal shown here :
Engine bay prep, top mount off, induction kit, pipework, maf etc off, basically remove EVERYTHING you can to make your pipe run easier. I took the header tank off, everything I could.
As you can see, my previous header tank split, causing that nasty orange staining :/ will remove that all in the end of the project.
Next, get the nice shiny kit out.

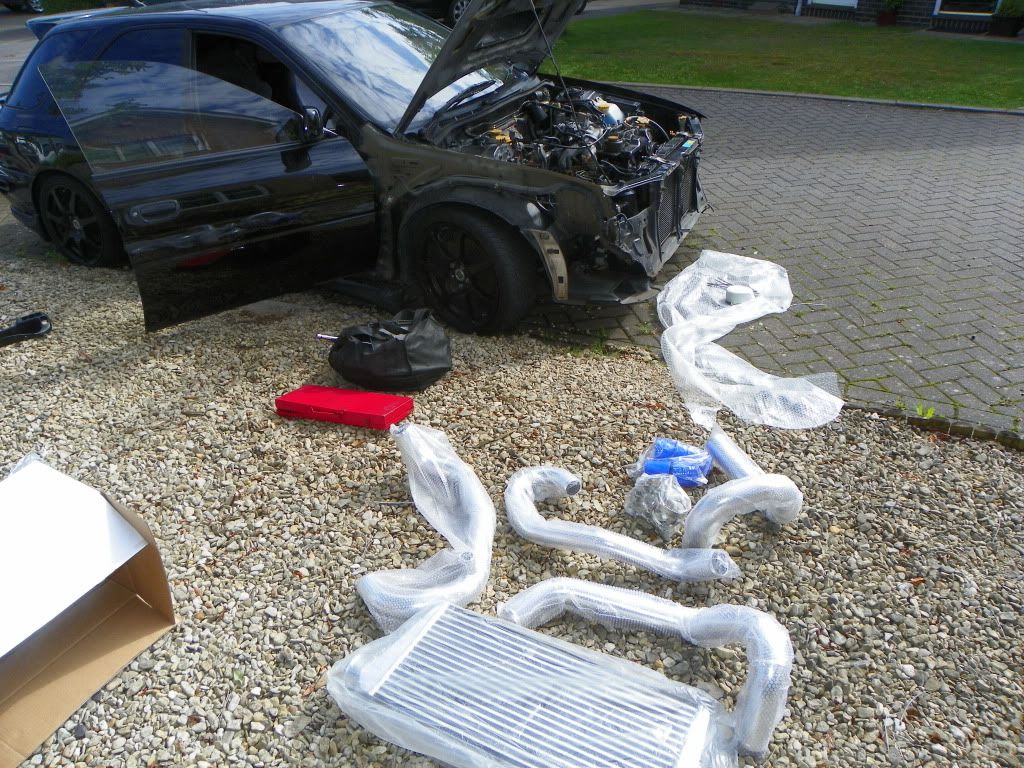
started heat wrapping the intercooler pipe only to find out it was getting in my bloody way, so i took it off until i have completed the installation.

After cutting the crap out of the kit ( The turbo pipe was 1 1/4 foul, and the inlet pipe needed cutting half in order to bend around the oil filler cap ) aswell as that I needed to cut a hole in the wing to allow the pipe to go through. The red tape you see is purely to stop me scratching the pipework.
The result :


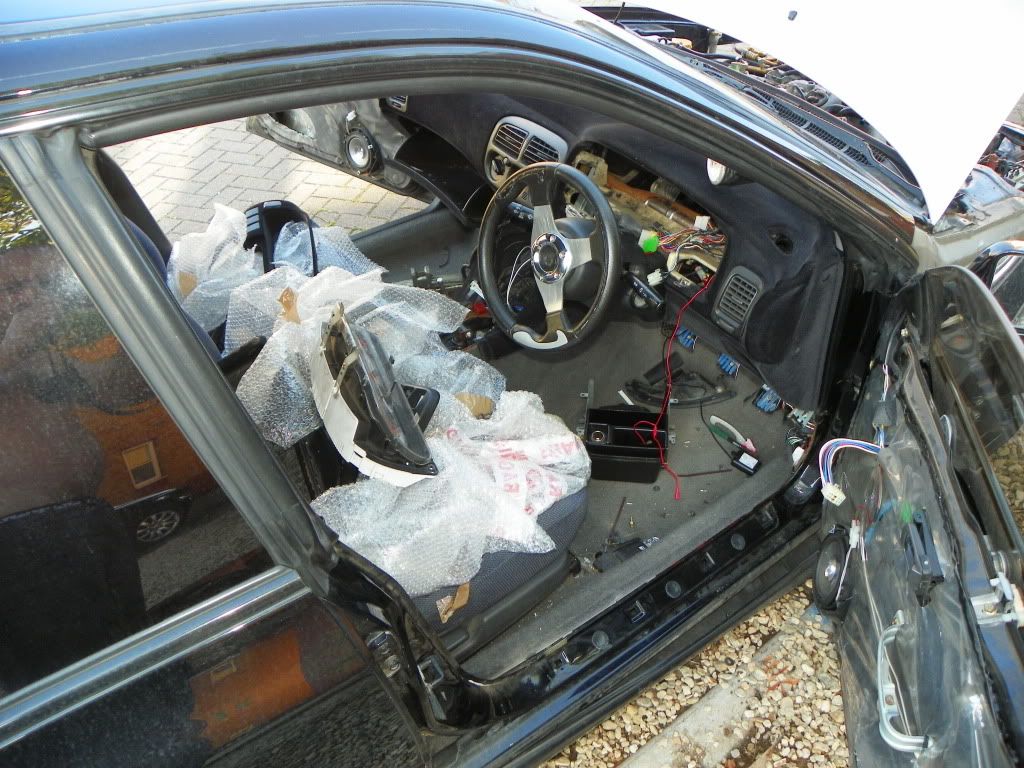
Now onto the dash fitment :
I have included a couple of pics of the flocked dash pre fitted. I have rewired the immobiliser, and the fogs, so hopefully it will start ok.

Im waiting for some other bits and bobs to arrive, once they do I will post the finished result.
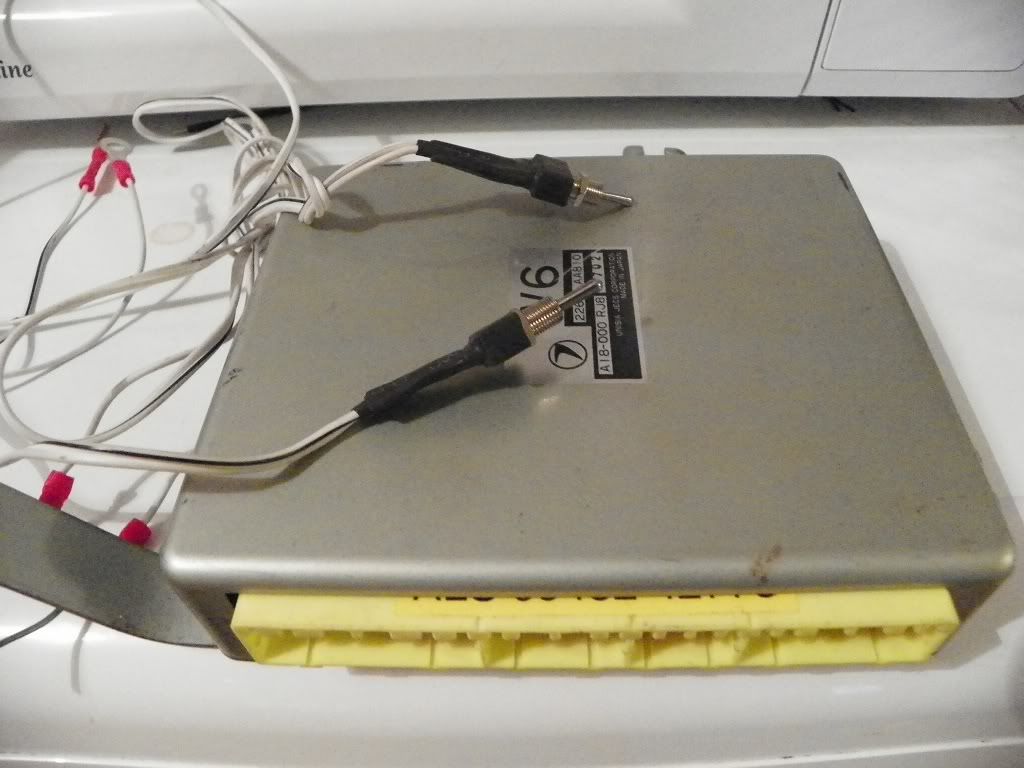
I have also bought a Simtek ECU with Anti-lag, Launch Control, and shift light, along with crystal bumper indicators, and a box full of samco hoses.
Here they are below. The simtek isnt being fitting until my car is taken to bob rawle.
you can see the antilag, and launch control switches. I am having cockpit missile type switches installed for these once my interior is finished
Nice box of samco hoses :

Walboro 225lph fuel pump :

and of course, crystal indicators for me bumper!
Happy days so far
Here is an update from last weeks escapades! The weather is ****e at the moment and with work, im doing what I can.
I have added a few bits to the car, and have also ordered some. Check it out below!
Firstly, I wanted to get a move on with fitting the FMIC. I wanted to get all the oil cooling and engine cooling elements in place, so here we go...
First of all, panel and engine bay preperation. Off with the wing for easier access to the pipework :
Also the bumper bar seen here :
Requires removal shown here :
Engine bay prep, top mount off, induction kit, pipework, maf etc off, basically remove EVERYTHING you can to make your pipe run easier. I took the header tank off, everything I could.
As you can see, my previous header tank split, causing that nasty orange staining :/ will remove that all in the end of the project.
Next, get the nice shiny kit out.
started heat wrapping the intercooler pipe only to find out it was getting in my bloody way, so i took it off until i have completed the installation.
After cutting the crap out of the kit ( The turbo pipe was 1 1/4 foul, and the inlet pipe needed cutting half in order to bend around the oil filler cap ) aswell as that I needed to cut a hole in the wing to allow the pipe to go through. The red tape you see is purely to stop me scratching the pipework.
The result :
Now onto the dash fitment :
I have included a couple of pics of the flocked dash pre fitted. I have rewired the immobiliser, and the fogs, so hopefully it will start ok.
Im waiting for some other bits and bobs to arrive, once they do I will post the finished result.
I have also bought a Simtek ECU with Anti-lag, Launch Control, and shift light, along with crystal bumper indicators, and a box full of samco hoses.
Here they are below. The simtek isnt being fitting until my car is taken to bob rawle.
you can see the antilag, and launch control switches. I am having cockpit missile type switches installed for these once my interior is finished
Nice box of samco hoses :
Walboro 225lph fuel pump :
and of course, crystal indicators for me bumper!
Happy days so far
Last edited by scoobynelly; 24 July 2011 at 03:13 PM.

 24 July 2011, 06:43 PM
#48
Scooby Regular
Thread Starter
iTrader: (21)
Join Date: Jan 2010
Posts: 1,111
Likes: 0
Received 0 Likes
on
0 Posts
Hello guys,
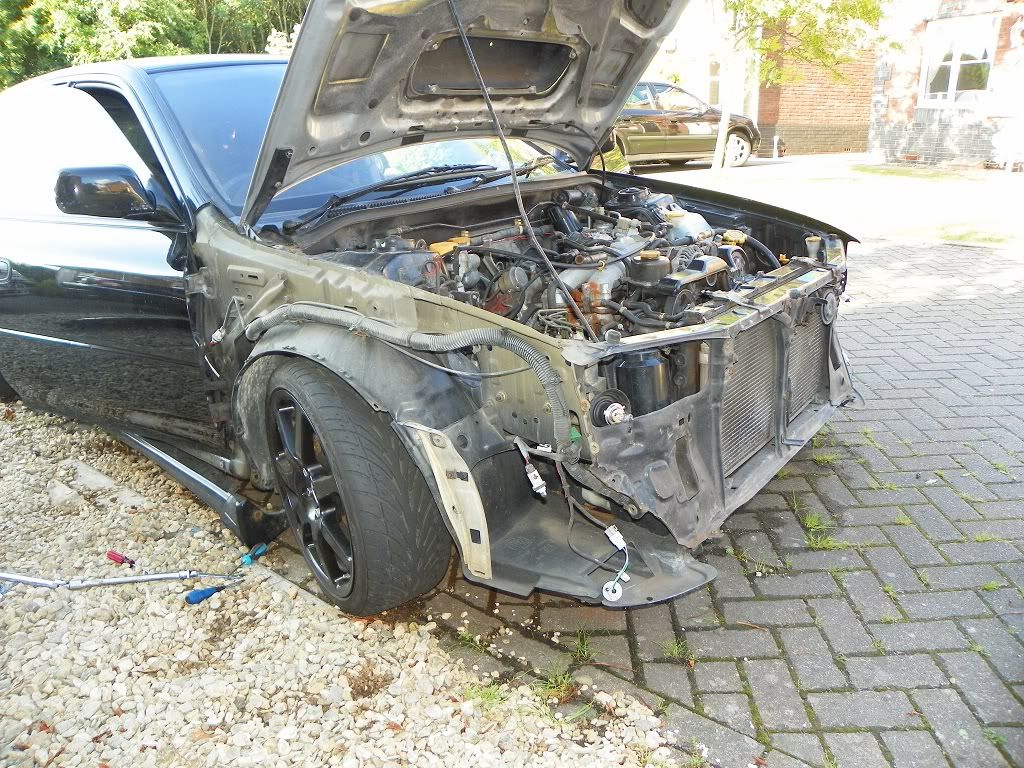
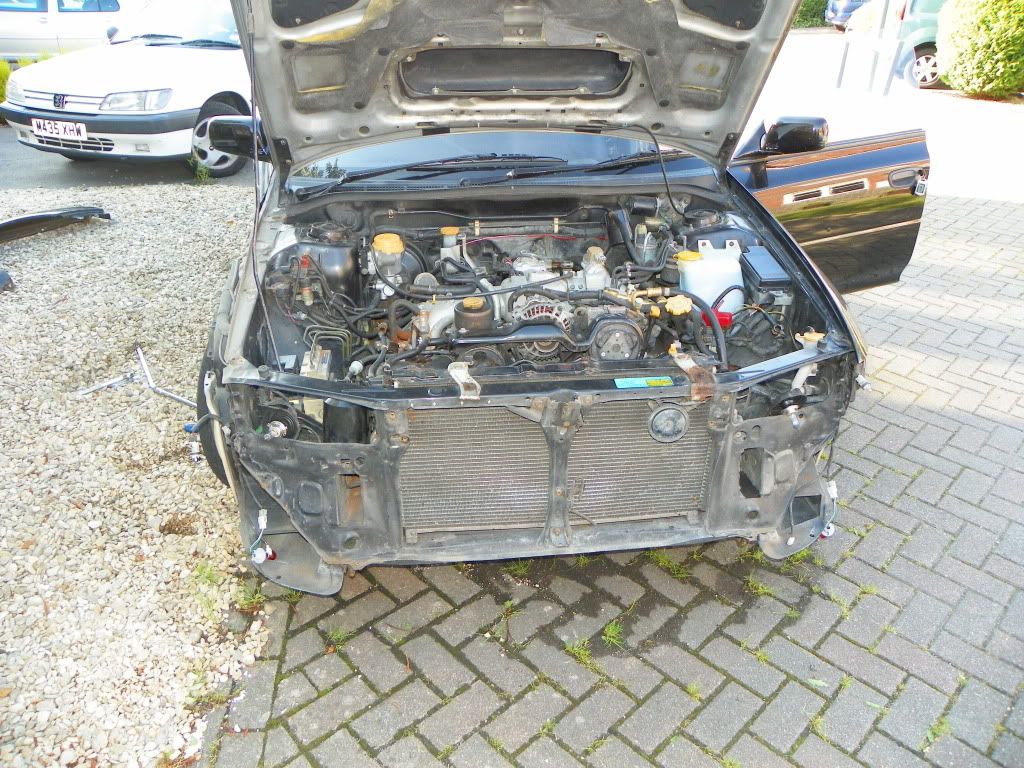
Just a quick before and after progress pic for you all to see. Rebuilt the front end today, so heres how she looked when I started :

and up to date :

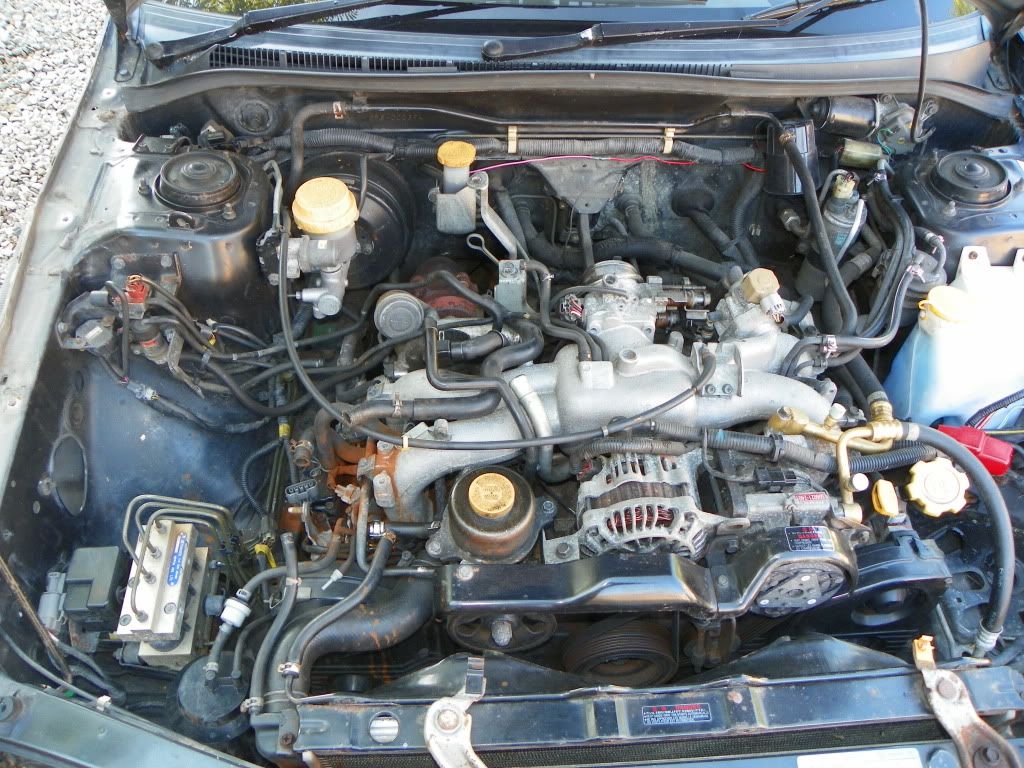
Started brushing the engine bay up today. Pics soon!
Just a quick before and after progress pic for you all to see. Rebuilt the front end today, so heres how she looked when I started :
and up to date :
Started brushing the engine bay up today. Pics soon!
24 July 2011, 07:56 PM
#50
Scooby Regular
Thread Starter
iTrader: (21)
Join Date: Jan 2010
Posts: 1,111
Likes: 0
Received 0 Likes
on
0 Posts
Was waiting for a comment on her... that's my sister and no you can't have her number ( jags mine though ) lol
Then again, looking at your avatar, maybe we can strike a deal? say my sister, for your scooby?
and no you can't have her number ( jags mine though ) lolThen again, looking at your avatar, maybe we can strike a deal? say my sister, for your scooby?
 01 October 2011, 08:25 PM
#57
Scooby Regular
Thread Starter
iTrader: (21)
Join Date: Jan 2010
Posts: 1,111
Likes: 0
Received 0 Likes
on
0 Posts
Good Evening all!
Im giving a quick update on the thread
I now have 4 pots here and ready to fit. Im going to sand them down and paint them black with a cheeky magic touch!
Had a nightmare with the re-wiring of the car at the moment, I have cut a load out and the alarm was wired in crap.
I have my ashtray, cup holder section, and handbrake surround all being carbon wrapped for a nice effect, also some plasma white dials to freshen up the interior!
The rust blister on the PS rear arch is being sanded down, rust treated and primed tomorrow.
I will have some decent pictures to put up once i get underway.
Cheers for now!
16 October 2011, 08:48 AM
#58
Scooby Regular
Thread Starter
iTrader: (21)
Join Date: Jan 2010
Posts: 1,111
Likes: 0
Received 0 Likes
on
0 Posts
The wagon is now put together and on the road again. i have put the dashboard in, full wrapped centre console, and plasma dials for a newer fresher look. i will post some pictures of her so far this weekend. comments appreciated
17 October 2011, 01:26 AM
#59
Hi mate,
Well done for getting stuck in and doing all the work yourself, I love your dash and I'm looking forward to seeing some interior pics.
However.....I really think you've spoiled the exterior by giving it a facelift and adding the huge unnecessary scoop.
In an earlier post you said you were keen to make your wagon stand out from the rest, I reckon it did stand out from the rest already, how many pre-facelift black wagons do you see on the road? It looked mint to begin with, very jdm and subtle
It just looks like any other standard standard impreza with a big scoop stuck on it now.
But each to their own, thats just my opinion. Good luck with it.
22 October 2011, 06:46 PM
#60
Scooby Regular
Thread Starter
iTrader: (21)
Join Date: Jan 2010
Posts: 1,111
Likes: 0
Received 0 Likes
on
0 Posts
Valid point there buddy and i partially agree with what your saying! i like the old skool wagons, but wanted to give it a fresh look. My bonnet scoop is large yes, but carbon fibre  i have a few more tweaks to the front end, this is just the base of the build. I have some magical ideas coming soon ;p dash is in, along with carbon surround centre console etc..;.. i am picking up new front seats tomorrow, and im having brand new carpet fitted appreciate the honest comment though
and i partially agree with what your saying! i like the old skool wagons, but wanted to give it a fresh look. My bonnet scoop is large yes, but carbon fibre i have a few more tweaks to the front end, this is just the base of the build. I have some magical ideas coming soon ;p dash is in, along with carbon surround centre console etc..;.. i am picking up new front seats tomorrow, and im having brand new carpet fitted appreciate the honest comment though