
My CS400 Cosworth Hatch and S202 RA Bugeye
 04 August 2013, 11:58 PM
#31
Scooby Regular

Thread Starter
Well due to an early arrival in the family ( ) I've had to delay getting the rear diffuser vane fitted, but I'll be giving Brian at CAMS in Darwen a try when all the associated family commitments calm down a tad.
Anyway, went to the garage on Friday evening to start the car and after about six presses of the alarm fob it opened. But the interior light didn't glow... and my spot diagnosis was confirmed when I put the key in the fob (as in, **** all happened).
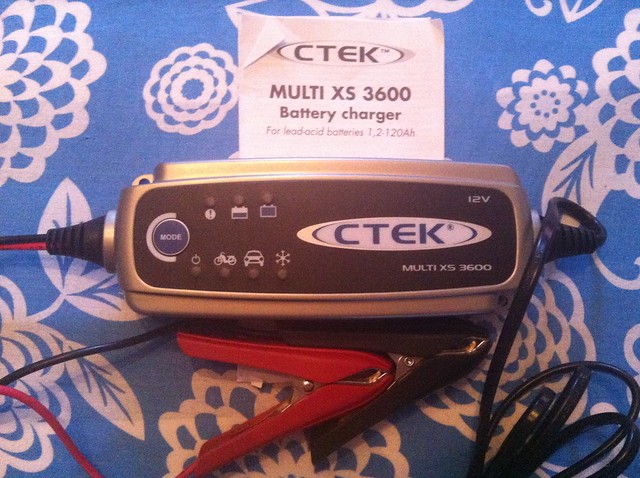
So I went and bought this off t'interweb, wasn't able to find anything quickly with the search thread on here but referred to one on the Porsche forums which recommended this trickle charger for flat batteries and cars in storage.
Some of you may remember that thread I started on the general discussion forum about those dreaded dump valves, I was very grateful for David's from API's input. I've also chased it up a little more with a couple of other tuners and mechanics I know including those in my close family.
I've basically come to the conclusion that running a top quality one may be very mildly beneficial (vs OEM) for your car if it is of the recirculating type, especially if you run at higher boost. So anyway I took the OEM part off to have a look and thought it looked pretty cheap.
So, set to fully recirculating I have fitted this piece of engine bay bling that has been lying around since before I bought the car... even if it doesn't serve to do anything at least it looks good!
By the way it is a real bitch getting the screws out of the elbow hose attachment to the OEM part.


) I've had to delay getting the rear diffuser vane fitted, but I'll be giving Brian at CAMS in Darwen a try when all the associated family commitments calm down a tad.Anyway, went to the garage on Friday evening to start the car and after about six presses of the alarm fob it opened. But the interior light didn't glow... and my spot diagnosis was confirmed when I put the key in the fob (as in, **** all happened).
So I went and bought this off t'interweb, wasn't able to find anything quickly with the search thread on here but referred to one on the Porsche forums which recommended this trickle charger for flat batteries and cars in storage.
Some of you may remember that thread I started on the general discussion forum about those dreaded dump valves, I was very grateful for David's from API's input. I've also chased it up a little more with a couple of other tuners and mechanics I know including those in my close family.
I've basically come to the conclusion that running a top quality one may be very mildly beneficial (vs OEM) for your car if it is of the recirculating type, especially if you run at higher boost. So anyway I took the OEM part off to have a look and thought it looked pretty cheap.
So, set to fully recirculating I have fitted this piece of engine bay bling that has been lying around since before I bought the car... even if it doesn't serve to do anything at least it looks good!
By the way it is a real bitch getting the screws out of the elbow hose attachment to the OEM part.
 05 August 2013, 07:25 AM
#32
Scooby Senior
what's that trumpet thing for?
05 August 2013, 08:50 AM
#33
Scooby Regular
Thread Starter
23 August 2013, 09:43 PM
#34
Scooby Regular
Thread Starter
Unfortunately the battery had sulphated so wouldn't hold much charge. So I replaced the OEM Panasonic with one of those Vartas, used them in the past with no problems at all. Bought for an excellent price with a great warranty from the friendly chaps at autopoint of Preston http://www.justcarbatteries.co.uk/ . Won't stop me from getting a spare from Subaru under warranty though.
Anyways, I finally got round to getting that rear diffuser fitted. I've been strongly advised by most of the Subaru community here in Lancashire to give Brian, Chris, Tim and the team at CAMS in Darwen a shout and I'm glad I did. It's worth going for the banter alone but they make a good brew and love talking cars. http://cams-performance.blogspot.co.uk/
I was also lucky enough to bump into Andrew Carr, well known to many and while it was nice to be able to put a face to the name it was great to get reassurance of what official parts I'll need off Cosworth to take my car to where I want to - and where Cosworth originally intended. Andrew I'll be in touch when my warranty expires
Anyway here are some pics of Brian's and team's handy work.
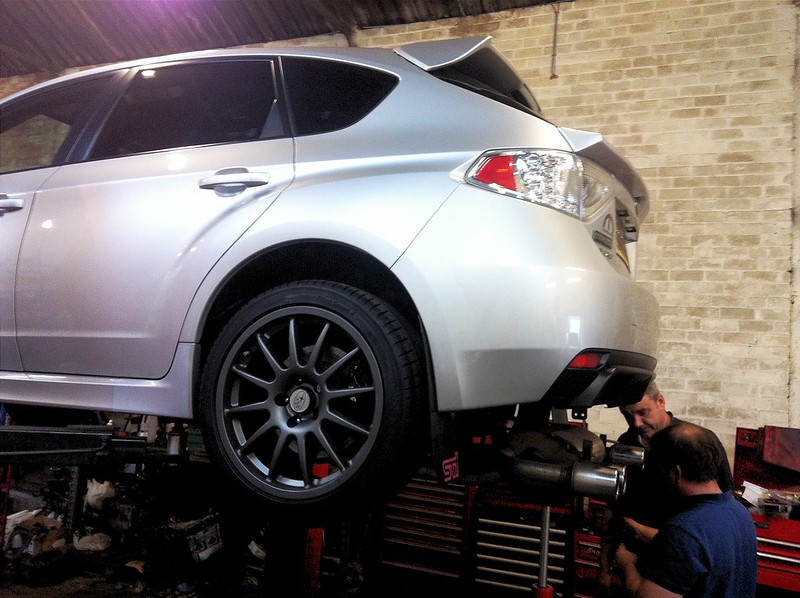
Brian and Chris sorting the troublesome right hand side, Tim rinsed the left!

From below.

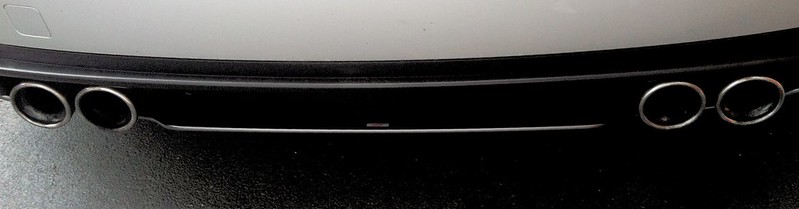
Eye height. I'm really not sure why this part wasn't imported here, I think Chris summed it up best "makes the back look more complete".
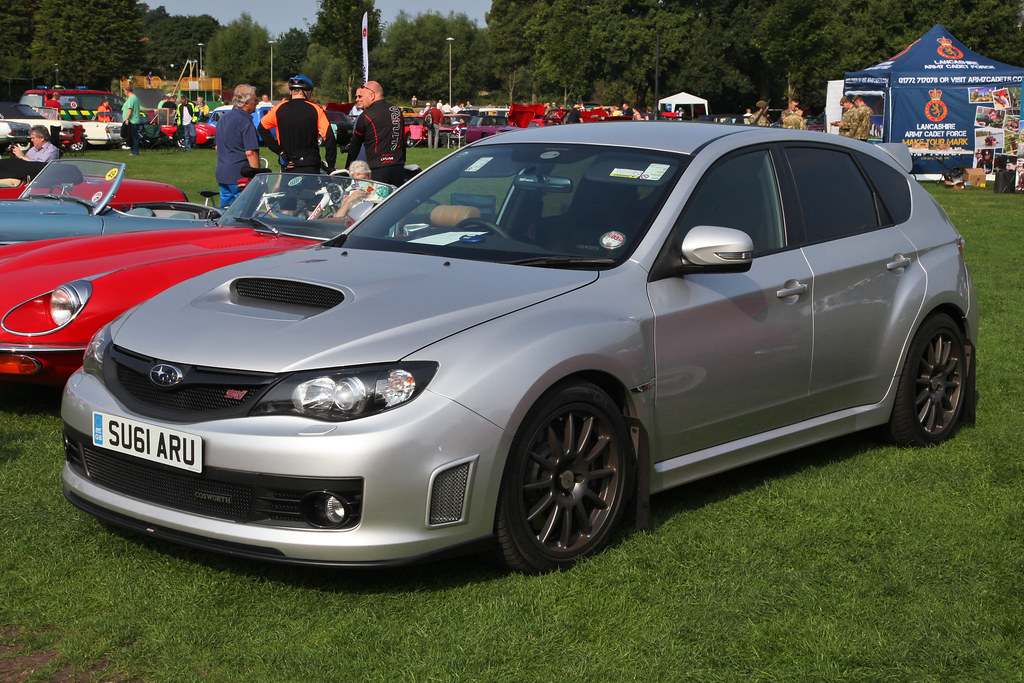
And a pic at home, it's secure at motorway speeds
Anyways, I finally got round to getting that rear diffuser fitted. I've been strongly advised by most of the Subaru community here in Lancashire to give Brian, Chris, Tim and the team at CAMS in Darwen a shout and I'm glad I did. It's worth going for the banter alone but they make a good brew and love talking cars. http://cams-performance.blogspot.co.uk/
I was also lucky enough to bump into Andrew Carr, well known to many and while it was nice to be able to put a face to the name it was great to get reassurance of what official parts I'll need off Cosworth to take my car to where I want to - and where Cosworth originally intended. Andrew I'll be in touch when my warranty expires
Anyway here are some pics of Brian's and team's handy work.
Brian and Chris sorting the troublesome right hand side, Tim rinsed the left!
From below.
Eye height. I'm really not sure why this part wasn't imported here, I think Chris summed it up best "makes the back look more complete".
And a pic at home, it's secure at motorway speeds
The following users liked this post:
28 August 2013, 12:26 AM
#36
Scooby Regular
Thread Starter
I think this should have been offered as an upgrade here to our cars.I've got the valve set to fully recirc at the moment but to be honest I think it is a little louder but I think it is simply a knock-on effect of running higher pressure as it sounds like it is coming from the induction system.
If you want the noise to sound aggressive but not chavvy you can turn it very slightly towards VTA and it gives it more of a rasp inbetween gear changes without feeling any different.
I haven't done it with this car but from my experience with the Stealth FX Pro, it is very loud indeed set to full VTA. Great if you like that kind of thing but it's not my scene.
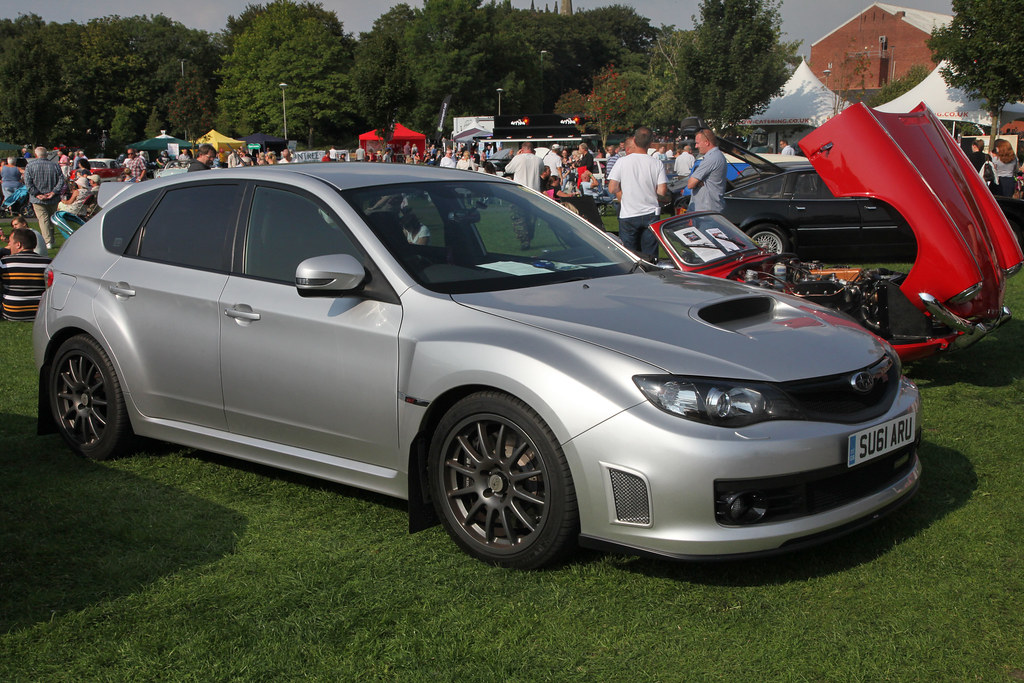
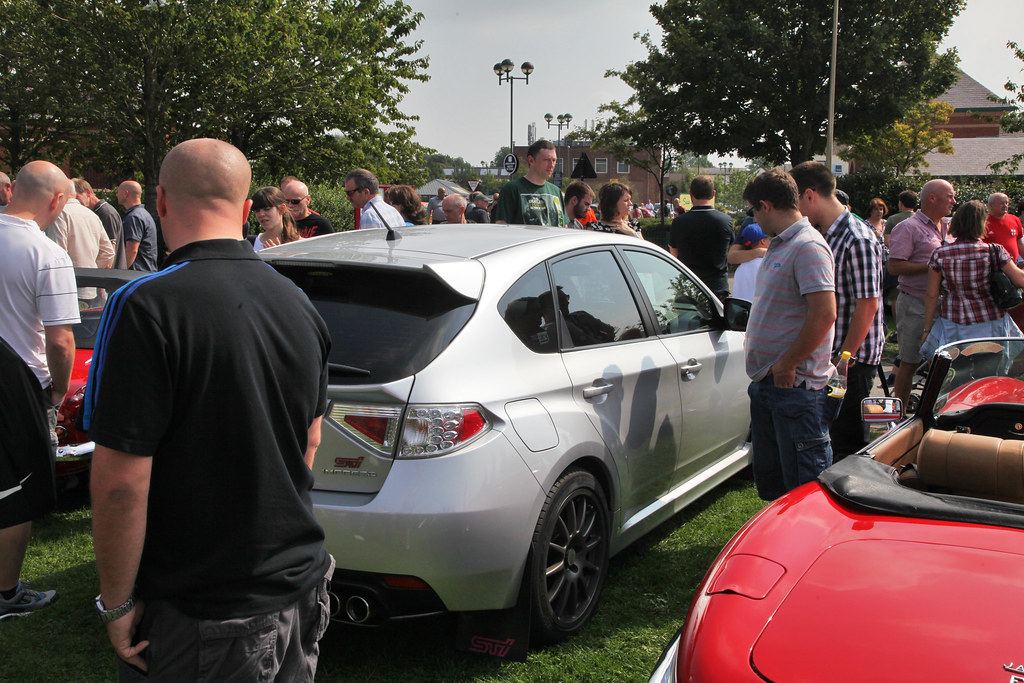
Anyways, I was at the Ormskirk Motorfest on Sunday and got some pics of my car on display.


 28 August 2013, 07:20 AM
#37
Scooby Senior
^^
where have you fitted the reverse light?
where have you fitted the reverse light?
28 August 2013, 08:51 AM
#38
Scooby Regular
Thread Starter
It's still there, I put some red light filter over the rear cluster to make the lights look slightly better for the show.
My next mod will be sorting those awful Lexarse lights out, I'm looking into options at the moment!
Ideally looking for a light cluster replacement rather than placing something on the inside of them.
My next mod will be sorting those awful Lexarse lights out, I'm looking into options at the moment!
Ideally looking for a light cluster replacement rather than placing something on the inside of them.
Last edited by thenewgalaxy; 28 August 2013 at 09:21 AM. Reason: Clumsy sentence construction
31 August 2013, 08:54 PM
#39
Scooby Regular
Thread Starter
Well again many thanks to Tim and Brian at CAMS, they've dug up a part for me that I've been searching for ages.
So I got back home earlier, polished it up and got it fitted.
BEFORE:

AFTER (note new battery, BRZ STi oil filler cap, GFB respons and second STi 1.3 bar cap):
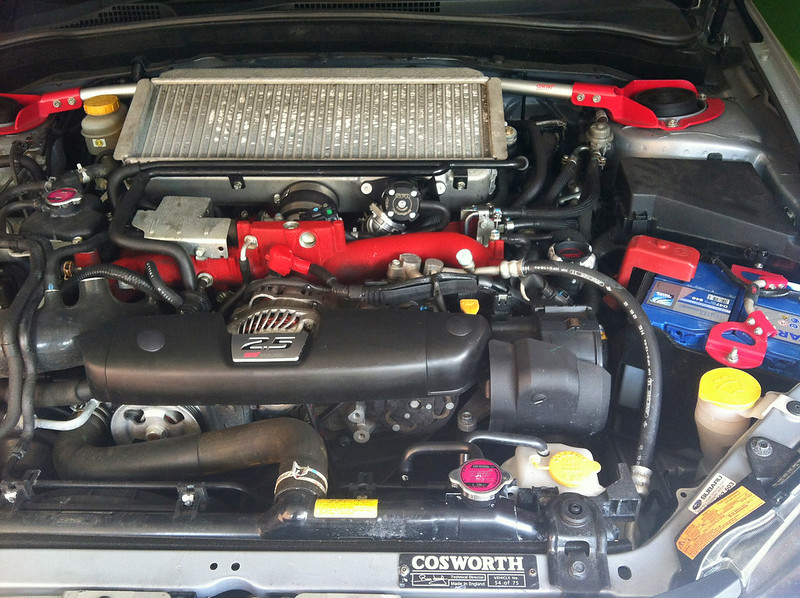
CLOSEUP:

Just got to clean the engine bay up a bit and get an intercooler comb onto that intercooler when I get a spare couple of hours.
So I got back home earlier, polished it up and got it fitted.
BEFORE:
AFTER (note new battery, BRZ STi oil filler cap, GFB respons and second STi 1.3 bar cap):
CLOSEUP:
Just got to clean the engine bay up a bit and get an intercooler comb onto that intercooler when I get a spare couple of hours.
Last edited by thenewgalaxy; 31 August 2013 at 10:16 PM.
31 August 2013, 10:25 PM
#41
Scooby Regular
iTrader: (1)

Join Date: Jun 2012
Location: In my garage
Posts: 1,247
Likes: 0
Received 0 Likes
on
0 Posts
About time you got some pics up I cant believe I have missed this thread until tonight.Cars looking fab ...but...wtf has happened to your intercooler...straighten those fins lol...Im on my 2nd intercooler had 1st replaced as some numpty used it as a tool tray.If I see a bent fin its gently straightened forthwith . I use a good fitting screwdriver but these are available
http://www.ebay.co.uk/itm/New-Draper...item5894ddadb6
I cant believe I have missed this thread until tonight.Cars looking fab ...but...wtf has happened to your intercooler...straighten those fins lol...Im on my 2nd intercooler had 1st replaced as some numpty used it as a tool tray.If I see a bent fin its gently straightened forthwith . I use a good fitting screwdriver but these are availablehttp://www.ebay.co.uk/itm/New-Draper...item5894ddadb6
31 August 2013, 10:53 PM
#42
Scooby Regular
Thread Starter
When I'd had the car for about six months I asked the mechanic in the main dealer why it looked like that and he asked me if I'd given her any beans, explaining that they bend with aggressive driving.
I've not really driven this car too aggressively though

I mean in comparison to any of my previous Prodrive STis this car is much much faster but surely not so that it can wreck an intercooler through the odd vigorous drive?
 01 September 2013, 06:25 PM
#44
Scooby Regular
iTrader: (1)
Join Date: Jun 2012
Location: In my garage
Posts: 1,247
Likes: 0
Received 0 Likes
on
0 Posts
I'm starting to wonder if it's normal tbh! I've had bent intercooler fins in the past but not to this extent.
When I'd had the car for about six months I asked the mechanic in the main dealer why it looked like that and he asked me if I'd given her any beans, explaining that they bend with aggressive driving.
I've not really driven this car too aggressively though
I mean in comparison to any of my previous Prodrive STis this car is much much faster but surely not so that it can wreck an intercooler through the odd vigorous drive?
02 September 2013, 02:46 PM
#45
Scooby Regular
Join Date: Aug 2012
Location: Kent
Posts: 286
Likes: 0
Received 0 Likes
on
0 Posts
Can anyone help. I've taken delivery of some used cosworth cs400 springs and dampers. Are the springs on the cosworth red and also are the rear dampers coilovers? The have a round plate at the bottom that can be wound tighter. If a cosworth owner can just lean under the back of their car and let me know that'd be appreciated

 02 September 2013, 03:50 PM
#49
Scooby Regular
iTrader: (15)
Join Date: Apr 2006
Location: Kent
Posts: 2,995
Likes: 0
Received 0 Likes
on
0 Posts
You can also buy a repair tool as below but never used so cannot say what they are like.
http://www.ebay.co.uk/itm/RADIATOR-A...#ht_1172wt_778
02 September 2013, 04:14 PM
#50
Scooby Regular
Thread Starter
It is a standard STi top mount. I'm considering the Cosworth upgrade package at present that uses a front mount.
I'll get back to you on that, I think I have the relevant pic(s) on my phone.
It makes sense to be honest have you ever opened the window at 100mph? I never get close to the backs of cars for starters I don't need to, and too much like an accident waiting to happen. Also heard that they can ping and bend when cooling down. Maybe the snow had something to do with it, I drove it a lot when it was snowing heavily...?
You can also buy a repair tool as below but never used so cannot say what they are like.
http://www.ebay.co.uk/itm/RADIATOR-A...#ht_1172wt_778
I bought that exact one on Saturday evening, am waiting for it to arrive. Actually can't wait to have a go at it!
Can anyone help. I've taken delivery of some used cosworth cs400 springs and dampers. Are the springs on the cosworth red and also are the rear dampers coilovers? The have a round plate at the bottom that can be wound tighter. If a cosworth owner can just lean under the back of their car and let me know that'd be appreciated
You can also buy a repair tool as below but never used so cannot say what they are like.
http://www.ebay.co.uk/itm/RADIATOR-A...#ht_1172wt_778
02 September 2013, 04:48 PM
#52
Scooby Regular
Thread Starter
02 September 2013, 05:03 PM
#53
Scooby Regular
The bent TMIC fins are due to the air hitting them at an angle, rather than perpendicular.
After a long weekend on the SIDC Highland Fling were we encountered sleat, hale and heavy rain, the top third of mine where completely flattened.
Hopefully this will aleviate the problem and give better distribution over the complete surface.......................


After a long weekend on the SIDC Highland Fling were we encountered sleat, hale and heavy rain, the top third of mine where completely flattened.
Hopefully this will aleviate the problem and give better distribution over the complete surface.......................
02 September 2013, 05:31 PM
#54
Scooby Regular

The fins can also be flattened by over enthusiastic pressure washing... as for stones causing the damage, given you've got a grille in place that should stop most, I know I've seen a vast reduction in damage since fitting mine. Either that or you've been following someone shovelling grit at you I like Don's addition... along with the rest of the car 
I like Don's addition... along with the rest of the car
02 September 2013, 05:59 PM
#55
Scooby Regular
iTrader: (1)
Join Date: Jun 2012
Location: In my garage
Posts: 1,247
Likes: 0
Received 0 Likes
on
0 Posts
Dealer replaced my intercooler as their recommended paintshop used it as a tooltray. I have also bought one of these
http://www.ebay.co.uk/sch/i.html?_od...cover&_sacat=0
02 September 2013, 09:59 PM
#56
Scooby Regular
Thread Starter
The bent TMIC fins are due to the air hitting them at an angle, rather than perpendicular.
After a long weekend on the SIDC Highland Fling were we encountered sleat, hale and heavy rain, the top third of mine where completely flattened.
Hopefully this will aleviate the problem and give better distribution over the complete surface.......................
After a long weekend on the SIDC Highland Fling were we encountered sleat, hale and heavy rain, the top third of mine where completely flattened.
Hopefully this will aleviate the problem and give better distribution over the complete surface.......................
Nice engine bay by the way.
Also got some lights for the bumper, waiting for the next pay cheque so I can do something about those fookin' rear lights too I'm really starting to hate them.
03 September 2013, 09:30 AM
#57
The bent TMIC fins are due to the air hitting them at an angle, rather than perpendicular.
After a long weekend on the SIDC Highland Fling were we encountered sleat, hale and heavy rain, the top third of mine where completely flattened.
Hopefully this will aleviate the problem and give better distribution over the complete surface.......................
After a long weekend on the SIDC Highland Fling were we encountered sleat, hale and heavy rain, the top third of mine where completely flattened.
Hopefully this will aleviate the problem and give better distribution over the complete surface.......................

Interesting Don, I thought the grille would protect it/spread the sleat/rain.
I am sure the Zerosports difuser should solve the problem hopefully.
Nice engine bay btw
 17 September 2013, 08:25 AM
#58
Scooby Regular
Thread Starter
Still waiting on a few bits to arrive at the moment. Think they took the slow boat from Japan!
Still, if you can source readily-imported bits then things arrive a lot quicker
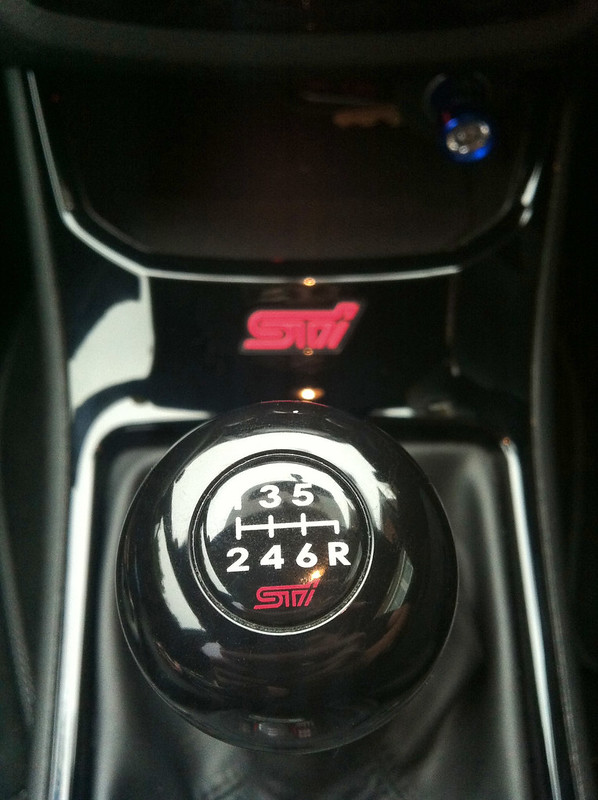
Did not really like the gear **** that comes as standard it looked a bit out of place with the piano black interior, so I replaced it with this one which I think matches the centre enamel nicely.
Still, if you can source readily-imported bits then things arrive a lot quicker
Did not really like the gear **** that comes as standard it looked a bit out of place with the piano black interior, so I replaced it with this one which I think matches the centre enamel nicely.
22 September 2013, 06:59 PM
#59
Scooby Regular
Thread Starter
Came across some red-wrapped plastic tubing on my travels recently, up in the Lakes of all places, so I snapped it up and ran it along the mesh grille to give my take on the GTi-style mod:

Still need to sit down with a toothpick and a comb to sort out the intercooler fins but it's going to take a good couple of hours or so that I don't have at the moment.
So I've fitted two things to it, first a cover that I came across on eBay:

And second a Zero Sports Cool Action II imported via David Hendry Cars:

Also need to clean the engine bay up, it's looking a little dirty. Wish there were more than 24 hours in a day sometimes!
Still need to sit down with a toothpick and a comb to sort out the intercooler fins but it's going to take a good couple of hours or so that I don't have at the moment.
So I've fitted two things to it, first a cover that I came across on eBay:
And second a Zero Sports Cool Action II imported via David Hendry Cars:
Also need to clean the engine bay up, it's looking a little dirty. Wish there were more than 24 hours in a day sometimes!
03 November 2013, 07:49 PM
#60
Scooby Regular
Thread Starter
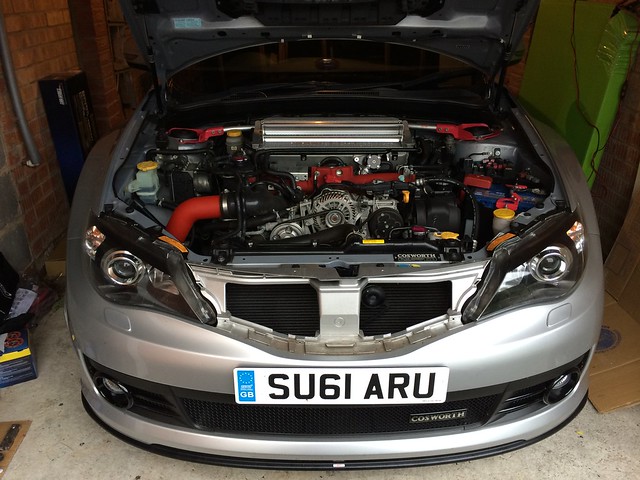
Two new mods to post up tonight.
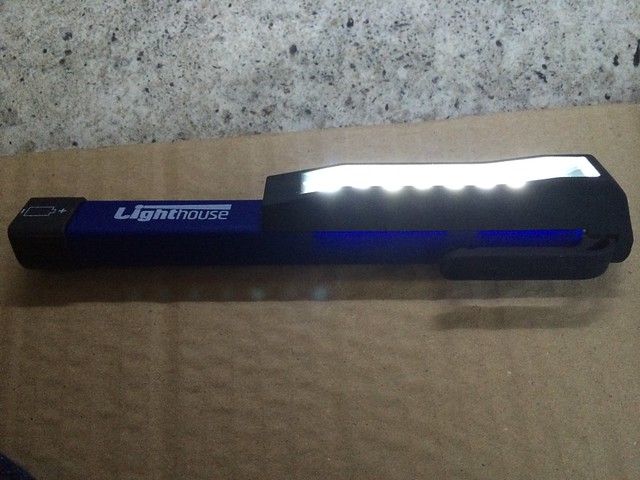
But before I do here is a little tool I acquired recently that’s been incredibly useful, it is a row of LEDs on a pen-sized holder with a magnetic clip. Very useful unless you have an aluminium bonnet or bits of carbon fibre.
Well I thought I’d be original and install some red hellas behind the Zunsport Grille.
Things I used:
Phillips-type Screwdriver Kit.
Plastic Spatula.
Wrench Kit.
Spanner Kit.
Grease.
Plastic Ties.
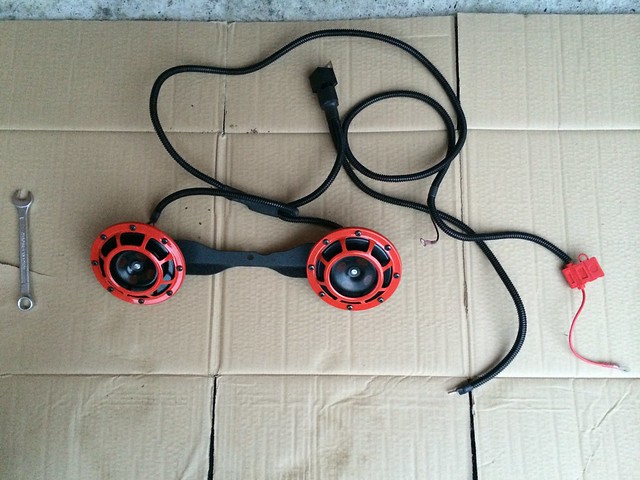
2x Hella Supertones, best in red!
Subimods mount.
Subimods relay and harness.
Remove front grille, I prefer to do this to removing the whole bumper. Once you know how to do this it’s actually easy, first remove the plastic holders on the superior aspect with a narrow spatula.
The problem is that there are four small screws holding it in. If you feel under the grille (by putting your hand through the opening next to the latch) you’ll find them. I’d recommend putting the grille on a towel.
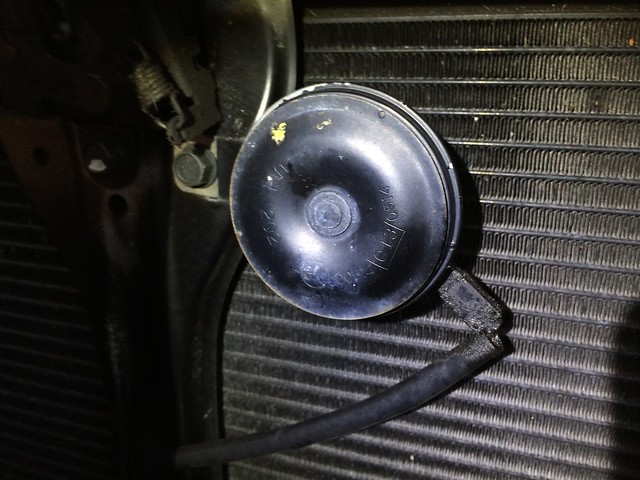
Remove centre horn, this is easy you just have to use a wrench. You will need this horn cable, I’d recommend tying it to something so you don’t lose it.

You don't have to do it but removing the driver horn is more troublesome. Firstly remove the side vent, best thing to do is feel under with a spatula or credit car and get your fingers underneath. Pull to break the seal.
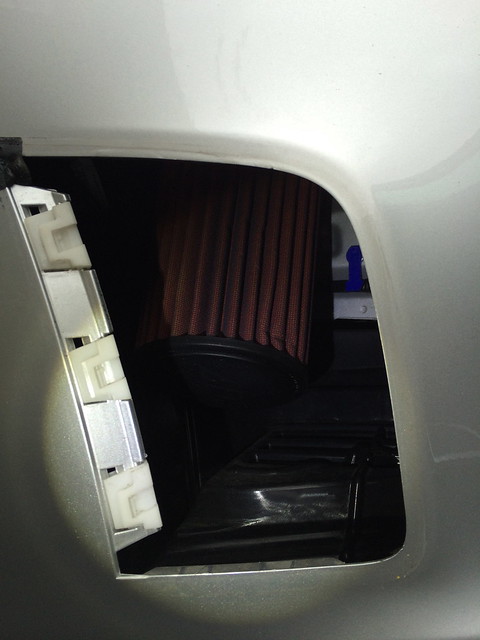
If you have a Cosworth you’ll see a large cone filter, shine a light inside and you’ll see the horn. It can only be removed with a spanner as it’s a little tight in there. I fixed the horn cable to the harness and sealed the end to prevent a short.
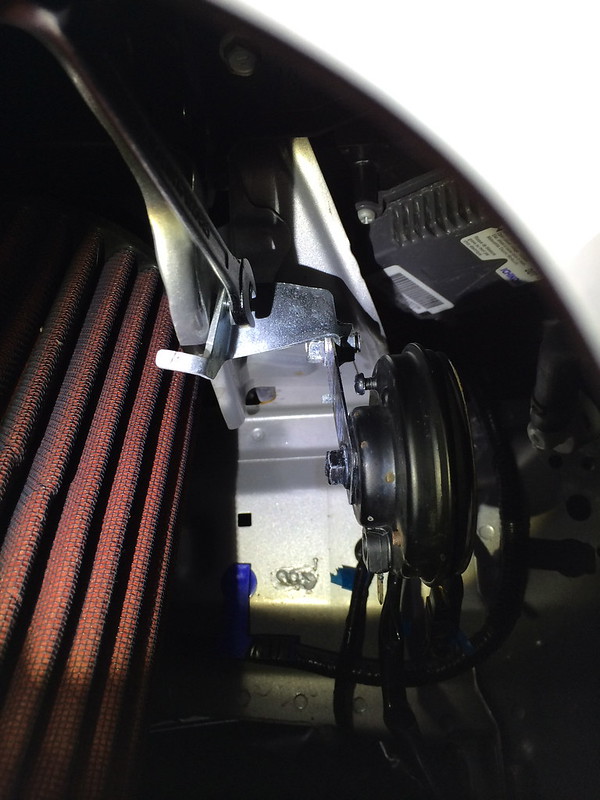
At this point I realised that the Hellas were going to be difficult to line up the way I desired as the metal strips they supply are very short and would have them visually obscured by the centre bumper. The wires I had were not really suitable for fixing the horns, so I ordered a harness from a company in America called Subimods.
Two weeks later, I received the harness and mount. Bloody hell the nuts on the back of the horns are screwed on tight. I was actually unable to get them off with WD40 and a wrench so I got in touch with Brian at Cams, who removed them for me with a pneumatic wrench.
So use the nut that the original horn was attached with to fix the brace back, do up some of the way and line up. Then tighten up!

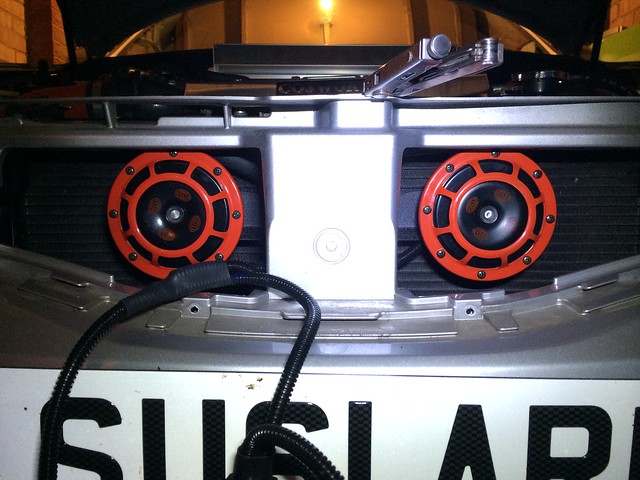
Fixing the harness is easy, and you simply plug the wiring into the horn wire that was secured earlier. I recommend fixing the relay high up, I fixed the relay tab beneath the harness with tigerseal.

Once it is connected, simply feed the wiring up and disconnect the battery. Attach the wiring to the battery clips and reconnect. Some people have voiced concern that this drains the battery but the Subimods relay prevents this from happening.
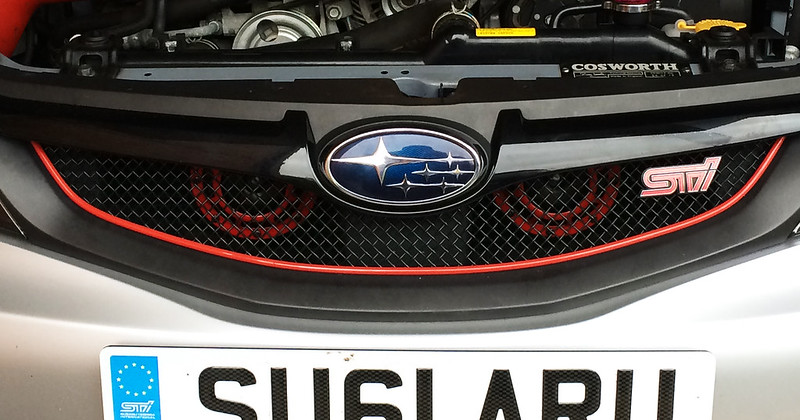
Reattach the grille and admire!
But before I do here is a little tool I acquired recently that’s been incredibly useful, it is a row of LEDs on a pen-sized holder with a magnetic clip. Very useful unless you have an aluminium bonnet or bits of carbon fibre.
Hella Supertones
Well I thought I’d be original and install some red hellas behind the Zunsport Grille.
Things I used:
Phillips-type Screwdriver Kit.
Plastic Spatula.
Wrench Kit.
Spanner Kit.
Grease.
Plastic Ties.
2x Hella Supertones, best in red!
Subimods mount.
Subimods relay and harness.
Remove front grille, I prefer to do this to removing the whole bumper. Once you know how to do this it’s actually easy, first remove the plastic holders on the superior aspect with a narrow spatula.
The problem is that there are four small screws holding it in. If you feel under the grille (by putting your hand through the opening next to the latch) you’ll find them. I’d recommend putting the grille on a towel.
Remove centre horn, this is easy you just have to use a wrench. You will need this horn cable, I’d recommend tying it to something so you don’t lose it.
You don't have to do it but removing the driver horn is more troublesome. Firstly remove the side vent, best thing to do is feel under with a spatula or credit car and get your fingers underneath. Pull to break the seal.
If you have a Cosworth you’ll see a large cone filter, shine a light inside and you’ll see the horn. It can only be removed with a spanner as it’s a little tight in there. I fixed the horn cable to the harness and sealed the end to prevent a short.
At this point I realised that the Hellas were going to be difficult to line up the way I desired as the metal strips they supply are very short and would have them visually obscured by the centre bumper. The wires I had were not really suitable for fixing the horns, so I ordered a harness from a company in America called Subimods.
Two weeks later, I received the harness and mount. Bloody hell the nuts on the back of the horns are screwed on tight. I was actually unable to get them off with WD40 and a wrench so I got in touch with Brian at Cams, who removed them for me with a pneumatic wrench.
So use the nut that the original horn was attached with to fix the brace back, do up some of the way and line up. Then tighten up!
Fixing the harness is easy, and you simply plug the wiring into the horn wire that was secured earlier. I recommend fixing the relay high up, I fixed the relay tab beneath the harness with tigerseal.
Once it is connected, simply feed the wiring up and disconnect the battery. Attach the wiring to the battery clips and reconnect. Some people have voiced concern that this drains the battery but the Subimods relay prevents this from happening.
Reattach the grille and admire!
Last edited by thenewgalaxy; 03 November 2013 at 07:55 PM. Reason: It helps if I add all the images!