
My CS400 Cosworth Hatch and S202 RA Bugeye

 03 November 2013, 11:07 PM
#62
Scooby Regular

Thread Starter
Thanks Rob, I have actually sealed the unit with resin so I imagine it'll be okay. The problem I had really was that setting it too low would mean it'd get spray from the lower grille and I didn't want to fit it to any other structures. To put it up near the battery unfortunately would have been a lot more re-wiring work for me.
Okay, this is a really testing mod.
It's not intensely difficult, it just requires loads of patience and a steady hand.
An observation I made is that it is MUCH easier to place the overlays on a new light, and favourable to clean and use a clay bar on the lights before placing them if you do not have a factory fresh car (or new lights).
There are three options to these overlays that I've come across, either full red coating (just get red overlays nothing else needed), red with dark tint (just get these but I don't like the look of them at all) or red overlays with cutouts (require a replacement clear fog lens unit).
Placing the overlays on the hatch lenses is much easier than the curved rear side units.
What you need -
Recently barred lights or factory fresh car
Replacement driver side rear hatch lens unit with clear fog lens
Overlay kit (red vinyl, templates and squeegee) I got mine from IAG Performance in the USA following good reviews on the American sites...
http://www.iagperformance.com/shoppi...prod=150313RED
Some *****
Lots of patience
Wrench Set
Freshly washed hands, I mean really scrub them so there is no grease on them!
Washing up liquid
Hair dryer
Scalpel
So remove the light replacement hatches on the rear boot lid. Remove the lights by unscrewing. Remove the bootlid handle by pulling out and then remove the rear bootlid trim. This requires the ***** part because you have to pull really hard to remove it, yet you feel like you're going to break something by trying. Do not worry. First start at the top of the bootlid by removing the small rectangular section and then both vertical parts. Then you can remove the large rear section of trim from the base of the hatch. When I was pulling the bits off they made quite a loud crack with each tug - the plastic Subarus are made from is rather rigid and hard wearing!
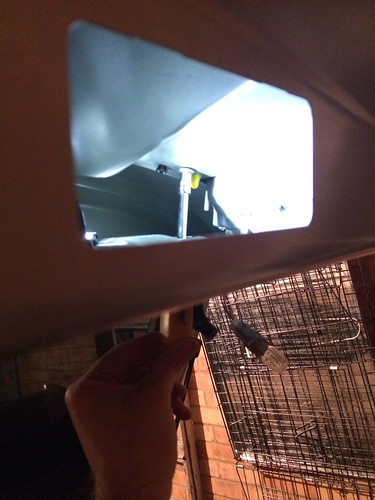
Then remove the nuts from the edge of the light tabs, there are two on each at the edge of the boot lid on the most lateral aspect. Then look in through the holes in the boot lid metal to see if you can find the third nut holding them in medially.
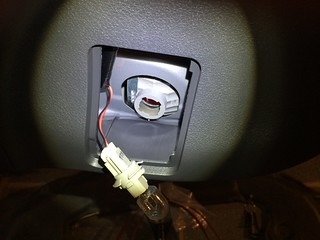
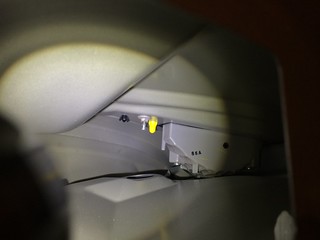
I found the best way to remove the other nuts is to look through the area where the bootlid handle is and use a wrench like so. The lens then needs pulling out firmly.
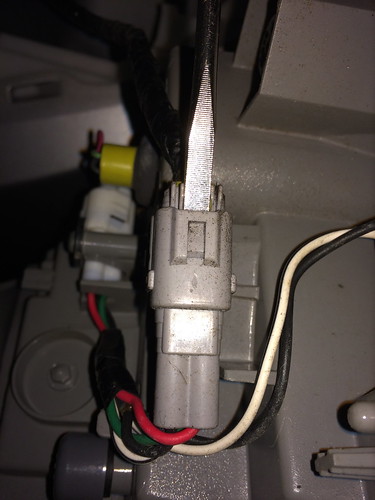
For the rear side lenses it is simply a case of removing the two nuts you can see and then slotting out backwards.

Once slotted out you'll see they are still attached firmly by some wiring. Insert a small screwdriver in and lift gently, they'll part leaving no lights on the back of the car.
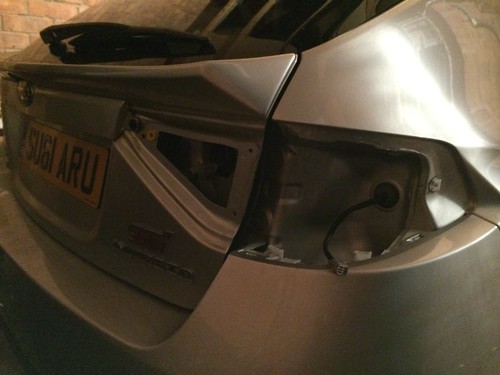
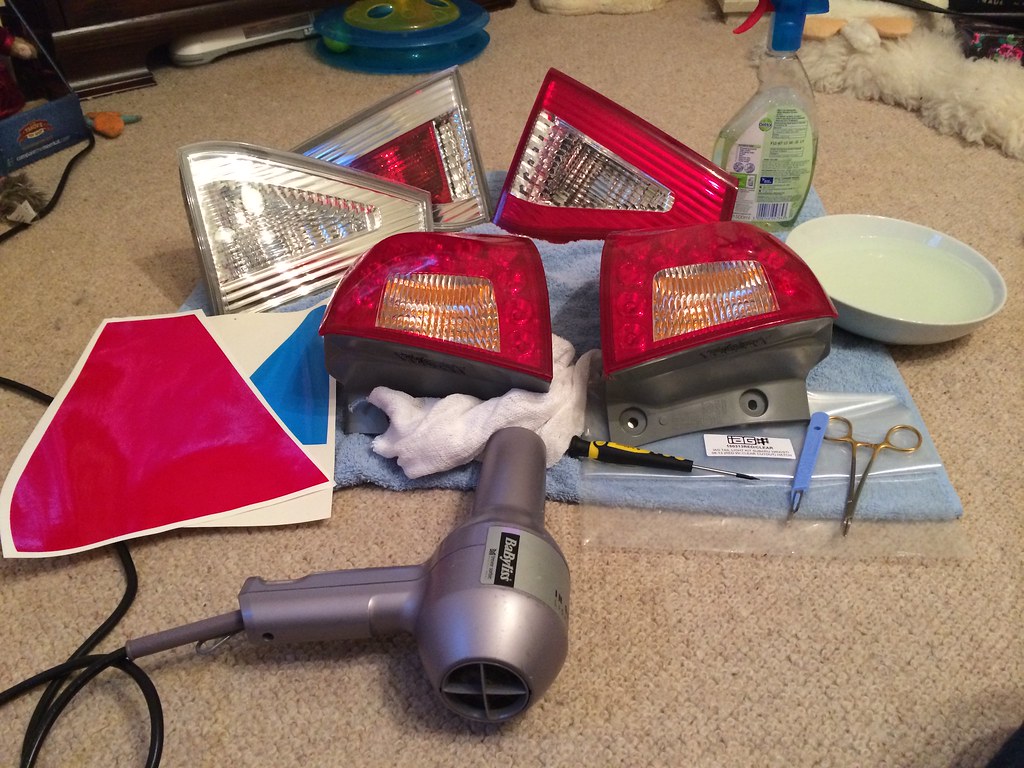
A boot light and some overlays, I put washing up liquid and water in an old dettol spray bottle so I could apply it more easily.

Pretty much everything I used. Be careful you don't have any contaminants nearby, these overlays would pick up dust, fingerprints, pet hair etc. I worked with the overlays on top of the waxed backing paper they came on to stop things sticking to them.
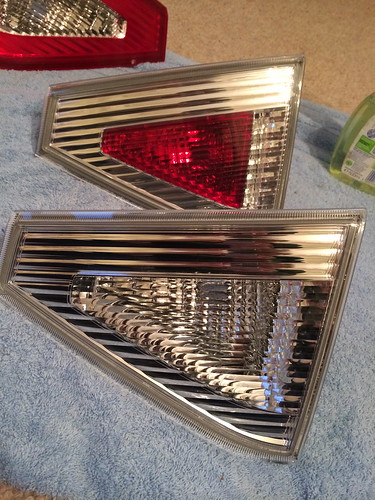
UK standard rear driver side unit with red fog lens and USDM with clear. You only need the USDM one if you want to do a cutout.
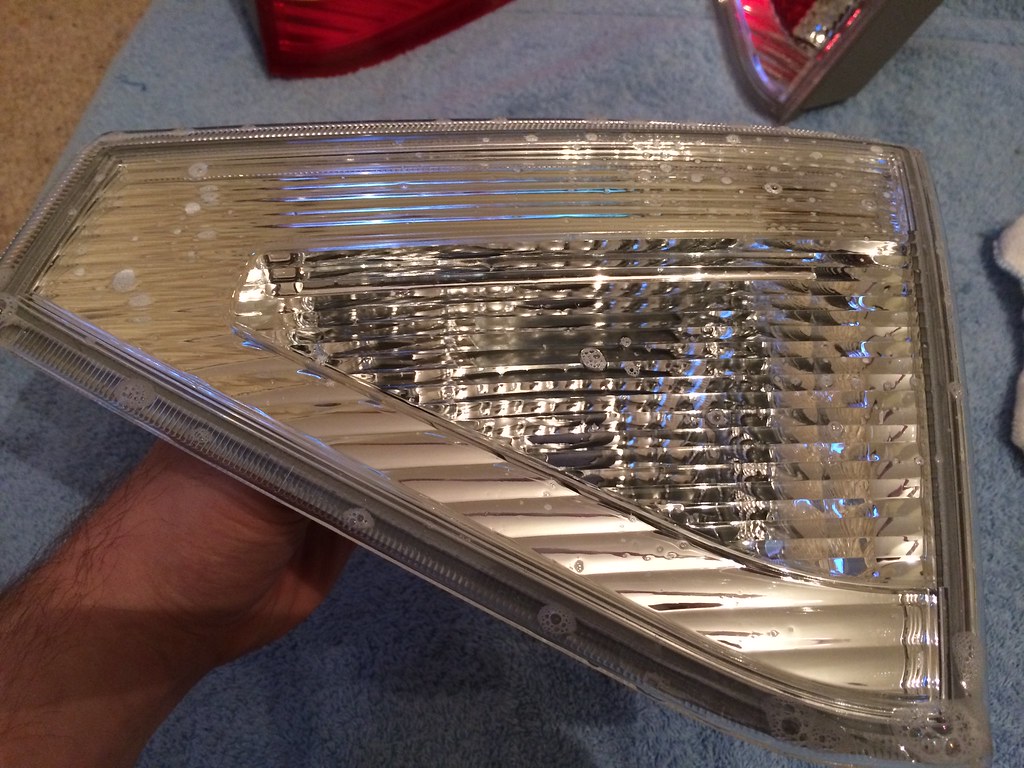
So spray some washing up liquid over the surface, make sure there isn't too much in otherwise it will be too foamy and cause residue under the vinyl.
Place the vinyl overlays and press down as firmly as you can.
No matter how hard you press (or evenly) you'll still get air bubbles. I found it best to move them towards the edges or even towards the middle of the unit where I'm going to remove the overlay for the cutout.
Use the squeegee to get a more even contact and work toward the edges if you can. Don't worry about scratching or scoring the surface too much, once it is stuck down it is not very apparent.

Gently heat with a hair dryer and then work the material towards the edges. It is worth remembering that the vinyl will shrink if you heat too quickly but if you work it at the same time it will expand and flow. It is very difficult to split or break the vinyl but quite easy to cause ridges, so I would recommend lubricating the layer by also spraying the overlays with washing up liquid. As you keep working, try and go from one end to the other and only go back to an earlier level to move air out. Try to fold over the edges but don't trim until you think you have finished.
The side lens units really need smoothing with a finger straight after heating, and repeated firm pressure can cause a fair bit of ache. I found it best to dip my finger in the washing up liquid water bowl after heating the overlay with the hairdryer and almost flowing it. The vinyl expands a fair bit when worked but contracts so be careful that you don't curve it round away from the contralateral side - it must be worked evenly both sides as you move along.
Ultimately this is the bit that needs patience, it is a real pain to work on if you don't have a factory fresh headlight and WHATEVER you do don't do this unless you have cleaned the clusters very thoroughly.


Unless you have a steadier hand than me I'd advise using these templates, or as a minimum drawing out the area you wish to cut first. I used a ruler to score the straight edges.
I'd recommend using a no.15 surgical blade as it is thin and you can accurately score the depth the thickness of the overlay. If you use a Stanley knife I fear you'd score too heavily into the light fitting underneath. Not a problem if you never plan to remove the overlays, but...

Peel off carefully. I'd recommend keeping the scalpel in the other hand to score the bits at the corners.
A seriously sweet-looking rear lens, yes I know I have just changed sides!

Some people will never appreciate the looks of the hatch but I personally couldn't stand the OEM "Lexarse" lights look, they were plain horrible. Especially on one people think I was daft enough to pay �50k for!
Much better!

And up close, wow I'm proud. This genuinely took me a long time to do and anyone wanting to do this needs patience. If not, get it done professionally because it is frustrating.

Okay, this is a really testing mod.
It's not intensely difficult, it just requires loads of patience and a steady hand.
An observation I made is that it is MUCH easier to place the overlays on a new light, and favourable to clean and use a clay bar on the lights before placing them if you do not have a factory fresh car (or new lights).
There are three options to these overlays that I've come across, either full red coating (just get red overlays nothing else needed), red with dark tint (just get these but I don't like the look of them at all) or red overlays with cutouts (require a replacement clear fog lens unit).
Placing the overlays on the hatch lenses is much easier than the curved rear side units.
What you need -
Recently barred lights or factory fresh car
Replacement driver side rear hatch lens unit with clear fog lens
Overlay kit (red vinyl, templates and squeegee) I got mine from IAG Performance in the USA following good reviews on the American sites...
http://www.iagperformance.com/shoppi...prod=150313RED
Some *****
Lots of patience
Wrench Set
Freshly washed hands, I mean really scrub them so there is no grease on them!
Washing up liquid
Hair dryer
Scalpel
So remove the light replacement hatches on the rear boot lid. Remove the lights by unscrewing. Remove the bootlid handle by pulling out and then remove the rear bootlid trim. This requires the ***** part because you have to pull really hard to remove it, yet you feel like you're going to break something by trying. Do not worry. First start at the top of the bootlid by removing the small rectangular section and then both vertical parts. Then you can remove the large rear section of trim from the base of the hatch. When I was pulling the bits off they made quite a loud crack with each tug - the plastic Subarus are made from is rather rigid and hard wearing!
Then remove the nuts from the edge of the light tabs, there are two on each at the edge of the boot lid on the most lateral aspect. Then look in through the holes in the boot lid metal to see if you can find the third nut holding them in medially.
I found the best way to remove the other nuts is to look through the area where the bootlid handle is and use a wrench like so. The lens then needs pulling out firmly.
For the rear side lenses it is simply a case of removing the two nuts you can see and then slotting out backwards.
Once slotted out you'll see they are still attached firmly by some wiring. Insert a small screwdriver in and lift gently, they'll part leaving no lights on the back of the car.
A boot light and some overlays, I put washing up liquid and water in an old dettol spray bottle so I could apply it more easily.
Pretty much everything I used. Be careful you don't have any contaminants nearby, these overlays would pick up dust, fingerprints, pet hair etc. I worked with the overlays on top of the waxed backing paper they came on to stop things sticking to them.
UK standard rear driver side unit with red fog lens and USDM with clear. You only need the USDM one if you want to do a cutout.
So spray some washing up liquid over the surface, make sure there isn't too much in otherwise it will be too foamy and cause residue under the vinyl.
Place the vinyl overlays and press down as firmly as you can.
No matter how hard you press (or evenly) you'll still get air bubbles. I found it best to move them towards the edges or even towards the middle of the unit where I'm going to remove the overlay for the cutout.
Use the squeegee to get a more even contact and work toward the edges if you can. Don't worry about scratching or scoring the surface too much, once it is stuck down it is not very apparent.
Gently heat with a hair dryer and then work the material towards the edges. It is worth remembering that the vinyl will shrink if you heat too quickly but if you work it at the same time it will expand and flow. It is very difficult to split or break the vinyl but quite easy to cause ridges, so I would recommend lubricating the layer by also spraying the overlays with washing up liquid. As you keep working, try and go from one end to the other and only go back to an earlier level to move air out. Try to fold over the edges but don't trim until you think you have finished.
The side lens units really need smoothing with a finger straight after heating, and repeated firm pressure can cause a fair bit of ache. I found it best to dip my finger in the washing up liquid water bowl after heating the overlay with the hairdryer and almost flowing it. The vinyl expands a fair bit when worked but contracts so be careful that you don't curve it round away from the contralateral side - it must be worked evenly both sides as you move along.
Ultimately this is the bit that needs patience, it is a real pain to work on if you don't have a factory fresh headlight and WHATEVER you do don't do this unless you have cleaned the clusters very thoroughly.
Unless you have a steadier hand than me I'd advise using these templates, or as a minimum drawing out the area you wish to cut first. I used a ruler to score the straight edges.
I'd recommend using a no.15 surgical blade as it is thin and you can accurately score the depth the thickness of the overlay. If you use a Stanley knife I fear you'd score too heavily into the light fitting underneath. Not a problem if you never plan to remove the overlays, but...
Peel off carefully. I'd recommend keeping the scalpel in the other hand to score the bits at the corners.
A seriously sweet-looking rear lens, yes I know I have just changed sides!
Some people will never appreciate the looks of the hatch but I personally couldn't stand the OEM "Lexarse" lights look, they were plain horrible. Especially on one people think I was daft enough to pay �50k for!
Much better!
And up close, wow I'm proud. This genuinely took me a long time to do and anyone wanting to do this needs patience. If not, get it done professionally because it is frustrating.
Last edited by thenewgalaxy; 04 November 2013 at 12:49 AM. Reason: IAG link added
 04 November 2013, 12:07 AM
#65
Scooby Regular
Thread Starter
Depends what you're after to be honest!
Occasionally hatch parts are coming up at breakers, if you want to fit rare Newage and Classic parts such as the filler cap then typing the part number or product description into Google search with quotation marks is the best option.
I've been ordering some JDM parts such as that rear underspoiler and cross member braces that I find are best sourced places like japanparts.com and avojdm.com .
However if you can get a part number it is worth approaching a friendly dealer I'd recommend asking nicely on the official hatch thread there are some very helpful people who work at main dealers on here.
Thanks matey I really appreciate it
04 November 2013, 10:51 AM
#67
Scooby Regular
As above
japanparts.com or Avojdm.com
STi parts catalogue that covers parts for both early hatch and current hatch/saloon here
http://www.sti.jp/parts/catalogue/impreza_gr/index.html
other bits and pieces here........
http://www.subaru.jp/accessory/wrx/interior/index.html
japanparts.com or Avojdm.com
STi parts catalogue that covers parts for both early hatch and current hatch/saloon here
http://www.sti.jp/parts/catalogue/impreza_gr/index.html
other bits and pieces here........
http://www.subaru.jp/accessory/wrx/interior/index.html
05 November 2013, 10:50 AM
#69
Scooby Regular
Thread Starter
You can if you're well connected or savvy try going through Yahoo japanese auctions but be careful it can be like eBay for bad sellers.
Google can work for rare parts if out of stock, and it can also be worth trying to get them through a UK dealer if you have the part number as they will ship parts common with UKDM.
You can always ask if you want a specific part on here there is a large collective knowledge of parts and contacts!
06 November 2013, 01:47 PM
#72
Scooby Regular
Thread Starter
You're welcome. You might also want to find a part number or isolate an item on this website:
www.opposedforces.com/parts/
It's not *totally comprehensive* but it's got most of what was fitted to the base model cars we have. Some of the JDM options and figments made it over on the 2011 hatches and 2012 saloons.
You can always try also for the same reasons:
www.Subaru.co.uk/accessories
www.subarupartsstore.co.uk
www.pro-r.co.uk
But they suck a little bit and only very basic bits can be found there.
Last edited by thenewgalaxy; 06 November 2013 at 01:48 PM.
17 November 2013, 08:24 PM
#73
Scooby Regular
Thread Starter
On Friday morning I got not one but two parcels, one from AVO JDM and the other from Japanparts. Happy days 
So I lined up the bits I can fit myself...
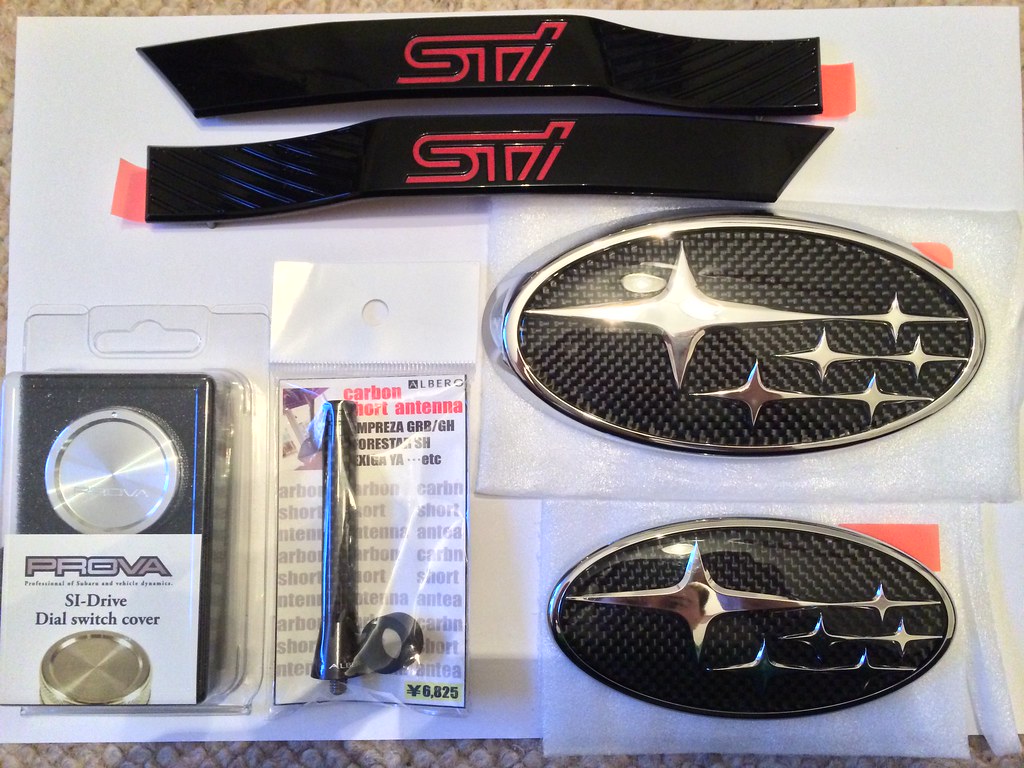
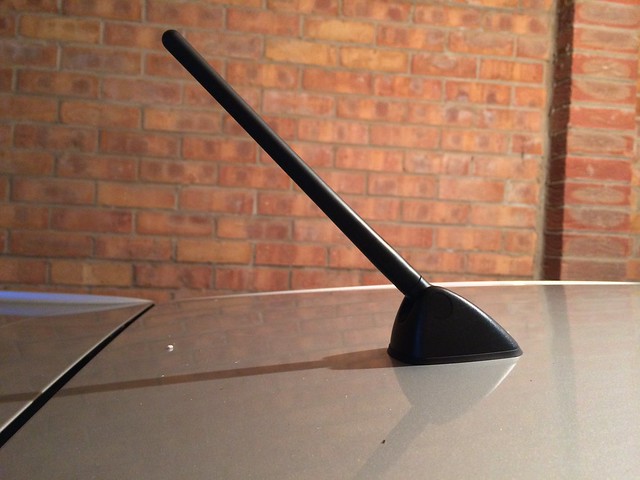
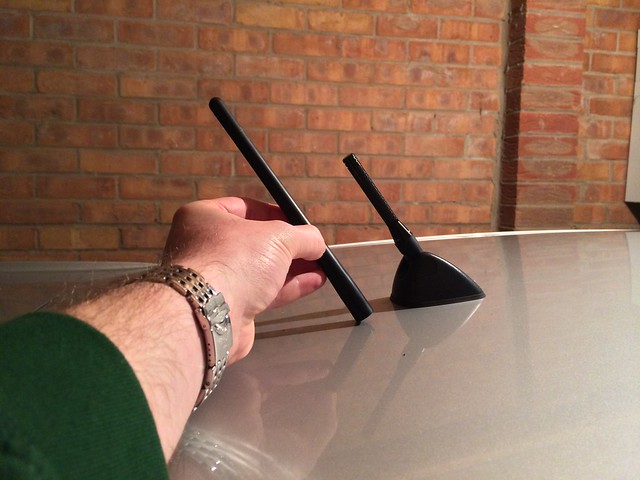
Fitted the "Albero CF Short Antenna" pretty much straight away. It's only with hindsight that I can see how horrid the OEM antenna is.
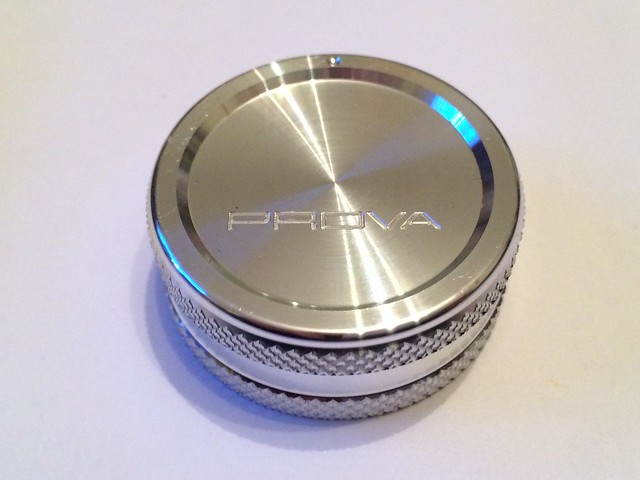
The Prova SI cover is a really shiny and nicely machined piece of kit. I covered it up with some very small STi stickers that I have lying around. Not sure if it works or not but at least I can pull them off.

And fitted. Looks chunky will have to see if it feels better on the road.

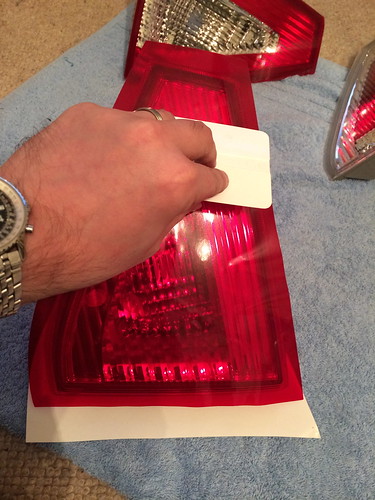
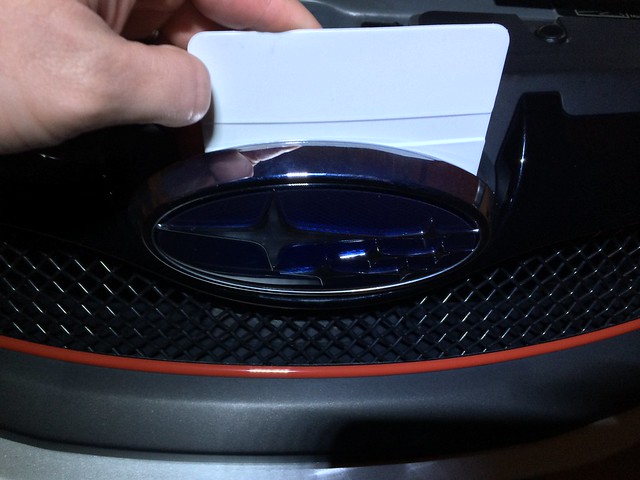
Black R205 fender garnishes are not exactly an original mod according to the 08/09 hatches thread but on a silver car with piano black parts it was always something I was going to do. Remove the old ones with a hair dryer and get a plastic card underneath. Old vs new...
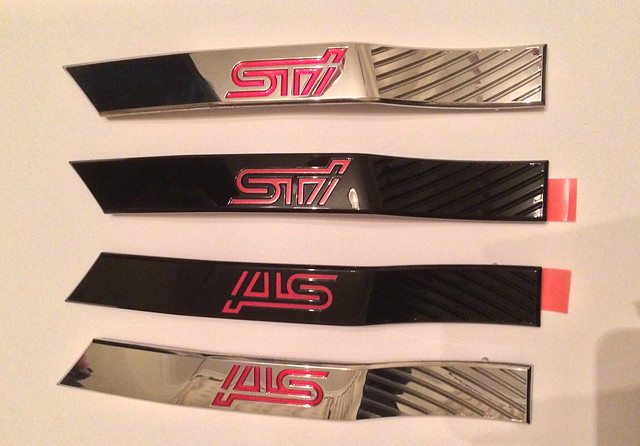
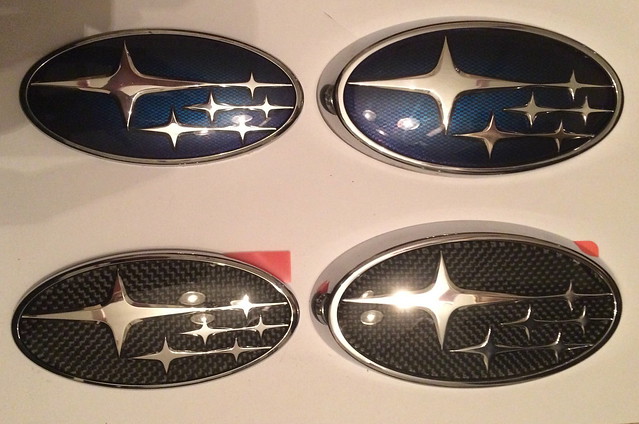
Something I did think was a bit more original and in keeping with the silver and black theme was a set of wet carbon K2Gear badges. They're really lovely and considerably superior quality to the OEM items

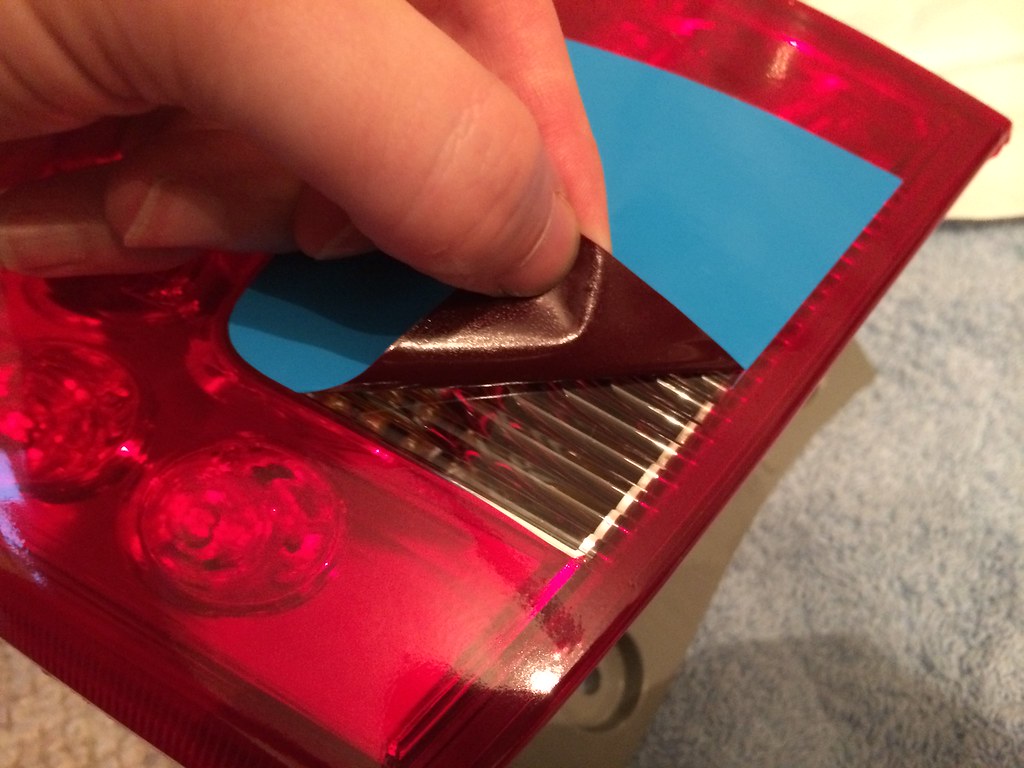
Removing the OEM badges involves a hairdryer and piece of plastic (I seem to spend a lot of time pointing a hairdryer at my car these days) but be warned about the rear badge, it is a real ballache to remove. I was unable to get even a piece of dental floss underneath it and had to resort to damaging the badge to remove it.
As it's now very dark outside and quite murky in the garage I'll get some pics up when we next have some sunshine...
So I lined up the bits I can fit myself...
Fitted the "Albero CF Short Antenna" pretty much straight away. It's only with hindsight that I can see how horrid the OEM antenna is.
The Prova SI cover is a really shiny and nicely machined piece of kit. I covered it up with some very small STi stickers that I have lying around. Not sure if it works or not but at least I can pull them off.
And fitted. Looks chunky will have to see if it feels better on the road.
Black R205 fender garnishes are not exactly an original mod according to the 08/09 hatches thread but on a silver car with piano black parts it was always something I was going to do. Remove the old ones with a hair dryer and get a plastic card underneath. Old vs new...
Something I did think was a bit more original and in keeping with the silver and black theme was a set of wet carbon K2Gear badges. They're really lovely and considerably superior quality to the OEM items
Removing the OEM badges involves a hairdryer and piece of plastic (I seem to spend a lot of time pointing a hairdryer at my car these days) but be warned about the rear badge, it is a real ballache to remove. I was unable to get even a piece of dental floss underneath it and had to resort to damaging the badge to remove it.
As it's now very dark outside and quite murky in the garage I'll get some pics up when we next have some sunshine...
 29 November 2013, 07:19 AM
#75
Scooby Regular
29 November 2013, 11:45 PM
#76
Scooby Regular
Thread Starter
 30 November 2013, 08:05 AM
#77
Scooby Regular

Join Date: Jun 2013
Location: N/A
Posts: 617
Likes: 0
Received 0 Likes
on
0 Posts
That is a very nice example you own there, the red overlays do transform the rear and make it look much better IMO.
When using avojdm.com it seems that the only available currencies are dollar or Yen... Is there any way to pay in pounds?
Finally what other places sell STI parts other than Japanparts and avojdm?
Regards,
Subaru Collector 555.
When using avojdm.com it seems that the only available currencies are dollar or Yen... Is there any way to pay in pounds?
Finally what other places sell STI parts other than Japanparts and avojdm?
Regards,
Subaru Collector 555.
Last edited by User 21721; 30 November 2013 at 08:22 AM.
30 November 2013, 10:40 PM
#78
Scooby Regular
Thread Starter

K2Gear Carbon Badge

Fitted R205 fender garnishes, and those carbon bumper side vents with Zunsport mesh. Thanks to Jason at TokyoRacer.co.uk for them
My advice is to use Japanparts for most things, they have a very competitive set of prices and a comprehensive list of parts. There is very little they don't sell that others do.
You can however try Nengun, RHDJapan, passwordjdm.com and rallysportdirect.com if you want to search for other parts that they may not have. It is also worth contacting MRT performance of Australia for rare JDM classic parts, or try a breaker such as japperformanceparts.co.uk, adgespeed. Lastly, Yahoo auctions of Japan and eBay of various regions can occasionally list rare JDM parts but you use them at your own risk - they are just as likely to pull a fast one as other well known auction websites.
Last edited by thenewgalaxy; 31 December 2013 at 12:46 AM.
 30 November 2013, 10:52 PM
#80
Scooby Regular
Join Date: Jun 2013
Location: N/A
Posts: 617
Likes: 0
Received 0 Likes
on
0 Posts
Unfortunately you have to pay in which ever currency they specify, and then it is calculated on the exchange rate of your credit card issuer at the time of purchase. I would not worry too much about that, it tends to fluctuate by small amounts over a few days - work out what it costs using xe.com and then budget for 20% VAT and add �20 here and there for import costs and handling fees by the courier.
My advice is to use Japanparts for most things, they have a very competitive set of prices and a comprehensive list of parts. There is very little they don't sell that others do.
You can however try Nengun, RHDJapan, passwordjdm.com and rallysportdirect.com if you want to search for other parts that they may not have. It is also worth contacting MRT performance of Australia for rare JDM classic parts, or try a breaker such as japperformanceparts.co.uk, adgespeed. Lastly, Yahoo auctions of Japan and eBay of various regions can occasionally list rare JDM parts but you use them at your own risk - they are just as likely to pull a fast one as other well known auction websites.
30 December 2013, 09:45 PM
#81
Scooby Regular
Thread Starter
Parked up at the Reebok today...
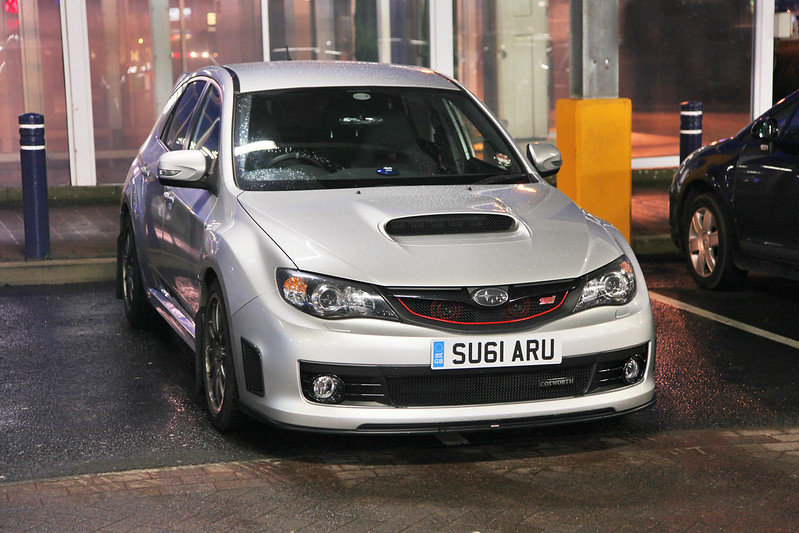
Turned my back for a minute and saw this next to mine!
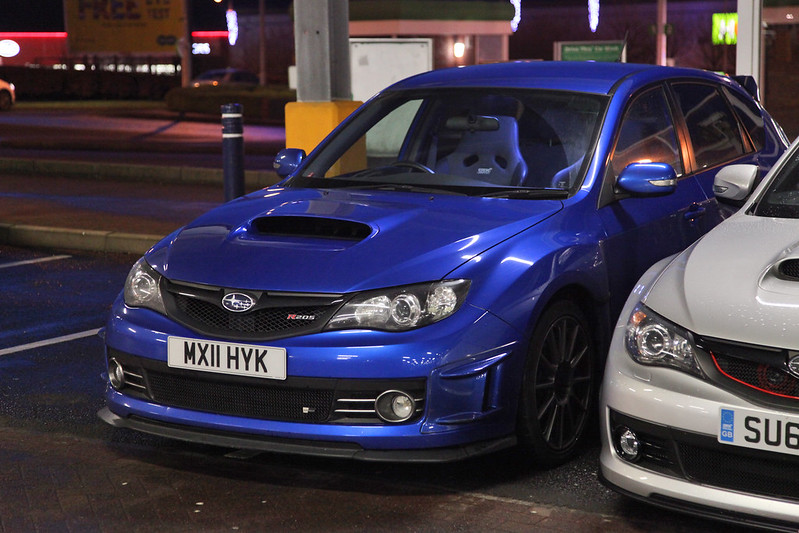
As a passer by summed it up best as "car ****"

Turned my back for a minute and saw this next to mine!
As a passer by summed it up best as "car ****"
30 December 2013, 09:56 PM
#83
Scooby Regular
Thread Starter
30 December 2013, 10:02 PM
#85
Scooby Regular
Thread Starter
http://www.japanparts.com/db/parts_d...=&SEARCH_page=
They're expensive but sweeeet
 30 December 2013, 10:16 PM
#86
These ones Rob, select the MY and chassis from the drop down.
http://www.japanparts.com/db/parts_d...=&SEARCH_page=
They're expensive but sweeeet
http://www.japanparts.com/db/parts_d...=&SEARCH_page=
They're expensive but sweeeet
will need to double check my front grille emblem is the same as the earlier front due to me face lifting to the later car.
30 December 2013, 10:20 PM
#87
Thanks Rob, I have actually sealed the unit with resin so I imagine it'll be okay. The problem I had really was that setting it too low would mean it'd get spray from the lower grille and I didn't want to fit it to any other structures. To put it up near the battery unfortunately would have been a lot more re-wiring work for me.
Okay, this is a really testing mod.
It's not intensely difficult, it just requires loads of patience and a steady hand.
An observation I made is that it is MUCH easier to place the overlays on a new light, and favourable to clean and use a clay bar on the lights before placing them if you do not have a factory fresh car (or new lights).
There are three options to these overlays that I've come across, either full red coating (just get red overlays nothing else needed), red with dark tint (just get these but I don't like the look of them at all) or red overlays with cutouts (require a replacement clear fog lens unit).
Placing the overlays on the hatch lenses is much easier than the curved rear side units.
What you need -
Recently barred lights or factory fresh car
Replacement driver side rear hatch lens unit with clear fog lens
Overlay kit (red vinyl, templates and squeegee) I got mine from IAG Performance in the USA following good reviews on the American sites...
http://www.iagperformance.com/shoppi...prod=150313RED
Some *****
Lots of patience
Wrench Set
Freshly washed hands, I mean really scrub them so there is no grease on them!
Washing up liquid
Hair dryer
Scalpel
So remove the light replacement hatches on the rear boot lid. Remove the lights by unscrewing. Remove the bootlid handle by pulling out and then remove the rear bootlid trim. This requires the ***** part because you have to pull really hard to remove it, yet you feel like you're going to break something by trying. Do not worry. First start at the top of the bootlid by removing the small rectangular section and then both vertical parts. Then you can remove the large rear section of trim from the base of the hatch. When I was pulling the bits off they made quite a loud crack with each tug - the plastic Subarus are made from is rather rigid and hard wearing!
Then remove the nuts from the edge of the light tabs, there are two on each at the edge of the boot lid on the most lateral aspect. Then look in through the holes in the boot lid metal to see if you can find the third nut holding them in medially.
I found the best way to remove the other nuts is to look through the area where the bootlid handle is and use a wrench like so. The lens then needs pulling out firmly.
For the rear side lenses it is simply a case of removing the two nuts you can see and then slotting out backwards.
Once slotted out you'll see they are still attached firmly by some wiring. Insert a small screwdriver in and lift gently, they'll part leaving no lights on the back of the car.
A boot light and some overlays, I put washing up liquid and water in an old dettol spray bottle so I could apply it more easily.
Pretty much everything I used. Be careful you don't have any contaminants nearby, these overlays would pick up dust, fingerprints, pet hair etc. I worked with the overlays on top of the waxed backing paper they came on to stop things sticking to them.
UK standard rear driver side unit with red fog lens and USDM with clear. You only need the USDM one if you want to do a cutout.
So spray some washing up liquid over the surface, make sure there isn't too much in otherwise it will be too foamy and cause residue under the vinyl.
Place the vinyl overlays and press down as firmly as you can.
No matter how hard you press (or evenly) you'll still get air bubbles. I found it best to move them towards the edges or even towards the middle of the unit where I'm going to remove the overlay for the cutout.
Use the squeegee to get a more even contact and work toward the edges if you can. Don't worry about scratching or scoring the surface too much, once it is stuck down it is not very apparent.
Gently heat with a hair dryer and then work the material towards the edges. It is worth remembering that the vinyl will shrink if you heat too quickly but if you work it at the same time it will expand and flow. It is very difficult to split or break the vinyl but quite easy to cause ridges, so I would recommend lubricating the layer by also spraying the overlays with washing up liquid. As you keep working, try and go from one end to the other and only go back to an earlier level to move air out. Try to fold over the edges but don't trim until you think you have finished.
The side lens units really need smoothing with a finger straight after heating, and repeated firm pressure can cause a fair bit of ache. I found it best to dip my finger in the washing up liquid water bowl after heating the overlay with the hairdryer and almost flowing it. The vinyl expands a fair bit when worked but contracts so be careful that you don't curve it round away from the contralateral side - it must be worked evenly both sides as you move along.
Ultimately this is the bit that needs patience, it is a real pain to work on if you don't have a factory fresh headlight and WHATEVER you do don't do this unless you have cleaned the clusters very thoroughly.
Unless you have a steadier hand than me I'd advise using these templates, or as a minimum drawing out the area you wish to cut first. I used a ruler to score the straight edges.
I'd recommend using a no.15 surgical blade as it is thin and you can accurately score the depth the thickness of the overlay. If you use a Stanley knife I fear you'd score too heavily into the light fitting underneath. Not a problem if you never plan to remove the overlays, but...
Peel off carefully. I'd recommend keeping the scalpel in the other hand to score the bits at the corners.
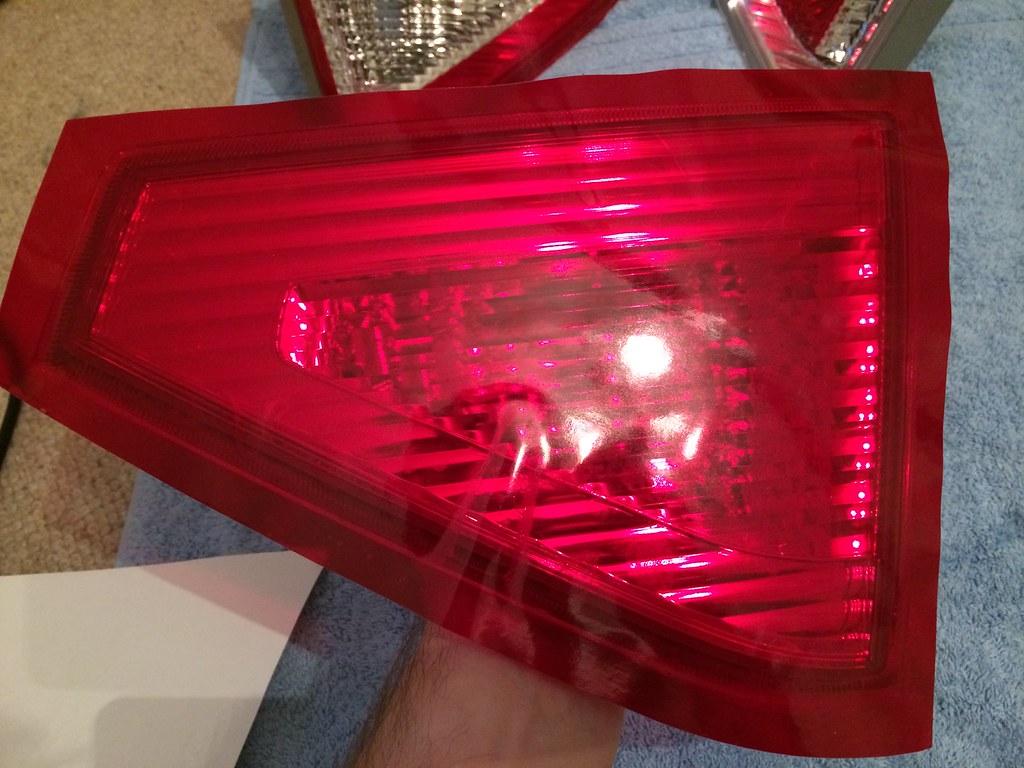
A seriously sweet-looking rear lens, yes I know I have just changed sides!
Some people will never appreciate the looks of the hatch but I personally couldn't stand the OEM "Lexarse" lights look, they were plain horrible. Especially on one people think I was daft enough to pay �50k for!
Much better!
And up close, wow I'm proud. This genuinely took me a long time to do and anyone wanting to do this needs patience. If not, get it done professionally because it is frustrating.
Okay, this is a really testing mod.
It's not intensely difficult, it just requires loads of patience and a steady hand.
An observation I made is that it is MUCH easier to place the overlays on a new light, and favourable to clean and use a clay bar on the lights before placing them if you do not have a factory fresh car (or new lights).
There are three options to these overlays that I've come across, either full red coating (just get red overlays nothing else needed), red with dark tint (just get these but I don't like the look of them at all) or red overlays with cutouts (require a replacement clear fog lens unit).
Placing the overlays on the hatch lenses is much easier than the curved rear side units.
What you need -
Recently barred lights or factory fresh car
Replacement driver side rear hatch lens unit with clear fog lens
Overlay kit (red vinyl, templates and squeegee) I got mine from IAG Performance in the USA following good reviews on the American sites...
http://www.iagperformance.com/shoppi...prod=150313RED
Some *****
Lots of patience
Wrench Set
Freshly washed hands, I mean really scrub them so there is no grease on them!
Washing up liquid
Hair dryer
Scalpel
So remove the light replacement hatches on the rear boot lid. Remove the lights by unscrewing. Remove the bootlid handle by pulling out and then remove the rear bootlid trim. This requires the ***** part because you have to pull really hard to remove it, yet you feel like you're going to break something by trying. Do not worry. First start at the top of the bootlid by removing the small rectangular section and then both vertical parts. Then you can remove the large rear section of trim from the base of the hatch. When I was pulling the bits off they made quite a loud crack with each tug - the plastic Subarus are made from is rather rigid and hard wearing!
Then remove the nuts from the edge of the light tabs, there are two on each at the edge of the boot lid on the most lateral aspect. Then look in through the holes in the boot lid metal to see if you can find the third nut holding them in medially.
I found the best way to remove the other nuts is to look through the area where the bootlid handle is and use a wrench like so. The lens then needs pulling out firmly.
For the rear side lenses it is simply a case of removing the two nuts you can see and then slotting out backwards.
Once slotted out you'll see they are still attached firmly by some wiring. Insert a small screwdriver in and lift gently, they'll part leaving no lights on the back of the car.
A boot light and some overlays, I put washing up liquid and water in an old dettol spray bottle so I could apply it more easily.
Pretty much everything I used. Be careful you don't have any contaminants nearby, these overlays would pick up dust, fingerprints, pet hair etc. I worked with the overlays on top of the waxed backing paper they came on to stop things sticking to them.
UK standard rear driver side unit with red fog lens and USDM with clear. You only need the USDM one if you want to do a cutout.
So spray some washing up liquid over the surface, make sure there isn't too much in otherwise it will be too foamy and cause residue under the vinyl.
Place the vinyl overlays and press down as firmly as you can.
No matter how hard you press (or evenly) you'll still get air bubbles. I found it best to move them towards the edges or even towards the middle of the unit where I'm going to remove the overlay for the cutout.
Use the squeegee to get a more even contact and work toward the edges if you can. Don't worry about scratching or scoring the surface too much, once it is stuck down it is not very apparent.
Gently heat with a hair dryer and then work the material towards the edges. It is worth remembering that the vinyl will shrink if you heat too quickly but if you work it at the same time it will expand and flow. It is very difficult to split or break the vinyl but quite easy to cause ridges, so I would recommend lubricating the layer by also spraying the overlays with washing up liquid. As you keep working, try and go from one end to the other and only go back to an earlier level to move air out. Try to fold over the edges but don't trim until you think you have finished.
The side lens units really need smoothing with a finger straight after heating, and repeated firm pressure can cause a fair bit of ache. I found it best to dip my finger in the washing up liquid water bowl after heating the overlay with the hairdryer and almost flowing it. The vinyl expands a fair bit when worked but contracts so be careful that you don't curve it round away from the contralateral side - it must be worked evenly both sides as you move along.
Ultimately this is the bit that needs patience, it is a real pain to work on if you don't have a factory fresh headlight and WHATEVER you do don't do this unless you have cleaned the clusters very thoroughly.
Unless you have a steadier hand than me I'd advise using these templates, or as a minimum drawing out the area you wish to cut first. I used a ruler to score the straight edges.
I'd recommend using a no.15 surgical blade as it is thin and you can accurately score the depth the thickness of the overlay. If you use a Stanley knife I fear you'd score too heavily into the light fitting underneath. Not a problem if you never plan to remove the overlays, but...
Peel off carefully. I'd recommend keeping the scalpel in the other hand to score the bits at the corners.
A seriously sweet-looking rear lens, yes I know I have just changed sides!
Some people will never appreciate the looks of the hatch but I personally couldn't stand the OEM "Lexarse" lights look, they were plain horrible. Especially on one people think I was daft enough to pay �50k for!
Much better!
And up close, wow I'm proud. This genuinely took me a long time to do and anyone wanting to do this needs patience. If not, get it done professionally because it is frustrating.
Want that look on our hatch, also hate the lexasre looking light clusters. Could be tempted on giving this a go. Is there an option for just buying the JDM clusters or are they silly money?
30 December 2013, 10:33 PM
#89
Scooby Regular
Thread Starter
The JDM clusters are actually the same as the USDM ones, all the rear lenses are transparent (here's an R205 standard rear end).

To get the red look you must use an overlay; the only coloured unit Subaru make is the one that we have here with the red triangle red area for the foglight. There are no aftermarket red lenses that I am aware you can get hold of unfortunately.
I bought mine from IAG Performance in the states, the chaps on NASIOC reckon those are the best ones. There are three options; full red overlays, full smoke overlays or the red with cutouts.
It's a ballache to do properly but you may be able to find a detailer or someone with an artistic hand who'll do it for you if you lack the patience.
Yep, absolutely top guy too!