Facelift classic FMIC fitting question
#1
Thread Starter
Scooby Regular
iTrader: (9)
Joined: Aug 2010
Posts: 1,189
Likes: 0
From: Stourbridge, West Midlands
Sorry in advance If this had been done to death but the only guide I can find on here is for a pre-facelift. Does anyone know how much of the bumper needs to be cut out. Not in actual measurements but looking at my HDI Gt spec I doubt it's going to fit between the rad and bumper.
#2
#3
Thread Starter
Scooby Regular
iTrader: (9)
Joined: Aug 2010
Posts: 1,189
Likes: 0
From: Stourbridge, West Midlands
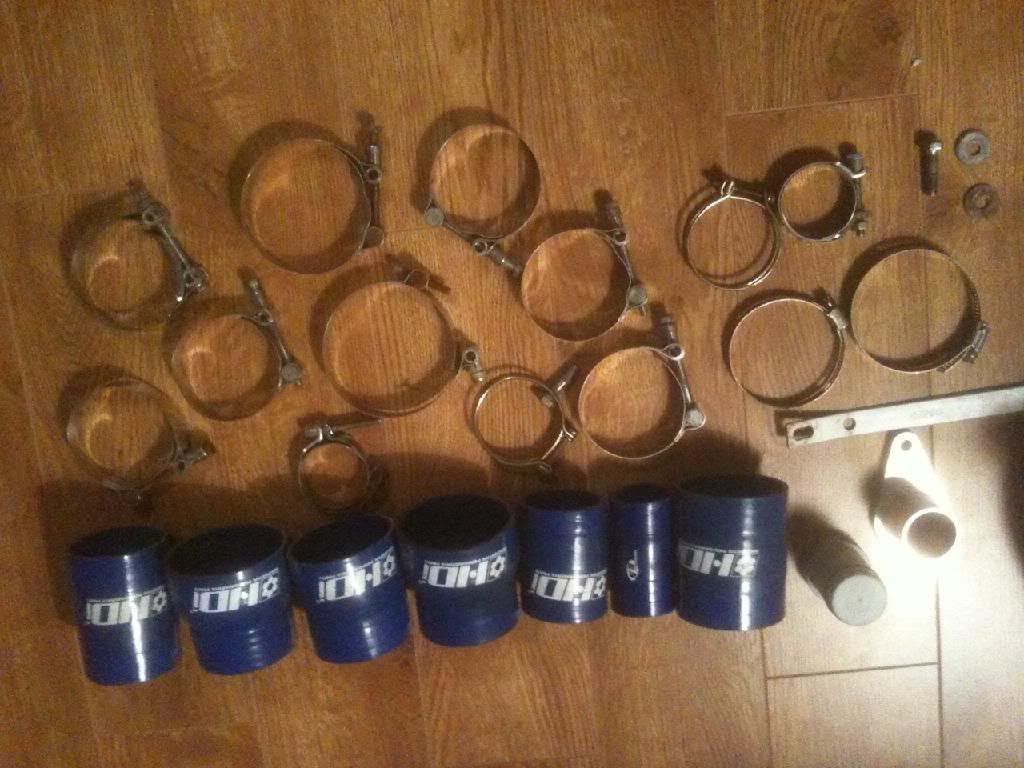
Thanks but I've seen that one and it's for a pre facelift. I know the guide will tell me everything apart from how much of the bumper for a facelift needs to be cut. I'm hoping that the bottom of the bumper in the middle won't have to be cut with just the bottom of the FMIC exposed to the ground? Also does anyone know what the little flat bar is for on the right of this pic? 

#4
Firstly the core sits level with the bumper and is exposed. I have never seen an instance where the bumper wraps underneath it.
That bar you mentioned is usually where the core is fixed to either the bumper or elsewhere as a stay
The cutting happens usually in four places depending on model of car and model of FMIC
1. wing and entry into engine bay. Most people find the entry hole that is there already needs to be enlarged
2. Sometimes the sides of the engine bay down where the pipes bend for the return up through the engine bay past the battery and into manifold need trimming
3. Bumper at the middle needs trimming to allow the depth of the core to sit correctly
4. Fog lights and mounting points. If you are lucky you can get away with retaining these
Last edited by SwissTony; 02 April 2014 at 04:13 PM.
#5
Thread Starter
Scooby Regular
iTrader: (9)
Joined: Aug 2010
Posts: 1,189
Likes: 0
From: Stourbridge, West Midlands
Firstly the core sits level with the bumper and is exposed. I have never seen an instance where the bumper wraps underneath it. That bar you mentioned is usually where the core is fixed to either the bumper or elsewhere as a stay The cutting happens usually in four places depending on model of car and model of FMIC 1. wing and entry into engine bay. Most people find the entry hole that is there already needs to be enlarged 2. Sometimes the sides of the engine bay down where the pipes bend for the return up through the engine bay past the battery and into manifold need trimming 3. Bumper at the middle needs trimming to allow the depth of the core to sit correctly 4. Fog lights and mounting points. If you are lucky you can get away with retaining these
#6
Trending Topics
Thread
Thread Starter
Forum
Replies
Last Post
KOEScoob
ScoobyNet General
6
17 September 2015 04:51 PM
evolvedgsr
Lighting and Other Electrical
0
14 September 2015 11:31 PM


