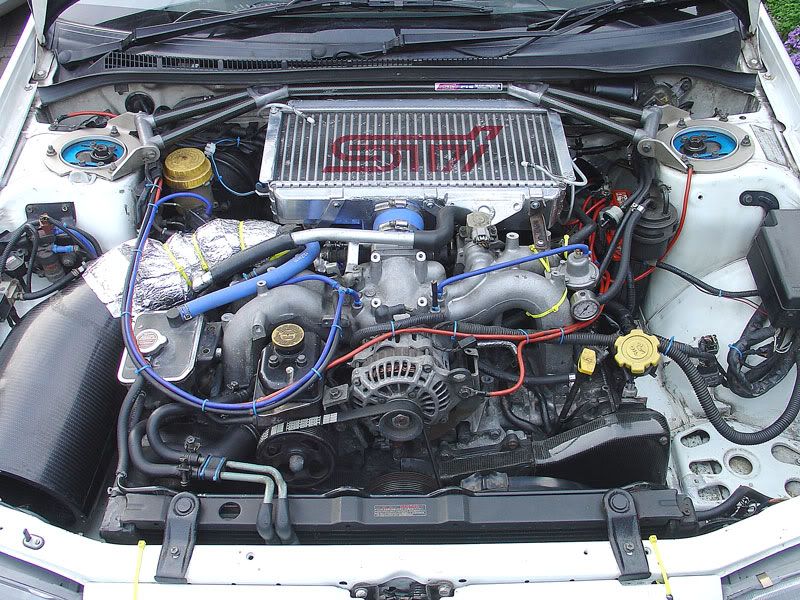
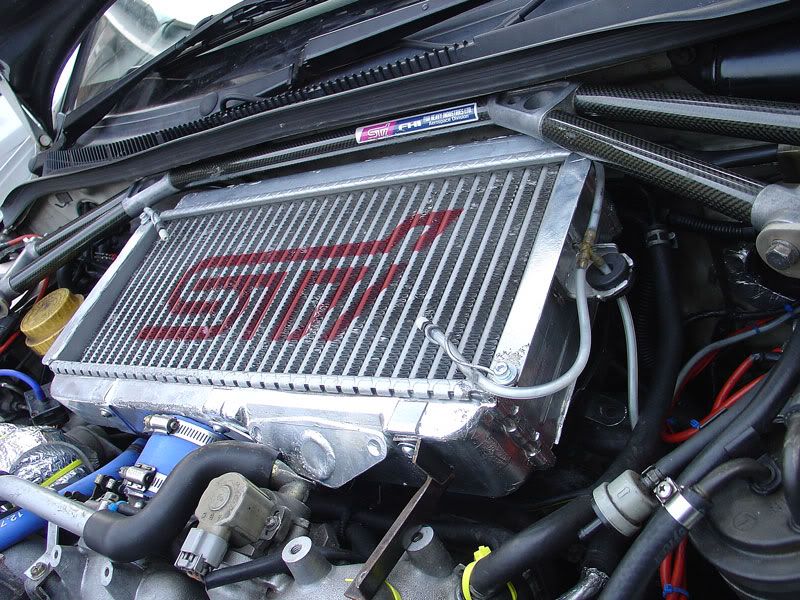
STi 8 TMIC into classic WRX - how?
#1
I've searched for a definitive answer to this but couldn't really get the info I needed, so the question is: how to fit an STi 8 top mount I/C onto my 98 WRX?
Everything I can dig up points to the STi 8 being about as good a TMIC upgrade as you can get on a Classic (for reasonable money) and adequate to handle power in the low 300's. Before anyone says it, I don't want a front mount and want to keep my Scooby looking standard up front. I simply want to be able to get a little more power mapped in on my current VF35.
What exactly do I need to do the job properly, and how is the conversion done? Is the entire STi8 scoop/undertray needed or will I need an aftermarket 'STi 8 style' scoop to fit my classic facelift bonnet? Presumably the STi 8 undertray has a larger hole otherwise it's pointless fitting a larger I/C? What will the STi8 I/C foul on in the engine bay? Just the clutch fluid reservoir? Can the existing support arms under the I/C be used, can they be modded to work, or do I need STi 8 support arms? Will my 98 pipework fit the new I/C or will I need to get new pipework as well?
Any help much appreciated. Cheers!
#6
Originally Posted by IWANASCOOBY
What sort of BHP increase do you get from this mod?
It's not about BHP but increased safety and potential to support further mods.
My STi 8 cooler is still in the garage. I've got the left hand bracket, just need to order some Samco's for the Turbo-Cooler and DV re-circ.
#7
Scott,
I bought my turbo to IC hose from what was www.j-w-racing.co.uk.
They ordered one from samco that wa 51mm ID with 90deg bend. Now the standard leg length is not enough. I asked them to add 2" to each leg making it about £20 in total, inc postage.
For a few IC pics have a look through here. No particular order. There are quite a few from Grahams (911's) thread.
http://www.zen24039.zen.co.uk/Scooby%20Pics/ICZEN/
Trending Topics
#8
If I were to do this mod again I would choose to close the bov hole on the STI8 intercooler and drill a similar new hole from the top-right side of the intercooler, pipe to the bov. I dont know why I didnt make it like this, it would be much easier. Less welding, cutting, time etc...
#10
Former Sponsor
iTrader: (234)
Joined: Jan 2003
Posts: 14,406
Likes: 0
From: Over 500ft/lbs of torque @ just 1.1bar
Originally Posted by Welloilbeefhooked
Ive done the same to my MY98WRX.
Let me know if you need to know anything or need pics.

Let me know if you need to know anything or need pics.

Do you have any close ups and details of how you made the undertray?
I have sticky foam on mine at the moment but it seems to blow all over the place.
Cheers,
Bob
#12
I cant get a strut brace on now. I think my IC is angled up at the back more than yours. Where is the DV outlet?
Also, do you have a cranking handle at the front?
Also, do you have a cranking handle at the front?
Last edited by Welloilbeefhooked; 03 May 2006 at 01:02 PM.
#13
\m/ ^_^ \m/
Joined: Dec 2001
Posts: 36,816
Likes: 0
From: 2010 Time Attack Club Pro Champion - Powered by ScoobyClinic
there isn't a DV outlet  mine was angled up like yours due to the height of the clutch res., i just cut it down more to make the strut brace fit
 mine was angled up like yours due to the height of the clutch res., i just cut it down more to make the strut brace fit
#14
Originally Posted by Welloilbeefhooked
Scott,
I bought my turbo to IC hose from what was www.j-w-racing.co.uk.
They ordered one from samco that wa 51mm ID with 90deg bend. Now the standard leg length is not enough. I asked them to add 2" to each leg making it about £20 in total, inc postage.
For a few IC pics have a look through here. No particular order. There are quite a few from Grahams (911's) thread.
http://www.zen24039.zen.co.uk/Scooby%20Pics/ICZEN/
I bought my turbo to IC hose from what was www.j-w-racing.co.uk.
They ordered one from samco that wa 51mm ID with 90deg bend. Now the standard leg length is not enough. I asked them to add 2" to each leg making it about £20 in total, inc postage.
For a few IC pics have a look through here. No particular order. There are quite a few from Grahams (911's) thread.
http://www.zen24039.zen.co.uk/Scooby%20Pics/ICZEN/
Are you sure J-W-Racing supplied a genuine samco i.e was it marked up as such ??
According to the Samco website, the leg length is 102mm.

Last edited by Scott.T; 03 May 2006 at 05:15 PM.
#15
The cooler/turbo hose has to be the right length and it is difficult to get the right combination. Measure 3 times, buy once.
The undertray i used was the stock Sti v3 cut open as far as i could go.
The deep foam surround I made sealed great.
I removed the strut brace as no way would it fit and i wanted a good seal of the tray/TMIC so it went.
Felt no difference in the handling of the car....bling imho.
The Sti V8 TMIC is a great mod and superb on the road. Kev will be the best judge of performance on the track (rather than drag strip).
Overall a good mod well worth doing and finishes up really neat if you pay attention to the details.
My car ran 407 bhp on Well Lane rollers and 380 bhp on PowerStation's rollers using the V8.

Graham
The undertray i used was the stock Sti v3 cut open as far as i could go.
The deep foam surround I made sealed great.
I removed the strut brace as no way would it fit and i wanted a good seal of the tray/TMIC so it went.
Felt no difference in the handling of the car....bling imho.
The Sti V8 TMIC is a great mod and superb on the road. Kev will be the best judge of performance on the track (rather than drag strip).
Overall a good mod well worth doing and finishes up really neat if you pay attention to the details.
My car ran 407 bhp on Well Lane rollers and 380 bhp on PowerStation's rollers using the V8.

Graham
#18
Scooby Regular
Joined: Nov 2004
Posts: 1,959
Likes: 0
From: In a 405 BHP/360 ft/lb P1 with SN superstar Sonic dog at my side!
I did not bother messing with hoses, i just welded an extension on so you can use the o.e one.
http://img.photobucket.com/albums/v3...ark/icmod2.jpg
Undertray i made. I put the V8 seal on.
http://img.photobucket.com/albums/v3...k/DSC00404.jpg
http://img.photobucket.com/albums/v3...k/DSC00405.jpg
http://img.photobucket.com/albums/v3...k/DSC00406.jpg
Made a splitter arrangement to fit in a big scoop.
http://img.photobucket.com/albums/v3...k/DSC00427.jpg
http://img.photobucket.com/albums/v3...k/DSC00425.jpg
http://img.photobucket.com/albums/v3...k/DSC00429.jpg
http://img.photobucket.com/albums/v3...k/DSC00428.jpg
I changed the sealing arrangement after a while. Made a flat surround that bolts on the top of the intercooler and then attached foam to the underside of the undertray as i did not like seeing foam in the engine bay
http://img.photobucket.com/albums/v3...rk/bigeng2.jpg
Then after all this work it was not realy up to my spec so i put a FMIC on. I just fitted this lot to a version4 typeR last weekend and i took pics of what i did with the cutting and welding of the DV take off but not downloaded them yet. I also took pics of the sealing arrangement on the undertray if you are interested?
beware of high boost, as mine split open at 1.5 bar
http://img.photobucket.com/albums/v331/p1mark/ic2.jpg
#20
Scooby Regular
Joined: Nov 2004
Posts: 1,959
Likes: 0
From: In a 405 BHP/360 ft/lb P1 with SN superstar Sonic dog at my side!
Scott.
Sorry mate i have neither the time nor the inclination at the minute as big DIY project on at home.
Wont be clear till autumn.
The pics are there for ideas to help peeps - Not for me to make loads more
Sorry mate i have neither the time nor the inclination at the minute as big DIY project on at home.
Wont be clear till autumn.
The pics are there for ideas to help peeps - Not for me to make loads more

#21
Ok, here are a couple of pics of mine. Not very nice to look at but the splitter does the job ok. I removed the scoop first and refitted the original undertray that I then cut out to match the size of the IC. The skirt is made of sheet steel that I cut and welded into place. Its a bit of trial and error as it depends on exactly where the IC sits on a particular car. They are all roughly the same, but steel hitting the IC is a nasty sound and doesnt help any.
Anyway.......


Anyway.......
Last edited by Welloilbeefhooked; 04 May 2006 at 03:11 PM.
#22
Originally Posted by Scott.T
I thought the regular 51mm Samco does the Job.
Are you sure J-W-Racing supplied a genuine samco i.e was it marked up as such ??
According to the Samco website, the leg length is 102mm.

Are you sure J-W-Racing supplied a genuine samco i.e was it marked up as such ??
According to the Samco website, the leg length is 102mm.

Yes they supplied it. They had samco make it to order. Speak to Jason.
Trust me, if you dont do what mark did, then you need a longer than standard hose. Or you could cut the standard one and use a tube to bridge the gap. This would, although it would be very minor, restrict flow.
#23
Scooby Regular
Joined: Nov 2004
Posts: 1,959
Likes: 0
From: In a 405 BHP/360 ft/lb P1 with SN superstar Sonic dog at my side!
Originally Posted by Welloilbeefhooked
Yes they supplied it. They had samco make it to order. Speak to Jason.
Trust me, if you dont do what mark did, then you need a longer than standard hose. Or you could cut the standard one and use a tube to bridge the gap. This would, although it would be very minor, restrict flow.
Trust me, if you dont do what mark did, then you need a longer than standard hose. Or you could cut the standard one and use a tube to bridge the gap. This would, although it would be very minor, restrict flow.
Longer hose or extension piece is the way to go.
#24
Originally Posted by p1mark
#26
Scooby Regular
Joined: Nov 2004
Posts: 1,959
Likes: 0
From: In a 405 BHP/360 ft/lb P1 with SN superstar Sonic dog at my side!
Thank you very much Graham-thats most kind of you sir
Heres the missing pics of the install i did on the type R (i.e same as WRX98 manifold) at the weekend.
DV take off chopped out, new plate and spigot welded on. Its look smooth cos i have fibreglassed the top weld of the plate.
http://img.photobucket.com/albums/v331/p1mark/tay3.jpg
The second 2 pics show the foam sealant on the undertray (same undertray as pictured in my earlier post). its 30mm thick, then carefully and neatlt taped up with duct tape to stop it flying off, but not too tight as to compress the foam. this seals perfectly on the surround around the IC.
http://img.photobucket.com/albums/v331/p1mark/tay6.jpg
http://img.photobucket.com/albums/v331/p1mark/tay5.jpg
http://img.photobucket.com/albums/v331/p1mark/tay1.jpg
#27
LOL all this craftsmanship is giving me the *******! I can wield a tool kit but welding is not in my repertoire. A bit of brazing is about as far as I can go.
I'll have to put in the hours and trawl through your thread Graham. So far I'm up to page 2 and it looks like a serious 'mission', to say the least, particularly sorting out the dump valve position.
I'll have to put in the hours and trawl through your thread Graham. So far I'm up to page 2 and it looks like a serious 'mission', to say the least, particularly sorting out the dump valve position.
#29
can some one give me the samco part number i rang jason at jw-racing & he told me he needed a part number, he said all samco's will come with a part number embossed in them, also if you wanted one ordering special its a 3-4 week turn around? i've been messing with this sti8 tmic for 3 weeks now so if anyone can help please post up a part number & somewhere that has them in stock many thanks steve


