
Going to attempt changing clutch and cambelt tomorrow!
 17 June 2013, 07:10 PM
#1
Scooby Regular
Thread Starter
iTrader: (2)
Join Date: Aug 2006
Location: UK
Posts: 263
Likes: 0
Received 0 Likes
on
0 Posts
Clutch has started slipping on my 1997 uk turbo so it's been parked up for a few weeks. Going to be doing everything on the floor in the driveway so as the cambelt was last changed at 62k (on 107k now) I'm going to do both at the same time.

I've got a few other little jobs to do as well, I'd like to change the spark plugs, I've got a very rattly turbo heatshield I want to get rid of but can't get it out in its current situation and I've got a leaking turbo/downpipe gasket. The fact I've got an engine crane and I'm doing it on the floor makes me think it'd be easier to lift the engine out and do everything at the same time.
I've just got a Dayco timing belt and Exedy OEM clutch kit at the moment, with the belt off I'm going to have a good look at all the pulleys/tensioners and bearings and replace anything that looks/feels suspect. Using my motorbike as a daily driver at the moment so it doesn't matter if I take my time doing everything. Any suggestions or things I need to bear in mind before I start tomorrow? Already found out about the clutch pin that needs to come out before splitting the engine and box. Other than that all looks fairly straightforward, though I'm not looking forward to trying to time the engine back up with the new belt on
Wish me luck! I'll take a few pictures as I go
 17 June 2013, 07:18 PM
#2
Scooby Regular
iTrader: (2)
Join Date: Jan 2004
Location: Hertfordshire
Posts: 4,312
Likes: 0
Received 0 Likes
on
0 Posts
Have you decided which way to do it. As your doing it on the ground id reccommend pulling the engine out the top to do the clutch rather than the box out the bottom. you can then do everything you need to while the engine is put the car. Engine can be out in around 2hrs
17 June 2013, 07:22 PM
#4
Scooby Regular
Thread Starter
iTrader: (2)
Join Date: Aug 2006
Location: UK
Posts: 263
Likes: 0
Received 0 Likes
on
0 Posts
Yep I'm going to lift the engine out rather than scrabble about on the floor disconnecting driveshafts and whatnot. Means I can give the motor a good look over once it's swinging from the crane and fix the issues I already know about plus anything else I find. I think I might have a minor coolant leak as well so it'd be good to see if I can see the source of that too.
2 hours would be a good time to get the engine out, we'll see how it goes!
2 hours would be a good time to get the engine out, we'll see how it goes!
17 June 2013, 07:44 PM
#5

Yep, agree with the engine out route, by far the easiest way to do what your after doing, as a DIY er on the drive.
I did it the first time in around 4hrs with a load of faffing and taking off loads that did not need to come off, just take your time and it's easy.
I did it the first time in around 4hrs with a load of faffing and taking off loads that did not need to come off, just take your time and it's easy.
17 June 2013, 07:51 PM
#6
Scooby Regular
Thread Starter
iTrader: (2)
Join Date: Aug 2006
Location: UK
Posts: 263
Likes: 0
Received 0 Likes
on
0 Posts
Is that four hours out and back in or just 4 hours to get it out? If it's the former I could have everything done in a day which would be nice, we'll wait and see though
17 June 2013, 08:41 PM
#7
Best laid plans mate taken mine out with my dad couple of times in the past if you have all the tools etc to hand what you need then you can get it out in 2 hours yes but I wouldt be in a rush as always remember how you did it as a lot harder placing it back in than taking out especially trying to locate them baXxxxd gear box lugs lol
Trending Topics
17 June 2013, 09:09 PM
#8

People who really know their way around a Scooby can lift an engine out in under an hour. For the purpose of doing it at home as a DIY job you should allow a full day & don't rush it atall.
 17 June 2013, 09:59 PM
#10
Scooby Regular
I've not had any probs with dayco belts in the past but I think the majority of kits would be gates anyway if bought from reputable seller, import car parts are always competitive with quality parts.
Mick
Mick
17 June 2013, 10:33 PM
#11
Scooby Regular
iTrader: (5)
Join Date: Aug 2009
Location: Hertfordshire
Posts: 663
Likes: 0
Received 0 Likes
on
0 Posts
Timing back up is easy, if you have a service manual to hand give it a few reads and all will become clear. Only thing to worry about is when aligning the cam wheels for the new belt don't turn them the wrong way.
Apart from that just line it up with the marks on the covers.
A very thin knife or screwdriver will help in separating the box from engine, it can be a ****!
Apart from that just line it up with the marks on the covers.
A very thin knife or screwdriver will help in separating the box from engine, it can be a ****!
18 June 2013, 04:50 AM
#12

Wiggle it and up and down on the engine crane a little bit at a time will break the seal, I use a plastic trim tool for the job of opening the gap along with some patience, and yes it can be an **** but just take your time.
It took 4 hrs to get it out, but like I said, I was faffing and took just about everything off the engine, some of which I also put back on.
I'd do it in 2hrs now STILL taking my time, "Haste makes Waste"


 18 June 2013, 08:54 AM
#15
Scooby Regular
iTrader: (1)

Join Date: Mar 2013
Location: Wilts
Posts: 1,123
Likes: 0
Received 0 Likes
on
0 Posts
Shoot me down for this, i have read that separating the engine and box can be a right pain in the ****. so just reading this i thought maybe remove all bolts etc from box to engine and then pull the fuel pump fuse and turn the engine over?
will that vibrate it enough to separate?
id probably do it the old fashioned way with big mallet if i was doing it, but just an idea lol
will that vibrate it enough to separate?
id probably do it the old fashioned way with big mallet if i was doing it, but just an idea lol
18 June 2013, 12:28 PM
#16
Scooby Regular
iTrader: (5)
Join Date: Aug 2009
Location: Hertfordshire
Posts: 663
Likes: 0
Received 0 Likes
on
0 Posts
Sorry mate but that's not good advice, Don't stick a screwdriver in there.
Wiggle it and up and down on the engine crane a little bit at a time will break the seal, I use a plastic trim tool for the job of opening the gap along with some patience, and yes it can be an **** but just take your time.
It took 4 hrs to get it out, but like I said, I was faffing and took just about everything off the engine, some of which I also put back on.
I'd do it in 2hrs now STILL taking my time, "Haste makes Waste"
I do agree that smashing a screwdriver down there and damaging the casings is a bad idea because it looks terrible, but obviously getting a very thin screwdriver or knife as a starting point works well for me with no damage at all.
What I actually use is some sort of painting spatula with a 4-5 inch super thin blade... but no idea what its proper name is so can't advise that.
 18 June 2013, 08:07 PM
#18
Scooby Regular
Thread Starter
iTrader: (2)
Join Date: Aug 2006
Location: UK
Posts: 263
Likes: 0
Received 0 Likes
on
0 Posts
Yep, a crack opened up with a bit of a wiggle but it was stuck on solid so needed some careful jimmying all the way round with a sharp pry bar to get it off in the end. I didn't realise the two lower studs were about a foot long, had to pull the block forward until it was nearly stuffed in the aircon rad before it was free enough to lift up!
Took me about 3 hours to get the engine out, with plenty of tea breaks, headscratching and looking round in the garage for tools, could probably do it quicker if I was more organised.
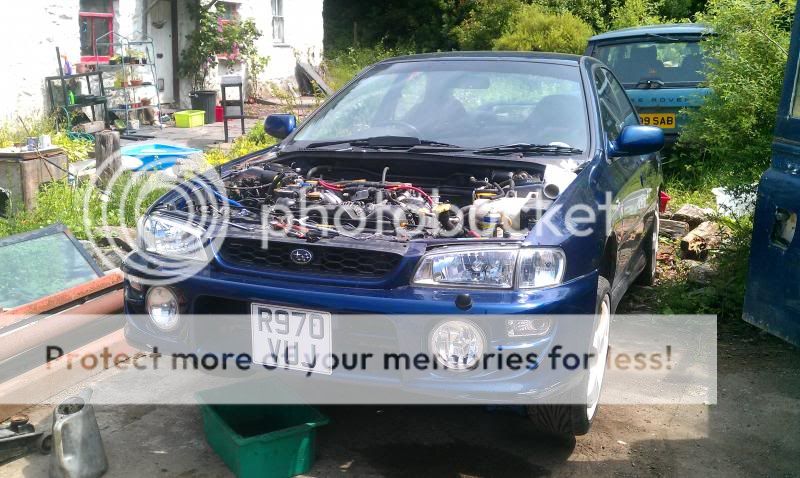
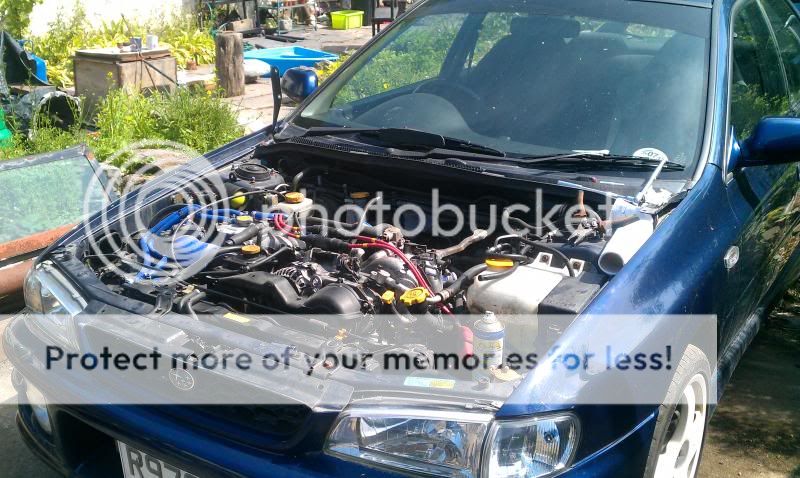
Anyway, a few pictures. Starting to get everything off the engine that I thought would be in the way:
Think I may have found the reason my coolant has been going down slightly, definitely looks like the sort of corrosion coolant creates by the colour and it was damp. Bit gutted as I really wanted to replace it with an alloy rad but they start at �120 for ebay specials or a Japspeed one if the group buy is still going, but a standard pattern part is �40 on the bay. No brainer really, if you haven't guessed by now this is my effort to disprove the myth that you can't run a Scooby on a shoestring budget

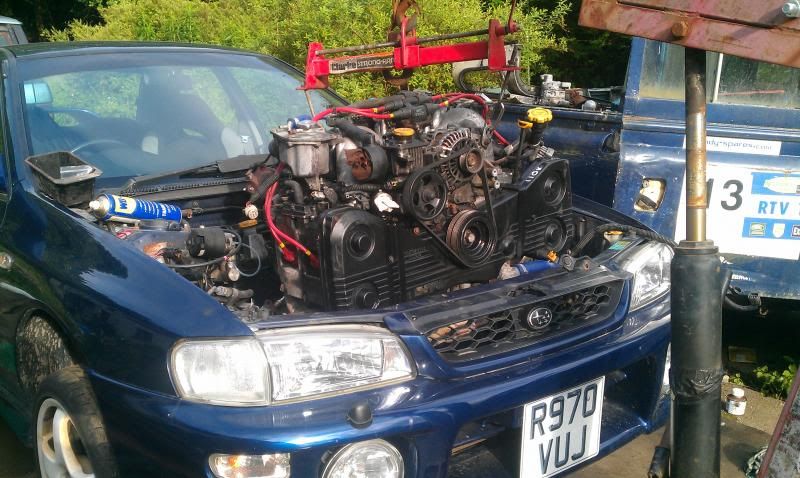
Engine on the way out:

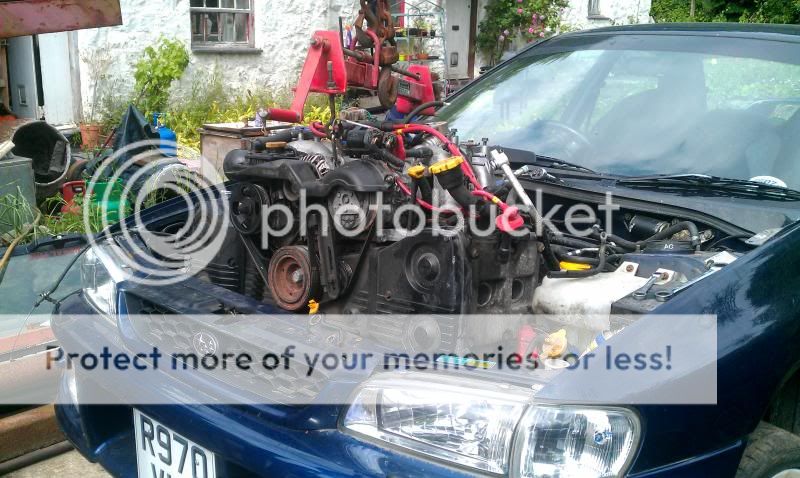

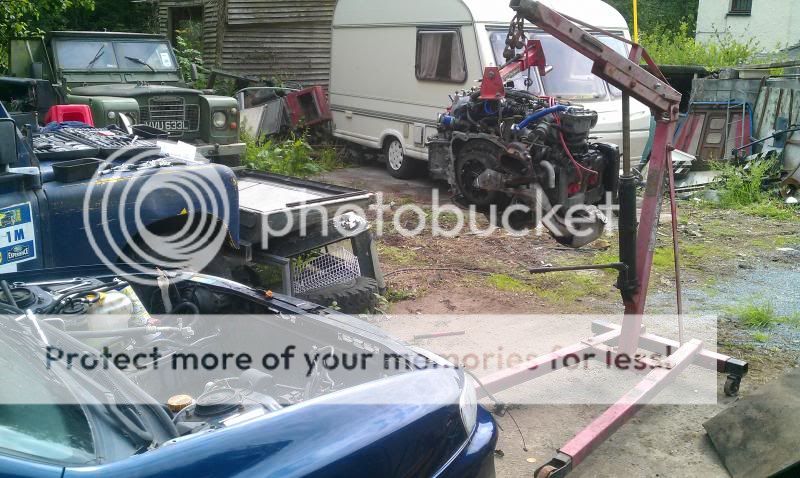
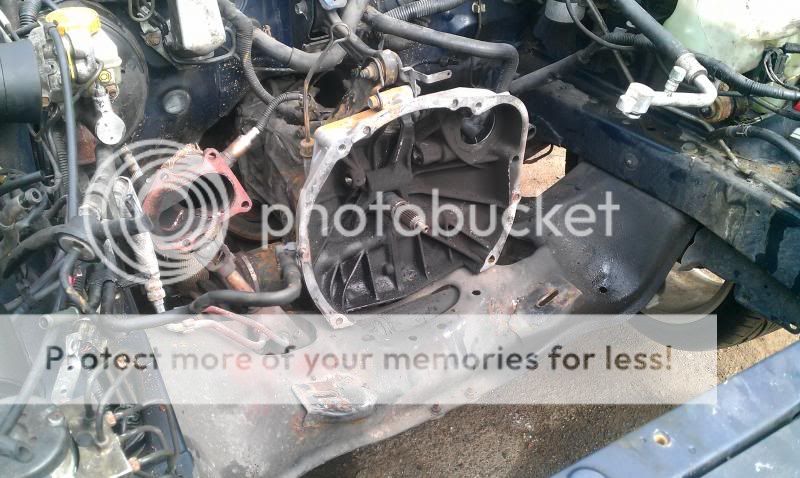
Leaving a big flat four shaped hole:
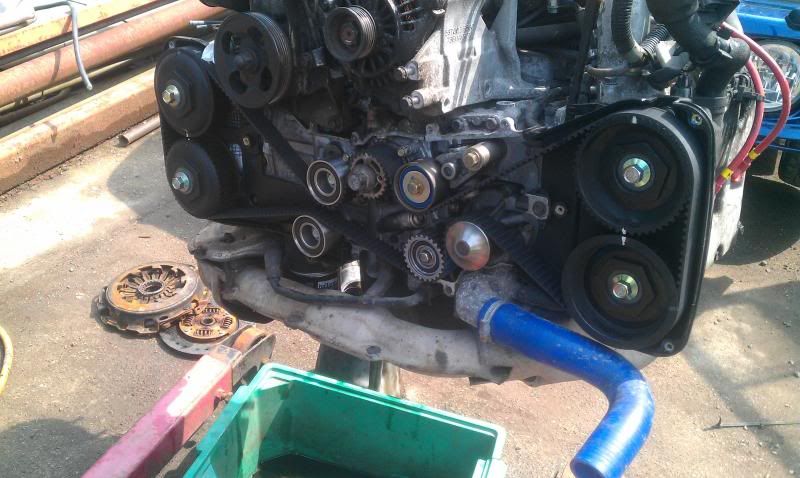
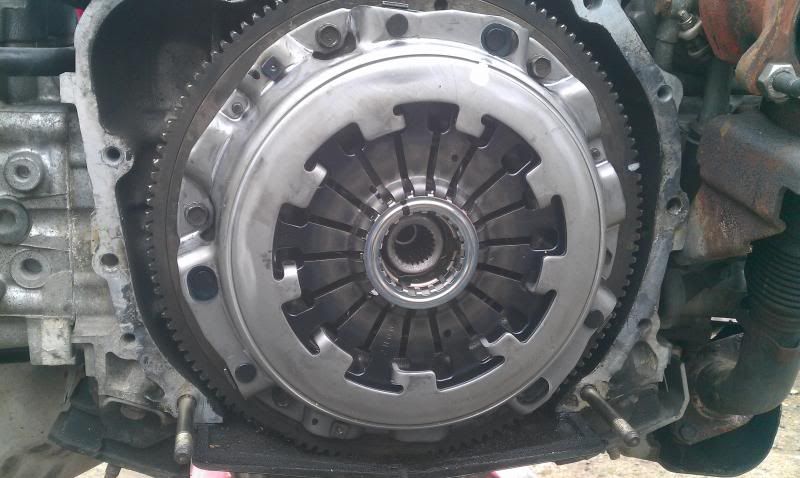
And the offending component. Got my money's worth out of this one! This was stamped as an Exedy pressure and friction plate, I'm assuming that means it wasn't the original clutch and the car's now on it's third one? Nice to know it's had an easy life! 

Started tackling a few other jobs I wanted to do like the rattling up pipe heatshield that's been driving me nuts for months, I couldn't get to it at all with the engine in the car but with it out two seconds with the grinder and off it came:
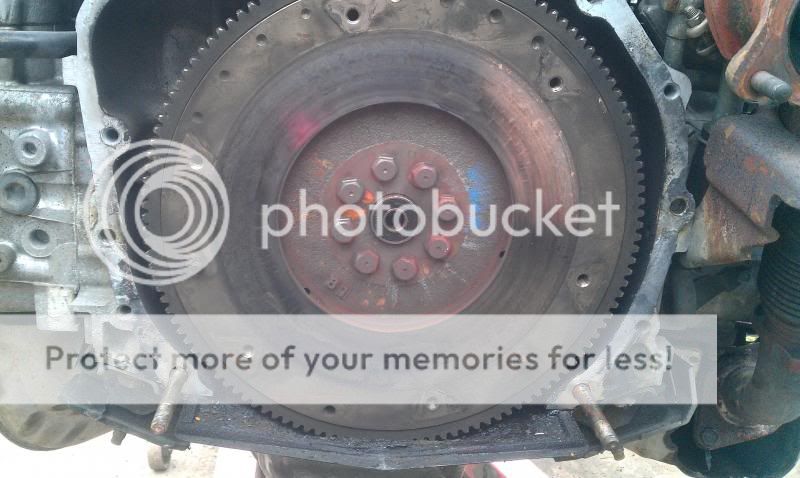
Then I thought I'd have a closer look at the flywheel to check it's alright. Not too sure in all honesty, it feels nice and smooth running a finger over it, but there's two definite marks which I'm guessing are heatspots, and also some signs of what I think might be hairline cracks/fissures. What do we think?

As the shopping list for this has already exceeded my next few paydays this is definitely going to be a longer term project rather than the turnaround in a few days I was hoping for. As well as the suspect flywheel there's also oily gunge in the bellhousing and around the bottom of the flywheel so I'm going to change the rear crank seal while the engines out, it'd be a shame not to.
Took me about 3 hours to get the engine out, with plenty of tea breaks, headscratching and looking round in the garage for tools, could probably do it quicker if I was more organised.
Anyway, a few pictures. Starting to get everything off the engine that I thought would be in the way:
Think I may have found the reason my coolant has been going down slightly, definitely looks like the sort of corrosion coolant creates by the colour and it was damp. Bit gutted as I really wanted to replace it with an alloy rad but they start at �120 for ebay specials or a Japspeed one if the group buy is still going, but a standard pattern part is �40 on the bay. No brainer really, if you haven't guessed by now this is my effort to disprove the myth that you can't run a Scooby on a shoestring budget
Engine on the way out:
Leaving a big flat four shaped hole:
And the offending component. Got my money's worth out of this one!
This was stamped as an Exedy pressure and friction plate, I'm assuming that means it wasn't the original clutch and the car's now on it's third one? Nice to know it's had an easy life! Started tackling a few other jobs I wanted to do like the rattling up pipe heatshield that's been driving me nuts for months, I couldn't get to it at all with the engine in the car but with it out two seconds with the grinder and off it came:
Then I thought I'd have a closer look at the flywheel to check it's alright. Not too sure in all honesty, it feels nice and smooth running a finger over it, but there's two definite marks which I'm guessing are heatspots, and also some signs of what I think might be hairline cracks/fissures. What do we think?
As the shopping list for this has already exceeded my next few paydays this is definitely going to be a longer term project rather than the turnaround in a few days I was hoping for. As well as the suspect flywheel there's also oily gunge in the bellhousing and around the bottom of the flywheel so I'm going to change the rear crank seal while the engines out, it'd be a shame not to.
18 June 2013, 08:23 PM
#19

provided if feels ok with your nail id re use that fly wheel. re used a similar condition one in mine and its been fine with no judder. i gave it a good clean first.
18 June 2013, 08:28 PM
#20
Scooby Regular
Thread Starter
iTrader: (2)
Join Date: Aug 2006
Location: UK
Posts: 263
Likes: 0
Received 0 Likes
on
0 Posts
That was my thinking, though it's probably going to be a couple of weeks until I get enough cash to sort everything out so if a lightweight flywheel comes up before then I'll fit one of them instead! Don't want to spend money on another standard used flywheel that might be no better though.
19 June 2013, 08:08 AM
#21
Scooby Regular
Thread Starter
iTrader: (2)
Join Date: Aug 2006
Location: UK
Posts: 263
Likes: 0
Received 0 Likes
on
0 Posts
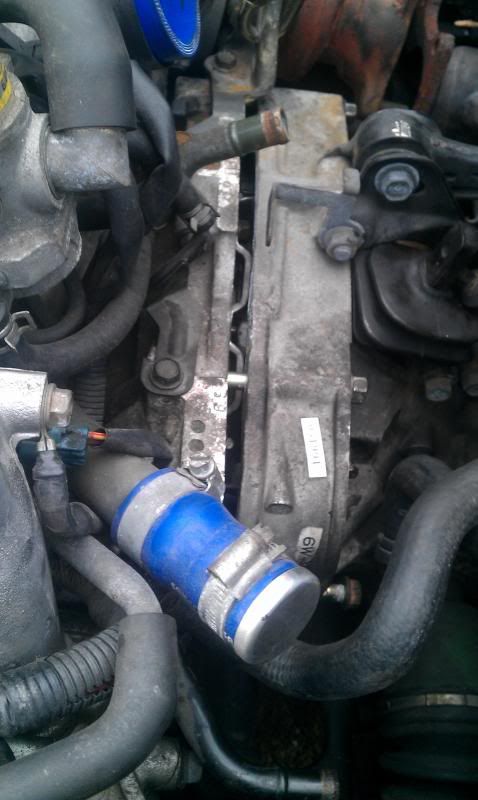
Well I've ordered front & rear crank oil seals, I also broke the T piece and a bit of piping that goes to the wastegate actuator when removing it, it was just so old and brittle it didn't like being moved so I've ordered some new 3mm vac line. Couple more questions, how easy is it to replace the crank oil seals? Can I pull the old ones out with a couple of self tapping screws or what? Also I want to replace the bit of pipe on the wastegate actuator I broke but I'm not sure where the restrictor pills are, hopefully I didn't lose one when the pipe snapped!
 19 June 2013, 05:50 PM
#24
Scooby Regular
iTrader: (5)
Join Date: Aug 2009
Location: Hertfordshire
Posts: 663
Likes: 0
Received 0 Likes
on
0 Posts
Crank seal is quite easy, as you say some small screws put into to to give you something to pull out on. Might need to carefully drill a pilot hole in the crank seal, but you will probably find it easy as the engine is out and you have space.
 21 June 2013, 02:58 PM
#26
Scooby Regular
Thread Starter
iTrader: (2)
Join Date: Aug 2006
Location: UK
Posts: 263
Likes: 0
Received 0 Likes
on
0 Posts
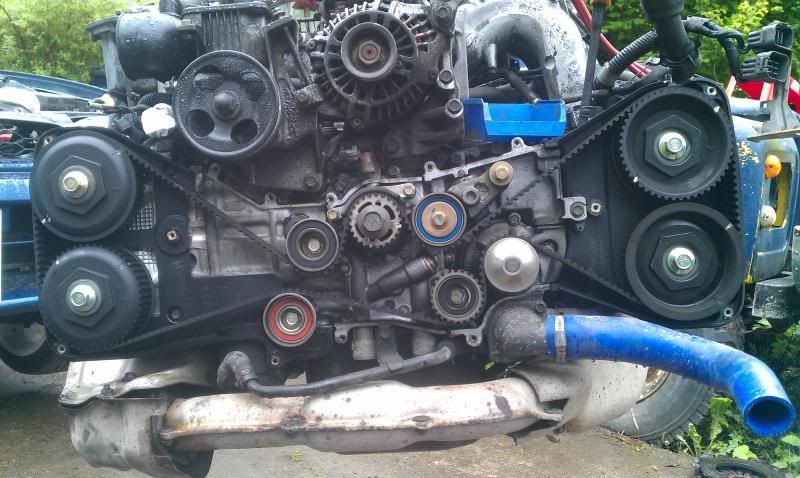
Well I said I was going to get the belt off and examine all the idlers and pulleys to see how they were doing before I replaced them. Well my guess is when the belt was last changed only the tensioner was done as that is still like brand new, bearings lovely and smooth and spins quietly. However the toothed idler and the lower plain idler are knackered, the toothed one makes a loud grinding when it's spun and the plain one has a few mm of play in the bearings, I can wobble it up and down!
Pleased I decided to do the cambelt now they definitely need changing even though the belt was fine. Slightly annoying though but the idler set is only �60 from import car parts so that's not too much damage I suppose.
Pleased I decided to do the cambelt now they definitely need changing even though the belt was fine. Slightly annoying though but the idler set is only �60 from import car parts so that's not too much damage I suppose.
22 June 2013, 10:01 AM
#27
Scooby Regular
Join Date: Oct 2011
Location: SE Wales
Posts: 207
Likes: 0
Received 0 Likes
on
0 Posts
Meatys Subaru Timing Belt Guide - I used this video to understand how to replace my timing belt back in December. I found that two long breaker bars were useful for setting the timing.
26 June 2013, 07:54 PM
#28
Scooby Regular
Thread Starter
iTrader: (2)
Join Date: Aug 2006
Location: UK
Posts: 263
Likes: 0
Received 0 Likes
on
0 Posts
Cheers for the tip Rob, found that video on Youtube and it was a help. He was doing it on a Newage engine though which has an extra idler pulley I think but the principles are the same. His method of leaving the bottom idler off until the belt is timed up made it pretty easy to go together, it probably would've taken me a while to figure out that was how you did it! Plus I wouldn't have known to compress the tensioner very slowly I'd probably have just squeezed it the whole way in a vice and blown the seal in it.
Only doing bits and bobs on the car as and when I get time so it's stood for a few days, here's a few pictures from this afternoon. The new idler pulleys on:

The belt on and all timed up:
And the new crank seal in place:

Also changed engine oil and filter, plugs, gearbox oil, fitted new wastegate actuator piping to replace the stuff I'd broke and fitted a boost gauge in an A pillar pod ready for when the engine's back in. I removed all the air con components and also treated and painted a few bits like the radiator fan brackets as they were a bit rusty, productive afternoon all in!
Only doing bits and bobs on the car as and when I get time so it's stood for a few days, here's a few pictures from this afternoon. The new idler pulleys on:

The belt on and all timed up:


And the new crank seal in place:

Also changed engine oil and filter, plugs, gearbox oil, fitted new wastegate actuator piping to replace the stuff I'd broke and fitted a boost gauge in an A pillar pod ready for when the engine's back in. I removed all the air con components and also treated and painted a few bits like the radiator fan brackets as they were a bit rusty, productive afternoon all in!
27 June 2013, 03:17 PM
#29
Your oil can also come from the plate on the right of the crank in the last pic, they are known for leaking, all be it the plastic ones that are worse, I think it's called the oil separator plate but don't quote me, always a good idea to fit a new gasket, you might also want to check the screws on your oil pump are nice and tight as they also have a habit of coming undone, I stuck some thread lock on the screws in both just to be sure, I can't remember exactly but I think you have to remove the cover of the oil pump to do it and I know its a pain now you've done the belt but better safe and all that.
Opps I bet your going to love me now i'd suggest you check the condition of the thermostat as well, due to the state of the rad.
Opps I bet your going to love me now
i'd suggest you check the condition of the thermostat as well, due to the state of the rad.
Last edited by ditchmyster; 27 June 2013 at 03:24 PM.
30 June 2013, 07:23 AM
#30
Scooby Regular
Thread Starter
iTrader: (2)
Join Date: Aug 2006
Location: UK
Posts: 263
Likes: 0
Received 0 Likes
on
0 Posts
Doh, only just seen your post and now the engine is back in! Ah well too late now, though I might put a new stat in at a later date.
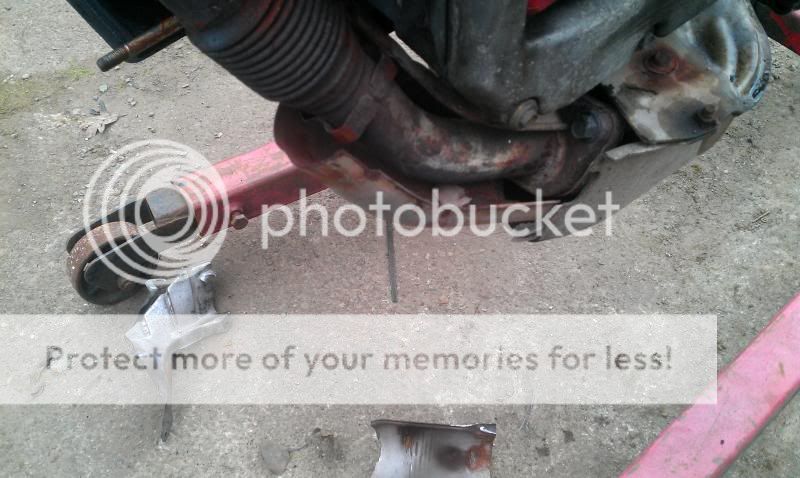
So to fit the clutch I had to precision engineer an alignment tool:

Clutch fitted. Bit gutted as I went for the 225mm clutch as I thought that's what the car would have had on it already, so a 230 wouldn't have fitted on the slightly worn recess in the flywheel. However turns out it already had a 230 fitted so I could've just replaced it like for like. Ah well it'll still do the job.
Engine on the way back in:
Now comes the fiddly part! To be fair I was expecting this to be a lot harder than it was, and it probably is if you've dropped the gearbox rather than lifted the engine out. But as long as you make sure the clutch is centred properly and everything is clear, and jack the gearbox up a bit to angle it upwards the whole lot slides together pretty easily. The only two snags I had were the lower engine mount studs catching on the subframe a bit which required some wiggling, then the turbo hit the downpipe without me realising so I had to lever that out of the way. With those two problems sorted it slid in this far:
Then it was just a case of tightening the studs and nuts around the bellhousing nice and evenly until it mated. I stuck a screwdriver down the hole in the top and popped the fork and thrust bearing into the pressure plate and job done. All connected up and felt like a clutch pedal straight away.
Just got to remember where everything else went now I'm connecting it all back up! I've not done myself any favours as I've decided now is the time to bin off the air con, carbon canister and some other bits and bobs so I'll have to figure out what pipes I need and what ones I don't
So to fit the clutch I had to precision engineer an alignment tool:

Clutch fitted. Bit gutted as I went for the 225mm clutch as I thought that's what the car would have had on it already, so a 230 wouldn't have fitted on the slightly worn recess in the flywheel. However turns out it already had a 230 fitted so I could've just replaced it like for like. Ah well it'll still do the job.

Engine on the way back in:

Now comes the fiddly part! To be fair I was expecting this to be a lot harder than it was, and it probably is if you've dropped the gearbox rather than lifted the engine out. But as long as you make sure the clutch is centred properly and everything is clear, and jack the gearbox up a bit to angle it upwards the whole lot slides together pretty easily. The only two snags I had were the lower engine mount studs catching on the subframe a bit which required some wiggling, then the turbo hit the downpipe without me realising so I had to lever that out of the way. With those two problems sorted it slid in this far:

Then it was just a case of tightening the studs and nuts around the bellhousing nice and evenly until it mated. I stuck a screwdriver down the hole in the top and popped the fork and thrust bearing into the pressure plate and job done. All connected up and felt like a clutch pedal straight away.
Just got to remember where everything else went now I'm connecting it all back up! I've not done myself any favours as I've decided now is the time to bin off the air con, carbon canister and some other bits and bobs so I'll have to figure out what pipes I need and what ones I don't