
STI rear lights - not happy with fit
 06 April 2009, 10:29 PM
#1
Scooby Regular
Thread Starter
iTrader: (9)

Join Date: Mar 2004
Location: .
Posts: 20,035
Likes: 0
Received 0 Likes
on
0 Posts
Hi people,
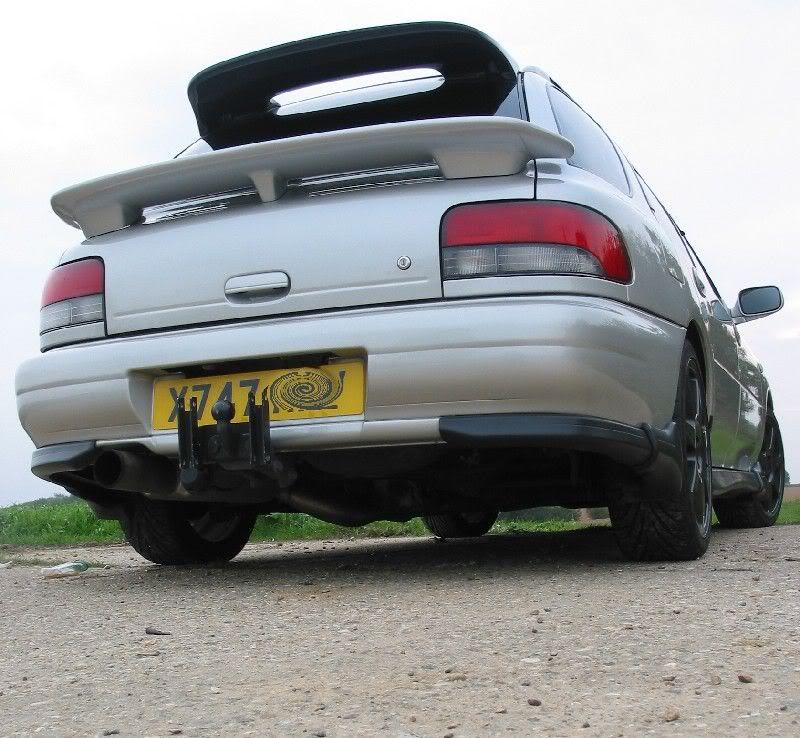
just fitted genuine new STI rear lights to my classic and not right happy with the fit to be honest. Offside is OK, but nearside is poor. Took it out again (major job with all that sealant) to check it, but it is fitted correctly so I guess this is just the way they fit. The originals fit much better to be honest. Oh well!
Pics
Nearside


Offside


just fitted genuine new STI rear lights to my classic and not right happy with the fit to be honest. Offside is OK, but nearside is poor. Took it out again (major job with all that sealant) to check it, but it is fitted correctly so I guess this is just the way they fit. The originals fit much better to be honest. Oh well!
Pics
Nearside
Offside

 Give us a rear shot though.
06 April 2009, 10:43 PM
Give us a rear shot though.
06 April 2009, 10:43 PM
#3
Scooby Regular
Thread Starter
iTrader: (9)
Join Date: Mar 2004
Location: .
Posts: 20,035
Likes: 0
Received 0 Likes
on
0 Posts
Well you maybe right about the fussy bit. Just seems an awful big gap on one side between the quarter panel and the light trim panel whereas the other is quite tight. Also the nearside light is recessed a bit futher into the quarter panel. Will get rear shot up shortly.
BTW - Social groups on the myScoobynet menu above - come and join the 94H group
BTW - Social groups on the myScoobynet menu above - come and join the 94H group


Trending Topics

 07 April 2009, 01:29 PM
#10
Scooby Regular
Join Date: Feb 2006
Location: Bring back infractions!
Posts: 4,554
Likes: 0
Received 0 Likes
on
0 Posts
 Hence your lights won't quite line up either
07 April 2009, 01:32 PM
Hence your lights won't quite line up either
07 April 2009, 01:32 PM
#11
Scooby Regular
Thread Starter
iTrader: (9)
Join Date: Mar 2004
Location: .
Posts: 20,035
Likes: 0
Received 0 Likes
on
0 Posts
If you look at some other classics the boot lining up like that is not uncommon. was behind one today that was exactly the same.
The point is the orginal lights fitted perfectly, the STIs do not fit as well.
BTW I have two Hondas as well and both are infinitely better built in terms of shutline consistency etc.
Last edited by f1_fan; 07 April 2009 at 01:34 PM.
07 April 2009, 01:41 PM
#13
Scooby Regular
Thread Starter
iTrader: (9)
Join Date: Mar 2004
Location: .
Posts: 20,035
Likes: 0
Received 0 Likes
on
0 Posts
Cheers, yes I probably will.
What annoys me is that it is the light itself that is at fault as the metal trim panel is screwed to the light. The metal panel lines up with the rear quarter which basically means the light is offset compared to the trim panel and the quarter panel. I may look for another set of lights and see if a different one is better.
Alternatively I may stop noticing it
07 April 2009, 01:45 PM
#14
Looks ok to me as well
The difference in the gaps on the trim panels can be adjusted by loosening the screws and moving them in or out (there is a little adjustment to be had with the screws loose), then tighten the screws up when it in the right place (a job I did on mine before adding the sealant)
The bootlid was like that on mine, can be tweeked by (probably a bit brutal but works) twisting the whole bootlid slightly on its hinges and voila perfik shutlines!!
The difference in the gaps on the trim panels can be adjusted by loosening the screws and moving them in or out (there is a little adjustment to be had with the screws loose), then tighten the screws up when it in the right place (a job I did on mine before adding the sealant
)The bootlid was like that on mine, can be tweeked by (probably a bit brutal but works) twisting the whole bootlid slightly on its hinges and voila perfik shutlines!!
 07 April 2009, 01:49 PM
#16
Scooby Regular
Thread Starter
iTrader: (9)
Join Date: Mar 2004
Location: .
Posts: 20,035
Likes: 0
Received 0 Likes
on
0 Posts
Looks ok to me as well
The difference in the gaps on the trim panels can be adjusted by loosening the screws and moving them in or out (there is a little adjustment to be had with the screws loose), then tighten the screws up when it in the right place (a job I did on mine before adding the sealant)
The bootlid was like that on mine, can be tweeked by (probably a bit brutal but works) twisting the whole bootlid slightly on its hinges and voila perfik shutlines!!
The difference in the gaps on the trim panels can be adjusted by loosening the screws and moving them in or out (there is a little adjustment to be had with the screws loose), then tighten the screws up when it in the right place (a job I did on mine before adding the sealant
)The bootlid was like that on mine, can be tweeked by (probably a bit brutal but works) twisting the whole bootlid slightly on its hinges and voila perfik shutlines!!


Thread
Thread Starter
Forum
Replies
Last Post
Mattybr5@MB Developments
Full Cars Breaking For Spares
33
29 August 2017 07:18 PM
matt12
ScoobyNet General
64
16 September 2015 09:16 PM
matt12
Engine Management and ECU Remapping
4
14 September 2015 09:36 AM