
Painted / Polished Inlet Manifolds
 21 August 2009, 04:12 PM
#1

Come on then, lets see them painted or polished. The crinkle finish is flaking off on my sti and i want some ideas of what to do. Re-paint in crinkle red or do i go for something different? Lets see what you've done / found out there on 'tinterweb 
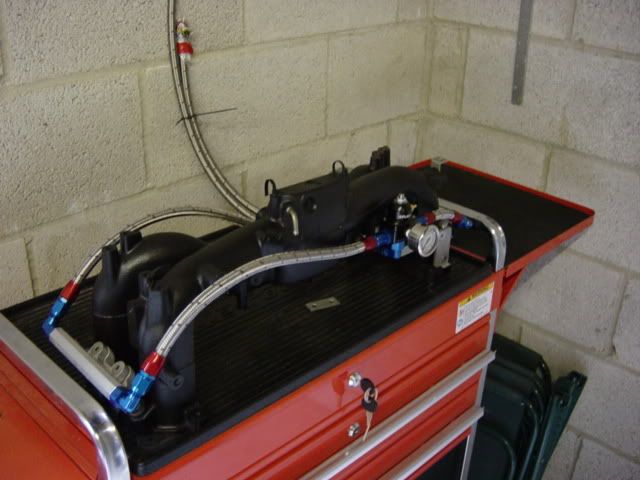
I know this is a non standard manifold but quick like the finish:

I know this is a non standard manifold but quick like the finish:


 21 August 2009, 04:33 PM
#6
Very challenging  you realise just how bad quality the finish is, the trouble is after you grind the krud off you then need to smooth in order to polish. I need to take it to work on a friday and after I finish and make a start on it, we have a polishing machine there and the mops as well.
TBH even though it's nice to do this yourself if you don't have the kit I think it's worth paying for this to be done, send it to a proper polishing company. The mops make the job easy and they can be expensive to buy along with the correct compounds, it's a 2 stage polishing job at the least with different grades of mops/compounds needed.
you realise just how bad quality the finish is, the trouble is after you grind the krud off you then need to smooth in order to polish. I need to take it to work on a friday and after I finish and make a start on it, we have a polishing machine there and the mops as well.TBH even though it's nice to do this yourself if you don't have the kit I think it's worth paying for this to be done, send it to a proper polishing company. The mops make the job easy and they can be expensive to buy along with the correct compounds, it's a 2 stage polishing job at the least with different grades of mops/compounds needed.
Last edited by Silver Scooby Sport; 21 August 2009 at 04:34 PM.

Trending Topics
 I know what's involved all to well

 21 August 2009, 08:00 PM
#16
Scooby Regular
iTrader: (30)
Join Date: Dec 2005
Location: leicester
Posts: 3,508
Likes: 0
Received 0 Likes
on
0 Posts
went for standard red on mine

my old one is spare now if any wants to make an offer its standard v5-v6 one ..lol
as i didnt want my car of the road to long
my old one is spare now if any wants to make an offer its standard v5-v6 one ..lol
as i didnt want my car of the road to long
 23 August 2009, 09:43 PM
#18
Scooby Regular
iTrader: (2)
Join Date: Jul 2007
Location: stoke-on-trent
Posts: 373
Likes: 0
Received 0 Likes
on
0 Posts
I got a second hand manifold from flebay for �10 did it gloss red as my sti one is looking sad now just got to swap it this week will post pics after fitted to

 That included the cleaning aswell. Just got to get it off now
24 August 2009, 11:12 AM
That included the cleaning aswell. Just got to get it off now
24 August 2009, 11:12 AM
#20
quite like the black crinkle. I'm going for a black / red combo on my sti so that could work quite nicely. The crinkle and gloss reds have been done nicely as well
Cheers Wrighty, I'll look that guy up.
Surprised nobody has commented on the mental setup in the pic in my first post. Yup that's an Impreza engine bay!
Cheers Wrighty, I'll look that guy up.
Surprised nobody has commented on the mental setup in the pic in my first post. Yup that's an Impreza engine bay!
 24 August 2009, 10:44 PM
#22
Scooby Regular
Join Date: May 2006
Posts: 1,609
Likes: 0
Received 0 Likes
on
0 Posts
 25 August 2009, 12:28 PM
#25
Scooby Regular
iTrader: (4)
Join Date: Jun 2005
Location: South Wales, Scoobless, Type R is gone!
Posts: 3,618
Likes: 0
Received 0 Likes
on
0 Posts
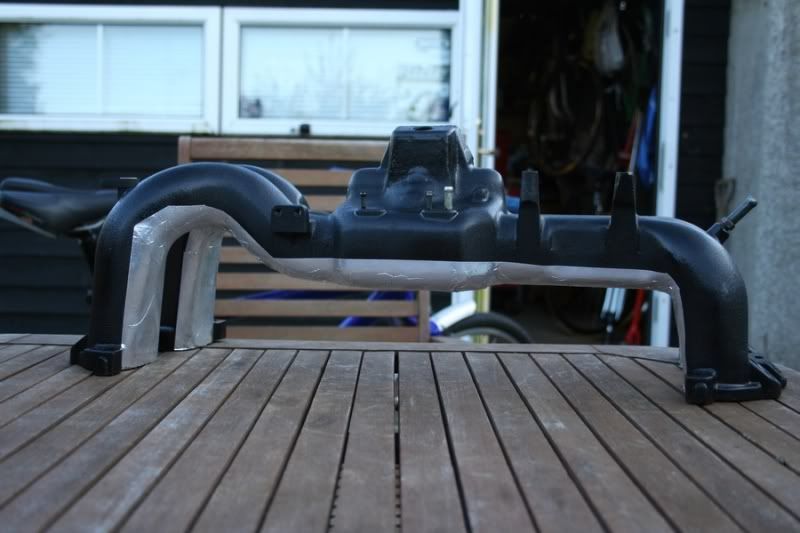
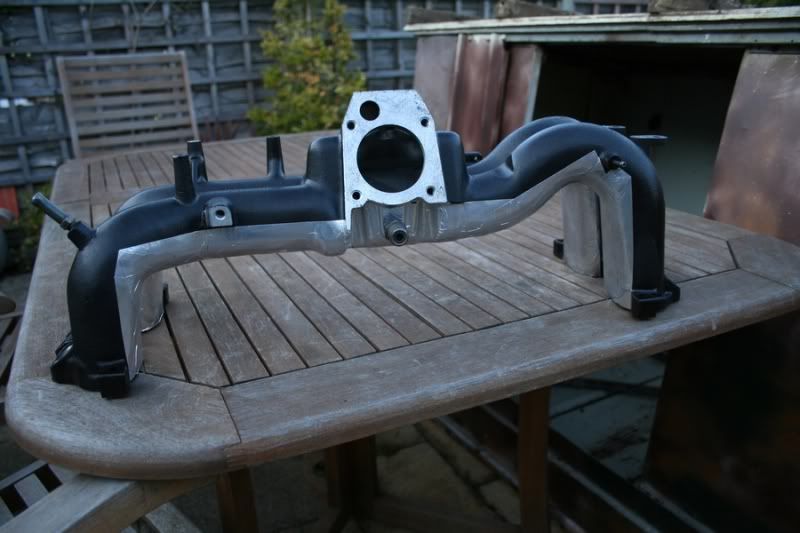
You've got futher than me, i'm still on the smoothing stage, must of spent 10+ hours so far on it, lost interest at the moment though

If the car don't sell will have to get round to finishing it and get it on.
 28 August 2009, 12:16 PM
#27
Scooby Regular
Join Date: Aug 2005
Location: My turbo blows, air lots of it!!
Posts: 9,073
Likes: 0
Received 0 Likes
on
0 Posts
nice, did you do this with a portable polisher (elec plug in type) or one of those bigger ones which are normally bolted to the floor?
29 August 2009, 12:59 PM
#28

I really wanted something different too...
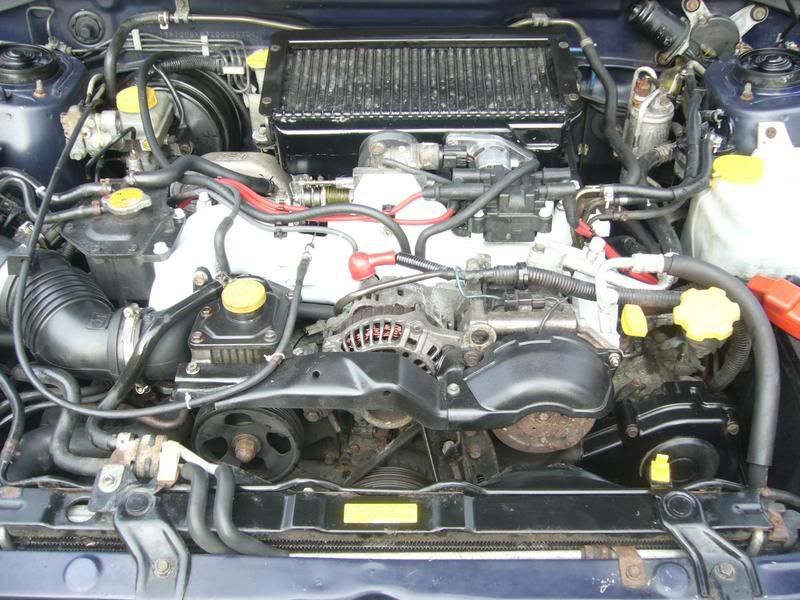
Looked much better in the flesh, the photo doesn't capture it very well. To be fair though, wish I'd picked something else as it's not exactly the easiest of things to keep clean...nicotene yellow appears the be the colour it's resolving to now!
Looked much better in the flesh, the photo doesn't capture it very well. To be fair though, wish I'd picked something else as it's not exactly the easiest of things to keep clean...nicotene yellow appears the be the colour it's resolving to now!
29 August 2009, 02:07 PM
#29
First off I used grinder for the really bad areas where the joints were then I used a flapped sanding wheel in the drill to try and smooth that over more, Ideally I could do with a phosphor bronze wire brush which will smooth the ally out nicely next.
Don't worry I'm not an anorak I work for a brush manufacturer Then after all that's done you need to work with the graded cloth polishing mops and compounds the get the shine.... but yes your right the small areas that have been polished were on a floor mounted machine, it was just a couple of trial areas to see what work was involved. It has shown me that I still need to do a lot more prep work still before the final polish. To polish one of these it is a serious amount of work trust me... like Dean I've lost some interest but during the winter when the car shows finish I need to get back on it for next year.
29 August 2009, 02:24 PM
#30
Scooby Regular
Join Date: Aug 2005
Location: My turbo blows, air lots of it!!
Posts: 9,073
Likes: 0
Received 0 Likes
on
0 Posts
First off I used grinder for the really bad areas where the joints were then I used a flapped sanding wheel in the drill to try and smooth that over more, Ideally I could do with a phosphor bronze wire brush which will smooth the ally out nicely next. Don't worry I'm not an anorak I work for a brush manufacturer Then after all that's done you need to work with the graded cloth polishing mops and compounds the get the shine.... but yes your right the small areas that have been polished were on a floor mounted machine, it was just a couple of trial areas to see what work was involved. It has shown me that I still need to do a lot more prep work still before the final polish.
To polish one of these it is a serious amount of work trust me... like Dean I've lost some interest but during the winter when the car shows finish I need to get back on it for next year.
Don't worry I'm not an anorak I work for a brush manufacturer Then after all that's done you need to work with the graded cloth polishing mops and compounds the get the shine.... but yes your right the small areas that have been polished were on a floor mounted machine, it was just a couple of trial areas to see what work was involved. It has shown me that I still need to do a lot more prep work still before the final polish. To polish one of these it is a serious amount of work trust me... like Dean I've lost some interest but during the winter when the car shows finish I need to get back on it for next year.
