My repair of a front splitter!
 30 January 2011, 07:22 PM
#1
Scooby Regular
Thread Starter
iTrader: (1)
Join Date: Jun 2008
Location: Reigate Surrey
Posts: 2,656
Likes: 0
Received 0 Likes
on
0 Posts
Not sure if this is in the correct section but here goes;
After breaking 2 splitters in 3 years I thought I would have a go at repairing the third one, never done anything like this before but I must say it wasn't that hard.
Materials used;
1 X 500ml can of grey flexible primmer.
1 X 500ml can of satin black paint.
1 X bumper repair filler (Halfords)
1 X pack of assorted wet & Dry paper.
Total cost of the above stuff was �19.00 all from Halfords.
1. Removed splitter from car, about 10 screws really easy, had to jack the car tho as its on Prodrive springs and its to low to get under.

2. From the back on the damaged area I stuck a large piece of plastic to it with the bumper repair kit (this stuff also bonds)
3. After 15 minutes it went rock hard and set, with the splitter now in one piece from the top side I scored a deep grove with a small grinder all down the crack (this was to allow the filler to penetrate)
4. I filled the crack and spread the filler all around the crack for some extra strength and feathered the edges, rubbed down and repeated this 3 times to achieve this;

5. I rubbed the whole splitter down to form a good base of three thin coats of grey primmer.
6. I then rubbed down with a very fine paper and sprayed three thin coats of black satin to achieve this;

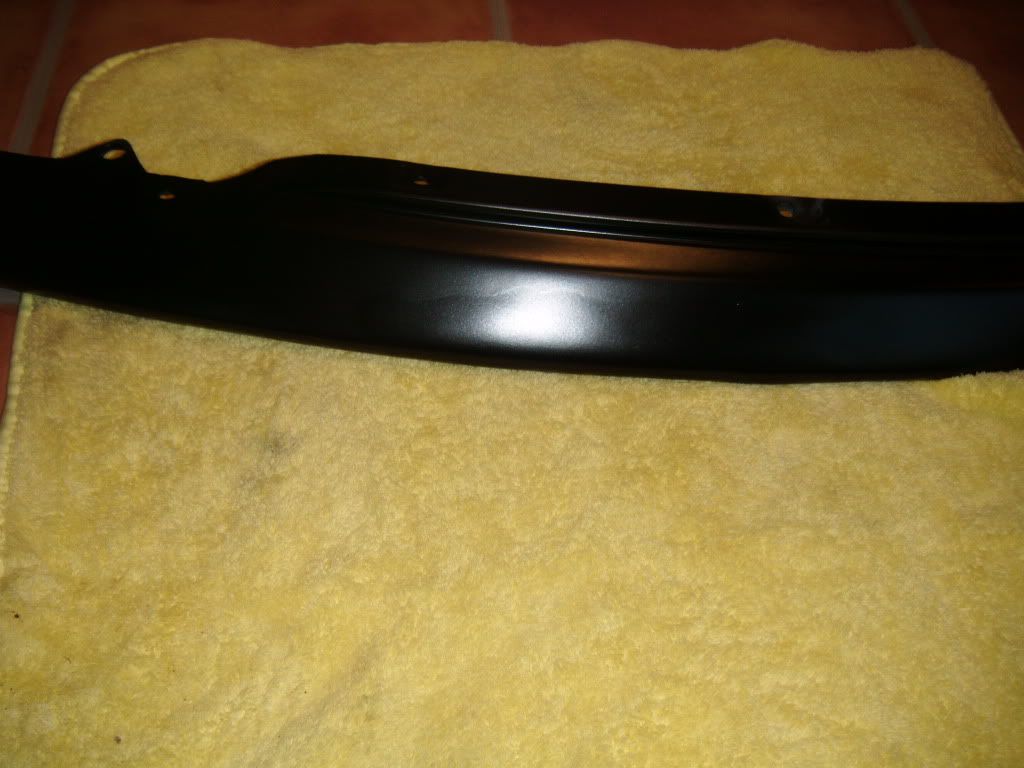
Really pleased with the results and feels really strong, I know it might not be perfect but not bad for the first time, so dont throw those broken one's away and have a go at a repair your self
After breaking 2 splitters in 3 years I thought I would have a go at repairing the third one, never done anything like this before but I must say it wasn't that hard.
Materials used;
1 X 500ml can of grey flexible primmer.
1 X 500ml can of satin black paint.
1 X bumper repair filler (Halfords)
1 X pack of assorted wet & Dry paper.
Total cost of the above stuff was �19.00 all from Halfords.
1. Removed splitter from car, about 10 screws really easy, had to jack the car tho as its on Prodrive springs and its to low to get under.
2. From the back on the damaged area I stuck a large piece of plastic to it with the bumper repair kit (this stuff also bonds)
3. After 15 minutes it went rock hard and set, with the splitter now in one piece from the top side I scored a deep grove with a small grinder all down the crack (this was to allow the filler to penetrate)
4. I filled the crack and spread the filler all around the crack for some extra strength and feathered the edges, rubbed down and repeated this 3 times to achieve this;
5. I rubbed the whole splitter down to form a good base of three thin coats of grey primmer.
6. I then rubbed down with a very fine paper and sprayed three thin coats of black satin to achieve this;
Really pleased with the results and feels really strong, I know it might not be perfect but not bad for the first time, so dont throw those broken one's away and have a go at a repair your self


Trending Topics
02 February 2011, 04:53 PM
#8
Scooby Regular
Thread Starter
iTrader: (1)
Join Date: Jun 2008
Location: Reigate Surrey
Posts: 2,656
Likes: 0
Received 0 Likes
on
0 Posts
 I know what you meen my mrs broke the other two I had, now she just denies everything that happens to the car;;; car park dents, cracked splitters, Sh*t all over the seats and leaving the car drained of fuel every time I come to use it

 03 February 2011, 12:26 PM
#13
Scooby Regular

Join Date: Jul 2010
Location: Bolton
Posts: 164
Likes: 0
Received 0 Likes
on
0 Posts
yeah aint that the truth!!cant live with them, cant suck t yourself!
03 February 2011, 04:17 PM
#15
Scooby Regular
Thread Starter
iTrader: (1)
Join Date: Jun 2008
Location: Reigate Surrey
Posts: 2,656
Likes: 0
Received 0 Likes
on
0 Posts
Yeah, you can see it in the photo but not now its on the car, I should have rubbed down the primer in between coats as its only the different in textures that cause it to stand out!

Thread
Thread Starter
Forum
Replies
Last Post
Mattybr5@MB Developments
Full Cars Breaking For Spares
28
28 December 2015 11:07 PM
shorty87
Full Cars Breaking For Spares
19
22 December 2015 11:59 AM