
My house extension Project from start to finish
 02 January 2008, 03:35 PM
#1
Scooby Regular
Thread Starter

Join Date: Mar 2002
Posts: 2,623
Likes: 0
Received 0 Likes
on
0 Posts
Hi all
Thought I would share my little house extension with you.
I bought this 3-bedroom property in May 2005 with the intention of extending it that same year. Unfortunately within 1 wk of moving in my Scooby engine went so I had to postpone whilst I spent on the car instead .
.
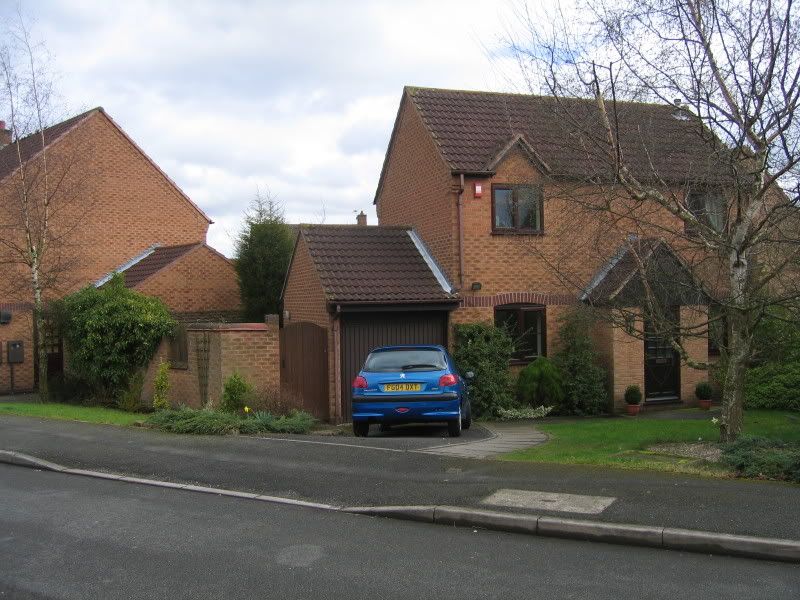
Our brief was to extend the small kitchen/diner into the attached garage, install a downstairs wc, build a separate detatched garage wide enough to take a car i.e. bigger than the daft one already there!, and turn bedroom 2 into a master bedroom with ensuite
As I used to be a draughtsman and now a Project Manager, I decided to take both roles to save on costs. And as I was working local at the time it was ideal to start work in '06.
We decided to commence with the building work in May 2006. I projected that our budget would cover for all building and services work and get us the new kitchen in. The upstairs would wait until early '07.
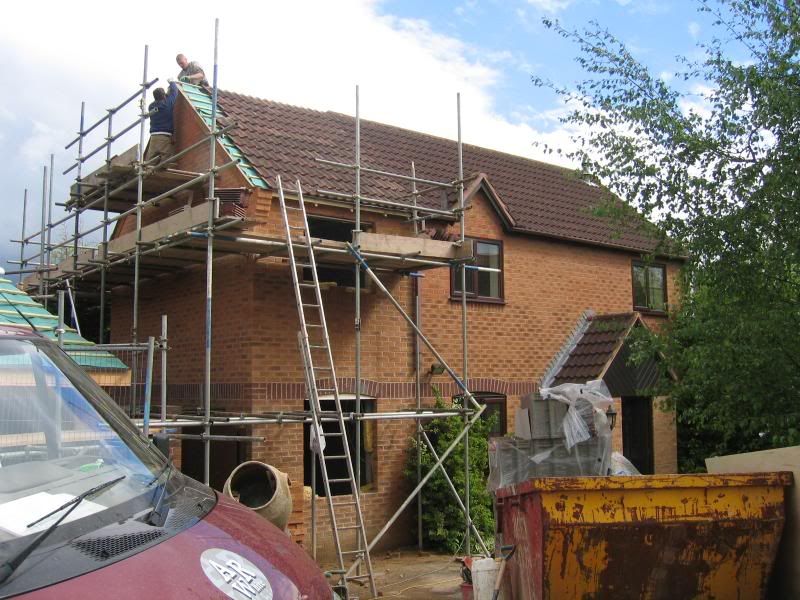
First we tackled the new garage. A small plot of land came with the property next to the original garage.
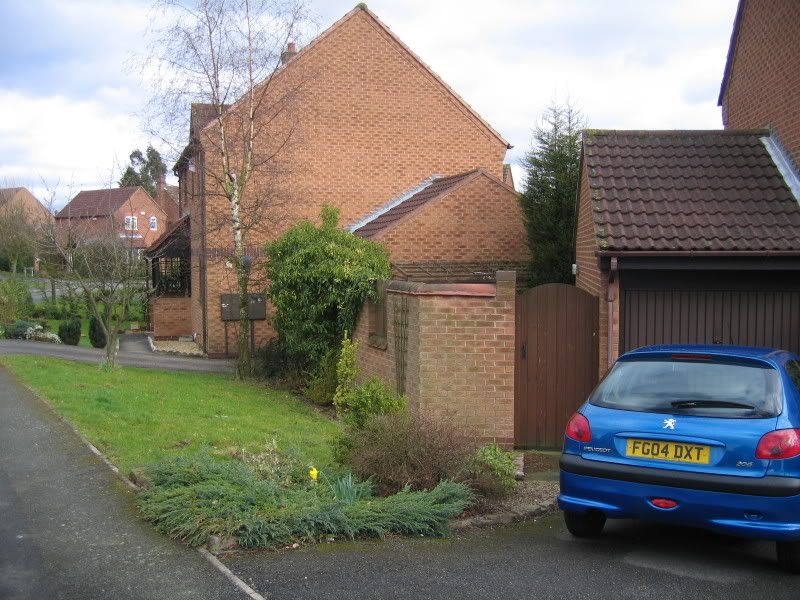

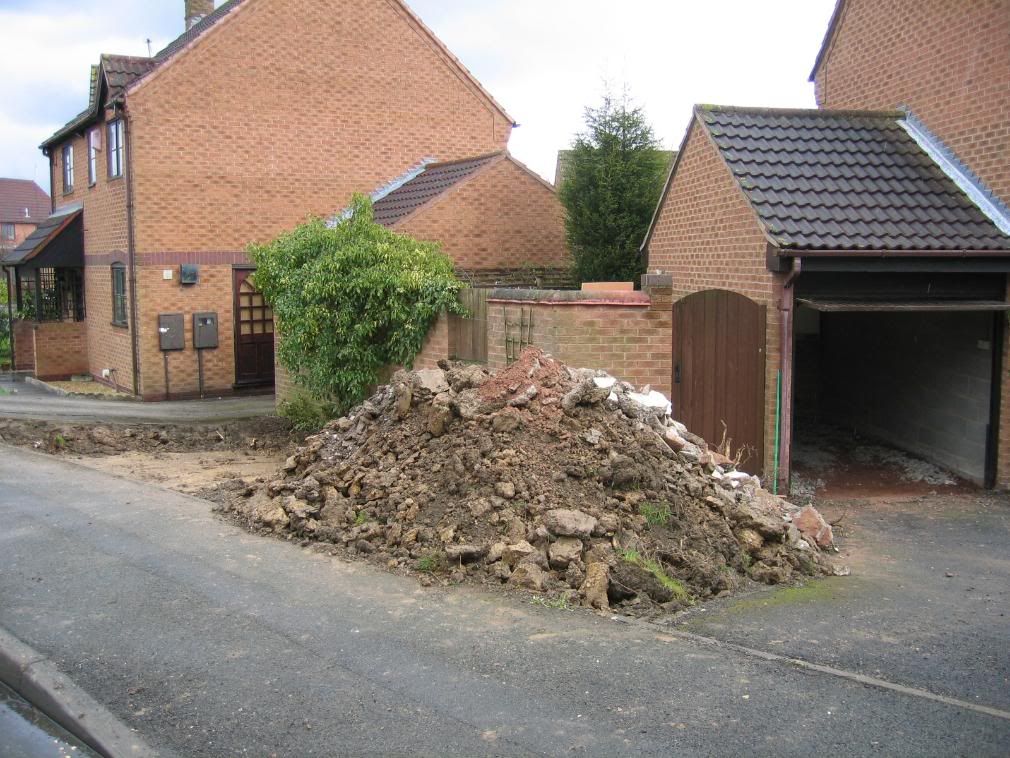
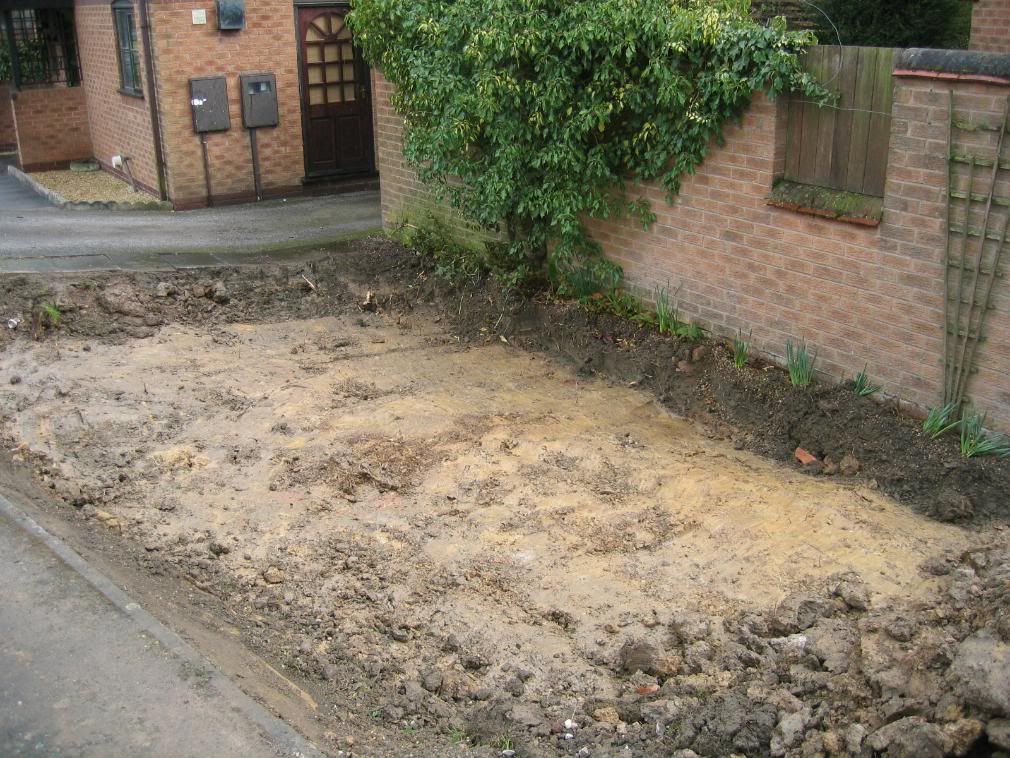
This meant taking down the wall as the new garage would act as the new retaining wall too.
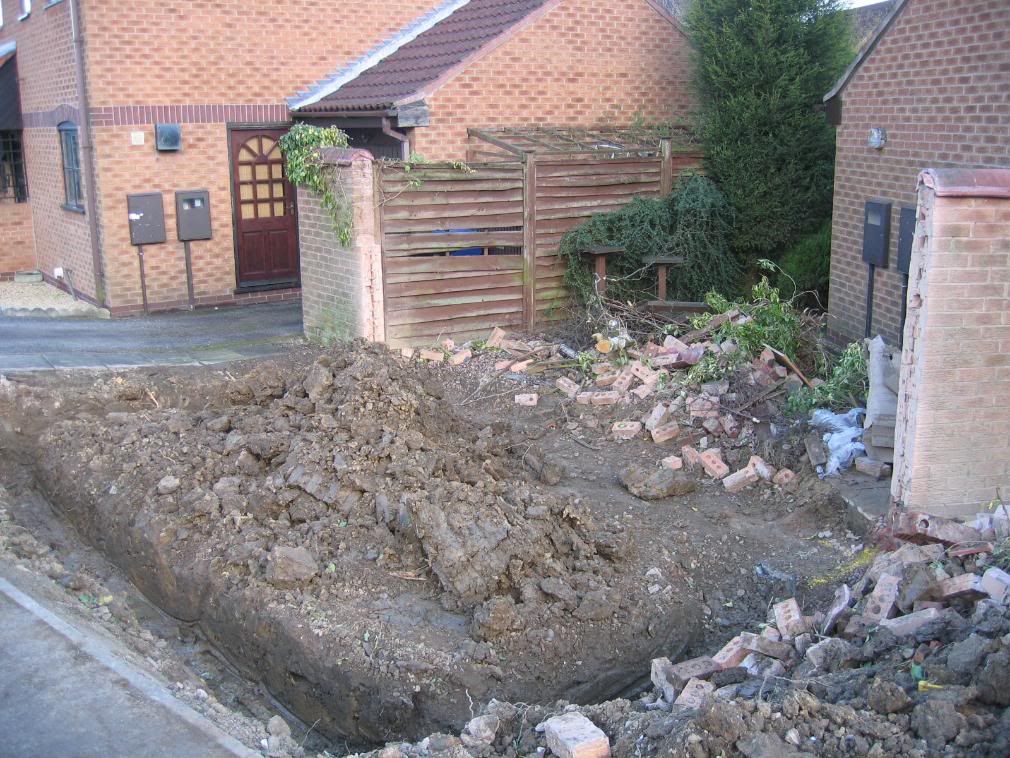
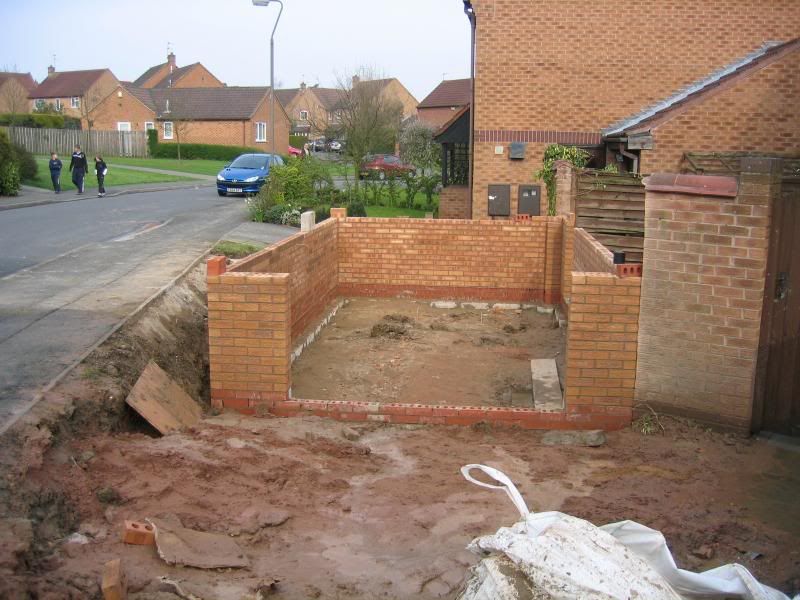
Before erecting scaffolding the footing was laid and some of the low-level brickwork.
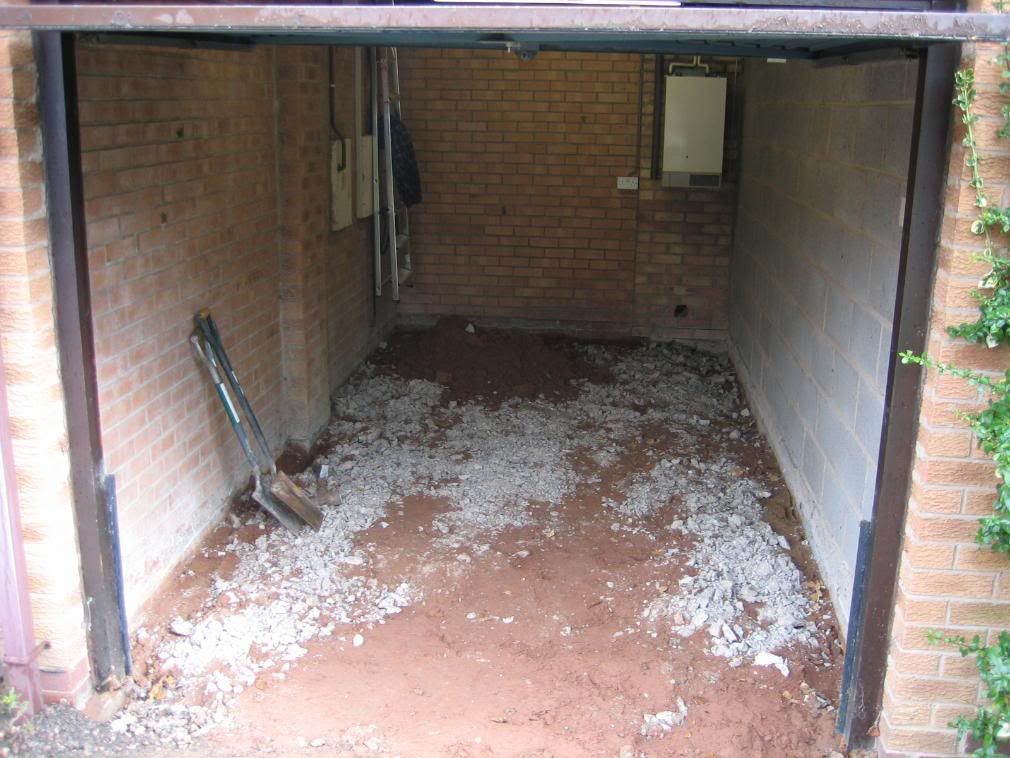
In the mean time I broke out the floor in the existing garage as it needed insulating. Those jack-hammers kill your wrists!
Progress so far...

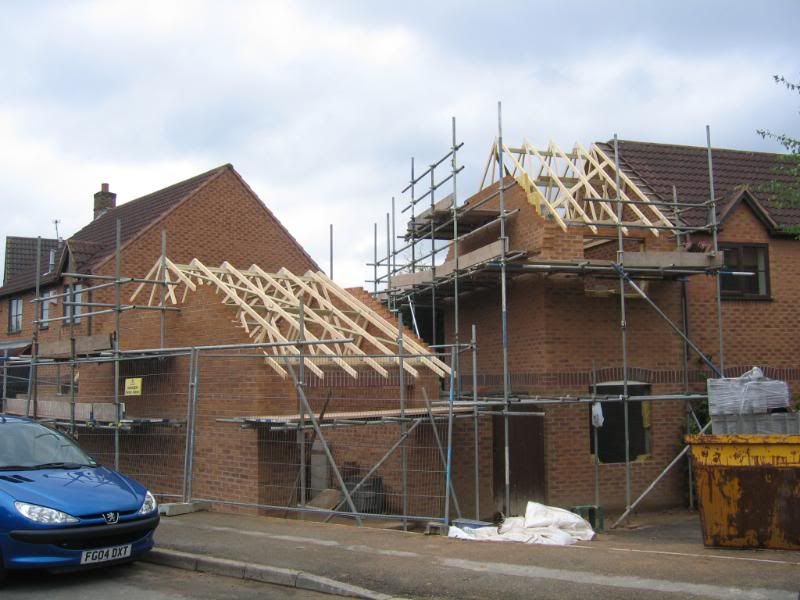
Time to get the scaffolders around. There's obviously detail missing here as I didn't take shots of everything.

Roof timbers on. There was a 2 week delay with the garage items. We used the original garage items for the house.
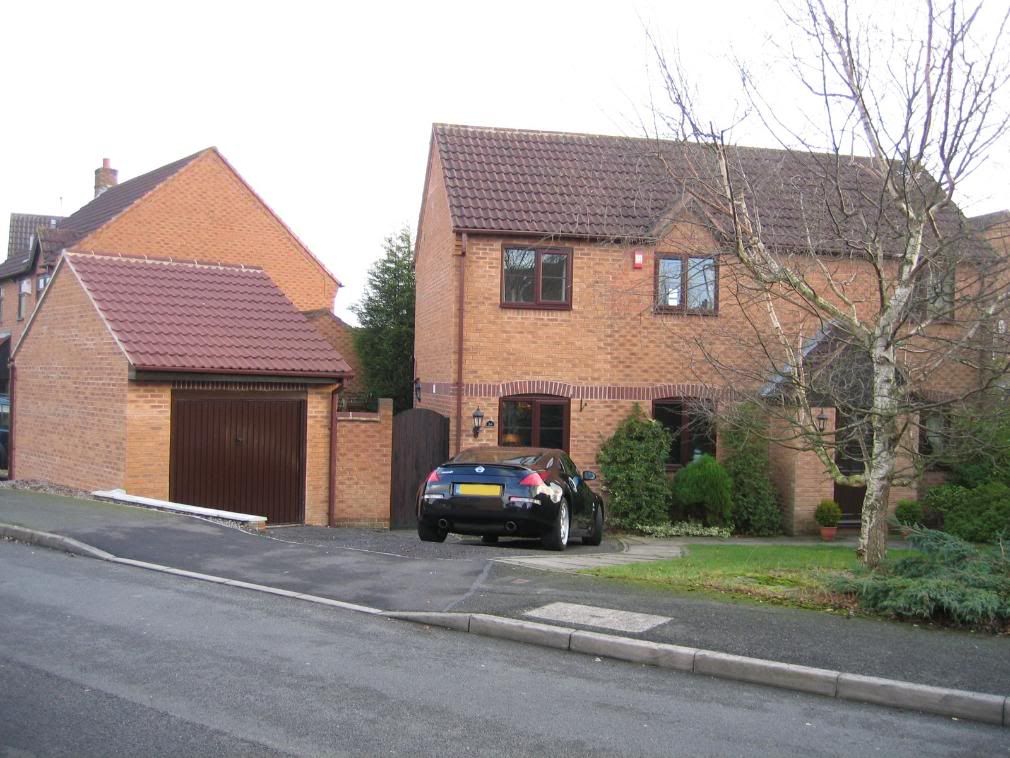
Salvaged roof tiles from original garage in order to blend as well as possible
Outside complete!

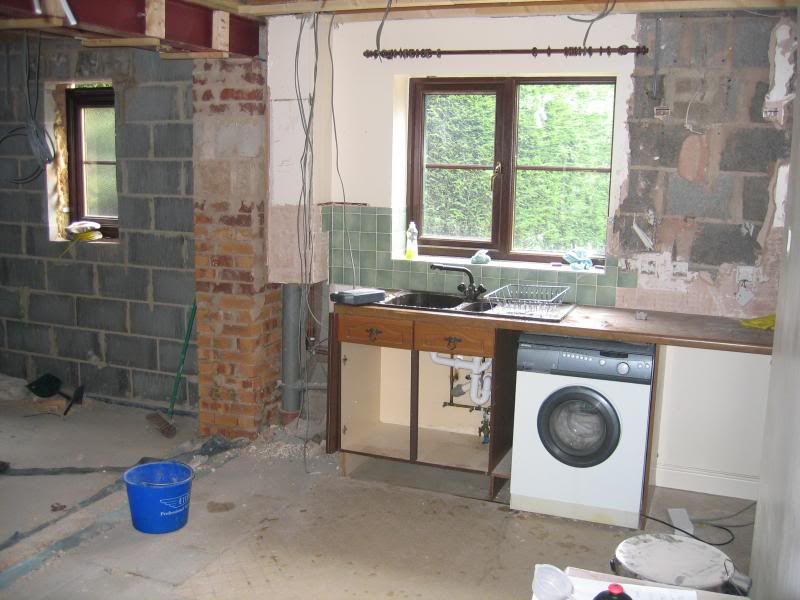
Now for the inside. Kitchen area as it was..
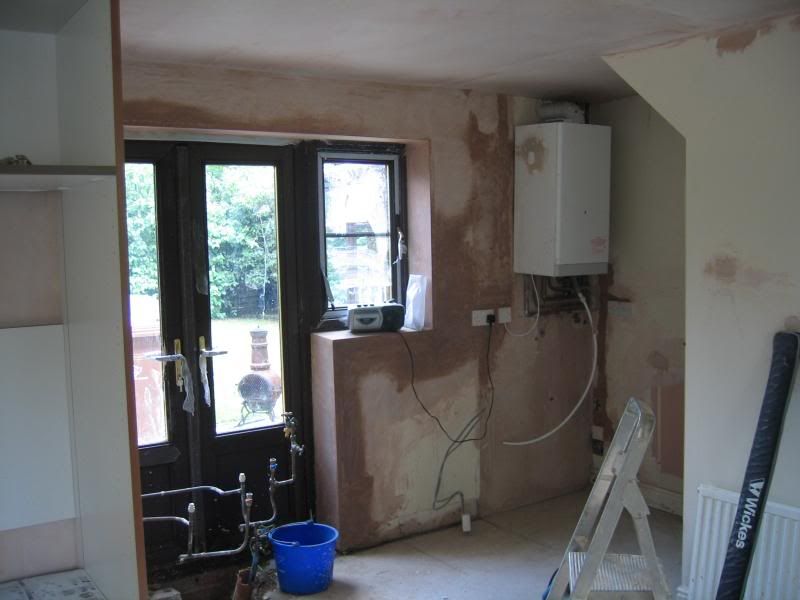
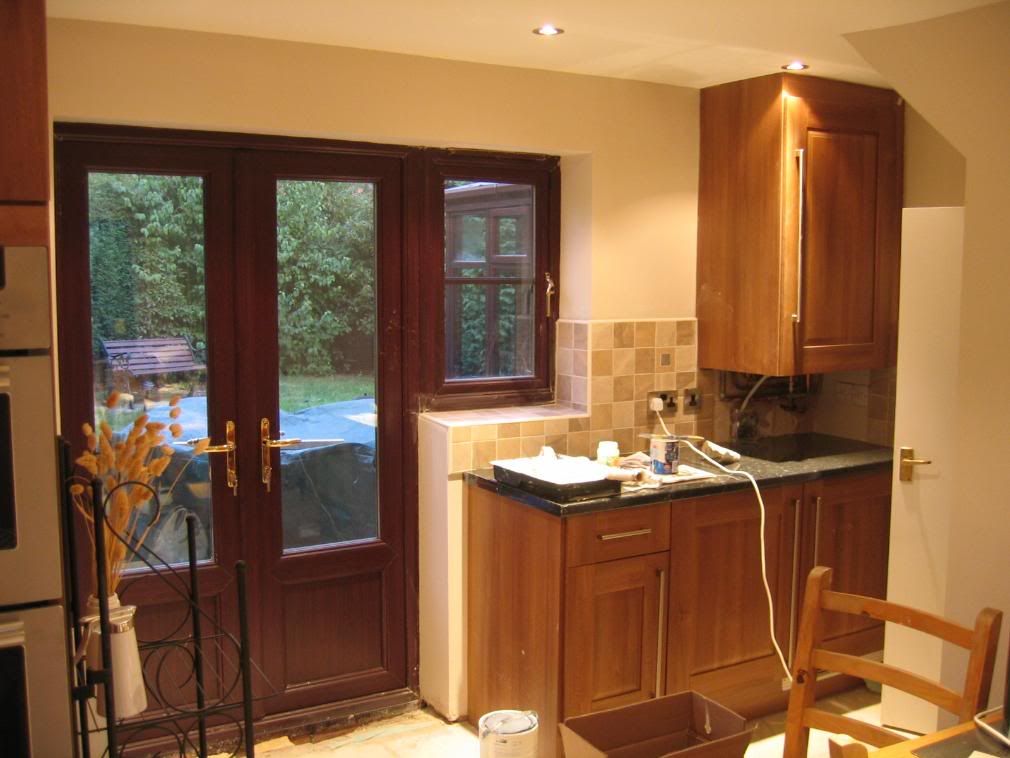
The window at the back to be removed and replaced with french doors leading to back garden. Existing single door to be blocked up as the new combi boiler will hang in that corner. Door re-used as a side entrance to garage.
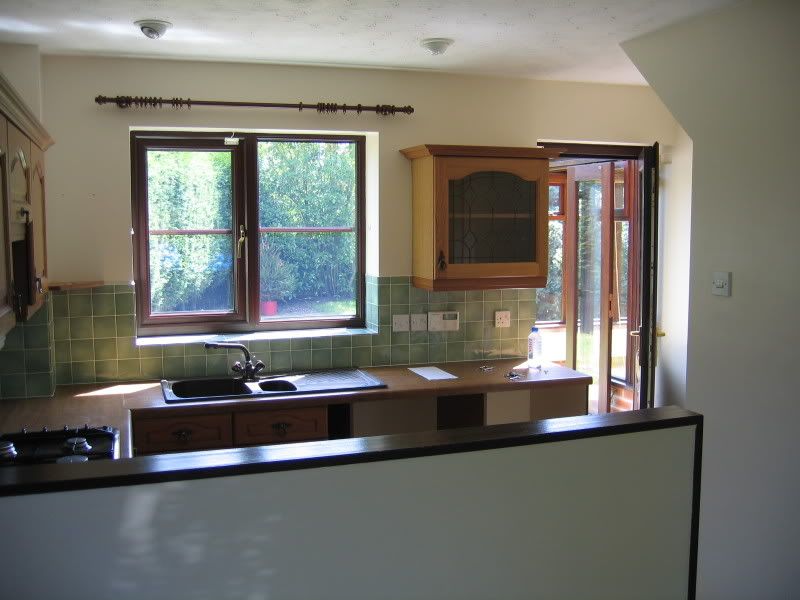
The wall with the pictures on to be removed - existing garage space on other side.
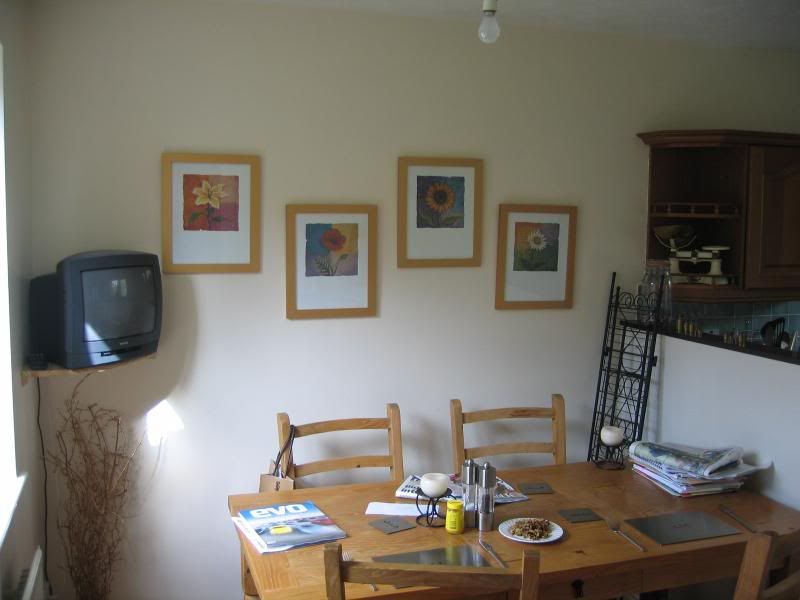
Another shot of the old kitchen area
Wall gone plus most of the old kitchen - we ripped the old kitchen out ourselves.
Beam in place. Calculated by local structural engineer.

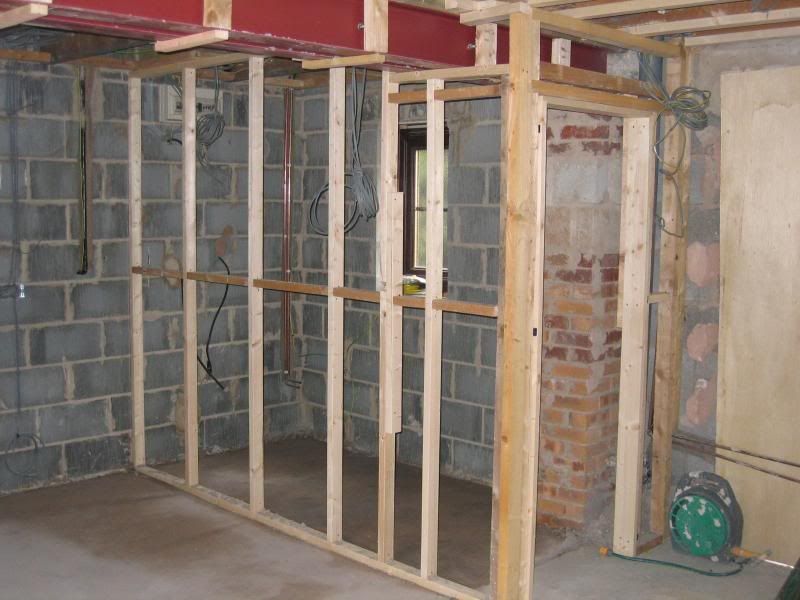
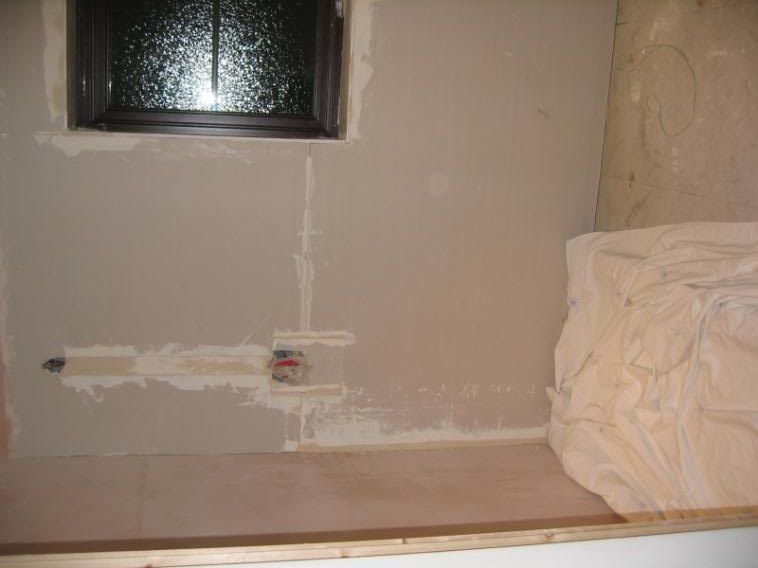
Studwork for downstairs loo.
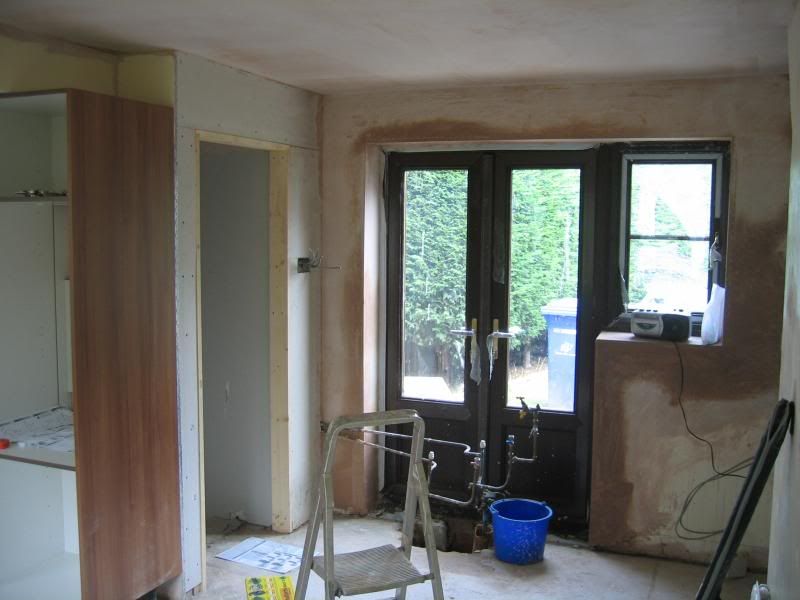
New french doors in place
Boiler hung by an incompetent plumber - he was sacked later as he couldn't commission it
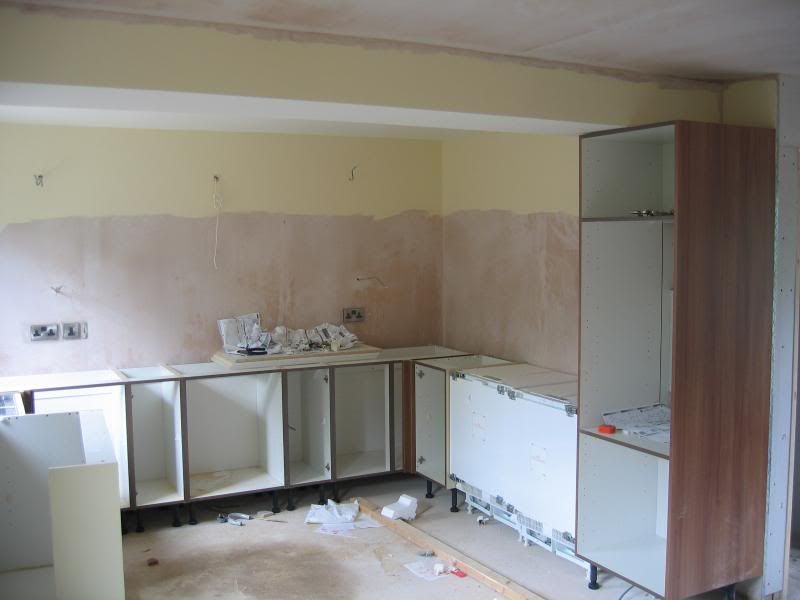
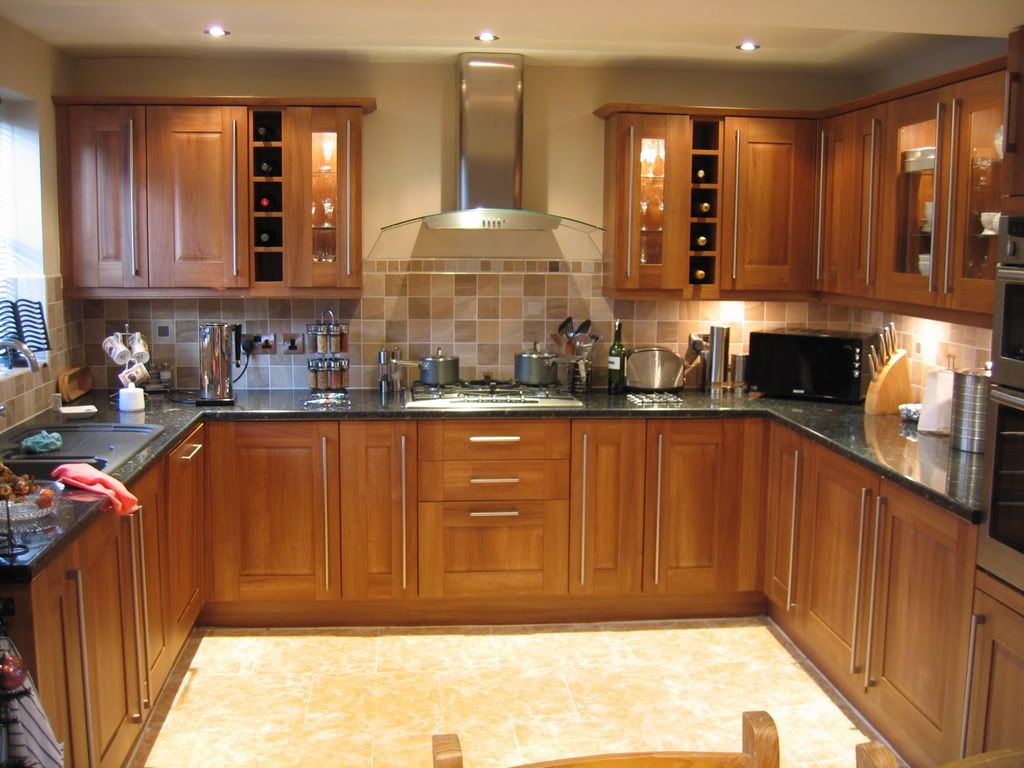
Kitchen units going in


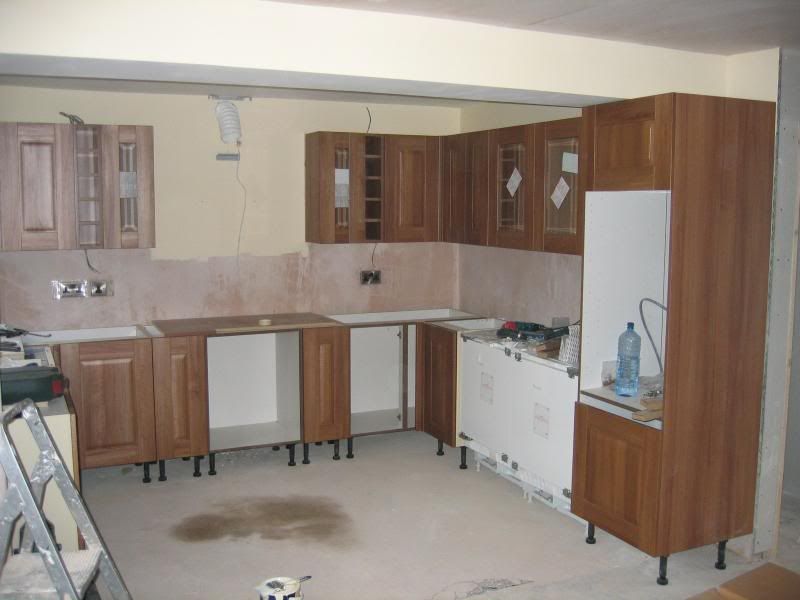

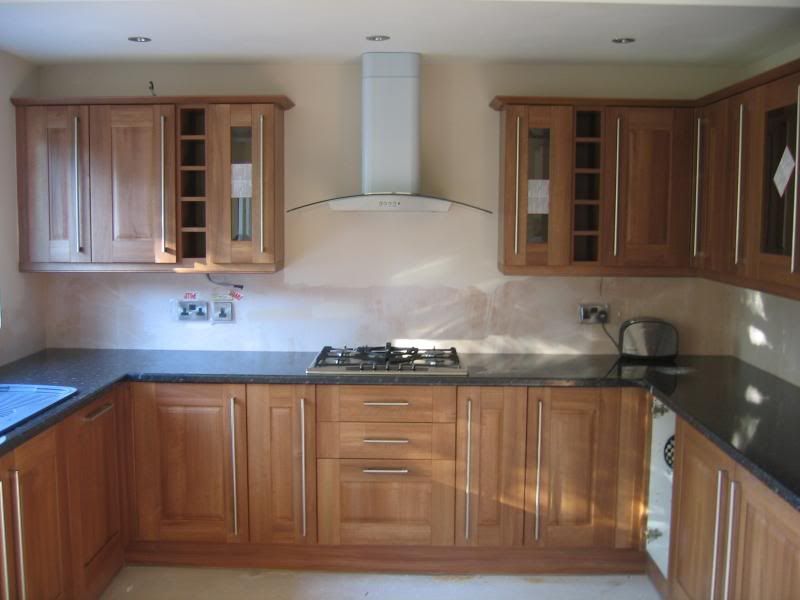
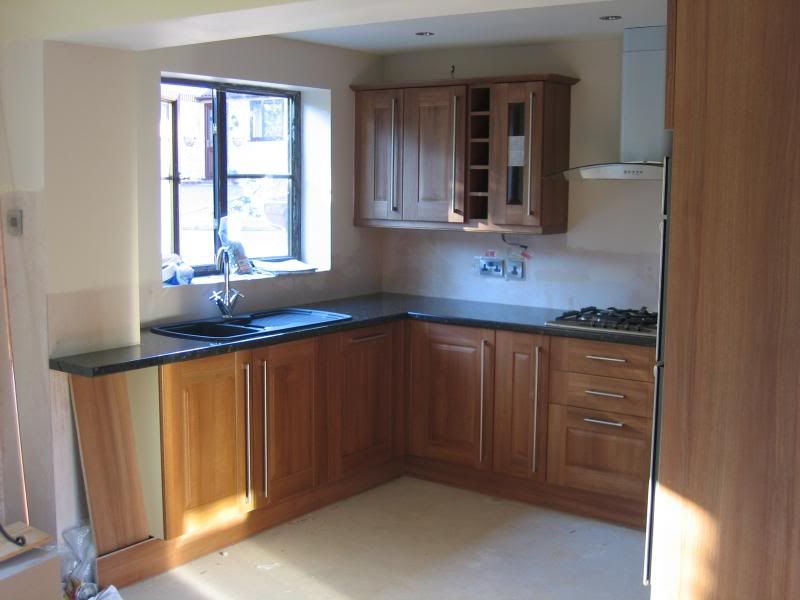
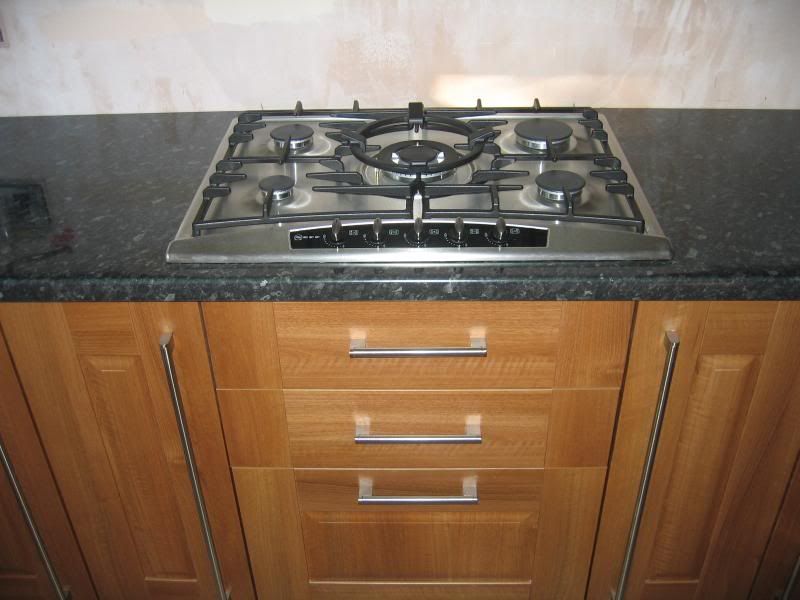
5-ring hob. Just wish we dug deeper into our funds and went for granite worktops!
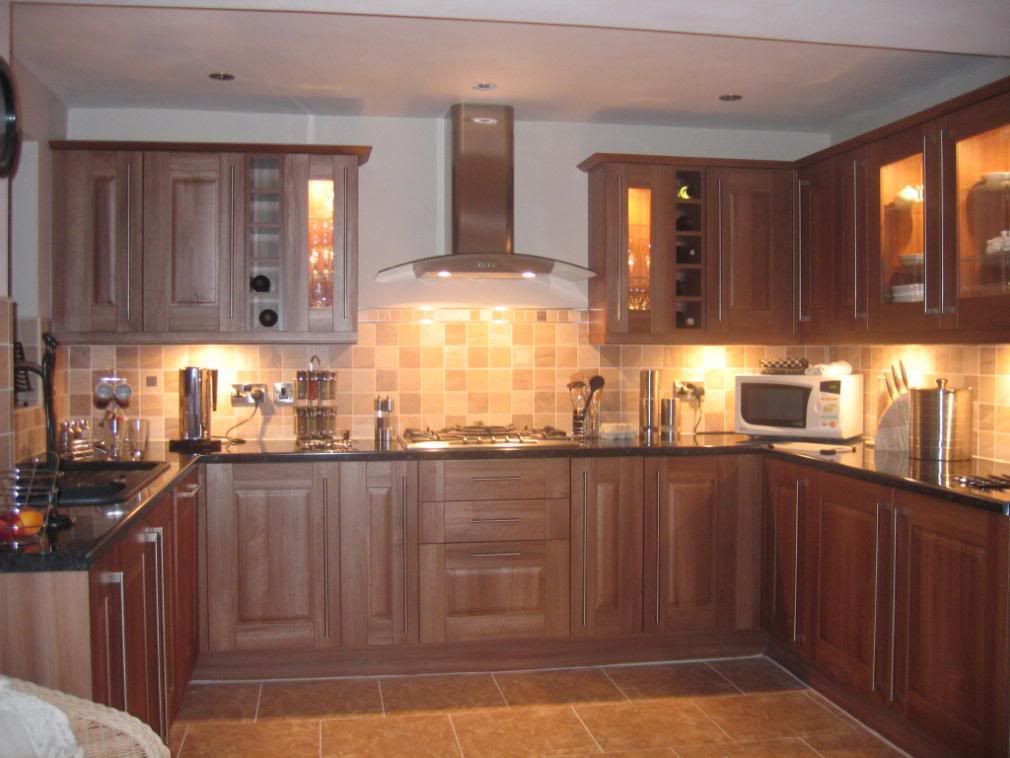
Wall tiles done with a bit of chrome bling under the hood. Cupboard lights and underlights in.

Utility corner complete. Boiler, washer, tumber dryer hidden behind cupboards.
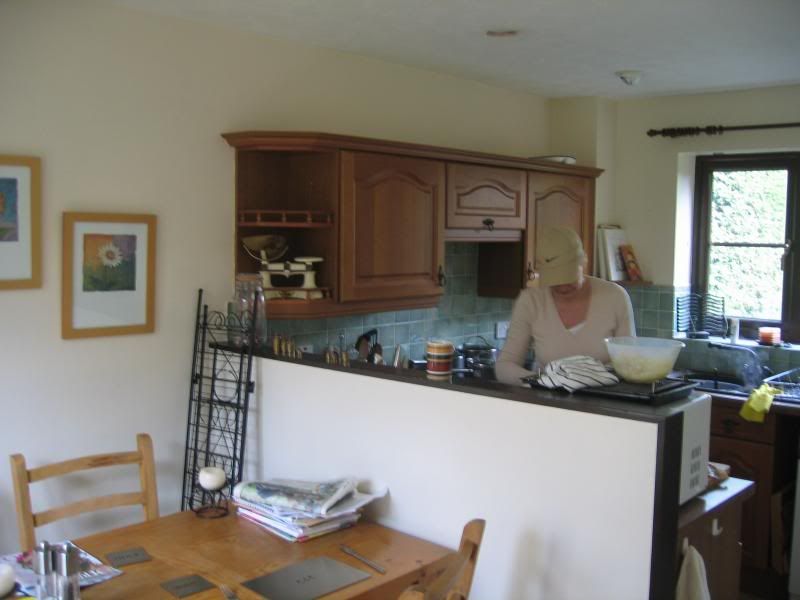
Done...
Just a detail - swap crap microwave for a cool black one!
(excuse the pink marigolds!)
Thought I would share my little house extension with you.
I bought this 3-bedroom property in May 2005 with the intention of extending it that same year. Unfortunately within 1 wk of moving in my Scooby engine went so I had to postpone whilst I spent on the car instead
.Our brief was to extend the small kitchen/diner into the attached garage, install a downstairs wc, build a separate detatched garage wide enough to take a car i.e. bigger than the daft one already there!, and turn bedroom 2 into a master bedroom with ensuite
As I used to be a draughtsman and now a Project Manager, I decided to take both roles to save on costs. And as I was working local at the time it was ideal to start work in '06.
We decided to commence with the building work in May 2006. I projected that our budget would cover for all building and services work and get us the new kitchen in. The upstairs would wait until early '07.
First we tackled the new garage. A small plot of land came with the property next to the original garage.
This meant taking down the wall as the new garage would act as the new retaining wall too.
Before erecting scaffolding the footing was laid and some of the low-level brickwork.
In the mean time I broke out the floor in the existing garage as it needed insulating. Those jack-hammers kill your wrists!
Progress so far...
Time to get the scaffolders around. There's obviously detail missing here as I didn't take shots of everything.
Roof timbers on. There was a 2 week delay with the garage items. We used the original garage items for the house.
Salvaged roof tiles from original garage in order to blend as well as possible
Outside complete!
Now for the inside. Kitchen area as it was..
The window at the back to be removed and replaced with french doors leading to back garden. Existing single door to be blocked up as the new combi boiler will hang in that corner. Door re-used as a side entrance to garage.
The wall with the pictures on to be removed - existing garage space on other side.
Another shot of the old kitchen area
Wall gone plus most of the old kitchen - we ripped the old kitchen out ourselves.
Beam in place. Calculated by local structural engineer.
Studwork for downstairs loo.
New french doors in place
Boiler hung by an incompetent plumber - he was sacked later as he couldn't commission it
Kitchen units going in
5-ring hob. Just wish we dug deeper into our funds and went for granite worktops!
Wall tiles done with a bit of chrome bling under the hood. Cupboard lights and underlights in.
Utility corner complete. Boiler, washer, tumber dryer hidden behind cupboards.
Done...
Just a detail - swap crap microwave for a cool black one!
(excuse the pink marigolds!)
Last edited by skoobidude; 03 January 2008 at 08:36 AM.

 02 January 2008, 03:50 PM
#3
Scooby Regular
Thread Starter
Join Date: Mar 2002
Posts: 2,623
Likes: 0
Received 0 Likes
on
0 Posts
Ensuite....
1400x900 shower tray down and mixervalve pipework in place.
Plumbing for sink. The rectangular holes in the wall were for shaver sockets (electric toothbrush chargers) and were later removed as it would look crap.
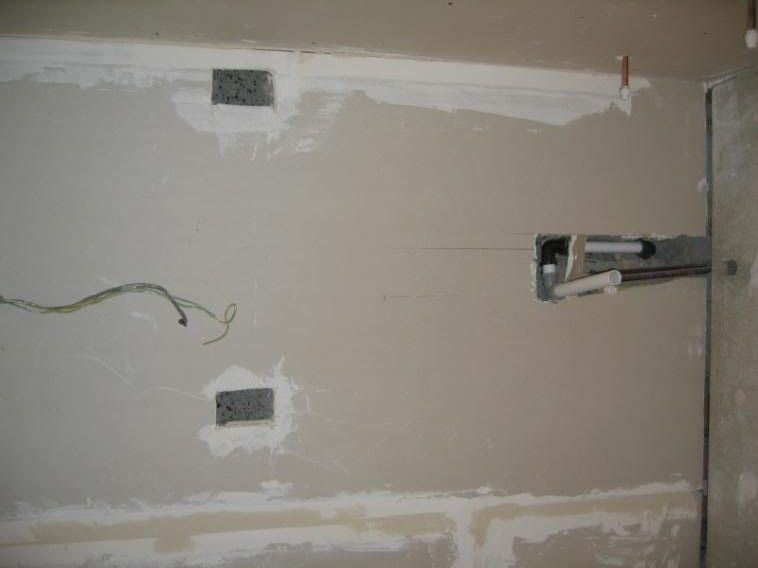
Toilet plumbing.

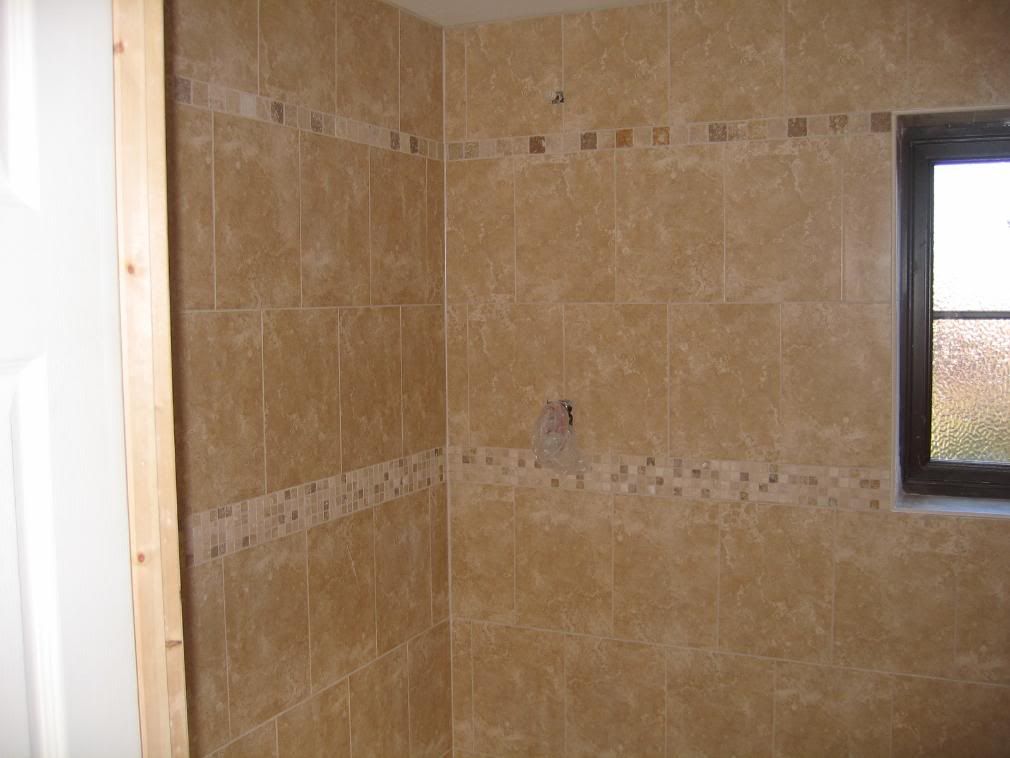
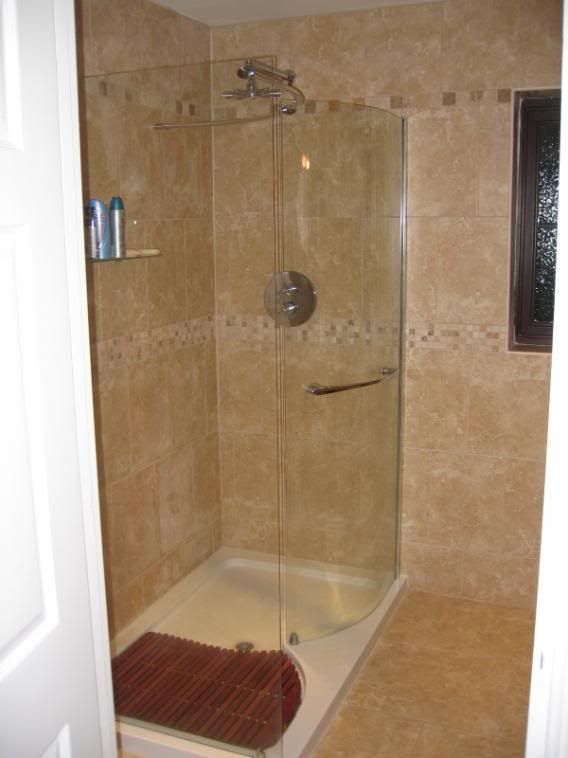
Shower tray

We tiled throughout -floor and all walls.
Job done
Soft-closing toilet lid in case I let go of it in the night

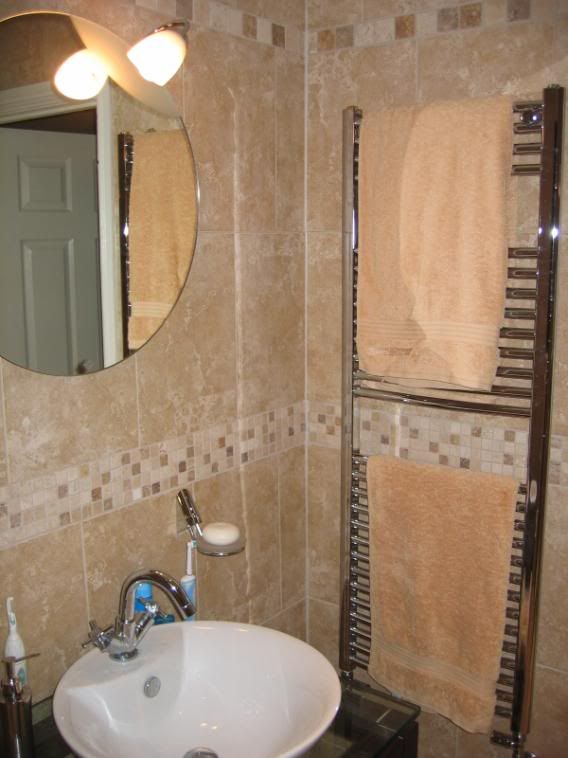
Mirror with light. This was originally �250 in a specialist shop but was lucky to get it in their sale together with various other wall mounted items for �85
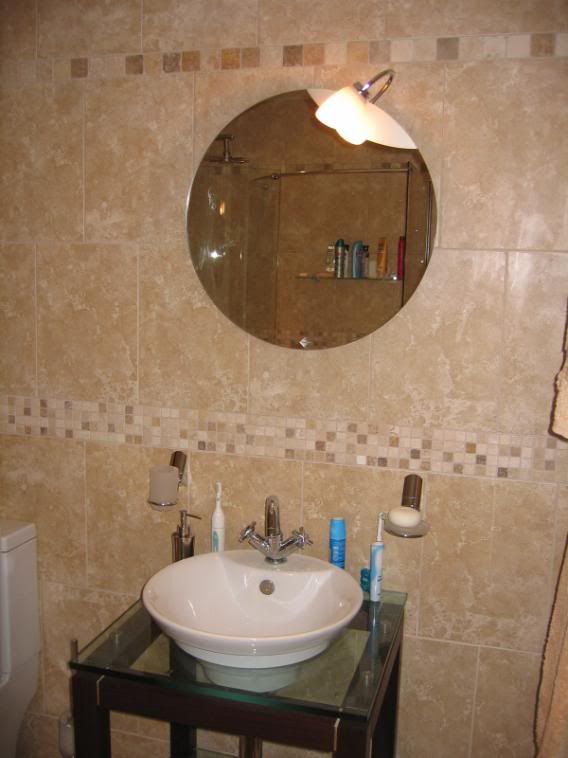
Chrome ladder towel radiator.
Walk-in shower

Done!
1400x900 shower tray down and mixervalve pipework in place.
Plumbing for sink. The rectangular holes in the wall were for shaver sockets (electric toothbrush chargers) and were later removed as it would look crap.
Toilet plumbing.
Shower tray
We tiled throughout -floor and all walls.
Job done
Soft-closing toilet lid in case I let go of it in the night
Mirror with light. This was originally �250 in a specialist shop but was lucky to get it in their sale together with various other wall mounted items for �85
Chrome ladder towel radiator.
Walk-in shower
Done!
Last edited by skoobidude; 02 January 2008 at 03:52 PM.

 02 January 2008, 04:10 PM
#7
Scooby Regular
Thread Starter
Join Date: Mar 2002
Posts: 2,623
Likes: 0
Received 0 Likes
on
0 Posts
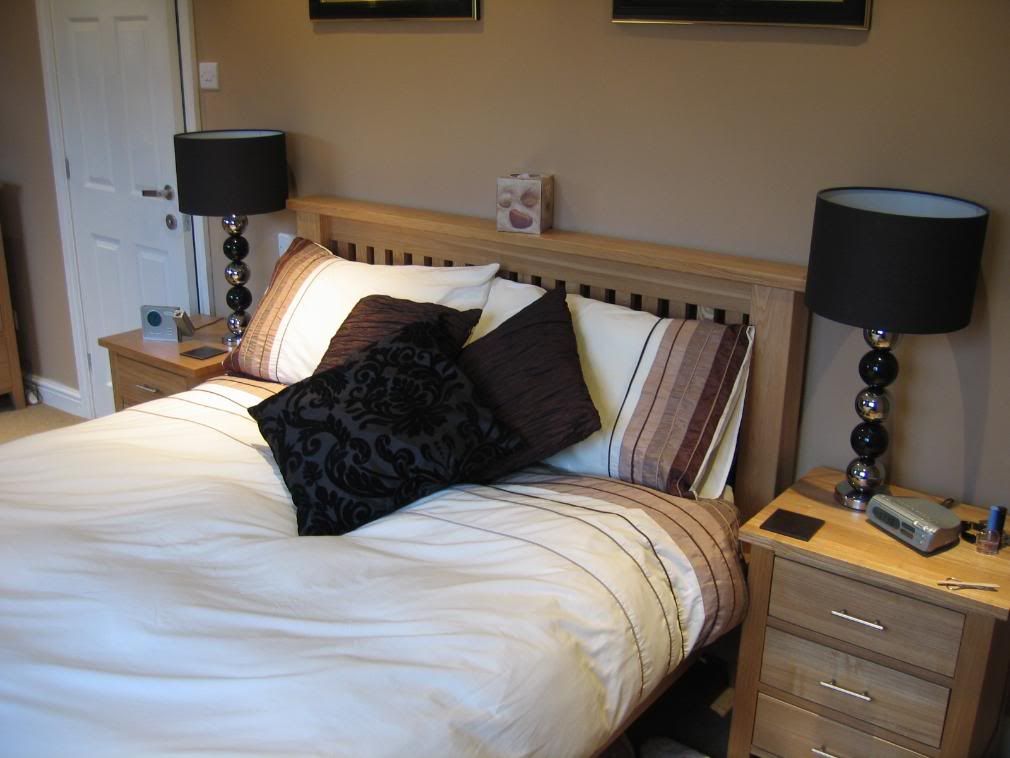
From a small second bedoom..
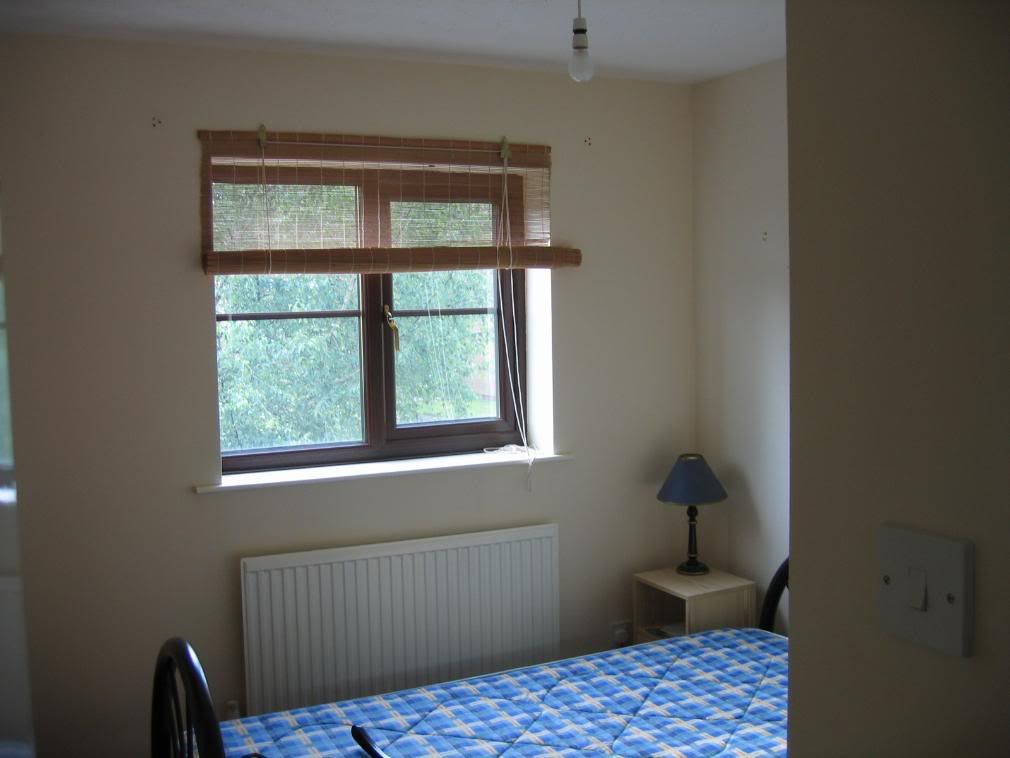

To this..

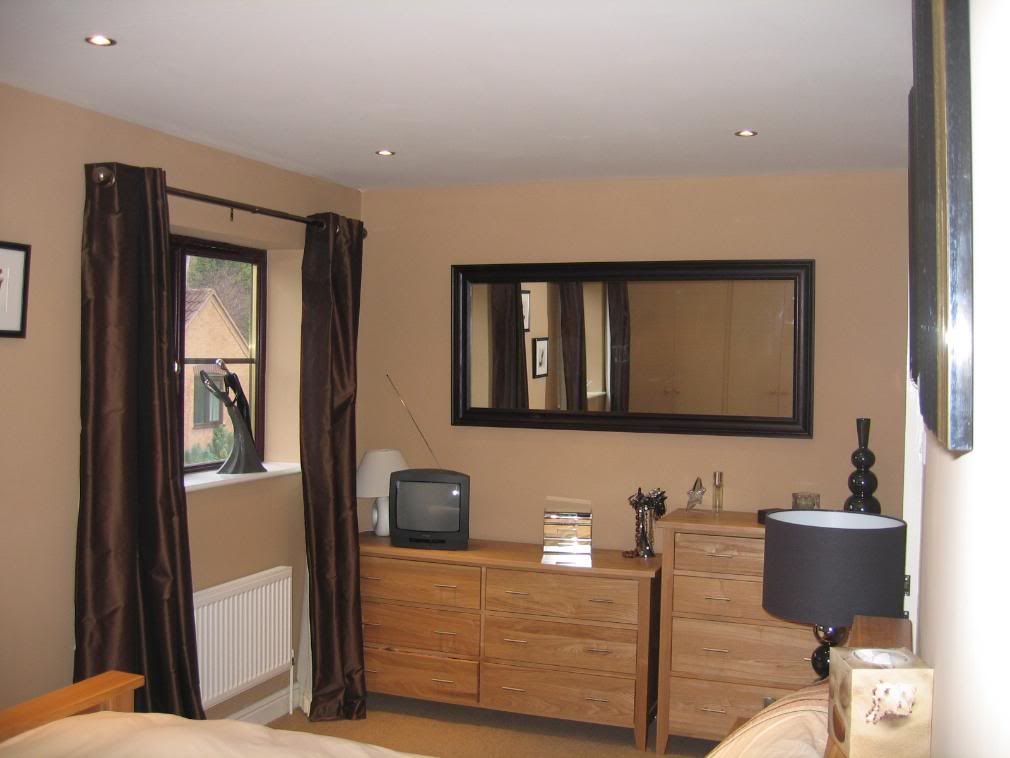
All solid oak furniture. The bed is very heavy!
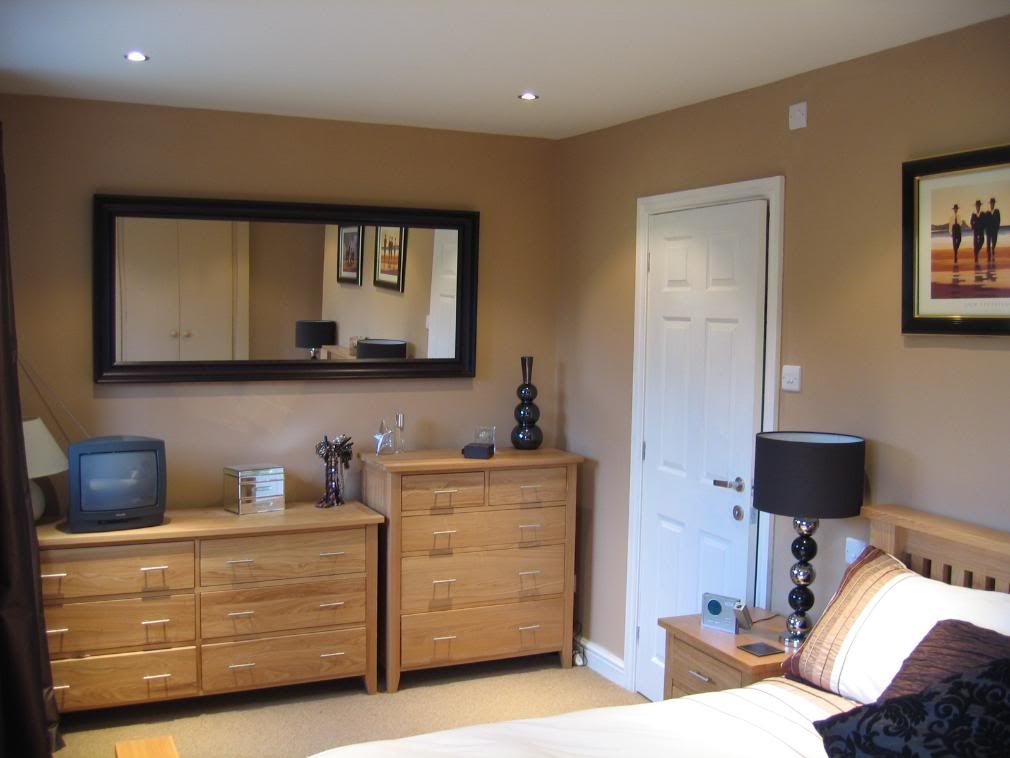
Where all the action happends
That's it!
Nick
PS thanks for the nice comments. I recommend it to those who have never done one!
To this..
All solid oak furniture. The bed is very heavy!
Where all the action happends
That's it!
Nick
PS thanks for the nice comments. I recommend it to those who have never done one!
Trending Topics
02 January 2008, 04:19 PM
#9
Scooby Regular
Thread Starter
Join Date: Mar 2002
Posts: 2,623
Likes: 0
Received 0 Likes
on
0 Posts
Davey, no because it's still a 3-bed. I would have liked to add a fourth bedroom but the layout didn't offer scope to do so without spending a small fortune.
Nick
Nick
02 January 2008, 04:29 PM
#10
Scooby Regular
iTrader: (22)
Join Date: May 2006
Location: Doncaster, S. Yorks.
Posts: 21,415
Received 0 Likes
on
0 Posts
) and would be interesting to see your outlay compared to the added value and visual impact youve achieved.
02 January 2008, 04:37 PM
#11
Scooby Regular

Join Date: Jun 2000
Posts: 4,413
Likes: 0
Received 0 Likes
on
0 Posts
Well done and respect. The house looks great. You must be very please. I really admire people who can do this. I think I'm too scared to do it myself, though our kitchen really could do with being extended before we rip it out and put in a new one.
 02 January 2008, 04:48 PM
#13

Nicely done skoob. We've (me and the wife)+ builder knocked down our attached double garage and rebuilt it for a living room. Wife wanted to make it slightly bigger so it now measures 8metres by 8metres inside, tis a lovely room though. New garage went up, now can house 6 cars or 4 cars and two motorbikes, plus workshop area, with full length storage on top.
Benefits of moving to the countryside, lots of space.
Andy
Benefits of moving to the countryside, lots of space.
Andy

 02 January 2008, 06:00 PM
#17
Scooby Regular

Join Date: May 2006
Location: I have ad blocked my rep - so dont waste your time!
Posts: 1,548
Likes: 0
Received 0 Likes
on
0 Posts
Soft close toilet lids....one of the best things i bought las year 
With 4 kids and 4 loos i must have halved the noise output!
With 4 kids and 4 loos i must have halved the noise output!


 03 January 2008, 08:48 AM
#23
Scooby Regular
Thread Starter
Join Date: Mar 2002
Posts: 2,623
Likes: 0
Received 0 Likes
on
0 Posts
Yes. the only thing the council were concerned about was making sure I used matching bricks! As if I would use red or something

Also, my neighbour opposite didn't want to lose view of the sky so I had to convince her the garage was single storey and to sit at the same level as the house.
Shower is very good. Although it was in the back of my mind as to whether it would leak. I kept an eye on the ceiling downstairs for ages. Faith in my contractors!
Thanks everyone else for comments and for those who asked costs, I've PM'd you.
Nick
Last edited by skoobidude; 03 January 2008 at 08:56 AM.
 03 January 2008, 11:14 AM
#25
Scooby Senior

Looking at the photos it doesnt seem that close, I for one would be only worried about the light being blocked, it gives the drive added security.
03 January 2008, 11:20 AM
#26
Scooby Regular
![[Davey]'s Avatar](data:image/svg+xml;utf8,<svg xmlns='http://www.w3.org/2000/svg' viewBox='0 0 50 50'><circle class='avatar-circle-default' fill='%23806b84' cx='25px' cy='25px' r='20px'></circle><text class='avatar-text-default' x='49%' y='53%' fill='white' text-anchor='middle' alignment-baseline='middle'>[</text></svg>)
 03 January 2008, 12:03 PM
#27
Scooby Regular
Thread Starter
Join Date: Mar 2002
Posts: 2,623
Likes: 0
Received 0 Likes
on
0 Posts
Spider/Doc
At the time my neighbour was a lonely divorcee who wasn't bothered about it. I even gave her the choice of what to put down between her drive and my new garage but she didn't care. After all, she put her house on the market towards the end of our project as she needed to settle money with her ex. Well timed!
My current neighbour would have been a nightmare. He already parks both his cars side by side on his single drive. One of his cars is then only centimeteres away from the wall of our garage")
He has recently taken to putting one on his drive and one on his small front lawn. It's comical to watch.
Nick
At the time my neighbour was a lonely divorcee who wasn't bothered about it. I even gave her the choice of what to put down between her drive and my new garage but she didn't care. After all, she put her house on the market towards the end of our project as she needed to settle money with her ex.
Well timed!My current neighbour would have been a nightmare. He already parks both his cars side by side on his single drive. One of his cars is then only centimeteres away from the wall of our garage
He has recently taken to putting one on his drive and one on his small front lawn. It's comical to watch.
Nick
Last edited by skoobidude; 03 January 2008 at 12:07 PM.
03 January 2008, 12:10 PM
#28
Scooby Regular
Thread Starter
Join Date: Mar 2002
Posts: 2,623
Likes: 0
Received 0 Likes
on
0 Posts
All I need now is for my front to be blocked-paved as it's a mish-mash of base tarmac, knackered tarmac, slabs and grass. We intend to sweep the drive across the front of the house but retain some of the lawn and the "protected tree".
It should improve the frontage no end.
Note the pavement on the front was dropped at the same time as the extension as it was humped and often caught the underside of my car. The local council did this for free but left the edge of the drive lumpy as they wern't allowed to touch it.
Nick
It should improve the frontage no end.
Note the pavement on the front was dropped at the same time as the extension as it was humped and often caught the underside of my car. The local council did this for free but left the edge of the drive lumpy as they wern't allowed to touch it.
Nick
 03 January 2008, 02:12 PM
#30
Scooby Regular

Super job, we're currently in the planning phase for something similar in the next year or two, just working out costs etc at the minute.
If you could PM me with costs that would help me a lot.
Where did you get the oak bedroom furniture? Looking for something similar at the minute.
If you could PM me with costs that would help me a lot.
Where did you get the oak bedroom furniture? Looking for something similar at the minute.