
My barns and the conversion of one.......
 16 October 2011, 07:42 PM
#1

Posted loads of times on here about various things I've been up to, so I thought I'd put up one or two pics.

First pic, above, shows very untidy UPstairs, with e-bay chopsaw, e-bay plasterboard lifter and various items of wiring, woodwork etc.
The beams are what we were doing in the summer and will support the celiling, as seen by the first bit of plasterboard.
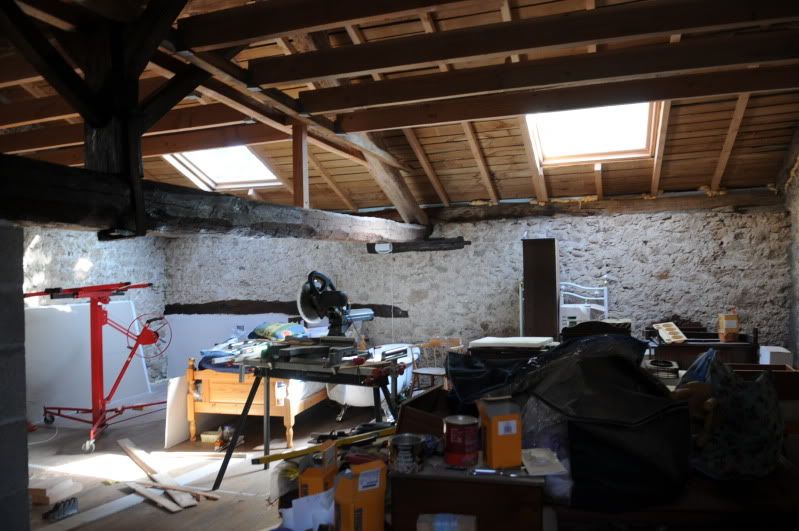
Second pic, above, same view from other side, standing in what will be the master bedroom
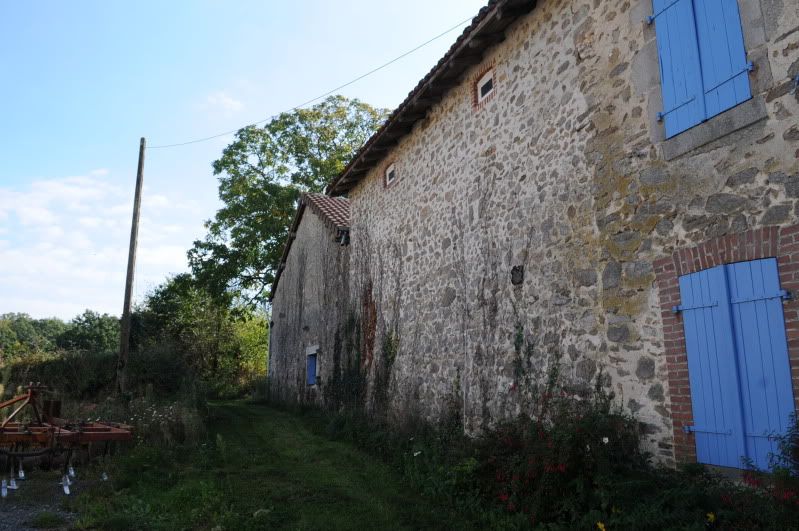
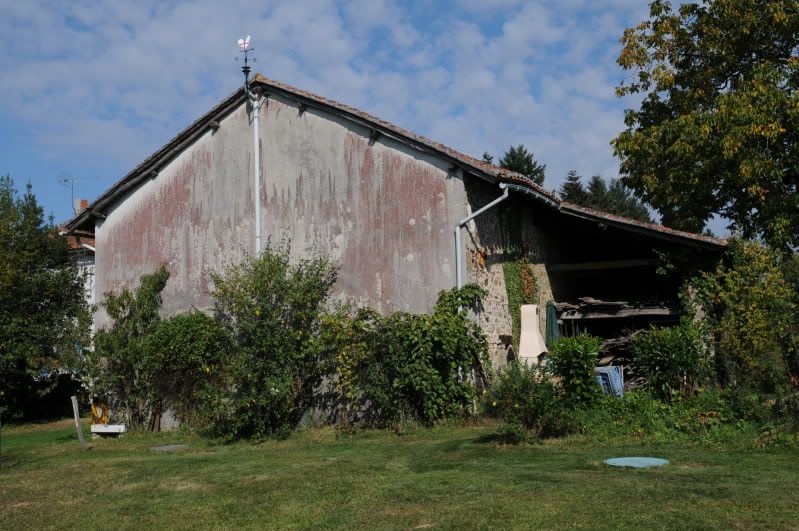
Third pic, above, showing the back of the house, with the barn bit I'm converting, from where the roof dips down to form a gulley. Also showing our green lane we bought off the local council for €100. View approximately looking east.

Rear of the barn conversion bit. The stuff all over the ground in the foreground is walnuts. Awaiting the arrival of my wife who will pick them all up LOL.
The door at left was a one and half personal barn entrance, and is now a one and half uPVC door. It has the original stone threshold in place, my wife insisted, took me a half day, the thing weighed over 120kg.
The two windows are in the end of the dining room, in the space where there WAS a huge double barn door. You can still see the lintel above.
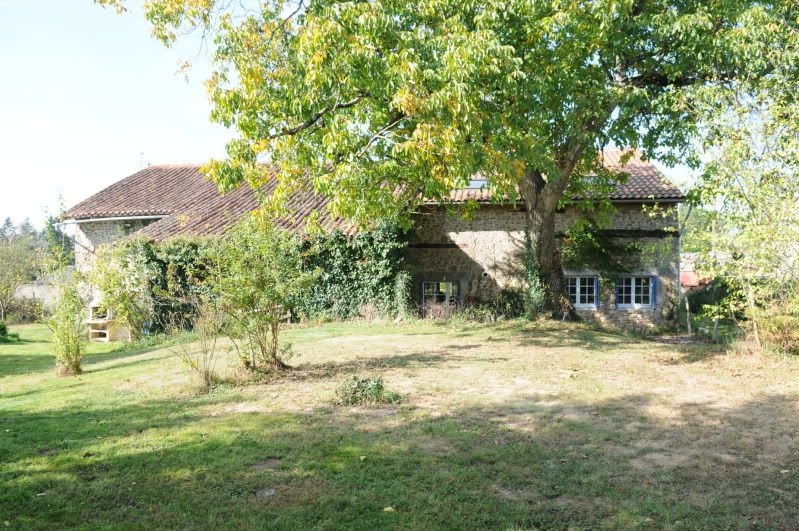
Rear view, looking approximately west. In the foreground, the woodstore, which has a roof that comes lower. At left can be seen our concrete barbecue, and at right can just be seen the one and half door to the utility.
Better view of the barbecue andf the woodstore area. The woodstore is slated to become an outside cooking area with sink, elctrics, fridge, hotplate etc. (Wife has these ideas") )
)
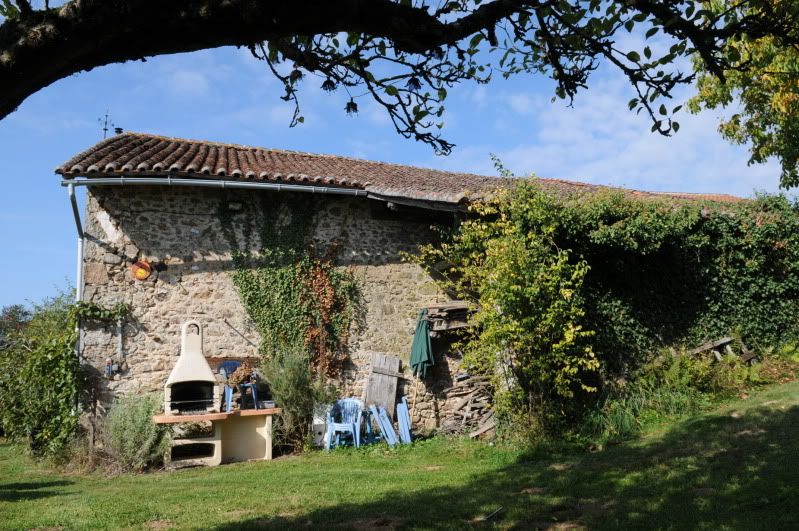
Looking at the end of the barn that will remain a barn, looking approximately north. Barbecue to right, again.
Note weathervane..........
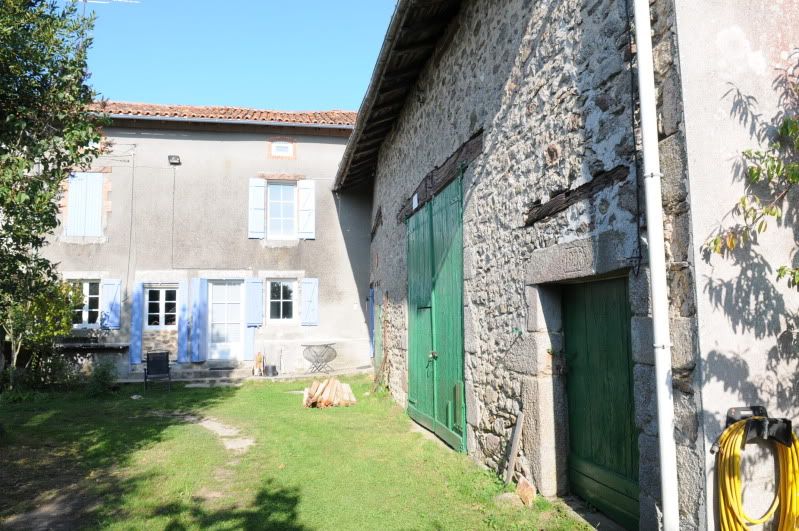
Looking up the drive from the south west, the house is to the right, barn in foreground.
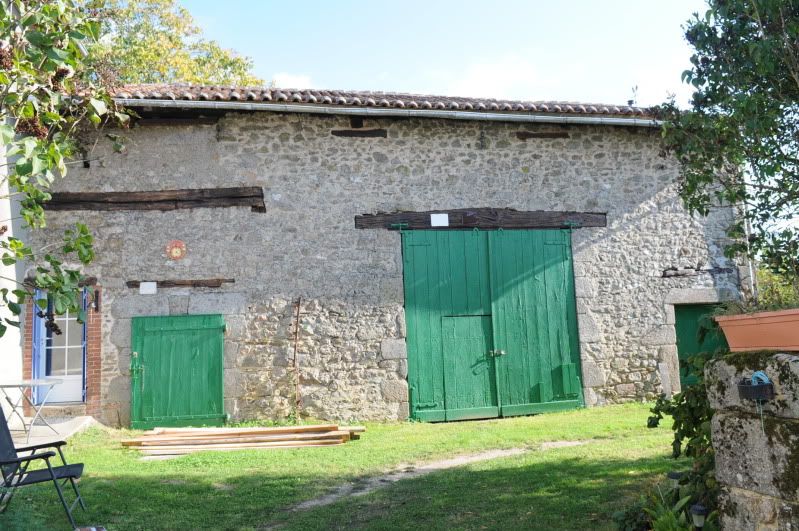
Barn that will remain a barn. Doors, from left to right: uPVC door into utility area in barn conversion, smaller door into dry woodstore and general garden store, (there is a plough, a harrow and a threshing machine in there, courtesy of previous owner ), large doors to main barn, smaller door to old piggery, nice concrete pens, concrete floor, part of which will become a workshop, mostly storage of wire, tiles, tools etc at the mo.
Those large doors are amazing. They must weigh half a ton each, but can be opened and closed with a fingertip. A tribute to the guy who put them up three hundred years ago.

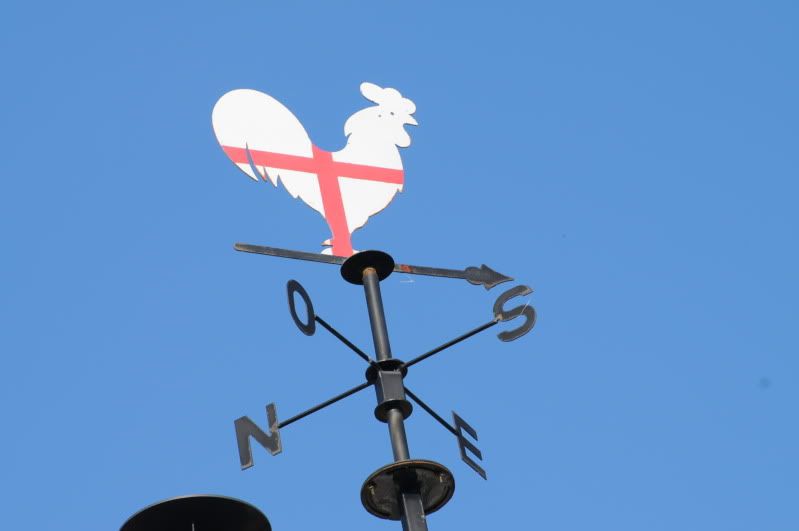
Finally, two shots of my weathervane, showing my non-partisan attitude, I hope.
Bit of rust showing, will have to get the ladder out next summer, THAT's a laugh a minute it's quite high..............
First pic, above, shows very untidy UPstairs, with e-bay chopsaw, e-bay plasterboard lifter and various items of wiring, woodwork etc.
The beams are what we were doing in the summer and will support the celiling, as seen by the first bit of plasterboard.
Second pic, above, same view from other side, standing in what will be the master bedroom
Third pic, above, showing the back of the house, with the barn bit I'm converting, from where the roof dips down to form a gulley. Also showing our green lane we bought off the local council for €100. View approximately looking east.
Rear of the barn conversion bit. The stuff all over the ground in the foreground is walnuts. Awaiting the arrival of my wife who will pick them all up LOL.
The door at left was a one and half personal barn entrance, and is now a one and half uPVC door. It has the original stone threshold in place, my wife insisted, took me a half day, the thing weighed over 120kg.
The two windows are in the end of the dining room, in the space where there WAS a huge double barn door. You can still see the lintel above.
Rear view, looking approximately west. In the foreground, the woodstore, which has a roof that comes lower. At left can be seen our concrete barbecue, and at right can just be seen the one and half door to the utility.
Better view of the barbecue andf the woodstore area. The woodstore is slated to become an outside cooking area with sink, elctrics, fridge, hotplate etc. (Wife has these ideas
)Looking at the end of the barn that will remain a barn, looking approximately north. Barbecue to right, again.
Note weathervane..........
Looking up the drive from the south west, the house is to the right, barn in foreground.
Barn that will remain a barn. Doors, from left to right: uPVC door into utility area in barn conversion, smaller door into dry woodstore and general garden store, (there is a plough, a harrow and a threshing machine in there, courtesy of previous owner
), large doors to main barn, smaller door to old piggery, nice concrete pens, concrete floor, part of which will become a workshop, mostly storage of wire, tiles, tools etc at the mo.Those large doors are amazing. They must weigh half a ton each, but can be opened and closed with a fingertip. A tribute to the guy who put them up three hundred years ago.
Finally, two shots of my weathervane, showing my non-partisan attitude, I hope.
Bit of rust showing, will have to get the ladder out next summer, THAT's a laugh a minute it's quite high..............
Last edited by alcazar; 16 October 2011 at 07:47 PM.


Trending Topics


 16 October 2011, 09:38 PM
#15
Scooby Regular

Join Date: May 2006
Posts: 2,193
Likes: 0
Received 0 Likes
on
0 Posts
Great to see some pics after reading your posts. I'd love to do a project like this, unfortunately my next project is a 2 bed terraced house in sunny Manchester
Can I ask why you are creating the ceiling? Could you not have boarded the roof to have high ceilings?
Can I ask why you are creating the ceiling? Could you not have boarded the roof to have high ceilings?
16 October 2011, 09:43 PM
#16
The beams are set at 600mm centres. French plasterboard is sold at 2500 x 1200mm, so guess which way they are going up?
Or should I put them up the other way, and somehow join the two edges, which will no longer meet on a beam? A board glued to the top edge of both?
Headroom: the beams I put in are set at 2500mm, the one across the roof, around 1800mm where the centre will be, which is where there will be an access to two bedrooms, with signs warning of low headroom in two languages.
That's the only place where people will have to go under it, it marks the centre of the barn, so will divide our room from the bathroom, and the two bedrooms from one another.
I'm only a little guy, so no probs for me
Anyone else takes their chance.
Last edited by alcazar; 16 October 2011 at 09:44 PM.
16 October 2011, 09:48 PM
#17
Added to that, the gap between celing and roof, for insulation purposes, is only 75mm if I do it that way. Doing it my way gives a small area like that, but the most of it will have 150mm between the joists and another 150mm layed over that.
Energy here is DEAR............
16 October 2011, 09:52 PM
#20
Anyone else noticed that each seating area has a terra-cotta clock/temperature gauge, hand painted? Got the first from a garden centre, cost nearly �20, the next two came from Lidl, cot �3.99 each
They come as bare terra-cotta, painting courtesy of Alcazar......cut my teeth painting Subbuteo men. I used to put moustaches and beards on them.........not to mention RECOGNISEABLE renditions of club badges, all in 1:76 scale.
My eyes aren't so good now, mind.
They come as bare terra-cotta, painting courtesy of Alcazar......cut my teeth painting Subbuteo men. I used to put moustaches and beards on them.........not to mention RECOGNISEABLE renditions of club badges, all in 1:76 scale.
My eyes aren't so good now, mind.
16 October 2011, 10:19 PM
#22
Scooby Regular
Fantastic post Alcazar, its nice actually seeing something postive out of your mostly neglective posts*. Definitely keep the pics coming as you progress as its really nice see and gives the rest of us something to strive for.
I think I'd have to turn the barn area into an uber-man garage with a lift.
*yes, I do realise this is like the pot calling the kettle black
Definitely keep the pics coming as you progress as its really nice see and gives the rest of us something to strive for.I think I'd have to turn the barn area into an uber-man garage with a lift.
*yes, I do realise this is like the pot calling the kettle black
 16 October 2011, 11:29 PM
#24
Scooby Regular

Join Date: Nov 2003
Location: riding the crest of a wave ...
Posts: 46,493
Likes: 0
Received 13 Likes
on
12 Posts
A couple , who helped install my sisters heating (drilling thro a 3 foot wall - i was there) , got a place in Creuse must been 10 years ago now , silly cheap* and rebuilt it between working as extras / more serious film aspirations in London
They had to leave cos the place was just too empty they said !
Moved to Aude
They had to leave cos the place was just too empty they said !
Moved to Aude
Last edited by dpb; 17 October 2011 at 09:02 AM. Reason: * temptingly inexpensive
17 October 2011, 09:29 AM
#25
�120 delivered, but we had to build a base for it, assemble it and cement it together, "paint" it with a runny cement mixture and then paint it.
I think they still go for around �120-�200, but delivery is extra.
I have one the same at home, brought home in the trailer when we used to bring trailersfull of stuff down, returning with a near-empty box.
17 October 2011, 09:34 AM
#26
dpb: I've done the "drilling metre thick walls, I have three long drills, 10mm, 16mm and 20mm, plus one I put in from both ends when the smaller ones have gone through, which is 30mm.
This summer I tried to do drilling low down on a wall, hit something solid going both ways, drills weren't touching it, about 20cm in. Chooped out one side, to find a lump of quartz the size of my head.
It had to be removed, took SEVEN hours with hand tools at floor level...............and I eneded up with REALLY bad tennis elbow from swinging a 7lb hammer horizontally
Oh well, it's done now.
Any more from the plasterers? Should I take that sheet down and put it back the other way? I can put the p/b lifter under it while I unscrew?
WHY does it/will it crack the way I've done it.

 17 October 2011, 12:35 PM
#30
Scooby Regular
Join Date: Nov 2003
Location: riding the crest of a wave ...
Posts: 46,493
Likes: 0
Received 13 Likes
on
12 Posts
Yep im sure we were into the second day getting thro this wall !!
taking hot water from the bolier ( old kitchen ) to the new kitchen straight next door ( these were at one point 2 separate addresses )
- just wasnt another option
taking hot water from the bolier ( old kitchen ) to the new kitchen straight next door ( these were at one point 2 separate addresses )
- just wasnt another option