
antone fitted apex bc coilovers?
 08 February 2009, 12:01 AM
#1
Scooby Regular
Thread Starter

Join Date: Apr 2008
Location: Sheffield
Posts: 234
Likes: 0
Received 0 Likes
on
0 Posts
just fitting my coilovers and was wondering what distance people have on the right height, at the mint without fitting the wheels ive just took them straight out of the box and fitted them straight on. Do you have to make any adustments they look to be pretty low, juat as a rough guideline and can yo adjust the ride height without undoing them from the hub?
cheers
cheers
Last edited by G8RDK; 08 February 2009 at 12:02 AM.

 08 February 2009, 08:05 PM
#4
Scooby Senior

Join Date: Sep 2003
Location: Essex
Posts: 2,600
Likes: 0
Received 0 Likes
on
0 Posts
front 14" and rear 13.5" front center of wheel to wheel arch lip.
I added 15 turns/30mm to each strut before fitting, which gave a drop of 30mm. If you fitted yours out of the box then you have a 60mm drop which is way too much.
dipster
I added 15 turns/30mm to each strut before fitting, which gave a drop of 30mm. If you fitted yours out of the box then you have a 60mm drop which is way too much.
dipster
09 February 2009, 12:24 AM
#5
Scooby Regular
Thread Starter
Join Date: Apr 2008
Location: Sheffield
Posts: 234
Likes: 0
Received 0 Likes
on
0 Posts
whats the pre tensioning the springs? so i need to higher, im looking for around a 40-50mm drop can you adjust them on the car or do they need to be removed?
09 February 2009, 12:49 AM
#6
Scooby Regular
iTrader: (9)
Join Date: Oct 2006
Location: midlands
Posts: 2,316
Likes: 0
Received 0 Likes
on
0 Posts
i assumed the springs where all pre set when fitted mine, i just set them high and lowered to the required height rather than set them low take the jack from underneath and the wheel ended up in the arch liner lol
09 February 2009, 04:43 AM
#7
Scooby Senior
Join Date: Sep 2003
Location: Essex
Posts: 2,600
Likes: 0
Received 0 Likes
on
0 Posts
The springs are preloaded from the factory(5mm)
loosen the bottom lockring using the C spanner, mark the thread with tip-ex and turn the whole unit by hand. I found that 15turns was 30mm, so to go 20mm higher I would turn the unit 10 times on each corner.
dipster
loosen the bottom lockring using the C spanner, mark the thread with tip-ex and turn the whole unit by hand. I found that 15turns was 30mm, so to go 20mm higher I would turn the unit 10 times on each corner.
dipster
Last edited by davedipster; 09 February 2009 at 04:45 AM.
Trending Topics
11 February 2009, 12:00 AM
#8
Scooby Regular
Thread Starter
Join Date: Apr 2008
Location: Sheffield
Posts: 234
Likes: 0
Received 0 Likes
on
0 Posts
i dont want to sound stupid but what does pre loaded mean? ive fitted the front 2 but the car is on stands till my wheels have been refurbed am i able to adjust them with out undoing them from the hub?
11 February 2009, 08:06 AM
#9
Scooby Senior
Join Date: Sep 2003
Location: Essex
Posts: 2,600
Likes: 0
Received 0 Likes
on
0 Posts
Just back off the lower lock ring and grab the threaded bit of the strut and turn.
All adjustments can be done on the car.
Easy.
11 February 2009, 10:52 PM
#10

The instructions they send with them are quite clear. I turned mine out a lot - 22 turns or 44 mm. BTW my car is a 2006 STi.
I have 5kg/mm front and 4 kg/mm rear, spring rates.
My measured heights as per the spec(center of wheel to wheel arch) are as follows:
Front: stock 385mm, actual 370mm
Rear: stock 350mm, actual 355mm
I might adjust them a bit more. I am SO happy, these coilovers are definitely the Mutt's Nuts...
I have the knocking on severe potholes, any side, only at back. Today I hit a damn pothole from all the rain, BLAM, it was hard. Curses ! the rear shock knocked but otherwise the coilovers are great. Way better than stock and the old trouble & strife is very happy. 10/10 to Apex.
18 February 2009, 04:41 PM
#15

i have just ordered some of these coilovers, are they easy to fit?
as in a haynes manual how many spanners of difficulty
ONE being easy peasy FIVE being hard as chuff.
roughly how long would it take and would i need any special tools?
many thanks
as in a haynes manual how many spanners of difficulty
ONE being easy peasy FIVE being hard as chuff.
roughly how long would it take and would i need any special tools?
many thanks
18 February 2009, 05:13 PM
#16
Scooby Regular
iTrader: (7)

Join Date: Oct 2003
Location: Stealth mode on
Posts: 5,277
Likes: 0
Received 0 Likes
on
0 Posts
Very easy to do just a little fidderly on the rears as you have to get your hand into a small whole to undo the nuts, Shouldn't take more than 2 hours to complete the job though
18 February 2009, 05:27 PM
#17
is it really that easy?
might have to clear a weekend starting saturday morning then hopefully thats enough time to get them fitted by sunday night, so i got it back to get to work on monday.lol
thanks dannyboy
might have to clear a weekend starting saturday morning then hopefully thats enough time to get them fitted by sunday night, so i got it back to get to work on monday.lol
thanks dannyboy
18 February 2009, 06:19 PM
#18
Scooby Regular
iTrader: (21)
Join Date: Oct 2008
Location: Whitby, North Yorkshire
Posts: 3,016
Likes: 0
Received 0 Likes
on
0 Posts
I'm doing mine on Saturday.
Still not sure how to initially set the height, as I don't really want to be taking the wheels on and off/jacking the car up and down etc all the time.
Any advice? Moley's looks a bit too low for me if I'm honest, as occasionally the car scrapes now.
Newage by the way.
Still not sure how to initially set the height, as I don't really want to be taking the wheels on and off/jacking the car up and down etc all the time.
Any advice? Moley's looks a bit too low for me if I'm honest, as occasionally the car scrapes now.
Newage by the way.
18 February 2009, 06:20 PM
#19
Scooby Regular
iTrader: (2)
Join Date: Nov 2006
Location: Kippis near Casvegas
Posts: 3,404
Likes: 0
Received 0 Likes
on
0 Posts
Hardest part is loosening the 2 bottom bolts on each strut, I ended up with 5 stitches in thumb
Use a good fitting socket and a breaker bar, ratchets can slip as I found out
Don't rush and its an easy task. Check spring tension, the 2 lock rings under spring set this, one nearest spring to compress it and the second one to lock it in place.
Locking ring at strut brace to lock height after adjustment, measure from top to bottom of lock rings to ensure each side is the same. Front to back is trial and error or your choice. I think most go for same distance from wheel arch to tyre front and back.
HTH
18 February 2009, 06:27 PM
#20
Scooby Regular
iTrader: (2)
Join Date: Nov 2006
Location: Kippis near Casvegas
Posts: 3,404
Likes: 0
Received 0 Likes
on
0 Posts
I went for more than 5mm tension (distance you tighten 1st ring upwards from initially touching spring bottom) as they will settle in and may become slack which could cause rattle, IMO.  Anyway spring will compress a lot with a ton or so of Scoob on it so can't really harm anything.
Anyway spring will compress a lot with a ton or so of Scoob on it so can't really harm anything.
18 February 2009, 07:11 PM
#21
Scooby Regular
iTrader: (21)
Join Date: Oct 2008
Location: Whitby, North Yorkshire
Posts: 3,016
Likes: 0
Received 0 Likes
on
0 Posts
To be honest, I haven't read the instructions, as they said they were for a GC8 and I have a GDB....so I'm not being lazy not reading the manual
So you adjust (screw down) the top ring to lower it? So for example, if I screwed it 30mm down, this should lower the car 30mm?
Thanks
So you adjust (screw down) the top ring to lower it? So for example, if I screwed it 30mm down, this should lower the car 30mm?
Thanks
18 February 2009, 08:04 PM
#22
Scooby Regular
iTrader: (2)
Join Date: Nov 2006
Location: Kippis near Casvegas
Posts: 3,404
Likes: 0
Received 0 Likes
on
0 Posts
To lower or raise you screw the main thread into or out of the hub mount which lengthens or shortens the distance from top plate to hub mount, the "rings" stop things adjusting themselves.

This may help
This may help
Last edited by imf1; 18 February 2009 at 08:36 PM.
19 February 2009, 12:48 AM
#24
Scooby Regular
iTrader: (16)
Join Date: Apr 2003
Location: Curlew FPSO
Posts: 2,771
Likes: 0
Received 0 Likes
on
0 Posts
I fitted a set of these last Friday. Thankfully I had access to a ramp at a mates garage and had every tool ever made within 2 feet.
The thing I found hardest was getting the clips which hold the brake flexi to each strut off. I ended up cutting all 4 clips which probably took 2 hours due to having very little room to move the hacksaw.
In total it took me 4 hours. I have never ever changed any suspension before in my life. To be honest it is all pretty straight forward.
After fitting I am very pleased to say on the softest setting they are softer than the original Bilstein dampers and Eibach springs as i was worried they would be super hard.
19 February 2009, 08:16 AM
#25
Scooby Senior
Join Date: Sep 2003
Location: Essex
Posts: 2,600
Likes: 0
Received 0 Likes
on
0 Posts
Add 30mm (15turns) to each strut before fitting.
Use a six sided socket and breaker bar and spanner for the lower nuts & bolts.
Jack up front, then back. Not ideal jacking each corner at a time cos the arb will cause problems.
Put copperslip on the threads before refitting the nuts & bolts.
A days work if you work slow.
dipster
Use a six sided socket and breaker bar and spanner for the lower nuts & bolts.
Jack up front, then back. Not ideal jacking each corner at a time cos the arb will cause problems.
Put copperslip on the threads before refitting the nuts & bolts.
A days work if you work slow.
dipster
19 February 2009, 09:34 AM
#26
This job is a 1-2. I wish they were all like this.
Just a note - before undoing the bottom bolts that hold the hubs on the FRONT, put a Tippex or Pain line on the bolt head so that you put the bolt back in the way it came out - then your alignment wont be badly out. Those bolts are offset like a cam to ajust the alignment.
Another tip is to break the bolts, just put a long bar on the spanner or you will pull till your naught is hanging on the ground next to you. I use a good socket and a piece of pipe to undo so that it comes off easily. Torque it back up properly, though.
The 2 longest jobs are setting the shock length - I counted the turns and then measured each just to be safe - and taking the bluddy wheels off. I gotsta get me one of those battery impact wrenches to take the wheel nuts off quickly. Everything else goes easily, and I did mine when it was 1C outside....so the job took me about 4 hours easy relaxed, lotsa coffee, lotsa peeing, etc etc...
Before you set off for a test ride, set all the dampers to about 4 clicks off softest. You will be amazed. Then try some harder settings and soon you will be SMILING...
Then spray everything except the brakes with Scotoiler FS365 anti-corrosion spray to protect your shiny coilovers against the damn salt.
20 February 2009, 10:31 PM
#30
Scooby Regular
Join Date: Jun 2007
Posts: 521
Likes: 0
Received 0 Likes
on
0 Posts
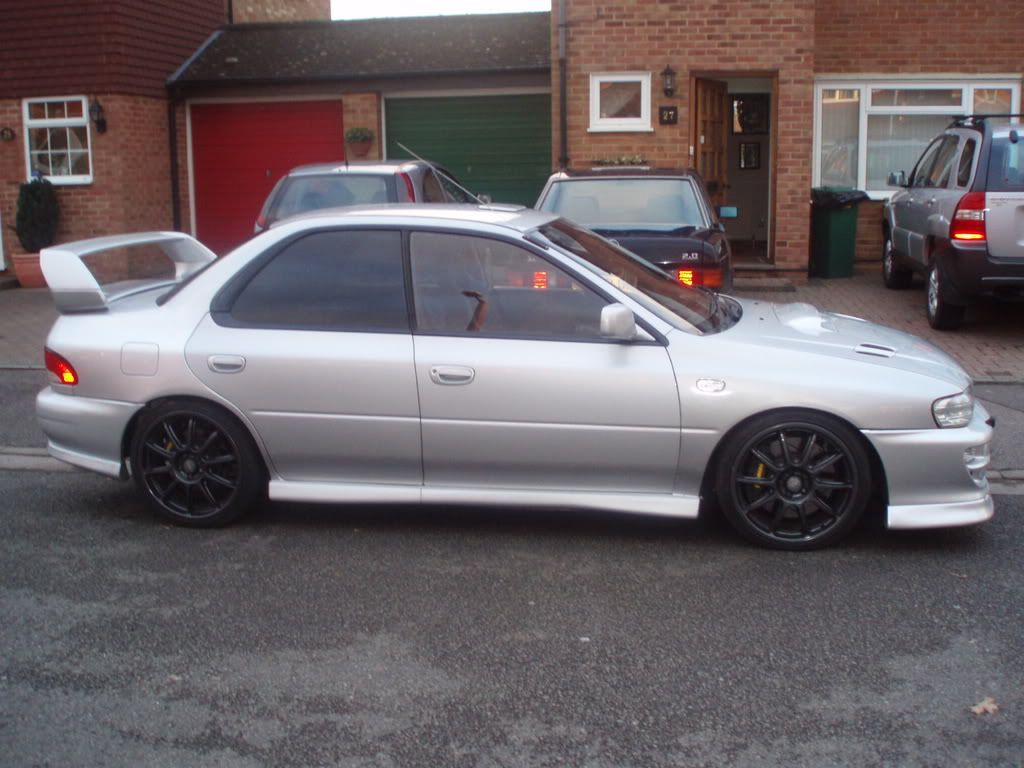
prwatts....could you please post a pic of how your car is sitting with these coilovers?...very interested to see how it looks on coilovers..on that note if anybody else with a hawkeye whos fitted the bc coilovers, if you can post your pictures up
thanks
thanks