
Not Scooby Related - My Camper Project (Plenty Pics)
 17 April 2011, 10:40 PM
#1
Scooby Regular
Thread Starter
iTrader: (3)

Join Date: Jan 2007
Location: Swansea South Wales, UK.
Posts: 692
Likes: 0
Received 0 Likes
on
0 Posts
Some of you may know that I have wanted a VW Transporter for so long now and the beginning of last year I actually bought one with the intention of converting it into a day van/camper.
I made a start doing little bits to it like the lights, wheels getting trim sorted for the interior then I ended up spending all my funds on putting the subaru back on the road oops
Last month it actually hit me that I had the van sitting there and had been going to waste over a year, thats when I took the decision to park up the scoob as i've owned it for 4 years and have had plenty of enjoyment from it but now is the vans time.
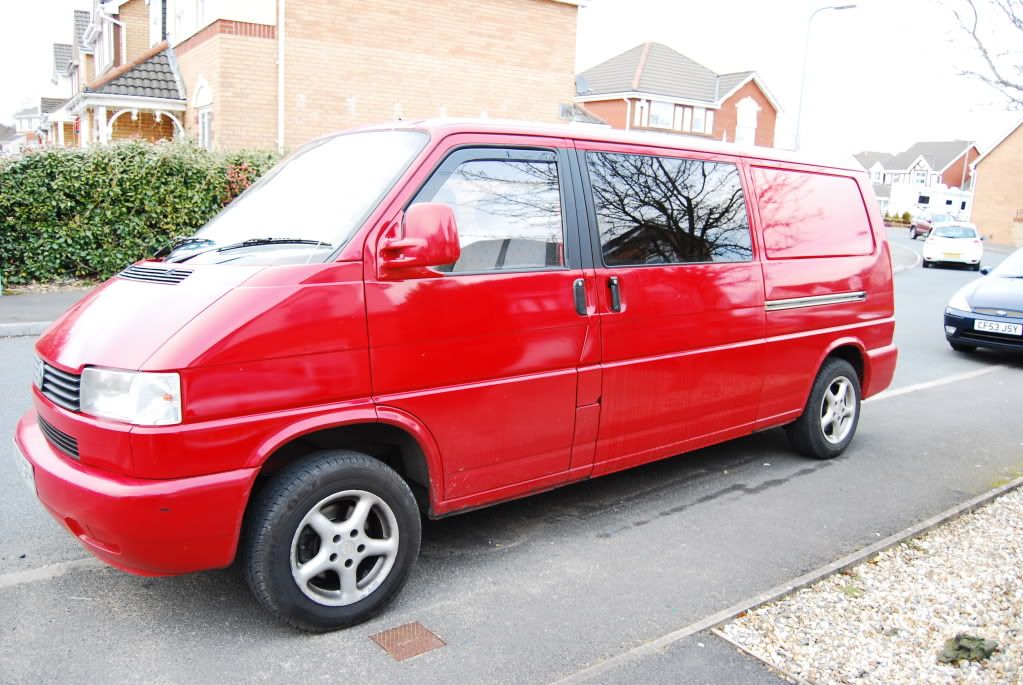
So heres the van completly standard when I bought her. A 'T' Plate 1.9td LWB:-

On ramps for me to fix the water leak and whilst its there I changed the indicator lights :-

A friend of mine who very kindly changed the timing belt and tensioners. He's also got a very nice looking T4:-


Carrying on the De-Tango look :-


The quick job the previous owner did to try and tidy up the rear :-

Stripped the ply out to have a side window fitted. The ply had been fixed on with stainless steel rivets, oh the joy I broke no end of drill bits and im going to have to grind the remainding bits off :-


Side window in place and going to make a start on flashing, this is a cheap alternative to Dynomat although it maybe a little heavier :-


Some lovely new number plates arrived :-
:-

Time to fit the central locking and alarm, first time for everything. Needed to work out where to install the universal actuators but using the VW rods as it doesn't line up with the existing holes. The pics may make it clearer but I screwed a piece of card to the actuator then hooked on the rod, pulled the door pin to the open position and then pulled down on the actuator to make sure it was fully extended. I then pulled the door pin up and down holding the actuator in place untill it was in such a position there was very little resistance. Then marked the card through the original mouting holes and transfered this onto the outside so I knew exactly where to drill my holes :-


Drivers side fitted and loomed into place :-

Taking power into the cab :-

Unsure about what route to go down with the wheels, these are an old set of wheels off my scooby that i've offered up to get an idea. They are the wrong stud pattern but I can get spacers :-


Time for wind deflectors, some tints and vinyl strips and if im lucky some alloys.
Pulling the rubbers back to fit the vinyl black out stirps :-


Cracking kit I bought from eBay for around �16 it has that plastic trim feel to it and also wraps around so you cant see the paint in the door jams or what ever you'd call them
Few more of the job :-


Fitting the piece behind the 'B' Pillar, awkward as you cant pull the rubbers away, The pics give you a little idea how I managed it. Trimmed it just overlapping the rubbers and managed to use my thumb to roll the rubber out over the top then once it was all tucked in just used a flat blade screw driver to smooth it down :-


Finished article, with wind deflector in place I've more pics of how i've formed it around the pillar if anyone needs to have a nose :-


Next was to tint the windows, for the price of tint on good old eBay I thought I would give this a go myself and was quite impressed with what I've achieved. Didn't get many pictures of this and its a fiddly enough job without trying to get pics of it all. If anyone wants a few tips its not as hard as it looks to tint your own windows. The one picture is a close up of the small crease that I had, oops. All the other little dots or most of them have gone due to me continuing to smooth out the tint and the solution evaporating, im normally quite fussy with things but im happy with the result as its very small in comparison to the size of the window and it only cost �10 for enough tint for the back 3 windows. Decided on limo for the rear side windows and Dark smoke for the fronts :-

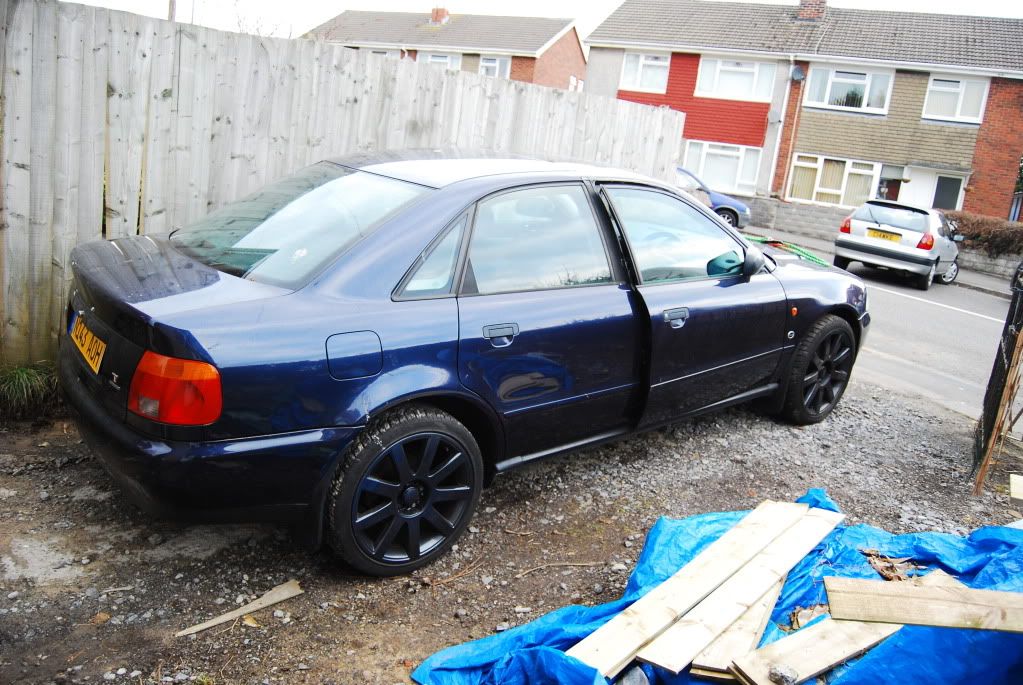
Next to come were the alloys wheels, a few weeks earlier me and a mate went to look at an audi a4 1.8T sport because my mates a3 gear boxed had packed in but unfortuatly the engine in the a4 is longitudinal and the a3 was different. It appeared to me that this guy just wanted to get rid of the car for some reason or another and it all seemed legit, the wheels on it were rather nice and the tread not so bad either. I just pictured them on the van, I made him and offer for the car of 200 and ended up with a whole car just for a set of rims. The car does run but has an immobiliser fault and very rarely start but all good fun.
Her she is, followed buy a few of them on the van :-


In desperate need of being lowered, bought a 50mm kit for the rear and the front is on a torsion setup so just wound them down. Also put a front splitter on and painted the VW badge black.


Bought myself a double din headunit all singing and dancing all that was left was to fit it in so I cut up the dash to get this in. The dash originally have 3 air vents across the top but I managed to neatly cut them down to make it look OEM.
Heres how it looked resting in place:-
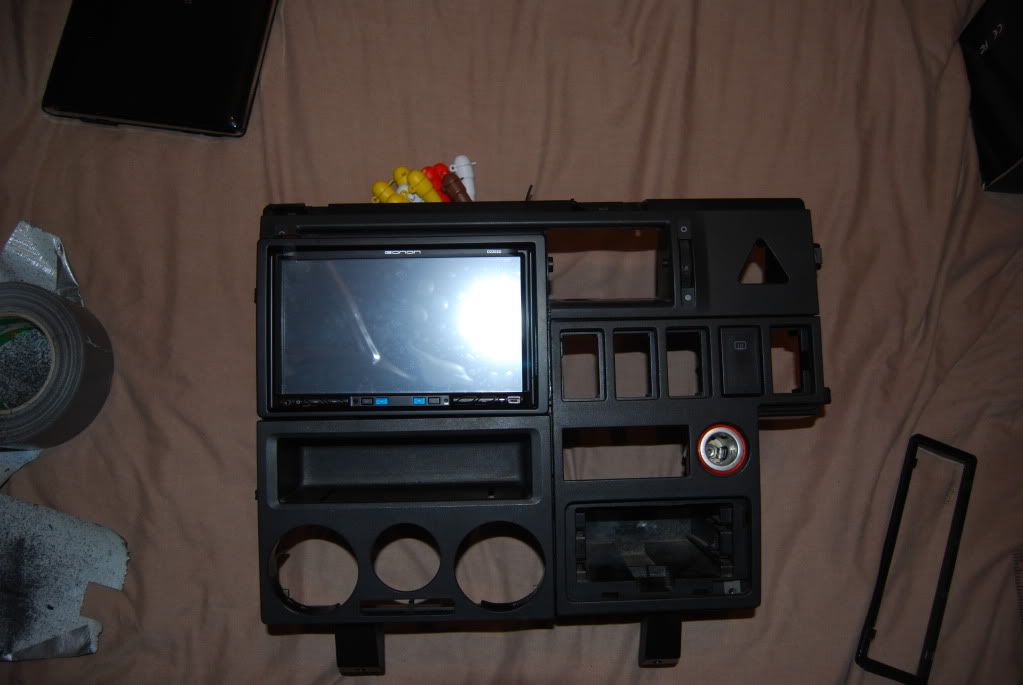
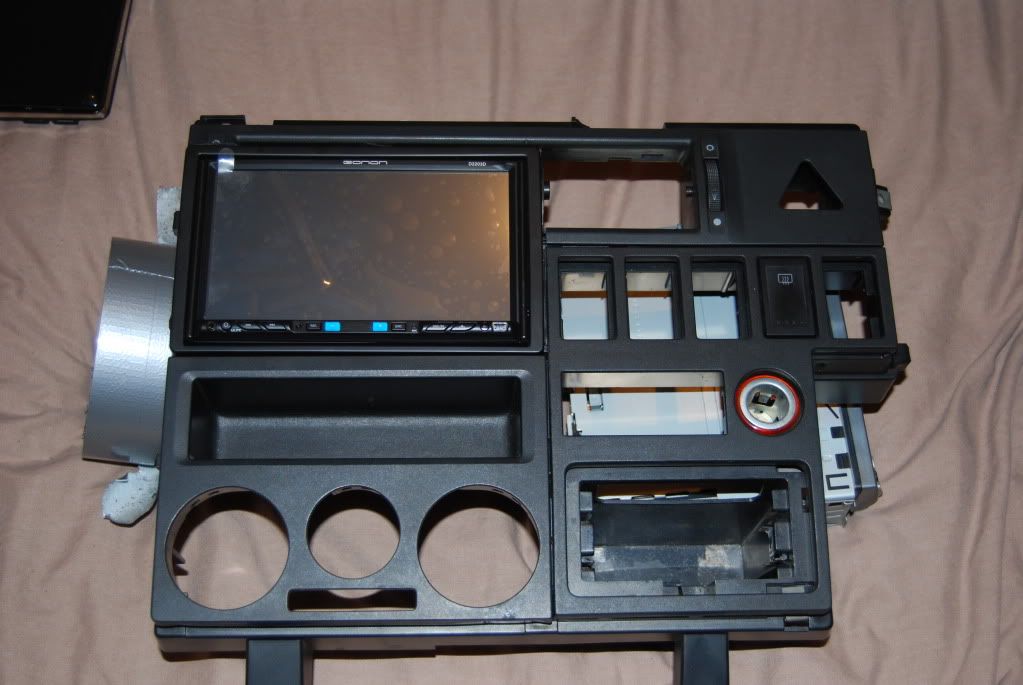
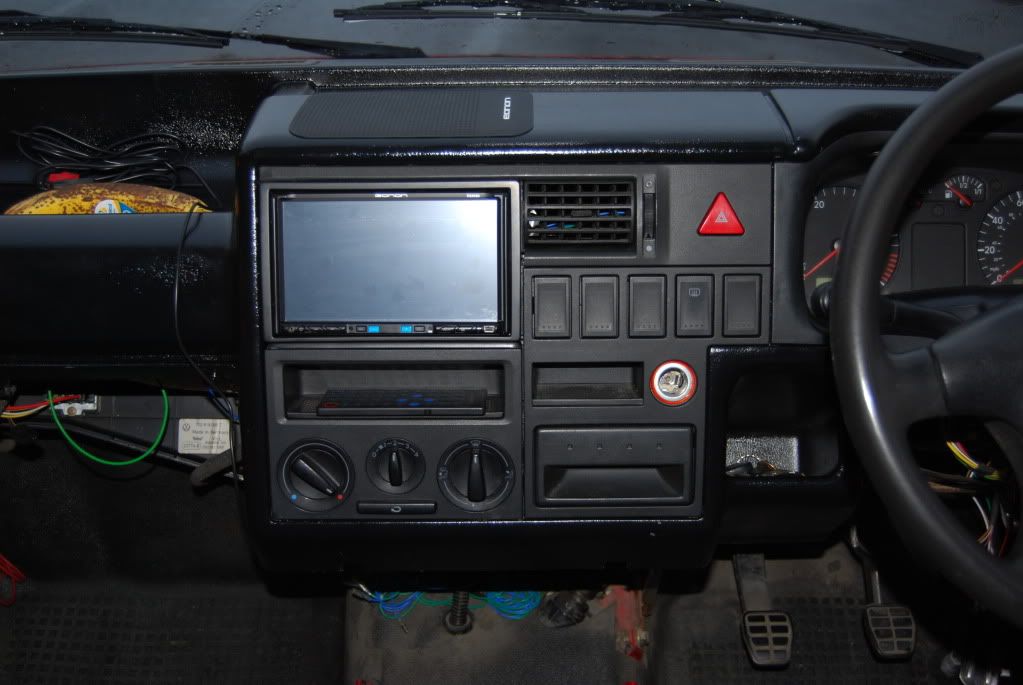
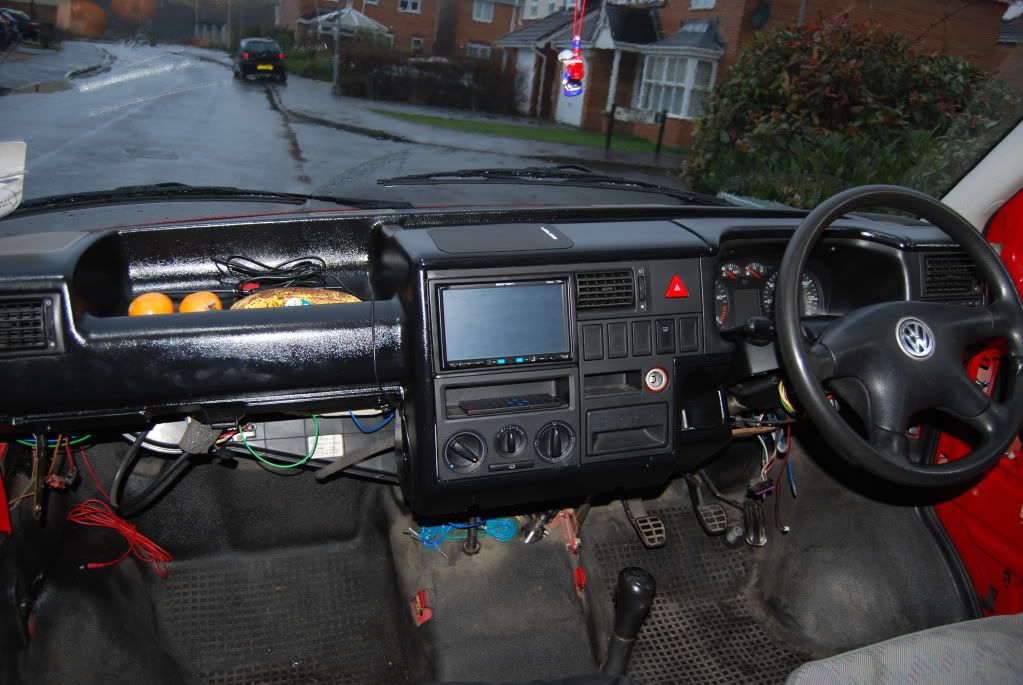
Yes the dash does look quite shiney but im thinking alot of that is due to the flash of the camera. I have lacquored the dash to give it better durability so im hoping it will fade a little over time.
I cut out 3 separate panels for the drivers side as the thought of possibly having to make changes in the future this would be the best option.
The last week I've done all the insulation carpeted all the boards, fitted the LED lights I purchased a long while back and been busy running in speaker cables, power cables and what ever else I can think of before I put the boards up for the final time.


Trial Fitting the boards I had made and they are perfect really really pleased with them.


Not the best of quality pics but you get the idea, arches covered with flashing and then carpeted with one piece.

Beginning to carpet all the visible metal work

LED Lights in place and things starting to take shape, the metal work is 90% covered now and it looks soooo much better.


Plenty of wires/cables, speakers, central locking, power.

Spacers made to step the speakers out slightly as the space behind was to tight,

How the van is looking at the moment and im quite please with the progress after a very very long weekend,


Heres the early stages of the covering of the roof lininers, im using the original as they are in top condition,

You may have noticed I had painted the dash a long while ago but it turned out shiney which I wasn't please with so I have started to put on the layers of Plasticote, here it is so far.

Well after a good lie in this morning I thought I best get a move on and start doing a few more bits for the van. I decided to start making the bench seat/slide out bed ive had in mind for a while and had a pretty productive late afternoon.
Heres the method I plan on using to slide the seat out into a bed.


Ive noticed with quite alot of builds that they have swivel seats but yet run cupboards right up behind the drivers seat and it becomes useless. I plan on being able to use both swivels seats towards the rear and this next couple of pics show how much space there is either side of the bench considering its 6ft5 long.


Once again I worked into the dark but it gave me an excuse to put my lights on

Well If your interested in the results guys let me know and I shall continue to update this thread
Hope you enjoy the read,
Ryan.
I made a start doing little bits to it like the lights, wheels getting trim sorted for the interior then I ended up spending all my funds on putting the subaru back on the road oops
Last month it actually hit me that I had the van sitting there and had been going to waste over a year, thats when I took the decision to park up the scoob as i've owned it for 4 years and have had plenty of enjoyment from it but now is the vans time.
So heres the van completly standard when I bought her. A 'T' Plate 1.9td LWB:-
On ramps for me to fix the water leak and whilst its there I changed the indicator lights :-
A friend of mine who very kindly changed the timing belt and tensioners. He's also got a very nice looking T4:-
Carrying on the De-Tango look :-
The quick job the previous owner did to try and tidy up the rear :-
Stripped the ply out to have a side window fitted. The ply had been fixed on with stainless steel rivets, oh the joy I broke no end of drill bits and im going to have to grind the remainding bits off :-
Side window in place and going to make a start on flashing, this is a cheap alternative to Dynomat although it maybe a little heavier :-
Some lovely new number plates arrived
:-Time to fit the central locking and alarm, first time for everything. Needed to work out where to install the universal actuators but using the VW rods as it doesn't line up with the existing holes. The pics may make it clearer but I screwed a piece of card to the actuator then hooked on the rod, pulled the door pin to the open position and then pulled down on the actuator to make sure it was fully extended. I then pulled the door pin up and down holding the actuator in place untill it was in such a position there was very little resistance. Then marked the card through the original mouting holes and transfered this onto the outside so I knew exactly where to drill my holes :-
Drivers side fitted and loomed into place :-
Taking power into the cab :-
Unsure about what route to go down with the wheels, these are an old set of wheels off my scooby that i've offered up to get an idea. They are the wrong stud pattern but I can get spacers :-
Time for wind deflectors, some tints and vinyl strips and if im lucky some alloys.
Pulling the rubbers back to fit the vinyl black out stirps :-
Cracking kit I bought from eBay for around �16 it has that plastic trim feel to it and also wraps around so you cant see the paint in the door jams or what ever you'd call them
Few more of the job :-
Fitting the piece behind the 'B' Pillar, awkward as you cant pull the rubbers away, The pics give you a little idea how I managed it. Trimmed it just overlapping the rubbers and managed to use my thumb to roll the rubber out over the top then once it was all tucked in just used a flat blade screw driver to smooth it down :-
Finished article, with wind deflector in place
I've more pics of how i've formed it around the pillar if anyone needs to have a nose :-Next was to tint the windows, for the price of tint on good old eBay I thought I would give this a go myself and was quite impressed with what I've achieved. Didn't get many pictures of this and its a fiddly enough job without trying to get pics of it all. If anyone wants a few tips its not as hard as it looks to tint your own windows. The one picture is a close up of the small crease that I had, oops. All the other little dots or most of them have gone due to me continuing to smooth out the tint and the solution evaporating, im normally quite fussy with things but im happy with the result as its very small in comparison to the size of the window and it only cost �10 for enough tint for the back 3 windows. Decided on limo for the rear side windows and Dark smoke for the fronts :-
Next to come were the alloys wheels, a few weeks earlier me and a mate went to look at an audi a4 1.8T sport because my mates a3 gear boxed had packed in but unfortuatly the engine in the a4 is longitudinal and the a3 was different. It appeared to me that this guy just wanted to get rid of the car for some reason or another and it all seemed legit, the wheels on it were rather nice and the tread not so bad either. I just pictured them on the van, I made him and offer for the car of 200 and ended up with a whole car just for a set of rims. The car does run but has an immobiliser fault and very rarely start but all good fun.
Her she is, followed buy a few of them on the van :-
In desperate need of being lowered, bought a 50mm kit for the rear and the front is on a torsion setup so just wound them down. Also put a front splitter on and painted the VW badge black.
Bought myself a double din headunit all singing and dancing all that was left was to fit it in so I cut up the dash to get this in. The dash originally have 3 air vents across the top but I managed to neatly cut them down to make it look OEM.
Heres how it looked resting in place:-
Yes the dash does look quite shiney but im thinking alot of that is due to the flash of the camera. I have lacquored the dash to give it better durability so im hoping it will fade a little over time.
I cut out 3 separate panels for the drivers side as the thought of possibly having to make changes in the future this would be the best option.
The last week I've done all the insulation carpeted all the boards, fitted the LED lights I purchased a long while back and been busy running in speaker cables, power cables and what ever else I can think of before I put the boards up for the final time.
Trial Fitting the boards I had made and they are perfect really really pleased with them.
Not the best of quality pics but you get the idea, arches covered with flashing and then carpeted with one piece.
Beginning to carpet all the visible metal work
LED Lights in place and things starting to take shape, the metal work is 90% covered now and it looks soooo much better.
Plenty of wires/cables, speakers, central locking, power.
Spacers made to step the speakers out slightly as the space behind was to tight,
How the van is looking at the moment and im quite please with the progress after a very very long weekend,
Heres the early stages of the covering of the roof lininers, im using the original as they are in top condition,
You may have noticed I had painted the dash a long while ago but it turned out shiney which I wasn't please with so I have started to put on the layers of Plasticote, here it is so far.
Well after a good lie in this morning I thought I best get a move on and start doing a few more bits for the van. I decided to start making the bench seat/slide out bed ive had in mind for a while and had a pretty productive late afternoon.
Heres the method I plan on using to slide the seat out into a bed.
Ive noticed with quite alot of builds that they have swivel seats but yet run cupboards right up behind the drivers seat and it becomes useless. I plan on being able to use both swivels seats towards the rear and this next couple of pics show how much space there is either side of the bench considering its 6ft5 long.
Once again I worked into the dark but it gave me an excuse to put my lights on
Well If your interested in the results guys let me know and I shall continue to update this thread
Hope you enjoy the read,
Ryan.


 17 April 2011, 11:39 PM
#4
Scooby Regular
Thread Starter
iTrader: (3)
Join Date: Jan 2007
Location: Swansea South Wales, UK.
Posts: 692
Likes: 0
Received 0 Likes
on
0 Posts
Cheers Kev, Im going to do the full conversion myself. Im extremely fussy and like everything to a high standard and the thought of paying someone who might then not do it quite how I like would peev me off. Got a lot to get done but I would love to use it at some point this summer.
18 April 2011, 10:15 PM
#5
Scooby Regular
Thread Starter
iTrader: (3)
Join Date: Jan 2007
Location: Swansea South Wales, UK.
Posts: 692
Likes: 0
Received 0 Likes
on
0 Posts
Well another evening on the van after a busy day in work but I just cant get my mind off it. Got the main frame built of my bench seat/slide out bed and im sooooo chuffed with it so far. A little few bits to finish dress it but its getting there A:
Ive made it a little higher than most but still at a really comfortable height, reason for making it higher is to create a nice amount of storage underneath.
Let me know what you think please guys!


Ive made it a little higher than most but still at a really comfortable height, reason for making it higher is to create a nice amount of storage underneath.
Let me know what you think please guys!
Trending Topics


 26 April 2011, 09:49 PM
#11
Scooby Regular
Thread Starter
iTrader: (3)
Join Date: Jan 2007
Location: Swansea South Wales, UK.
Posts: 692
Likes: 0
Received 0 Likes
on
0 Posts
Done a little more on the Van today, finished the top of the bed off and then set about cutting up the Ikea Faktum units I purchased. 2 x 70x40 cabinets and 1 x 80x70, I shall let the pics do the talking,


 fair play you've done a bloody good job there
  27 April 2011, 09:28 PM
#17
Scooby Regular
Thread Starter
iTrader: (3)
Join Date: Jan 2007
Location: Swansea South Wales, UK.
Posts: 692
Likes: 0
Received 0 Likes
on
0 Posts
Another late evening in the van, sat around most the day waiting on deliveries before I shot out to get some more wood to finish off the bed


28 April 2011, 10:56 PM
#18
Scooby Regular
Thread Starter
iTrader: (3)
Join Date: Jan 2007
Location: Swansea South Wales, UK.
Posts: 692
Likes: 0
Received 0 Likes
on
0 Posts
Thanks guys, I look to the feedback for motivation and its working so far T:
Ive had another day tinkering around in the van today, trying to make an angled cupboard just inside the sliding door that will house my electrics and have the switch panel mounted on it.


Whilst tinkering in the van these arrived


Little more carpeting

Ive had another day tinkering around in the van today, trying to make an angled cupboard just inside the sliding door that will house my electrics and have the switch panel mounted on it.
Whilst tinkering in the van these arrived
Little more carpeting
 29 April 2011, 11:56 AM
#20
Scooby Regular
Join Date: Feb 2010
Location: on top of a wet hill
Posts: 955
Likes: 0
Received 0 Likes
on
0 Posts
looking good there m8 my buddy just got a t4 its in being painted at the moment hes got some good ideas of yours build sofar keep the up dates comeing 
29 April 2011, 12:07 PM
#21

Awesome project. Would love to do one.
Did you cut the window out yourself?
There used to be a program on Discovery called "Rags to Riches" with Dominic Littlewood. They'd buy a salvage car for someone and do it up, to their budget.
There was one of these on there, and they were doing the same as you, windows cut in, storage etc.
If you haven't seen it, look it up on youtube.
29 April 2011, 12:50 PM
#22
Scooby Regular
Thread Starter
iTrader: (3)
Join Date: Jan 2007
Location: Swansea South Wales, UK.
Posts: 692
Likes: 0
Received 0 Likes
on
0 Posts
Cheers guys, I had the window fitted by someone mate, I wasn't brave enough at the time now though I would deffo give it a go myself after seeing how many others have done theirs.
Should have a few more pics this evening, just heading out to tinker round with a little more.
Should have a few more pics this evening, just heading out to tinker round with a little more.
 04 May 2011, 01:35 PM
#24
Scooby Regular
Thread Starter
iTrader: (3)
Join Date: Jan 2007
Location: Swansea South Wales, UK.
Posts: 692
Likes: 0
Received 0 Likes
on
0 Posts
cheers dude, no problem always willing to help out. There is so much to think about though before you start give myself headache alot of the time thinking about it lol
 06 May 2011, 11:09 PM
#27
Looking good 
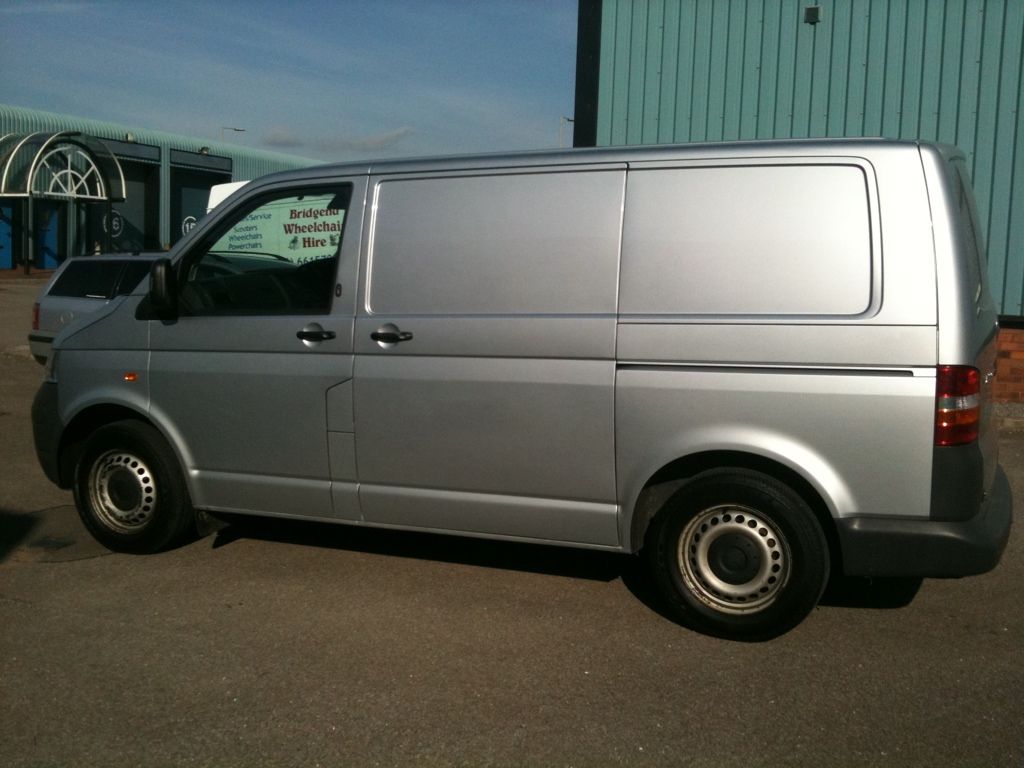
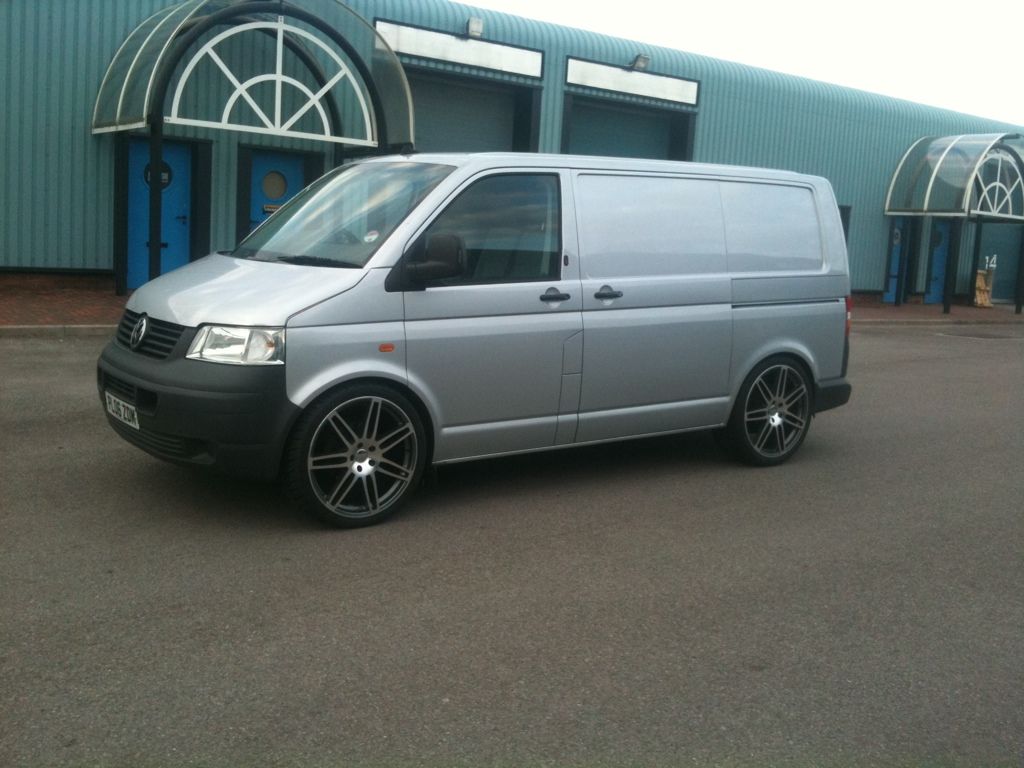
I have just bought a T5 panel van which is being converted to a window van with 5 seats , its in the body shop just having been resprayed Ferrari rosso red , I have fitted coilovers to lower it , and 22" alloys , its being boarded and carpeted out next week
This is what it looked when I bought it
And after the suspension and wheels done
I'm also having tinted side and a rear window fitted the same time as the interior being done
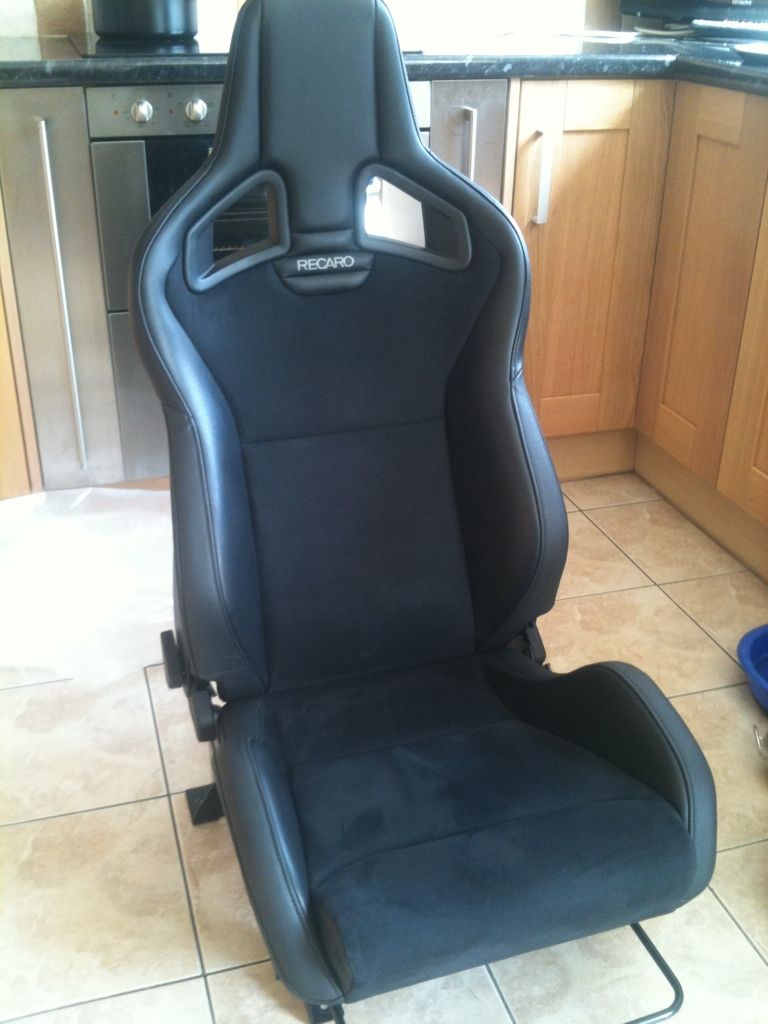
And just bought a pair of these to fit in the front , will be having the triple rear OE rear seat recovered to match
I have just bought a T5 panel van which is being converted to a window van with 5 seats , its in the body shop just having been resprayed Ferrari rosso red , I have fitted coilovers to lower it , and 22" alloys , its being boarded and carpeted out next week
This is what it looked when I bought it
And after the suspension and wheels done
I'm also having tinted side and a rear window fitted the same time as the interior being done
And just bought a pair of these to fit in the front , will be having the triple rear OE rear seat recovered to match
30 July 2011, 09:28 PM
#29
Scooby Regular
Thread Starter
iTrader: (3)
Join Date: Jan 2007
Location: Swansea South Wales, UK.
Posts: 692
Likes: 0
Received 0 Likes
on
0 Posts
Im still alive peeps just spent another week as ive been off working getting the van through its MOT and getting more of the electrics fitted in the rear. There will be pics to follow shortly, sorry for the delay only seem to find time to work on the van when im off work.
