Godspeed 4pot 335mm disc upgrade refurb...
#1
Thread Starter
Scooby Regular
iTrader: (2)
Joined: Mar 2014
Posts: 753
Likes: 0
From: Mancunian in Edinburgh
So recently won this little lot on ebay, for those not familier with it, Godspeed sell a custom made floating disc/alloy bell kit for the standard 4 pots that performs as well, some say better, than the STi Brembos. It comes with mounting brackets that reposition the calipers and spacers that widen the caliper so they fit over the new larger and thicker discs. To make the most of the larger disks, much larger modified pads taken from an Aston Martin DB7 are supplied.
My kit came with the caliper brackets and spacers already fitted to a pair of quite tired looking calipers
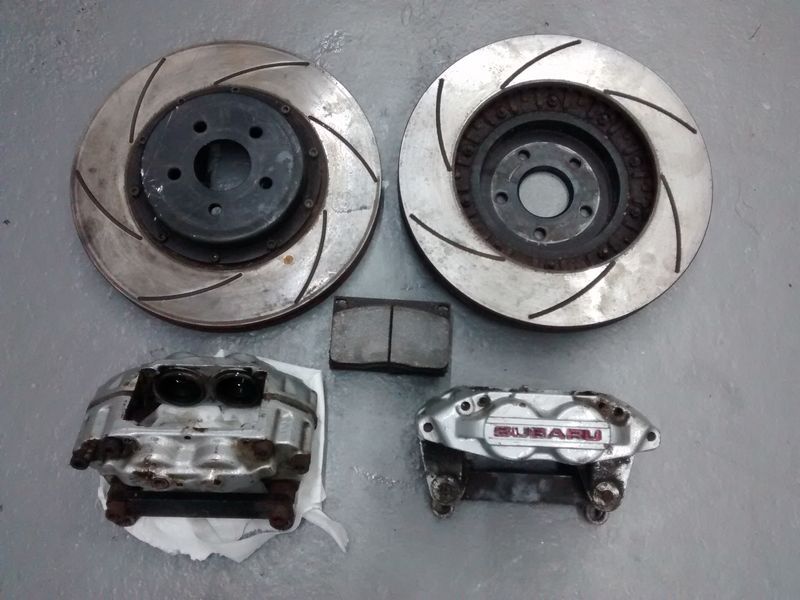
Discs and bells are in very good condition and will just need some cleaning-up. New disks are 32mm thick, these are 31mm (probably due the DS2500 pads which are heavy on discs) but have plenty of life left for my commute and A road blasts...
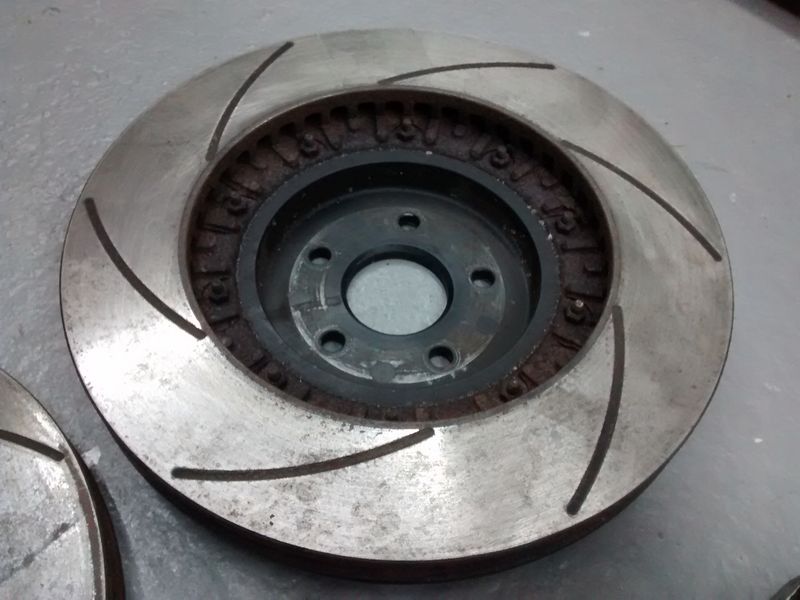
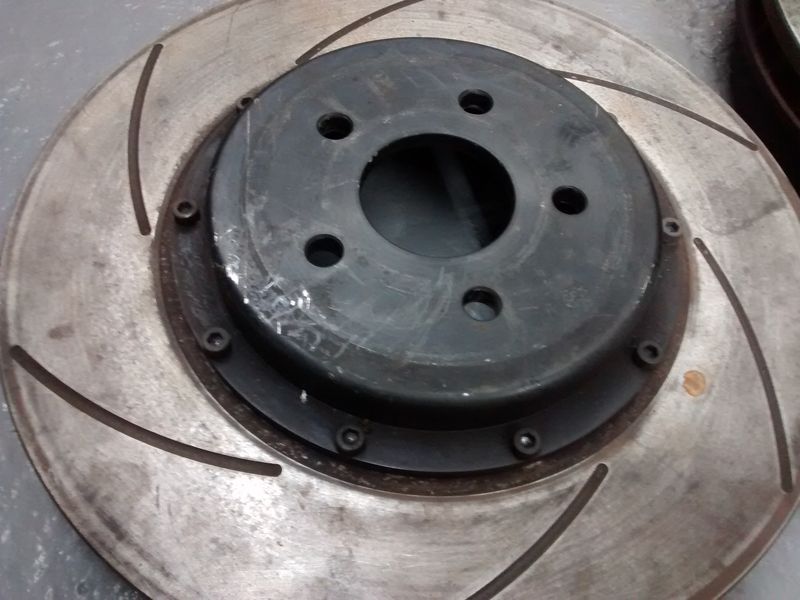
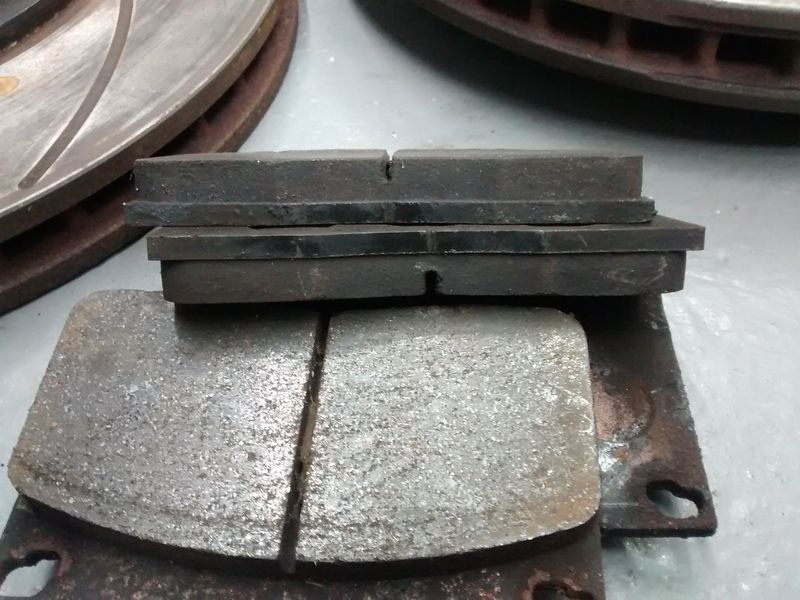
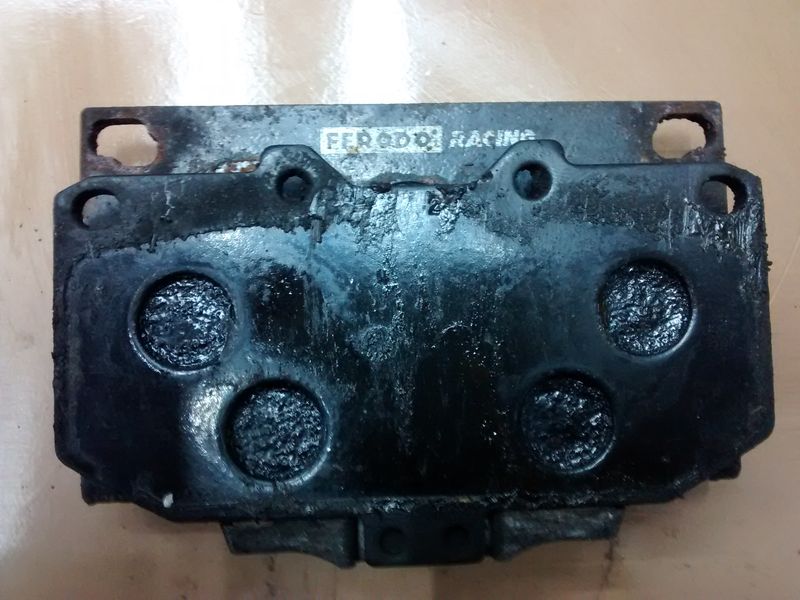
Ferodo DS2500 pads it excellent condition, just require a bit of spit and polish...
Calipers looking tired and in need of some TLC
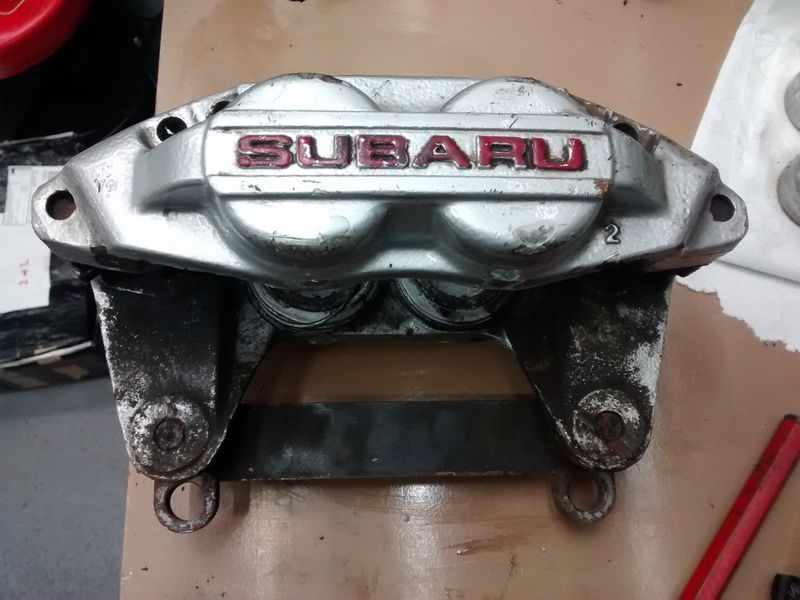
Some people think a lick of paint is a refurb! Even the seals have been over painted...
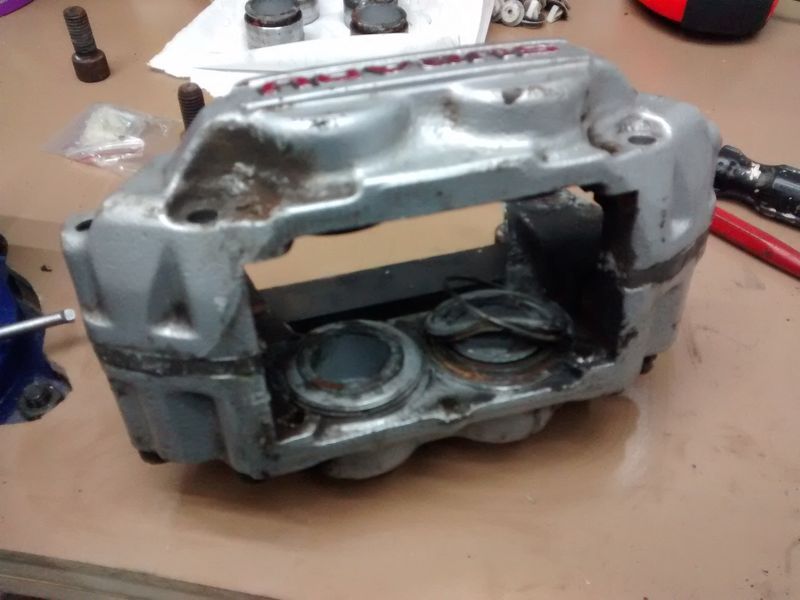
Removing the seals revealed corrosion and a set of stainless pistons added to the shopping list...
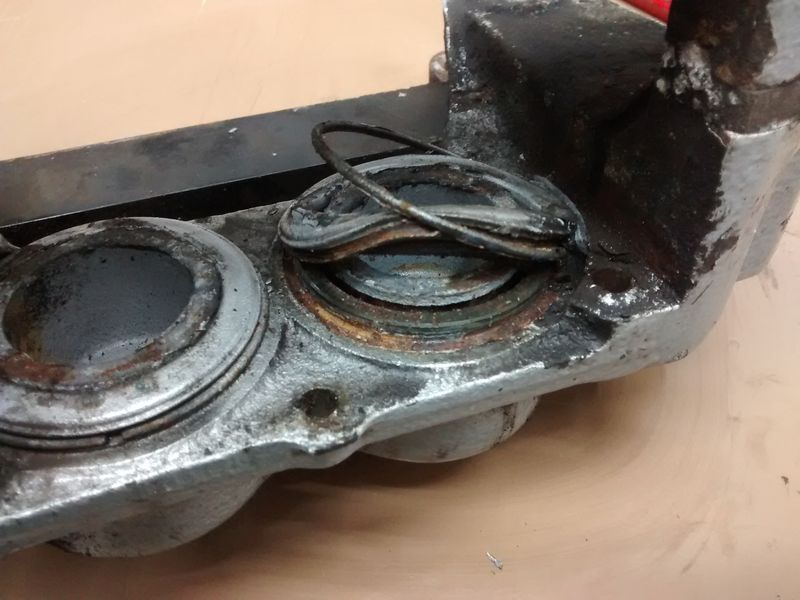
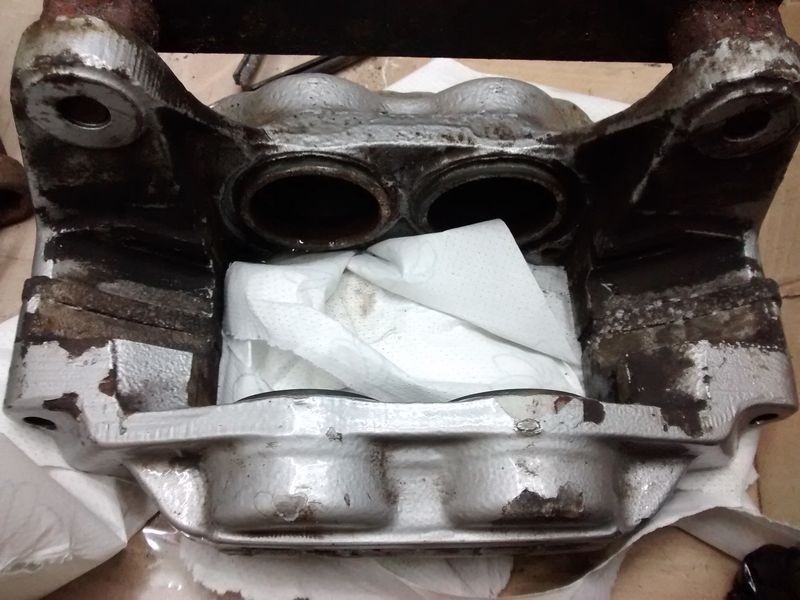
First 4 pistons just prised-out with little effort
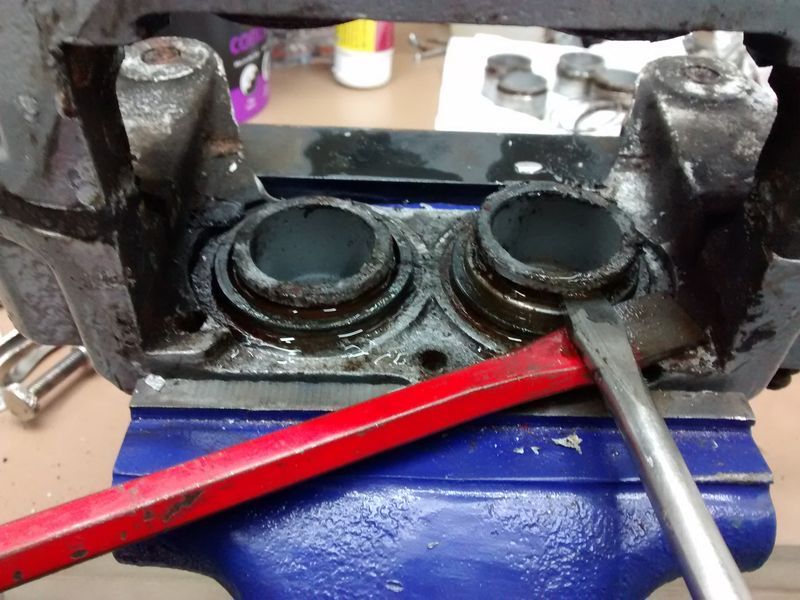
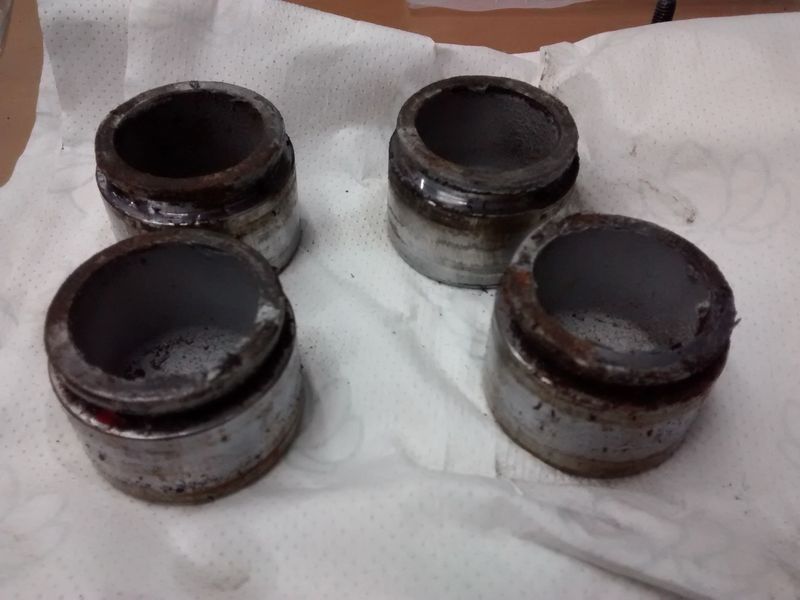
The 2nd caliper was a different story, all 4 pistons were almost solid so a liberal helping of WD40 and an over night soak helped, but still snapped the ends off 3 screwdrivers getting them out. I now have a set of new screwdrivers and some pry bars for the next time LOL!
Bottom half of the bores look fine, no rust, but top half is rusty and will need to be cleaned-up and treated. This layer of rust is what binds onto the pistons and stops them coming out easily.
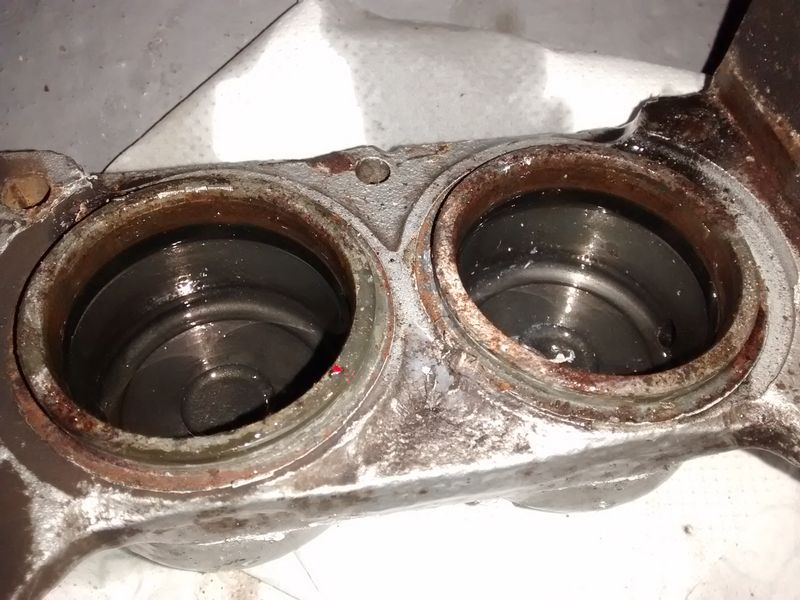
DB7 pads (top) are quite a bit bigger than the standard pads. Only modification to the DB7 pads are the holes for the slider pins are moved closer to the corners
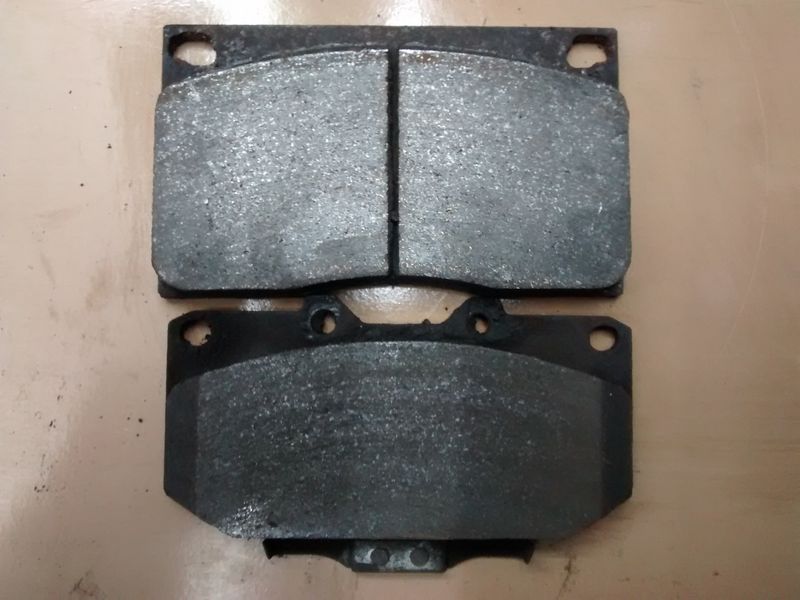
Jobs to do will be to finish stripping the calipers ready for the powder coaters and rebuild with new piston and seals, source new stainless slider pins as Godspeed only supply crude split pins, strip down the discs/bells and replace the bolts...
My kit came with the caliper brackets and spacers already fitted to a pair of quite tired looking calipers
Discs and bells are in very good condition and will just need some cleaning-up. New disks are 32mm thick, these are 31mm (probably due the DS2500 pads which are heavy on discs) but have plenty of life left for my commute and A road blasts...
Ferodo DS2500 pads it excellent condition, just require a bit of spit and polish...
Calipers looking tired and in need of some TLC
Some people think a lick of paint is a refurb! Even the seals have been over painted...
Removing the seals revealed corrosion and a set of stainless pistons added to the shopping list...
First 4 pistons just prised-out with little effort
The 2nd caliper was a different story, all 4 pistons were almost solid so a liberal helping of WD40 and an over night soak helped, but still snapped the ends off 3 screwdrivers getting them out. I now have a set of new screwdrivers and some pry bars for the next time LOL!
Bottom half of the bores look fine, no rust, but top half is rusty and will need to be cleaned-up and treated. This layer of rust is what binds onto the pistons and stops them coming out easily.
DB7 pads (top) are quite a bit bigger than the standard pads. Only modification to the DB7 pads are the holes for the slider pins are moved closer to the corners
Jobs to do will be to finish stripping the calipers ready for the powder coaters and rebuild with new piston and seals, source new stainless slider pins as Godspeed only supply crude split pins, strip down the discs/bells and replace the bolts...
#2
Thread Starter
Scooby Regular
iTrader: (2)
Joined: Mar 2014
Posts: 753
Likes: 0
From: Mancunian in Edinburgh
Some progress with the refurb
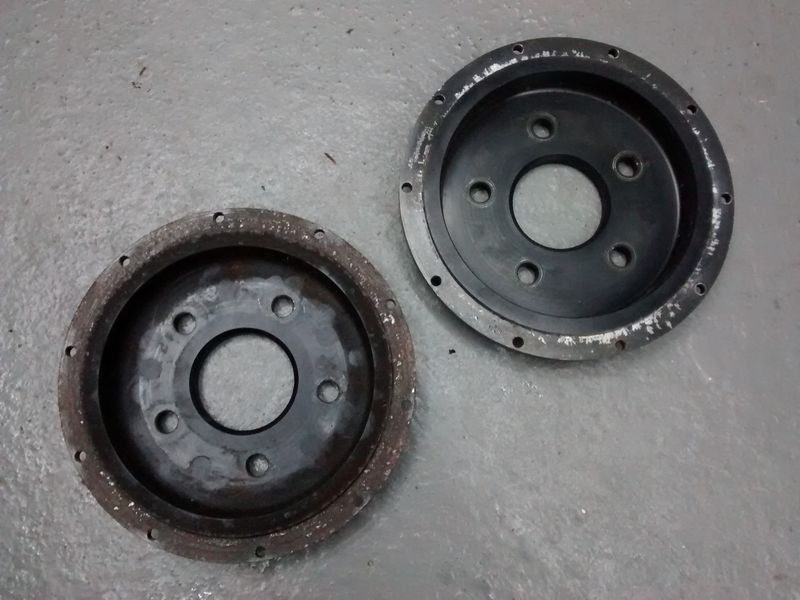
discs and bells split
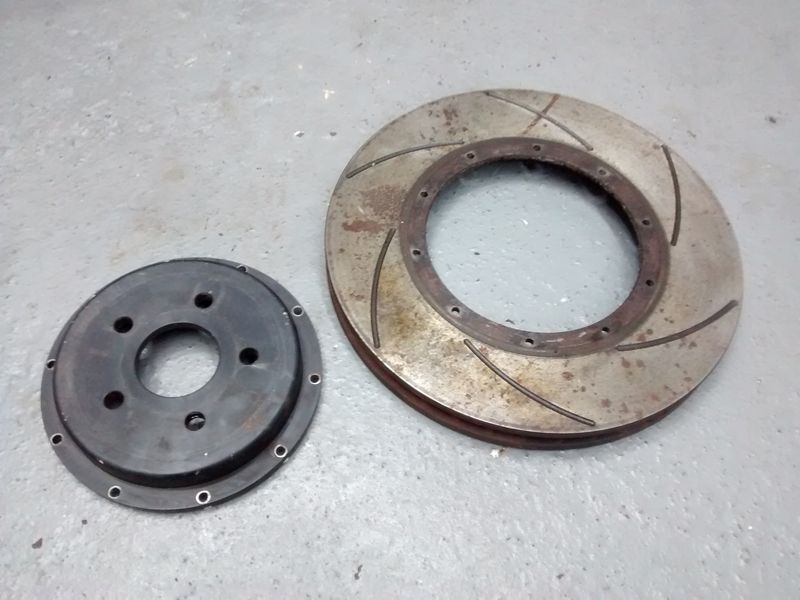
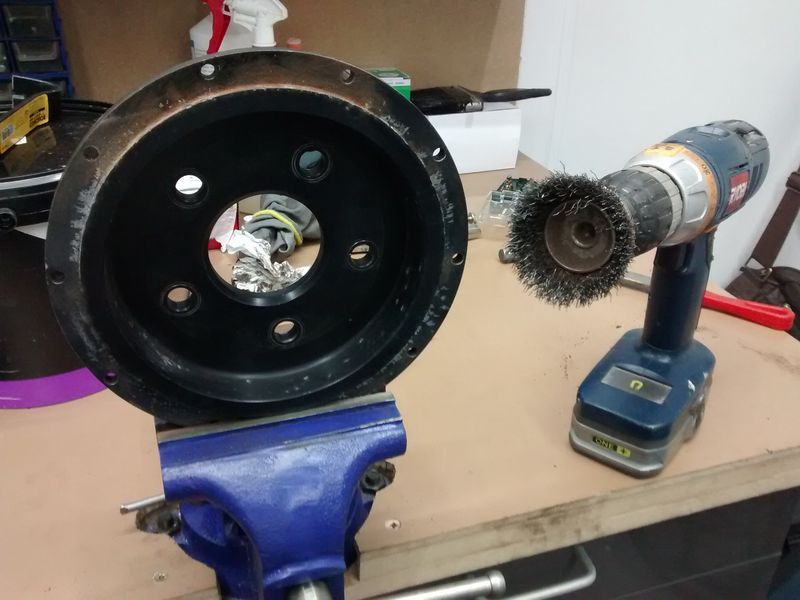
cleaning-up the bells
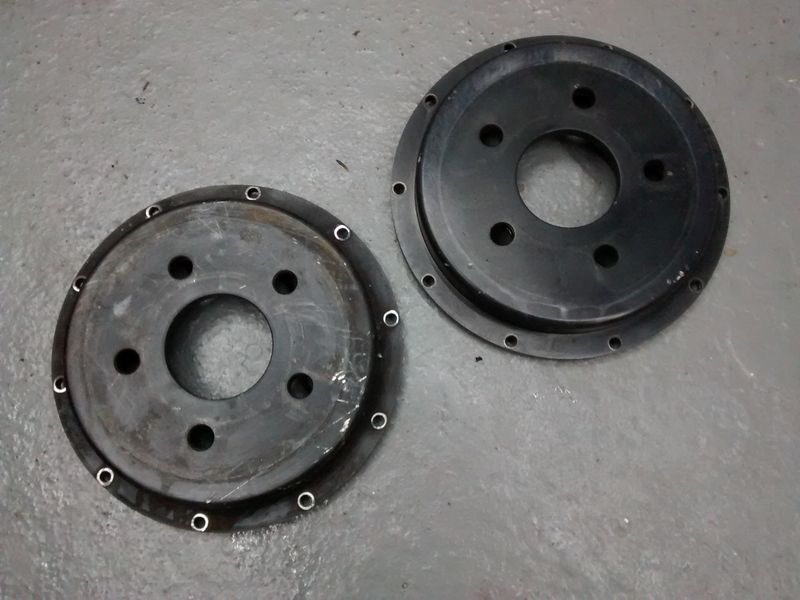
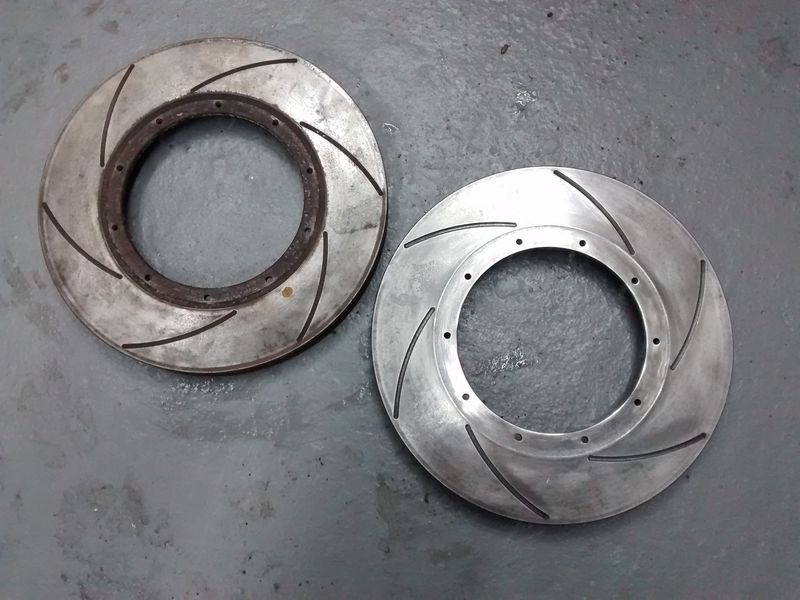
discs cleaned-up nicely
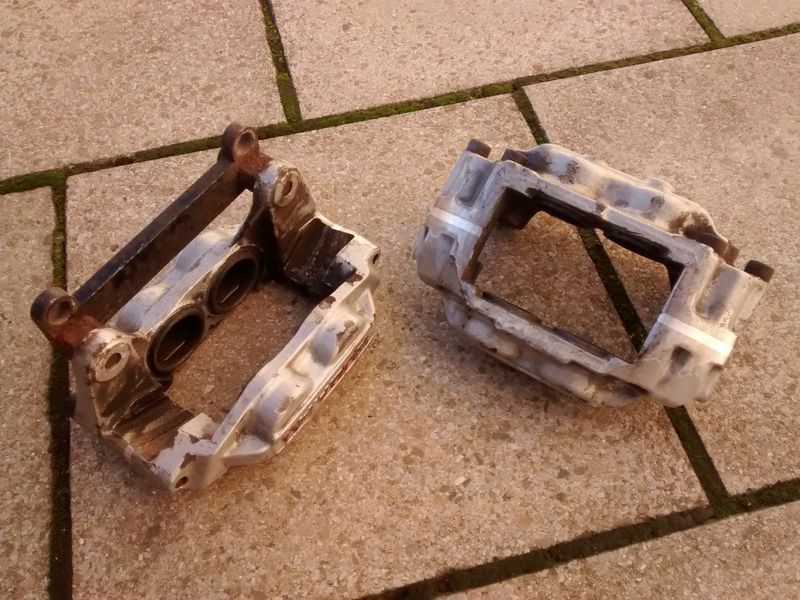
calipers now stripped and ready for the powder coaters, I've left the brackets in place so they get a coating of paint as well.
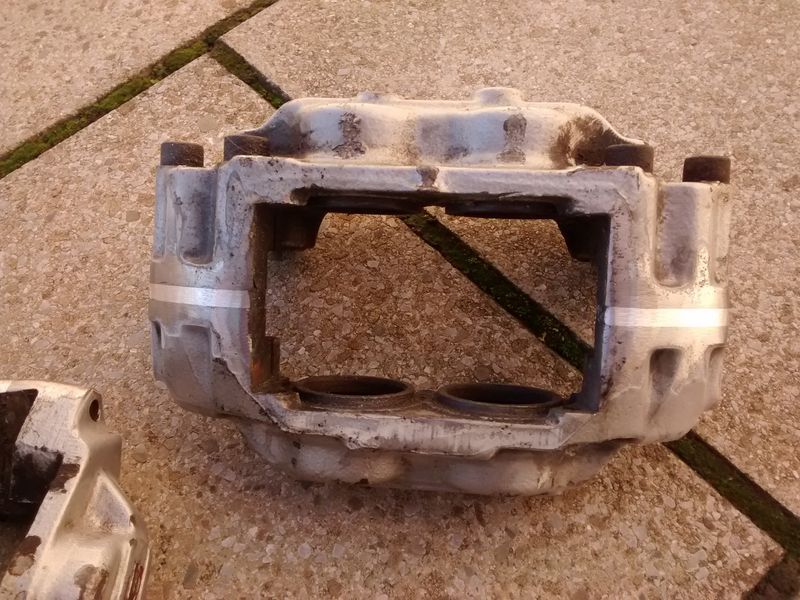
ground the Godspeed alloy spacers down so they are flush with the caliper halves
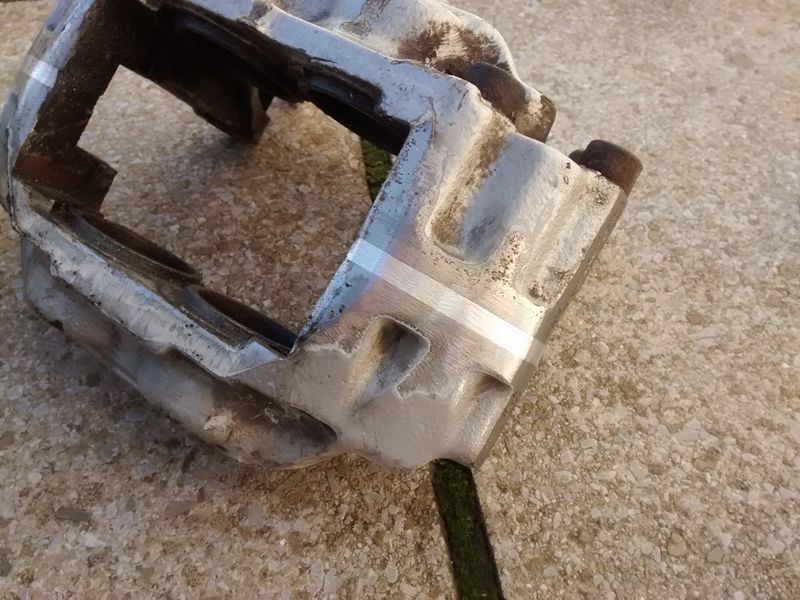
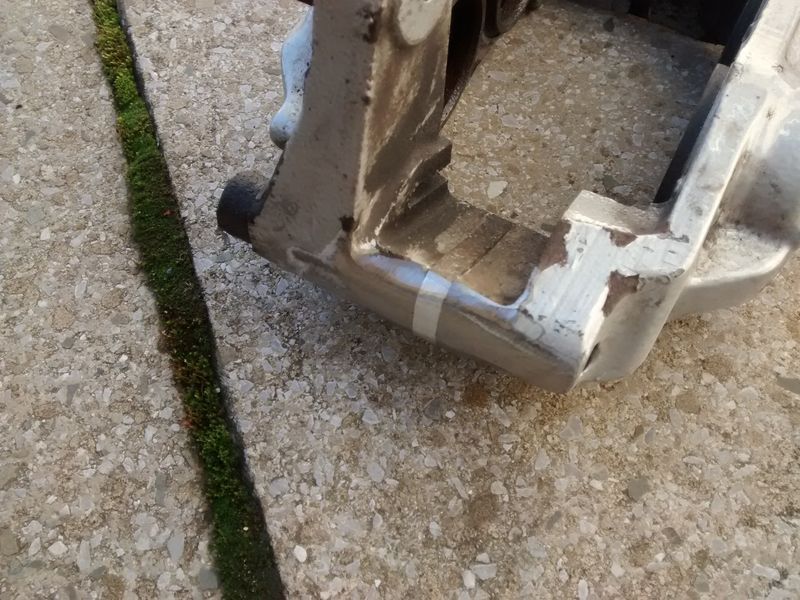
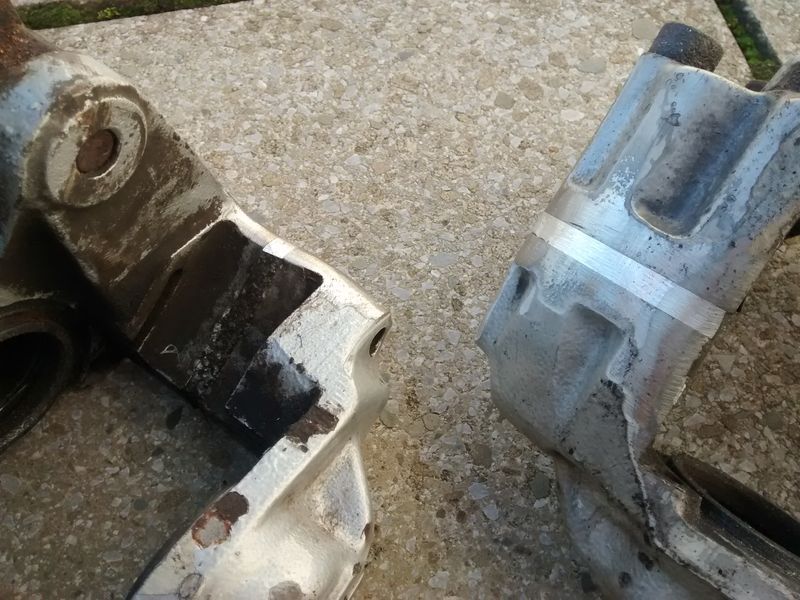
discs and bells split
cleaning-up the bells
discs cleaned-up nicely
calipers now stripped and ready for the powder coaters, I've left the brackets in place so they get a coating of paint as well.
ground the Godspeed alloy spacers down so they are flush with the caliper halves
#3
Making a good job of it.
I'd have a Dremel or similar on the interior surfaces where pads will slide, clean back to bare metal, don't paint too thickly.
I've often wondered about long stainless cap-headed bolts and nylock nuts for the retaining pins. You can buy stainless sleeves that extend them.
I'd have a Dremel or similar on the interior surfaces where pads will slide, clean back to bare metal, don't paint too thickly.
I've often wondered about long stainless cap-headed bolts and nylock nuts for the retaining pins. You can buy stainless sleeves that extend them.
#4
Thread Starter
Scooby Regular
iTrader: (2)
Joined: Mar 2014
Posts: 753
Likes: 0
From: Mancunian in Edinburgh
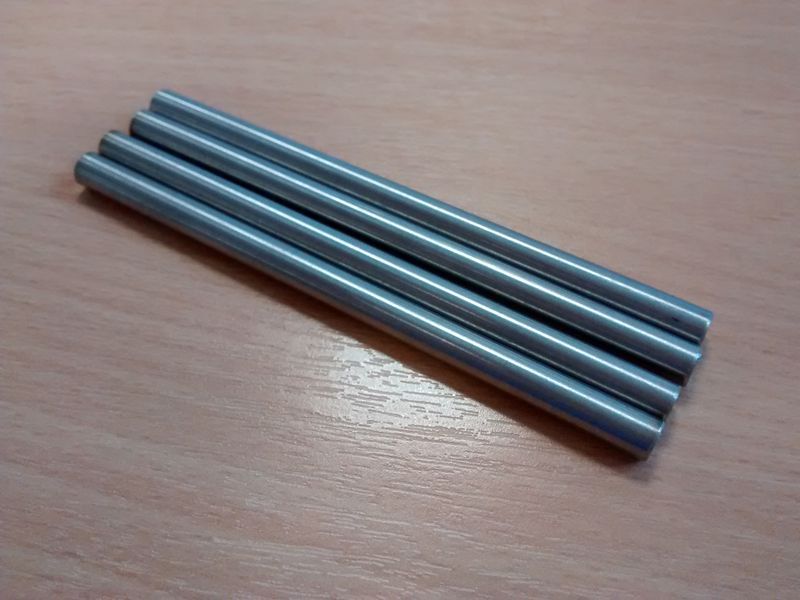
Cheers Alcazar. The calipers are at the powder coaters now, this is the 3rd pair I've had done and have always been a top job, paint not too think so hoping for a nice fit for the pads. I've got some 6mm stainless bar on order for the pins, CDF wanted £26 per pin for machined ones...lol
Trending Topics
#9
Thread Starter
Scooby Regular
iTrader: (2)
Joined: Mar 2014
Posts: 753
Likes: 0
From: Mancunian in Edinburgh
Calipers back from the powder coaters...
This is the third set I've had done now and always a perfect job from Pentland Powder Coaters.
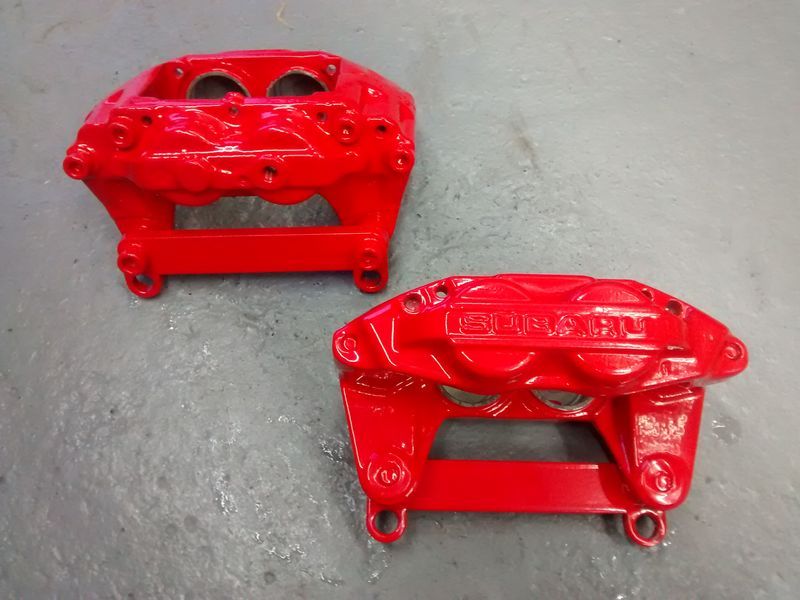
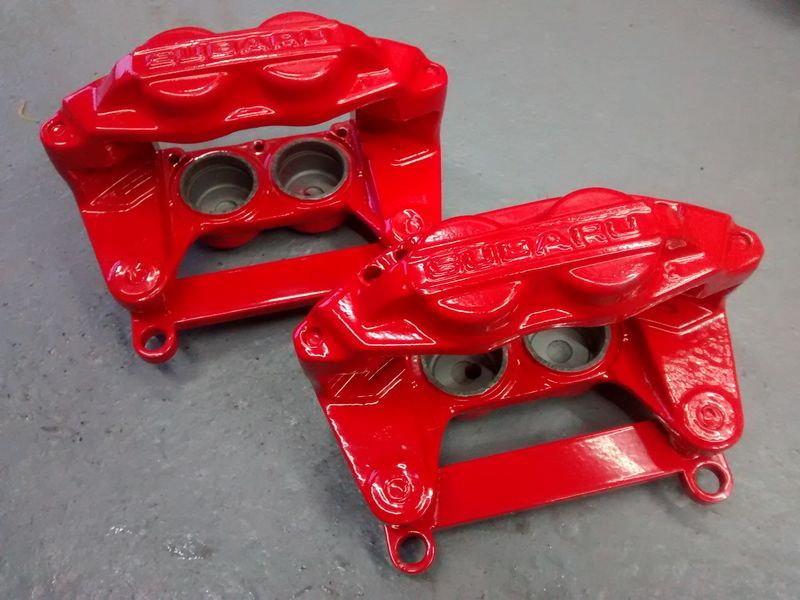
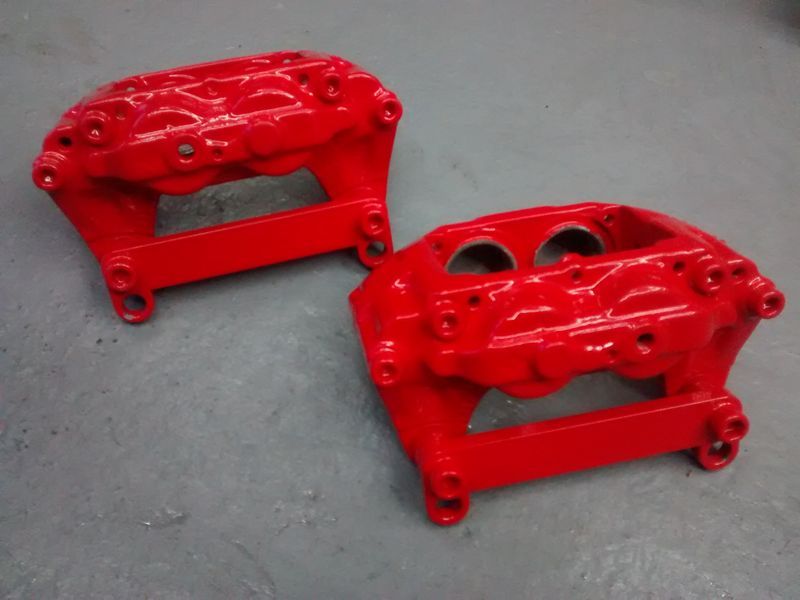
The brackets have some protection now, will probably over paint these in black
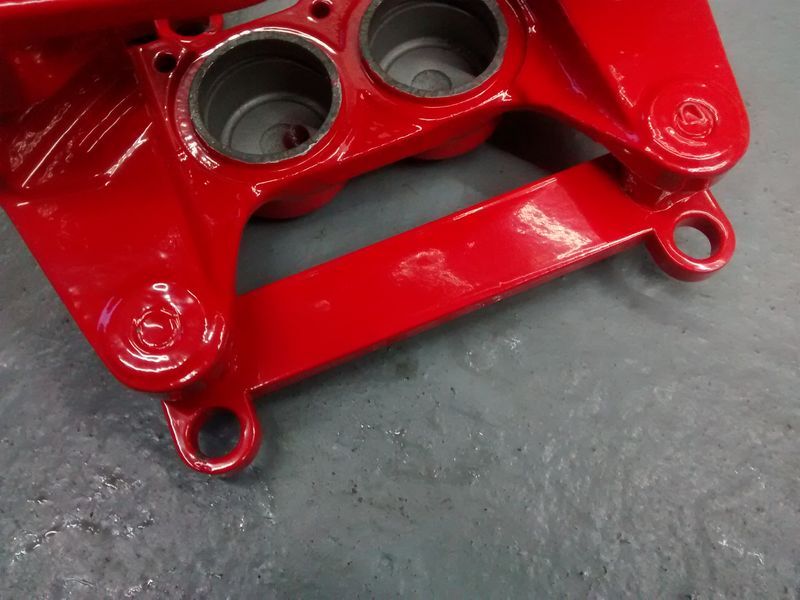
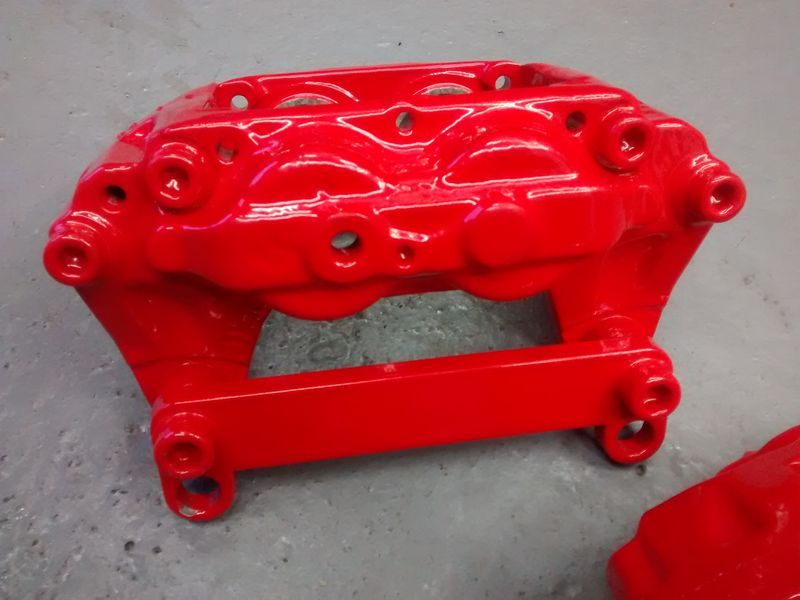
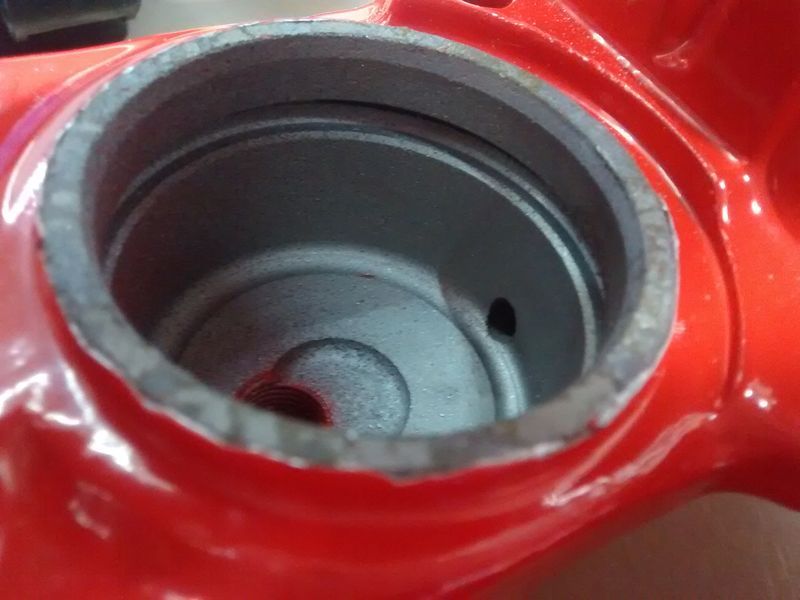
Bores nice and clean now
Got the stainless bar for the pad pins, all the way from Cyprus...
Next-up, painting the disc bells..
This is the third set I've had done now and always a perfect job from Pentland Powder Coaters.
The brackets have some protection now, will probably over paint these in black
Bores nice and clean now
Got the stainless bar for the pad pins, all the way from Cyprus...
Next-up, painting the disc bells..
#11
Thread Starter
Scooby Regular
iTrader: (2)
Joined: Mar 2014
Posts: 753
Likes: 0
From: Mancunian in Edinburgh
Doesn't help that the pics aren't great, too much reflection which makes them look gloopy! I always run a tap through the bleed nipple and banjo bolt threads to clean them out so not worried. Yep, I'll will be picking out the logo in white

#13
Looks good, quite a rare old set up now. Doubtful they'd work better than properly set up STi Brembos when pushed hard though. Won't be far behind I'm sure!
I find picking the logo out in silver makes the caliper look "more expensive" (for want of a better phrase) that painting the logo white!
Not the best pic.......

I find picking the logo out in silver makes the caliper look "more expensive" (for want of a better phrase) that painting the logo white!
Not the best pic.......

#14
I'm NOT a massive fan of Brembos, despite having them on my classic, both front and rear.
I find the hype that surrounds them means they rarely live up to expectations, and to design a caliper made of alloy, which will be held in place with a steel bolt tightened into tappings in the alloy, then sell it to a country that dumps tonnes of salt on it's roads, is criminal.
My rears had to be almost torn off for pad/disc replacement, after the bolts bound up in the threads and tore them out. They had to go to Ian for helicoiling. WHY don't Brembo cast the stainless inserts in place????
They were fitted by myself with grease coated bolts, but are, IMHO, unfit for purpose.
Both my lads have them on Renault Sport cars. The pins holding the pads in place seize EVERY time, usually distorting on removal, but hey, £17 to Brembo for new ones.

#15
Thread Starter
Scooby Regular
iTrader: (2)
Joined: Mar 2014
Posts: 753
Likes: 0
From: Mancunian in Edinburgh
Looks good, quite a rare old set up now. Doubtful they'd work better than properly set up STi Brembos when pushed hard though. Won't be far behind I'm sure!
I find picking the logo out in silver makes the caliper look "more expensive" (for want of a better phrase) that painting the logo white!
I find picking the logo out in silver makes the caliper look "more expensive" (for want of a better phrase) that painting the logo white!
I'm NOT a massive fan of Brembos, despite having them on my classic, both front and rear.
I find the hype that surrounds them means they rarely live up to expectations, and to design a caliper made of alloy, which will be held in place with a steel bolt tightened into tappings in the alloy, then sell it to a country that dumps tonnes of salt on it's roads, is criminal.
My rears had to be almost torn off for pad/disc replacement, after the bolts bound up in the threads and tore them out. They had to go to Ian for helicoiling. WHY don't Brembo cast the stainless inserts in place????
They were fitted by myself with grease coated bolts, but are, IMHO, unfit for purpose.
Both my lads have them on Renault Sport cars. The pins holding the pads in place seize EVERY time, usually distorting on removal, but hey, £17 to Brembo for new ones.
I find the hype that surrounds them means they rarely live up to expectations, and to design a caliper made of alloy, which will be held in place with a steel bolt tightened into tappings in the alloy, then sell it to a country that dumps tonnes of salt on it's roads, is criminal.
My rears had to be almost torn off for pad/disc replacement, after the bolts bound up in the threads and tore them out. They had to go to Ian for helicoiling. WHY don't Brembo cast the stainless inserts in place????
They were fitted by myself with grease coated bolts, but are, IMHO, unfit for purpose.
Both my lads have them on Renault Sport cars. The pins holding the pads in place seize EVERY time, usually distorting on removal, but hey, £17 to Brembo for new ones.

Last edited by modrich; 04 March 2016 at 11:59 AM.
#17
I'm NOT a massive fan of Brembos, despite having them on my classic, both front and rear.
I find the hype that surrounds them means they rarely live up to expectations, and to design a caliper made of alloy, which will be held in place with a steel bolt tightened into tappings in the alloy, then sell it to a country that dumps tonnes of salt on it's roads, is criminal.
I find the hype that surrounds them means they rarely live up to expectations, and to design a caliper made of alloy, which will be held in place with a steel bolt tightened into tappings in the alloy, then sell it to a country that dumps tonnes of salt on it's roads, is criminal.

#18
THE braking specialist
iTrader: (259)
Joined: Dec 2000
Posts: 8,010
Likes: 50
From: www.godspeedbrakes.co.uk
Cheers Ian
Last edited by Godspeed Brakes; 08 March 2016 at 11:25 AM.
#19
Thread Starter
Scooby Regular
iTrader: (2)
Joined: Mar 2014
Posts: 753
Likes: 0
From: Mancunian in Edinburgh
Thanks Ian, the pads are used DS2500s and don't have any paint left on the sides, I'm going to compare the width with some standard 4pot pads and take it from there, don't fancy having to trim every pad down so going to try gently filing down the powder coat.
BTW Ian, my next purchase will be some stainless pistons/seals etc. I can get these on ebay from BigRed for £119 delivered, can you do any cheaper?
BTW Ian, my next purchase will be some stainless pistons/seals etc. I can get these on ebay from BigRed for £119 delivered, can you do any cheaper?
#20
THE braking specialist
iTrader: (259)
Joined: Dec 2000
Posts: 8,010
Likes: 50
From: www.godspeedbrakes.co.uk
Thanks Ian, the pads are used DS2500s and don't have any paint left on the sides, I'm going to compare the width with some standard 4pot pads and take it from there, don't fancy having to trim every pad down so going to try gently filing down the powder coat.
BTW Ian, my next purchase will be some stainless pistons/seals etc. I can get these on ebay from BigRed for £119 delivered, can you do any cheaper?
BTW Ian, my next purchase will be some stainless pistons/seals etc. I can get these on ebay from BigRed for £119 delivered, can you do any cheaper?
We have never had an issue fitting DS2500's so i'll say its down to the thickness of powder coat on the insides of the calipers where the pads slide in.
The only pads we have had to clean off are EBC's.
We can supply you pistons and seals for £110 delivered
Cheers Ian
#23
Thread Starter
Scooby Regular
iTrader: (2)
Joined: Mar 2014
Posts: 753
Likes: 0
From: Mancunian in Edinburgh
Right, so I filed down the 'pooled' areas of powder coat that were stopping the pads being slid in with ease
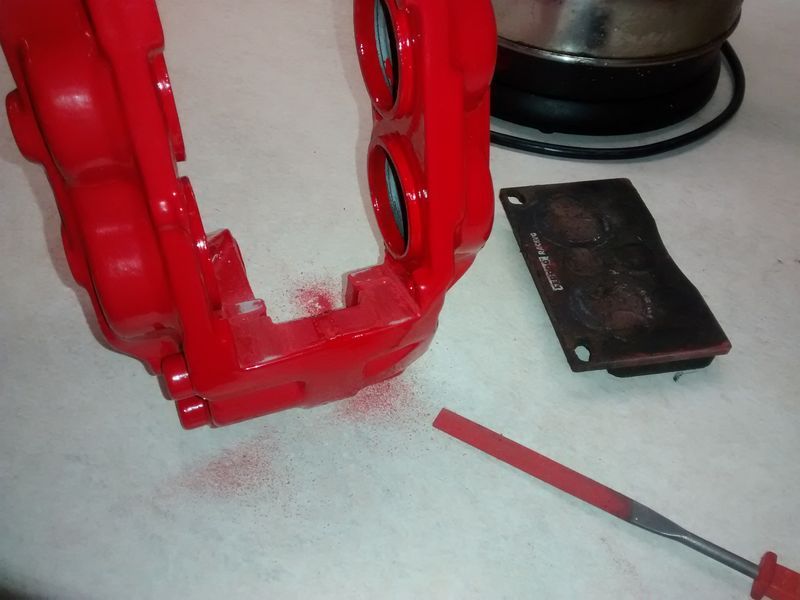
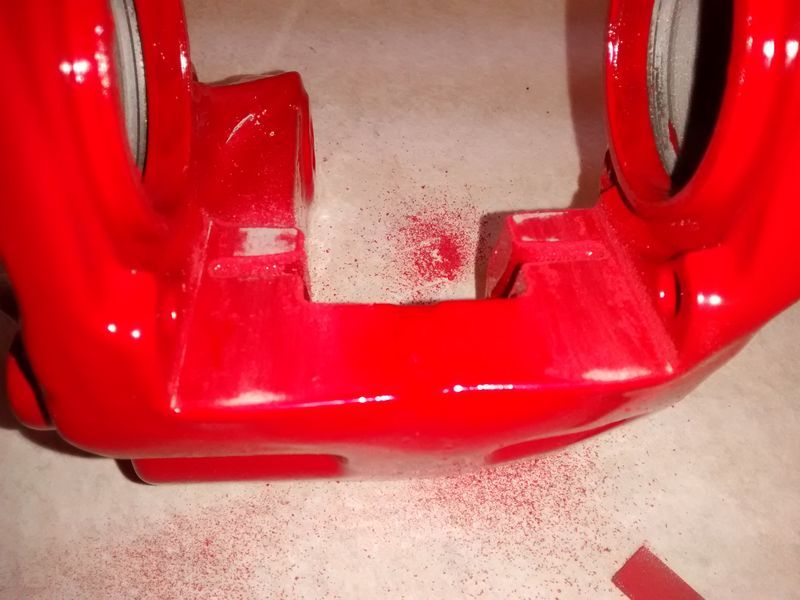
Took it back to bare metal
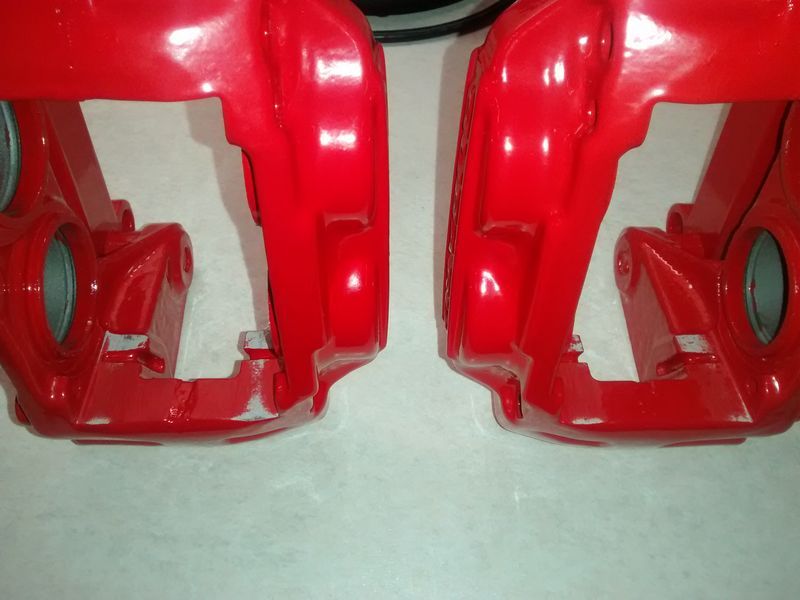
The benefits of using an RAL colour (in this case Traffic Red 3020) is that you can order paint that is a perfect match, so gave any bare metal a light coat of high temp traffic red to stop any future corrosion. You'll also notice that I have painted inside the lip of the bore that is exposed to atmosphere and tends to be the first part to corrode when moisture gets past the seals. I might have to thin this down with emery paper slightly to get the pistons to fit but it should be fine as the pistons only fit tight to the inner seals, not the piston bores themselves.
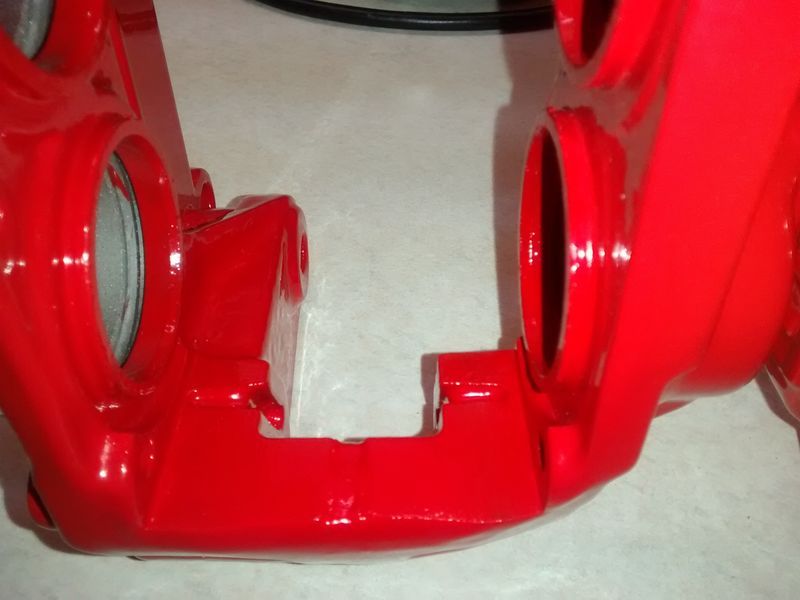
next step, order the pistons & seals...
Took it back to bare metal
The benefits of using an RAL colour (in this case Traffic Red 3020) is that you can order paint that is a perfect match, so gave any bare metal a light coat of high temp traffic red to stop any future corrosion. You'll also notice that I have painted inside the lip of the bore that is exposed to atmosphere and tends to be the first part to corrode when moisture gets past the seals. I might have to thin this down with emery paper slightly to get the pistons to fit but it should be fine as the pistons only fit tight to the inner seals, not the piston bores themselves.
next step, order the pistons & seals...
#26
Thread Starter
Scooby Regular
iTrader: (2)
Joined: Mar 2014
Posts: 753
Likes: 0
From: Mancunian in Edinburgh
Slow progress with these as too many jobs to do around the house and garden but I'm getting there...
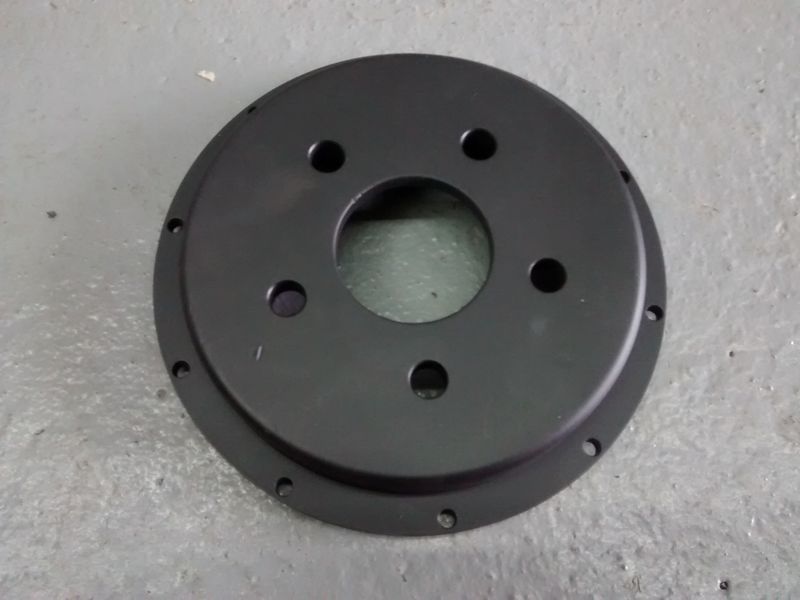
discs cleaned with wire brush and bells re-painted
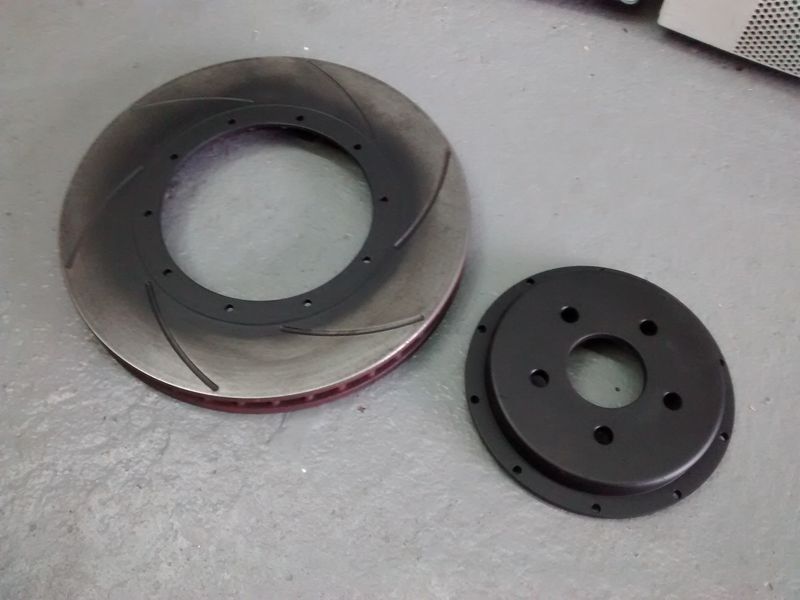
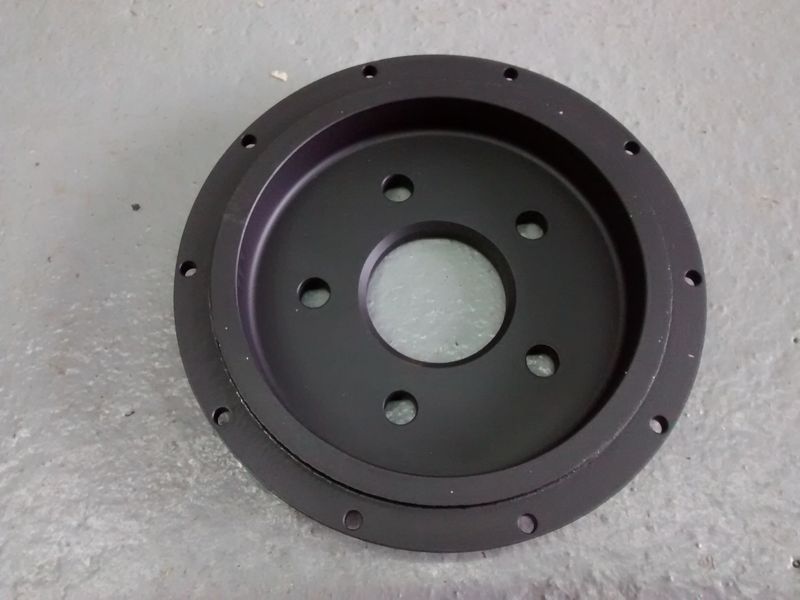
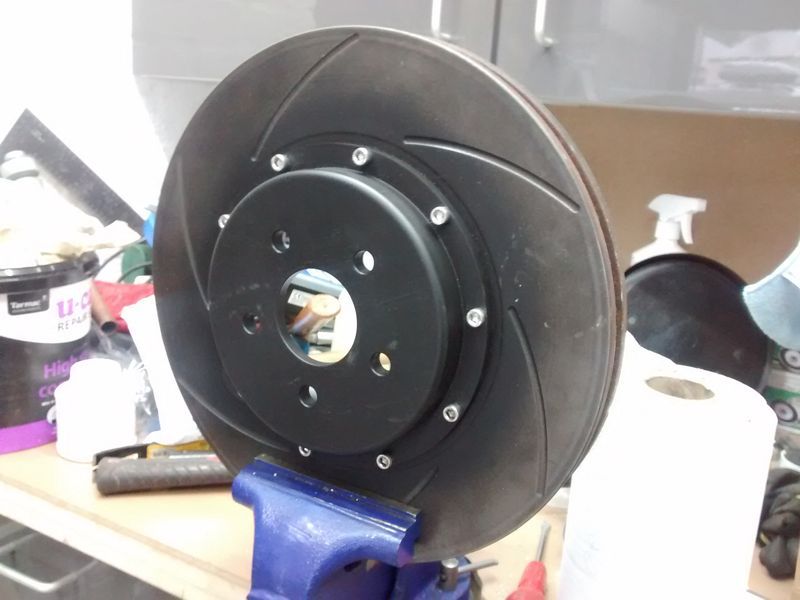
reassembled with stainless cap screws & nuts, torqued to 80lbf-ft
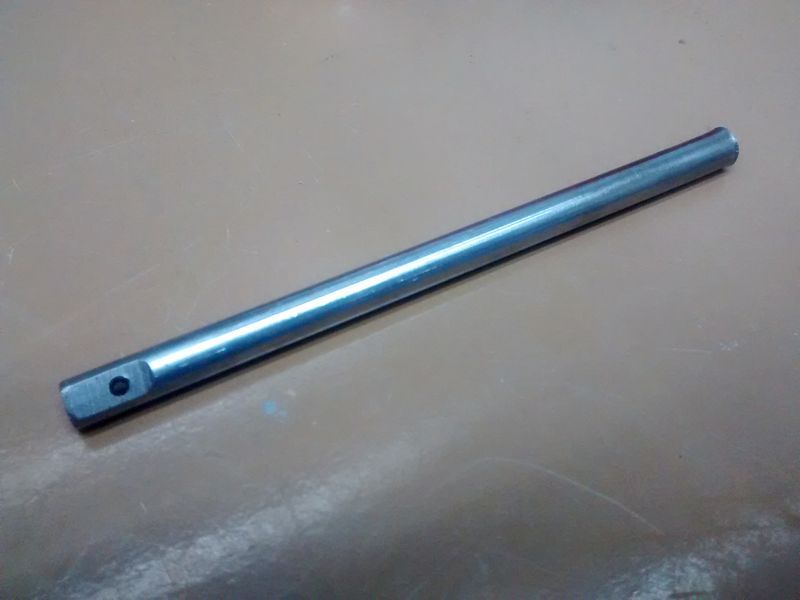
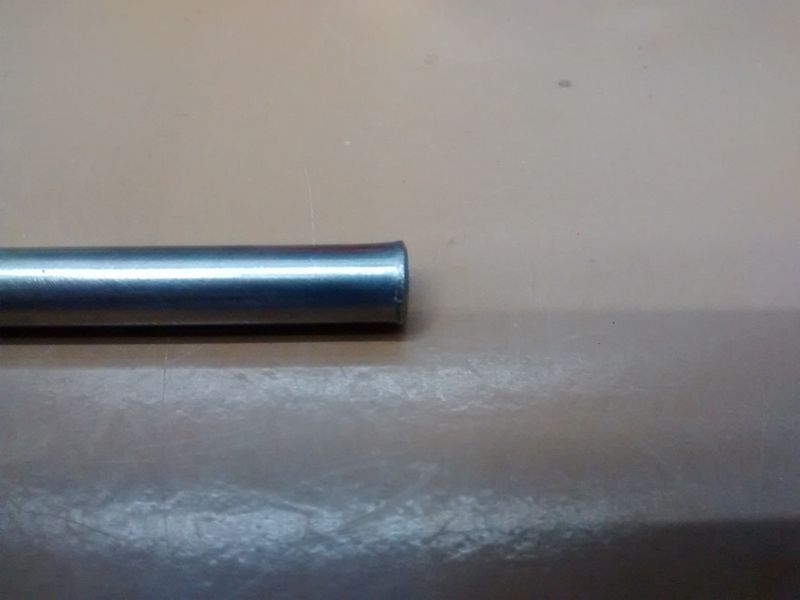
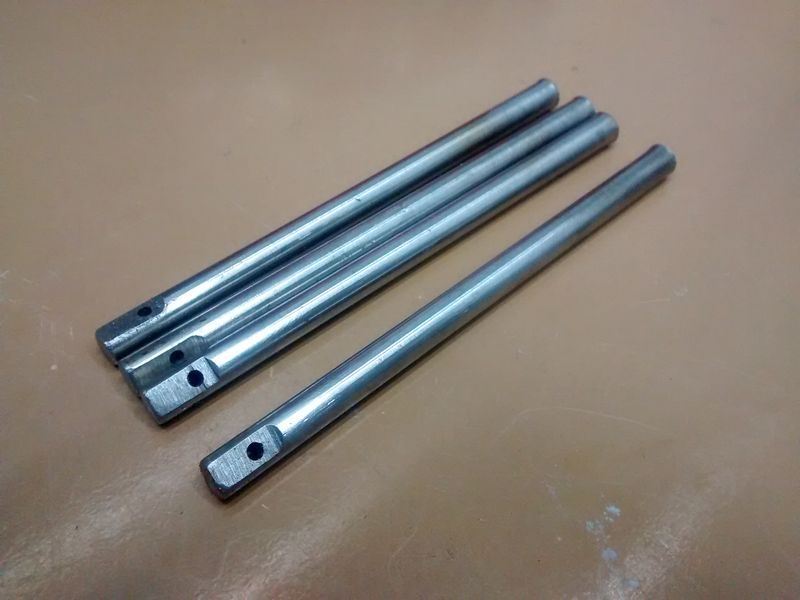
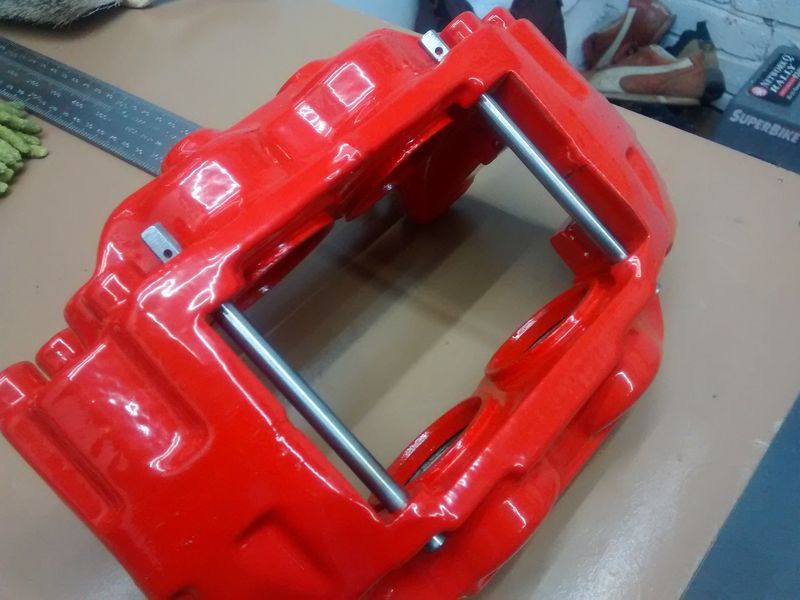
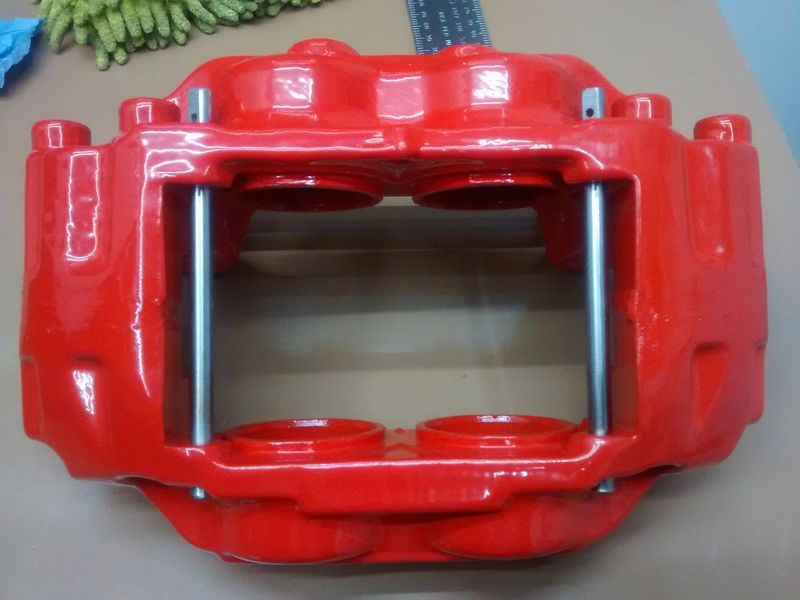
home made stainless caliper pins have turned out ok, although the domed head could have turned out a bit more 'domed'. Stainless is a bugger to work with, even getting it glowing red with a propane torch then using a rivet snap only mushroomed the end slightly, but there's enough to do the job though. Had to use HSS-G drill bits to drill the stainless bar for the retaining pin hole. I had originally bought 6mm stainless bar but was fractionally too small, turns out 1/4in (6.35mm) is the correct diameter.
discs cleaned with wire brush and bells re-painted
reassembled with stainless cap screws & nuts, torqued to 80lbf-ft
home made stainless caliper pins have turned out ok, although the domed head could have turned out a bit more 'domed'. Stainless is a bugger to work with, even getting it glowing red with a propane torch then using a rivet snap only mushroomed the end slightly, but there's enough to do the job though. Had to use HSS-G drill bits to drill the stainless bar for the retaining pin hole. I had originally bought 6mm stainless bar but was fractionally too small, turns out 1/4in (6.35mm) is the correct diameter.


 So have removed the paint...